
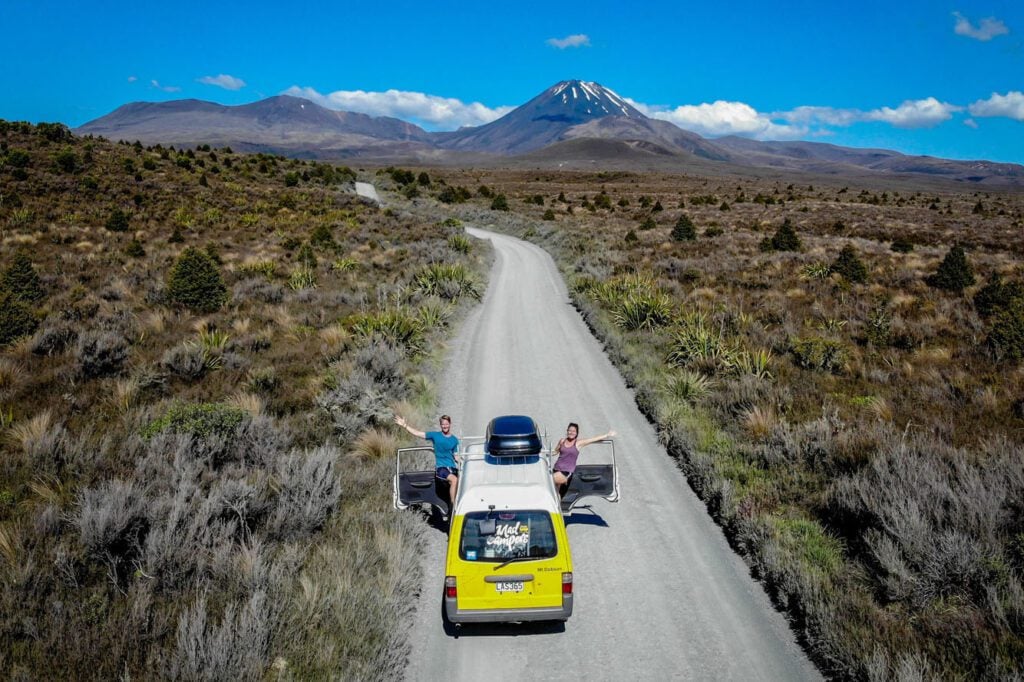
We’ve done all the trip planning for you and put together the best 2-week itinerary for South Island New Zealand you’ll find! It’s packed full of incredible sights and heart-thumping adventures, plus insider tips and advice.
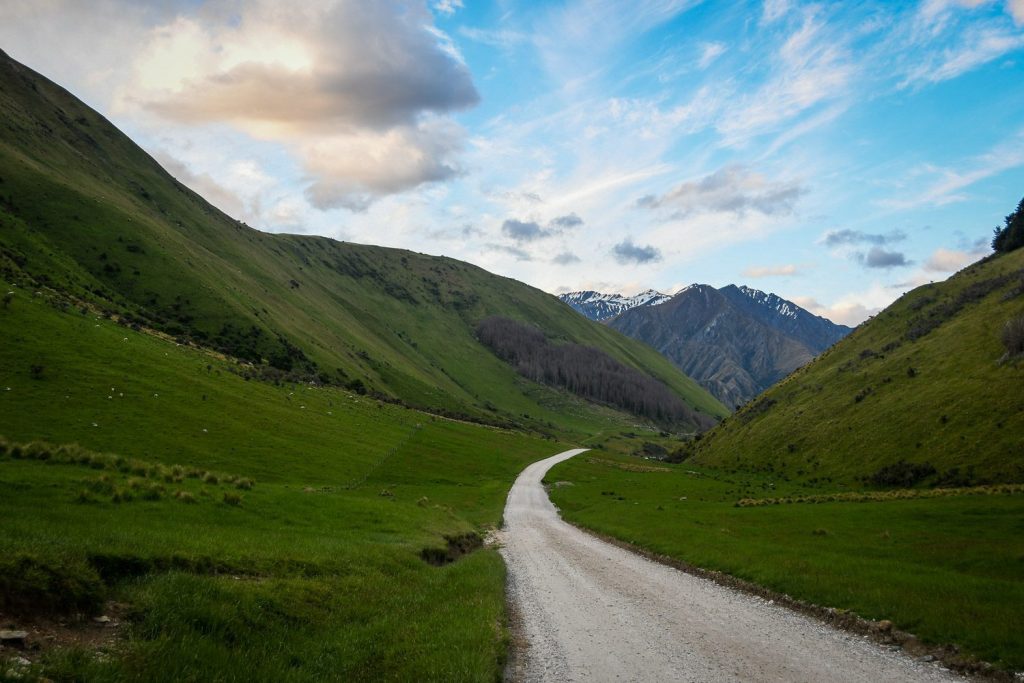
With picturesque fjords, snow-capped mountains, temperate rainforests and black sand beaches, South Island New Zealand is a nature-lover’s paradise.
Add to that a seemingly endless amount of activities—like bungy jumping, whale watching and some of the world’s best hiking—and you’ve got yourself one hell of an adventure!
Planning a trip to New Zealand can be overwhelming because there is just SO. MUCH. TO. DO. But if you plan it right, it will surely end up being one of the most memorable vacations of your life.
While two weeks isn’t nearly enough to “do it all,” we think it’s a good amount of time to hit the highlights. We created this itinerary that packs in the major highlights, gets off the beaten path, and allows some time to just soak it all in.
South Island New Zealand itinerary overview
- Day 1: Fly into Christchurch
- Day 2: Lake Tekapo & Lake Pukaki
- Day 3: Hiking around Mount Cook, then drive to Queenstown
- Day 4-5: Queenstown, Glenorchy, & adventure activities
- Day 6: Te Anau and Milford Road Highway
- Day 7: Milford Sound and Key Summit Hike
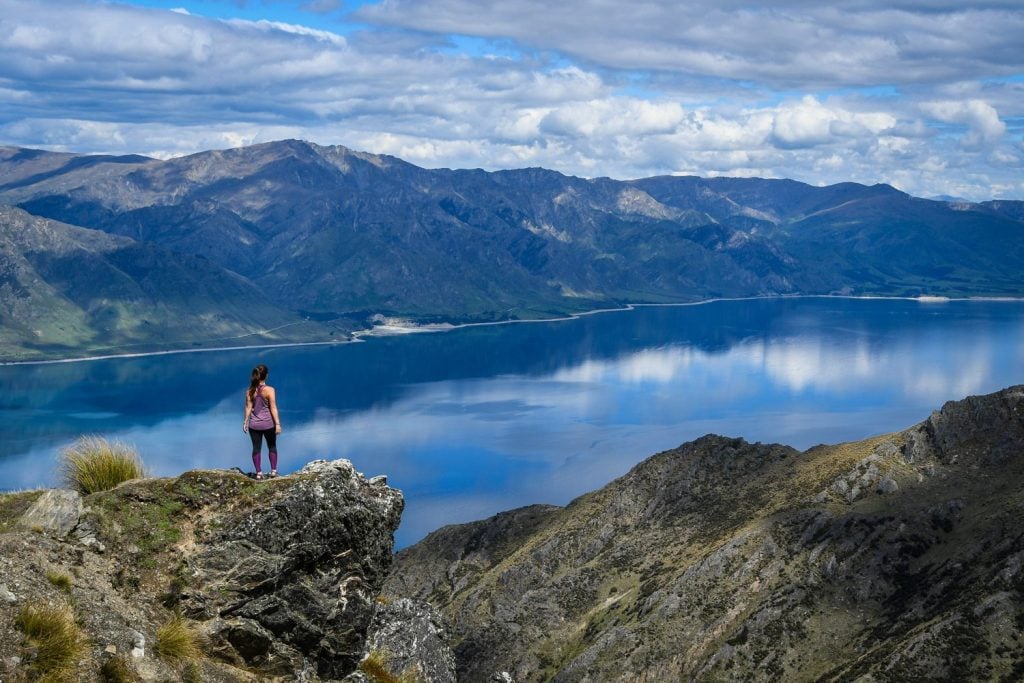
- Day 8: Wanaka
- Day 9: Hiking around Wanaka – Roys Peak vs. Isthmus Peak
- Day 10: Drive Haast Pass to Franz Josef
- Day 11: Helicopter ride and drive to Hokitika
- Day 12: Pancake Rocks, glow worm cave rafting and seals
- Day 13: Abel Tasman
- Day 14: Nelson, vineyards in Marlborough, and drive to Kaikoura
- Day 15: Dolphin encounter and whale watching tours
This 2-week itinerary for South Island New Zealand is perfect for any traveler with a sense of adventure and appreciation for nature. And we have even included tips for altering it to fit a shorter trip, or what to see if you have more than two weeks to explore!
South Island Itinerary Contents
For more tips and advice for planning your South Island New Zealand itinerary, jump to the following sections (or just keep scrolling to see it all!).
Before you go…
- Our experience
- New Zealand travel tips
- How many days – what to add or cut
- Choosing your campervan or car rental
- What to pack
- South Island vs. North Island
Our experience traveling in New Zealand
We’re a little obsessed with New Zealand. Okay fine—a lot.
After spending 5 epic weeks road tripping around the country in a campervan, hiking jaw-dropping trails, soaking in hidden hot springs, and eating more pies than we care to admit, we can confidently say New Zealand stole our hearts.
We’ve explored both the North and South Islands—chasing waterfalls, learning about Māori culture, and finding secret spots we still can’t believe exist. And the best part? We documented it all so you don’t have to start from scratch.
Whether you’re planning a campervan adventure or just want help narrowing down the must-do hikes and experiences, we’ve got you. Our guides are packed with practical tips, personal stories, and all the little things we wish we knew before our trip.
New Zealand is seriously one of our all-time favorite destinations—and we can’t wait to help you fall in love with it too.
About this South Island itinerary
Countless hours were spent researching our route for New Zealand. We pored over article after article. We talked to Kiwis and asked for their local advice. And we finally came up with a plan.
All our research paid off: We had an incredible road trip! So, we’ve taken our road trip route and made it even better for you.
We added some things we wish we would have made it to and we altered a couple things here and there that we wish we would’ve done differently.
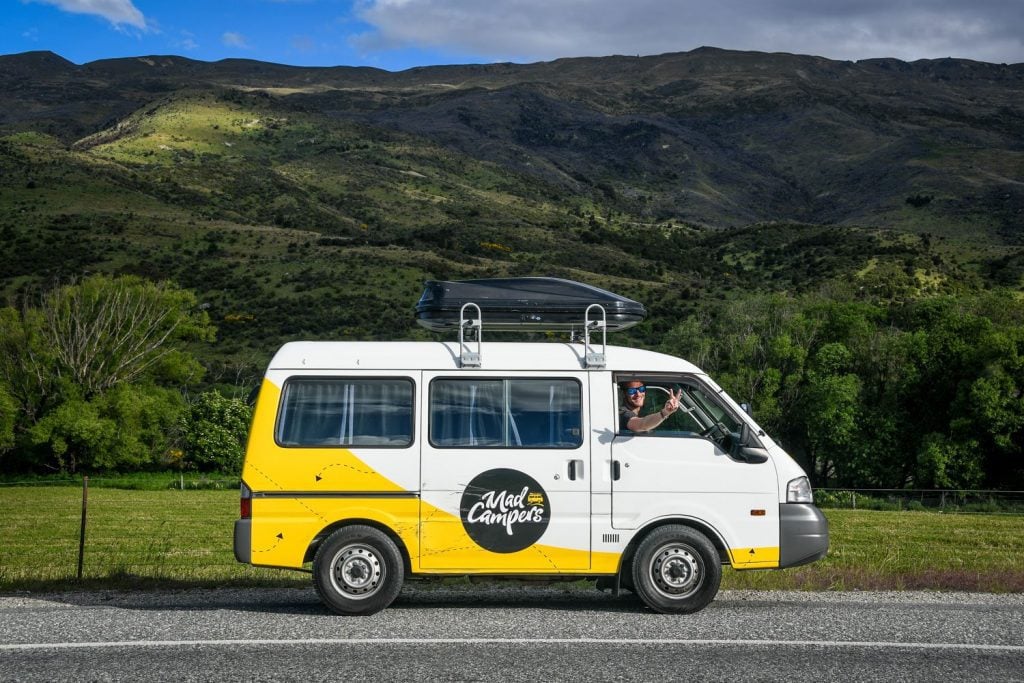
This itinerary for South Island New Zealand is set up for a campervan trip. However, you can follow much of this route if you’re traveling with a rental car and staying at hotels along the way.
We’re beginning this route in Christchurch, as this is where many people enter the country.
However, if you’re doing a tour of both the South and North Island (we would absolutely recommend this if you have the time!), we’d suggest following this two-week South Island itinerary and then head over to our two-week North Island itinerary for more details.
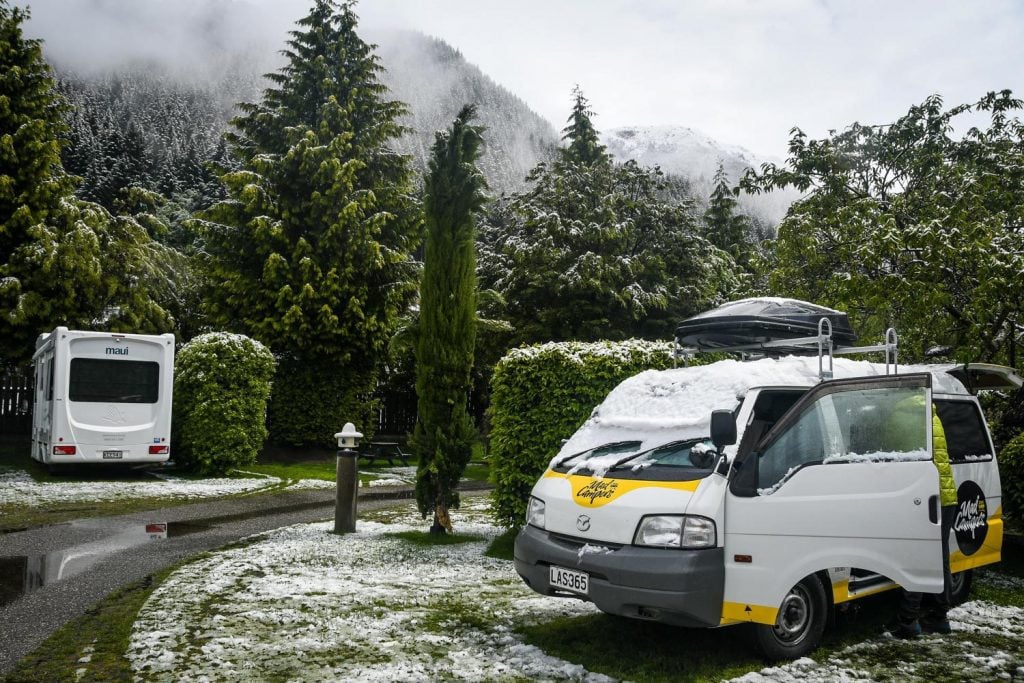
Important Note: One thing to know about traveling in New Zealand is you’ll need to be flexible. The weather in this country (especially in the South Island) is highly unpredictable, and a day of heavy rain or a surprise snowfall might derail your plans of hiking or bungy jumping.
We would highly recommend having some “flex days” so you can alter your plans if you encounter weather that is not ideal. Trust us on this one.
If you’re looking for an alternative…
We traveled in NZ for about 5 weeks and were able to visit most of the highlights of the country, including both the North and South islands.
We took our 5-week travels and condensed it down to 30 days because so many people wanted a 1-month route. We’ll send you our complete 1-month itinerary, filled with tips and advice. Just click below to get your 30-day New Zealand road trip itinerary today!
South Island itinerary map
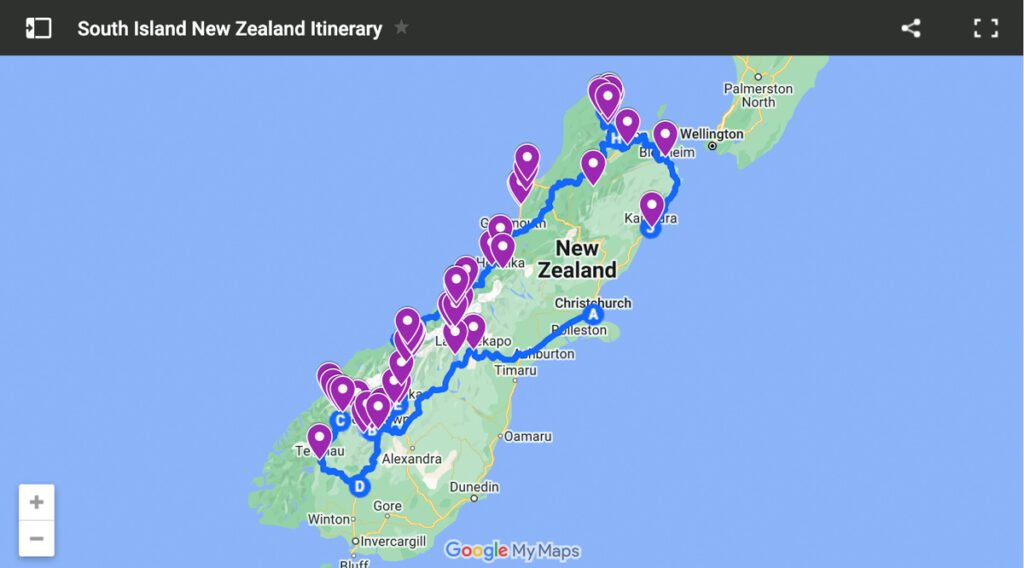
Click on the map and enter your email to gain access to the interactive Google Maps version of our South Island New Zealand itinerary.
Day 1: Fly into Christchurch
- At a glance: Welcome to New Zealand! Get your wheels, get connected, get stocked up, and get on the road!
- Distance: 7.6 km (4.3 miles)
- Driving time: 15 minutes
Unless you’ve got unlimited time in New Zealand, we’d recommend getting out of Christchurch as quickly as possible. It’s not that there’s anything wrong with this city, but it’s just that — another city. There are so many more epic places to explore in this country.
Get a SIM card
As soon as you land, get a SIM card at one of the booths at the airport. (We got Spark and had good service.) If you land at night and the booths are closed, don’t worry — we’ll share another place you can get a SIM card.
We purchased a month-long Spark plan with 4GB of data and some calls and texts for $54 NZD ($36 USD). (We did have to top off a few more GB’s after our two weeks in the South Island, but that’s only because we use our phones for work.)
Do you prefer an eSIM? We DO!
We have an article that walks you through how to get an international SIM card using Airalo; a neat app that allows you to download eSIMs and pay for data as you go in countries all over the world. This is now our preferred method of getting data service abroad.
Download Airalo now and browse their plans to see how cheap they are.
Pick up your campervan (or rental car)
From the airport, take the free shuttle to the rental lot where you will be given the keys to your home on wheels.
Good to know: Most reputable campervan companies will give you a little “orientation” where they explain how everything works and how to set up your bed (because it’s not always as simple as it sounds!). Our orientation took 30 minutes, and by the time we filled out paperwork and actually got on the road, an hour had passed. So budget your time accordingly.
If you land late at night and can’t pick up your campervan until the next morning, Commodore Airport Hotel is a good place to stay, as it’s close to the airport and the rental lots.
And if you’re not quite sure which route you want to take, we have some advice about choosing a campervan vs. a car rental below.
Run some essential errands
Now that you’re on the road, it’s time to stock up on a few essentials.
We found Hornby to be a good place to stop, as it’s on the way out of town. It’s a pretty drab suburb, but it’s got a mall and just about every store you’ll need.
- Pak’nSave: Discount supermarket (if you want the lowest prices on groceries, this is where you’ll find them)
- Countdown (Woolworths Hornby): A nicer grocery store
- The Warehouse: Cheap “big box” store with toiletries and clothes (like Walmart). – $10 NZD for hoodie and flannel
- If you didn’t get a SIM card at the airport and don’t want to use an eSIM, all three of the major network providers (Spark, Vodafone & 2degrees) have branches in the Hornby mall. Here is a quick guide to the cell service options in New Zealand.
Want advice on things to stock up on? We wrote about our favorite campervan meals including ingredient lists to help you come up with a grocery list, and go over our campervan essentials list to see if there are any essential items (like baby wipes!) you need to pick up.
Now that you’re stocked up on essentials and have your wheels, it’s time to find a place to camp. Depending on what time your flight arrived, you might be able to make it quite far — make it to Lake Tekapo if you can!
But if you’re like us and landed in the afternoon, the daylight will be fading and your stomach grumbling.
Where to stay
Chamberlains Ford Recreation Reserve: FREE, find it on the Rankers App. (Don’t know about the Rankers App? Read about it in our guide to campervaning in New Zealand.)
This camp area is 15 minutes from Hornby. There is a clean toilet and not much else, but it’s free.
Recommended? Sure. It’s literally just an open area with a toilet, but is convenient if you want to get out of Christchurch but don’t have time to drive far.
Day 2: Lake Tekapo & Lake Pukaki
- At a glance: Long day of driving, but totally worth it. Visit the Church of the Good Shepherd, drive by Lake Pukaki, and make it to Mount Cook village so you can do the Hooker Valley Track before sunset.
- Distance: 358 km (222 miles)
- Total driving time: 4 – 5 hours
Lake Tekapo
This postcard-perfect lake will be a sight for jetlagged eyes.
After making the flat (and honestly quite boring) journey from Christchurch, the piercing aqua waters of Lake Tekapo basically say, “Welcome to New Zealand, mate!” And you’ll finally feel like you’ve arrived.
Things to do around Lake Tekapo
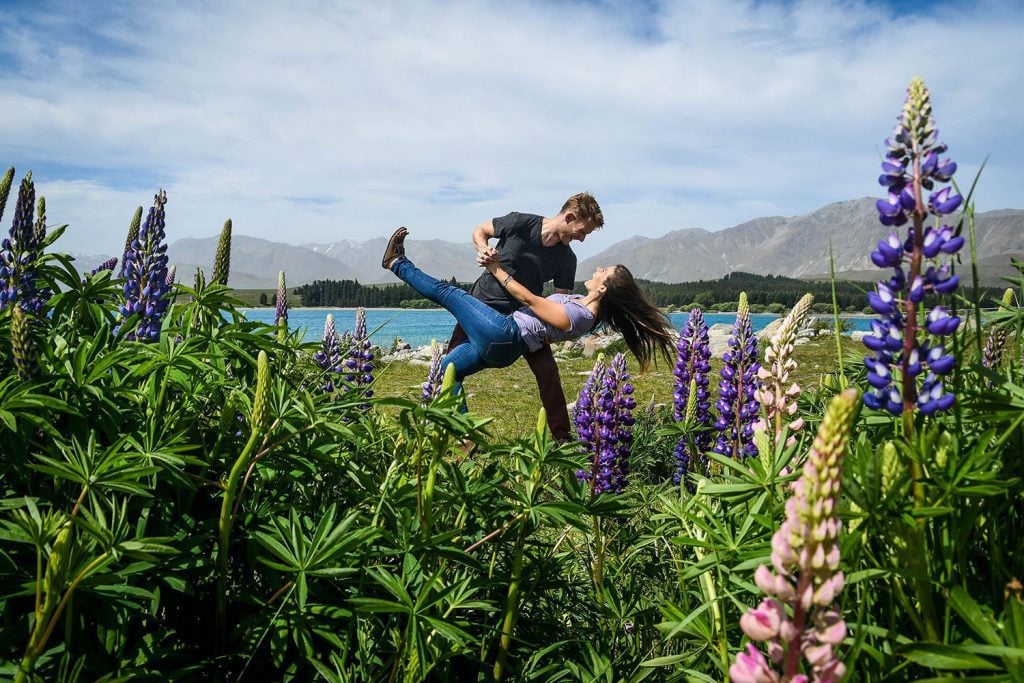
Have a picnic lunch: Park your car, grab a blanket and sit amongst the colorful lupines. You’ll want something to eat after the drive from Christchurch.
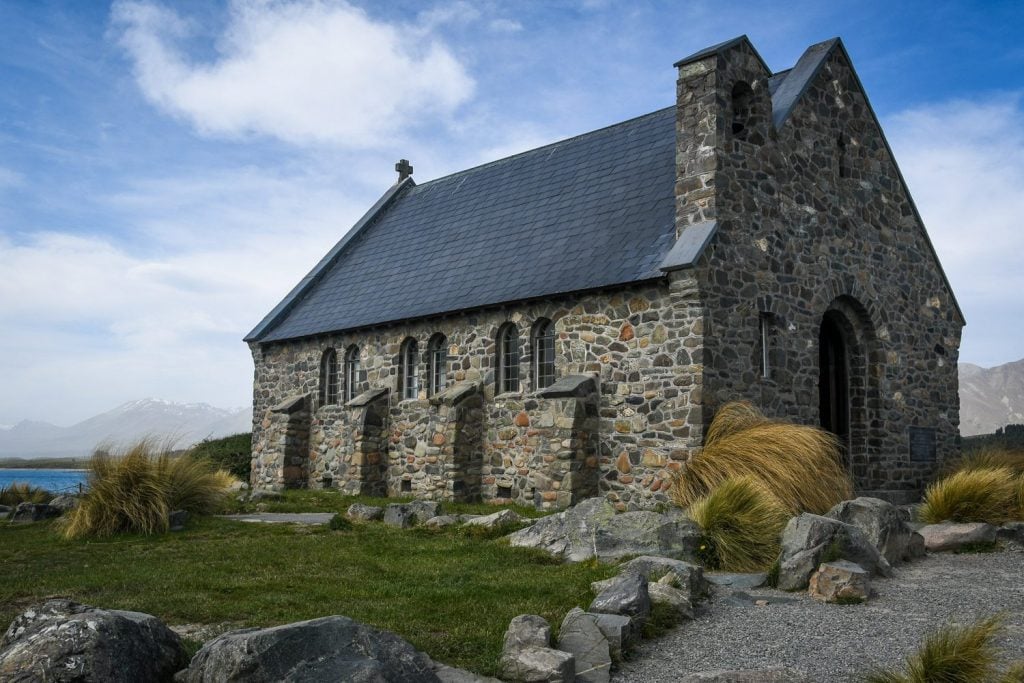
Church of the Good Shepherd: This tiny stone church is the main attraction of the area. Try your best to avoid people getting in your photos. The inside of the church is small and quiet with an epic view through the back window. A service is held there every Sunday at 4 p.m.
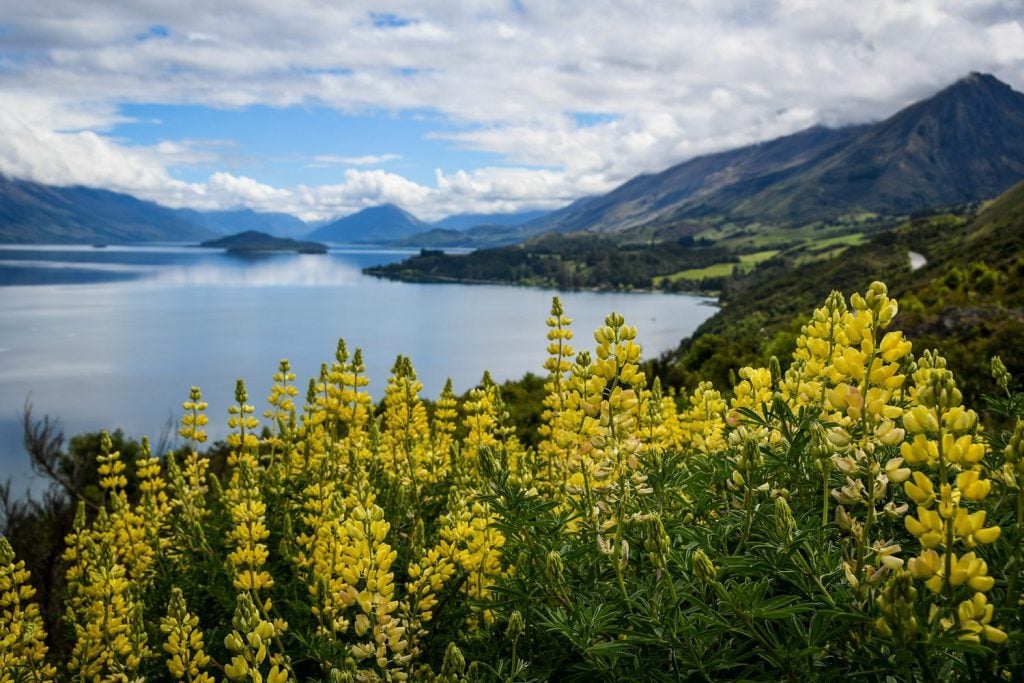
Photograph lupines: If you’re lucky and are visiting New Zealand during lupin season, Lake Tekapo is an excellent place to view these pretty purple and pink flowers.
They are only in bloom for a short 6 weeks, from mid-November through early January, and during this time you’ll find these beauties all over the South Island – near the lakes, in towns, and even on the side of the road. So get ready to snap away!
Interesting fact: Lupines are actually weeds that are not native to New Zealand. We learned from one Kiwi that any colored plant or flower is non-native.
Almost all native plants native to New Zealand are green, so settlers began bringing in flowers of all colors to brighten up the landscape without understanding the toll non-native species can take on the environment. But there’s no harm in enjoying the beautiful pop of color lupines bring for a short time each year.
Stargaze: Due to the lack of light pollution in the surrounding areas, Lake Tekapo is part of the Aoraki Mackenzie International Dark Sky Reserve.
Enjoy the stars for free on any clear night, or take a stargazing tour to learn more about the constellations. There are even nighttime hot pools where you can look at the sky while soaking a picturesque hot tub.
Good to know: Being that Lake Tekapo is quite close to Christchurch, it is a popular stop for bus tours and pretty much every tourist coming through the country. Even though every picture you’ve seen of Church of the Good Shepherd looks peaceful and abandoned, expect a small crowd (unless you arrive at sunrise or stay past dusk).
Lake Pukaki
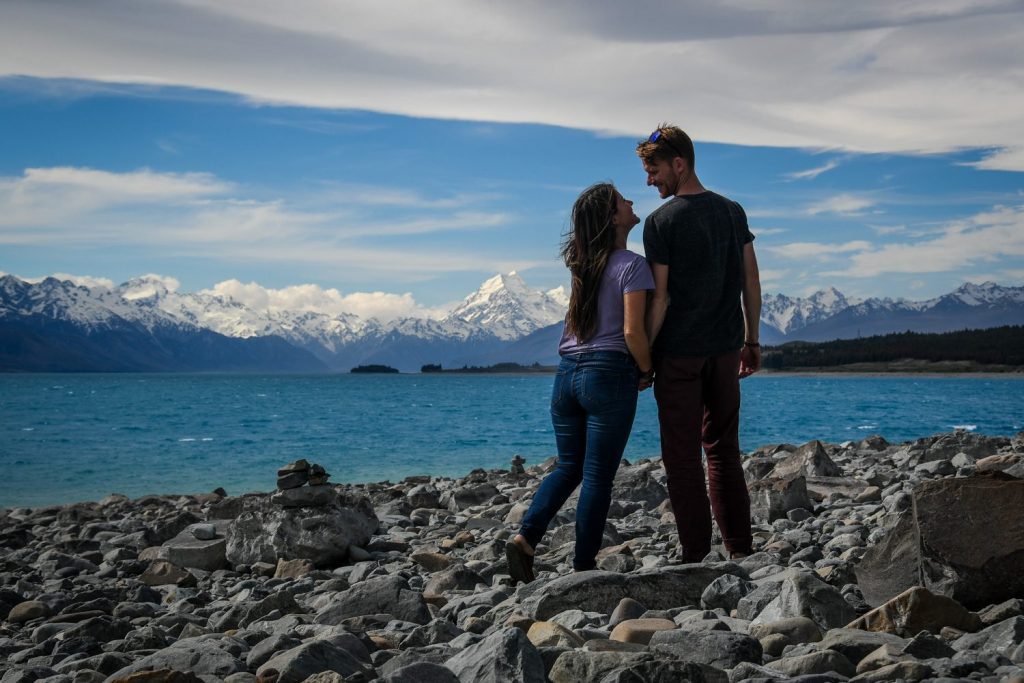
Just 30 minutes further is Lake Pukaki, another body of aqua water that, in our opinion, topped Lake Tekapo.
For one, it was less crowded than Tekapo. Plus, this narrow lake is flanked by Aoraki/Mount Cook, which you can see looming majestically at the far end. *cue jaw drop*
Lastly, the water was a significantly brighter shade of blue than Tekapo (at least on the day we visited).
Why are some of the lakes (and rivers) in New Zealand so blue? *enter Ben’s nerd voice*
Because these lakes and rivers are fed from glacier ice melt, there are small particles of earth in the water called rock flour (or glacier flour). This rock flour gets suspended in the water, which scatters and absorbs the colors of sunlight, giving it a cloudy blue color.
Things to do around Lake Pukaki
When you first reach the lake, you’ll find a parking lot, but don’t stop there. Instead, continue to the right on a small road (Hayman Road) for a few hundred meters. You’ll find a hidden little picnic spot that’s stunning.
Tip: We parked on the side of the road instead of turning in because the gravel road looked a bit rough.
Campground Recommendation: The Pines Freedom Camping (need to be self-contained)
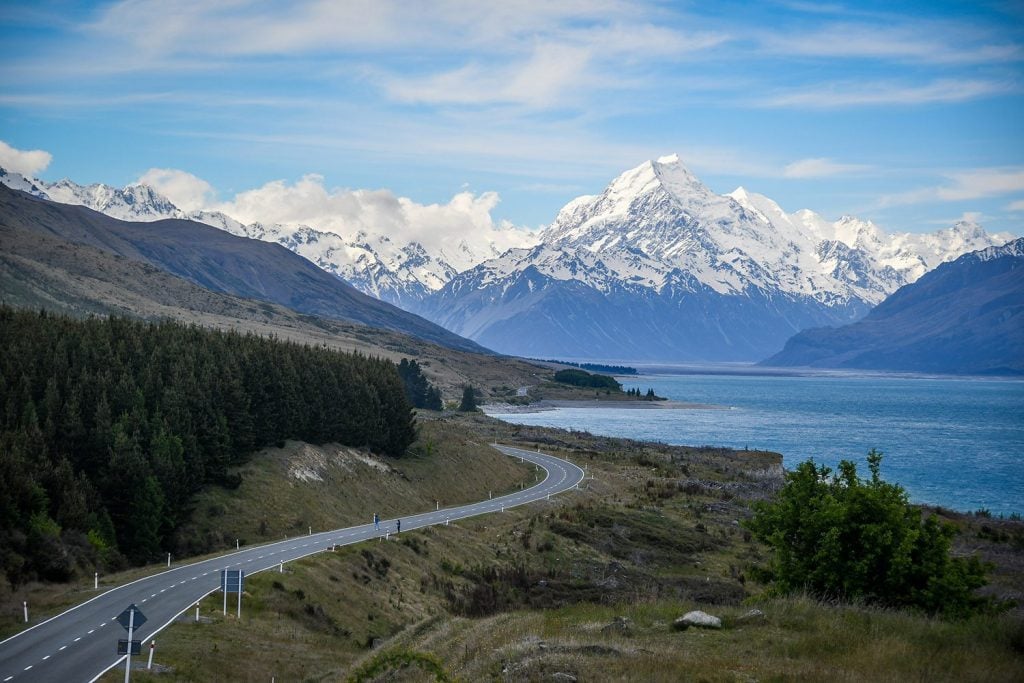
Be prepared, because you are about to embark on a super epic drive. The 45 minutes it takes to go from the south end of Lake Pukaki to Mount Cook Village is dangerously beautiful.
I say dangerous because you’ll no doubt want to stop your vehicle every couple hundred meters to take a photo! But be careful on this 2-lane road and only stop at the designated pullouts.
Insider tip: You’ll definitely want to stop at Peter’s Viewpoint, which is about ⅓ of the way up as you’re driving north along the lake.
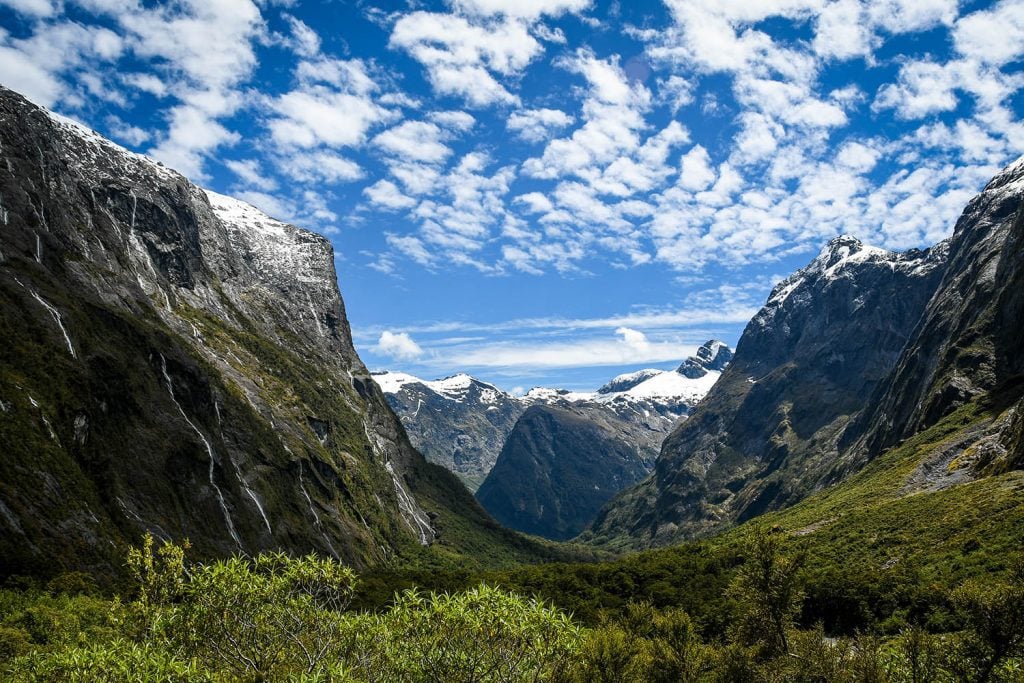
Aoraki / Mount Cook National Park
This National Park is home to the tallest mountain in New Zealand: Mount Cook. It also offers some of the most dramatic scenery in the country.
With glaciers, rocky rivers, unparalleled mountain views, and a series of hikes suitable for all levels, Mount Cook National Park was easily one of our favorite places on the South Island. So it comes as no surprise that it is listed as a World Heritage area.
Why are there two names? Aoraki is the Maori name, and Mount Cook is what the settlers called this peak.
Mount Cook Village

This tiny village consists of a few accommodation options, mountaineering tour offices, a couple cafes and the DOC Visitors Centre (which you should absolutely check out!).
Campgrounds in Mount Cook National Park: White Horse Hill Campground
- Cost: $13 per person ($6.50 for children)
- Type of campground: DOC (Department of Conservation)
- Would we recommend it? Yes, it’s definitely your best option in the area!
White Horse Hill is a DOC campsite and costs $13 per person per night ($6.50 for children). This campground is free if you have the DOC pass. You will need to self-register by filling out your information on an envelope and enclosing cash (exact change is needed).
This popular campground can get quite crowded as it is one of the only options in the area. The facilities are basic (drop toilets and a sheltered area). But the views are some of the best you’ll find at any campground in the country.
This campground is the starting point for Hooker Valley Track.
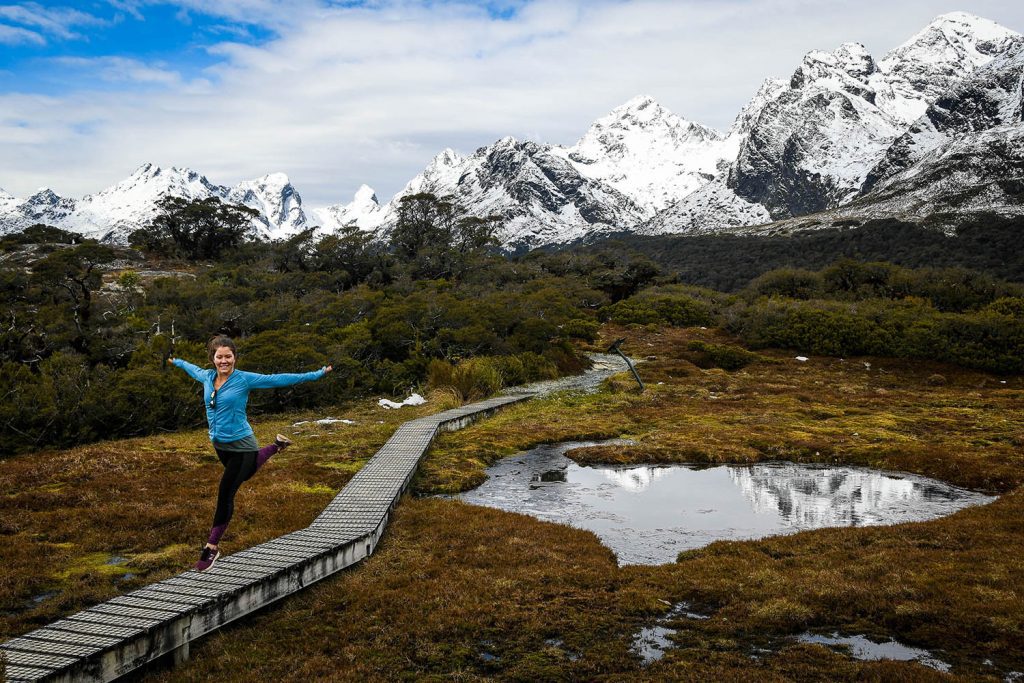
Hooker Valley Track
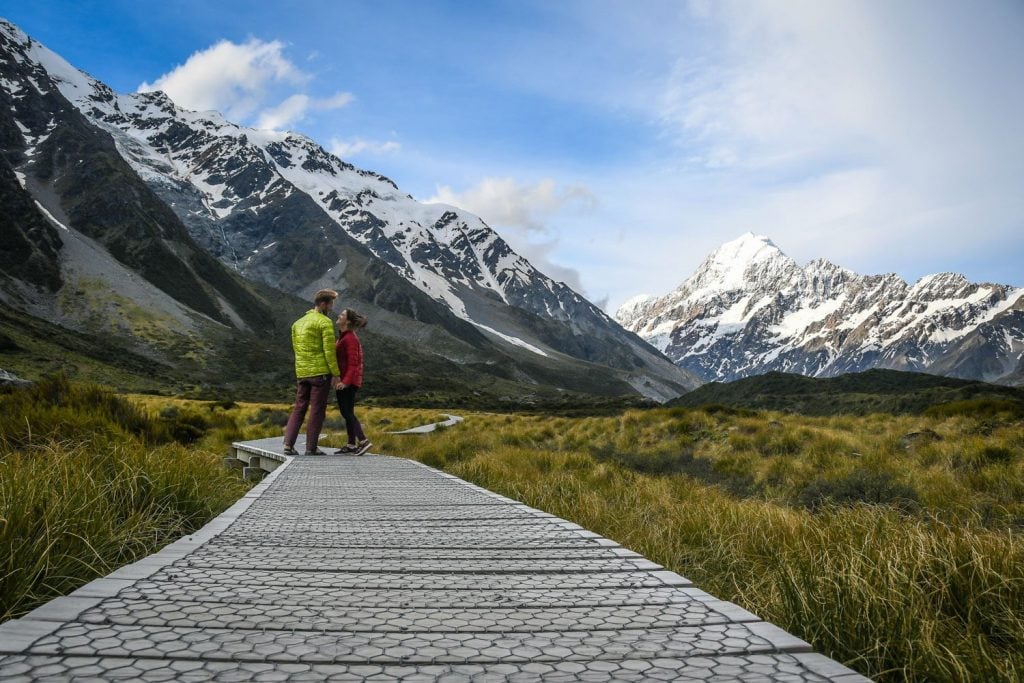
- Distance: 6.7 miles (10.7 km), out and back
- Elevation gain: 666 ft (203 m)
- Difficulty rating: Moderate
- View trail notes on DOC
The Hooker Valley Track is a very easy 3-hour return walk on a well maintained trail. It’s suitable for people of all abilities—we saw small children as well as elderly.
This incredible walk had changing landscapes, boardwalks, jaw dropping views of Mount Cook, and 3 suspension bridges. Be cautious if it’s windy!
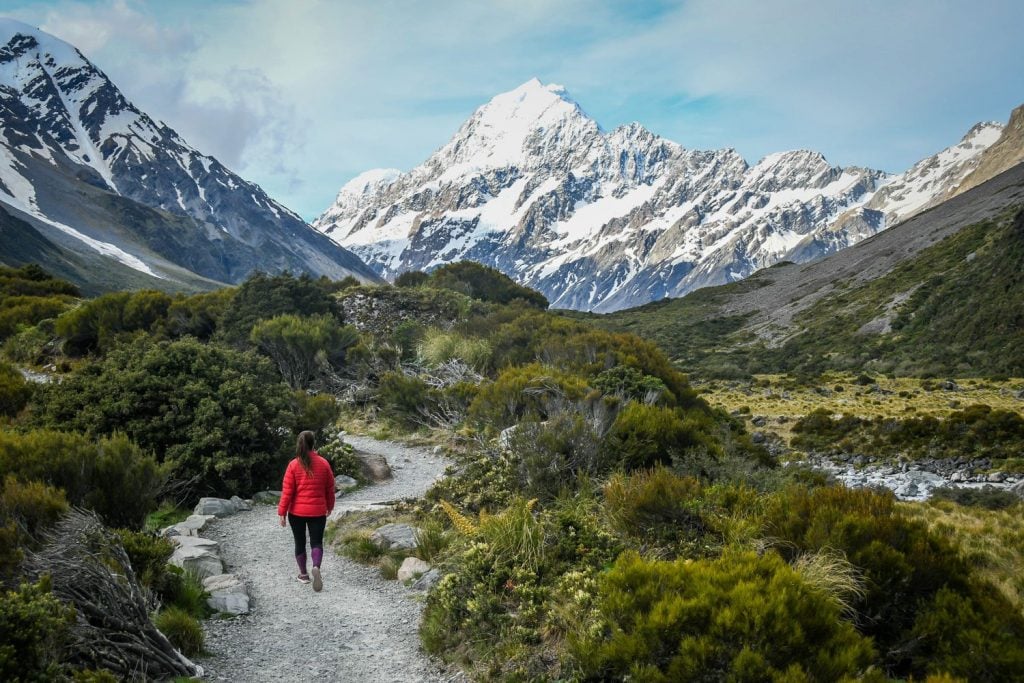
Keep your eyes peeled for Mount Cook Lilies—the largest buttercup flowers in the world. There are small signs along the path that point them out along the way. Just be sure you don’t touch them, as it is harmful to these fragile (and rare!) flowers.
→ Looking for more hikes? With the help of our local friend, we rounded up the most epic New Zealand hikes into one detail-packed article to help you plan your hiking adventures.
Day 3: Hiking around Mount Cook, then drive to Queenstown
- At a glance: Hike up to Sealy Tarns and/or to Tasman Glacier viewpoint, then drive to Queenstown.
- Distance: 264 km (164 miles)
- Total driving time: 3.5 to 4 hours
Aoraki Mount Cook Visitors Centre
This DOC visitor center is beautifully designed and has information on the local flora and fauna as well as some of the history of this region.
You can learn about Freda Du Faur, a badass Australian mountaineer who was the first woman to climb New Zealand’s highest peak (Mount Cook). The rangers also have up-to-date information on the condition of the nearby hiking trails.
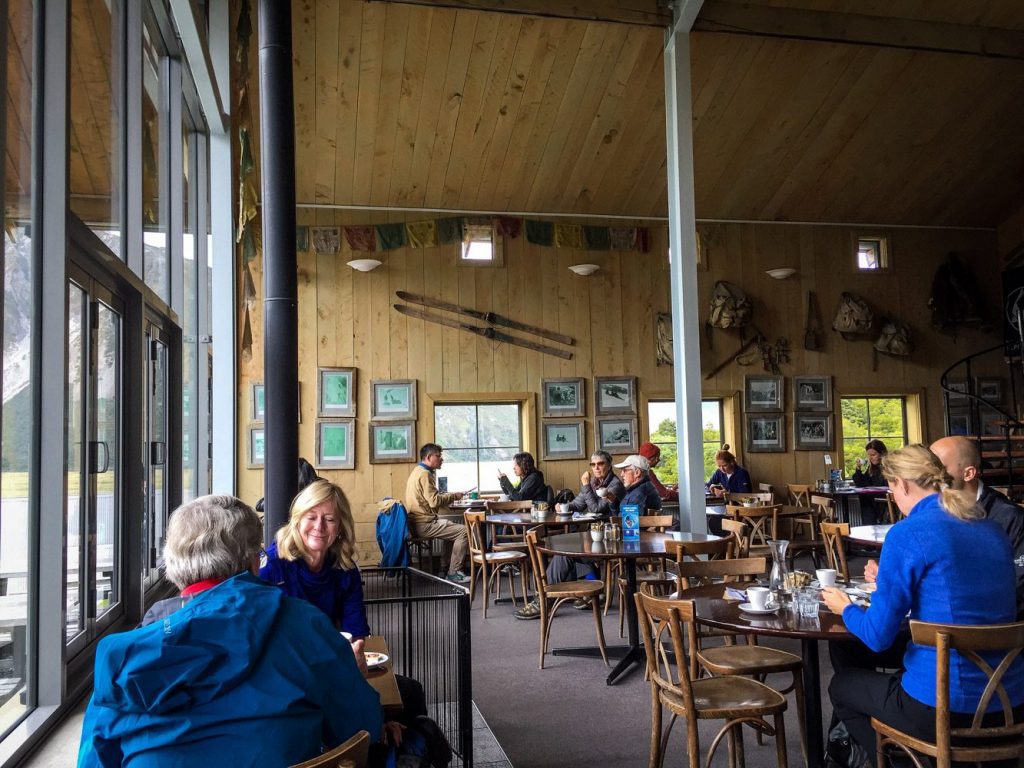
There is a nice cafe across from the visitor center. It’s a bit pricey, but there is not much else around.
Mueller Hut
- Distance: 6 miles (10 km), out and back
- Elevation gain: 3,454 ft (1,053m)
- Difficulty rating: Challenging
- View trail notes on DOC
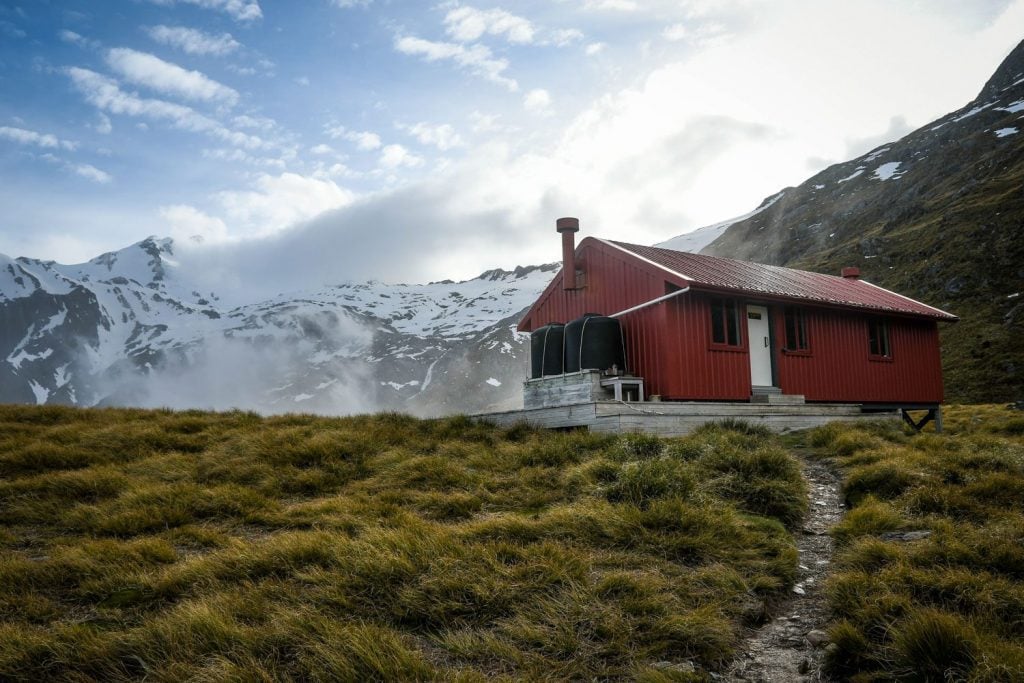
Overnighting at the Mueller Hut is one of the most popular things to do in Mount Cook Village.
It’s a 4-hour hike one-way, requiring advanced hiking and climbing ability. At the top you’ll be rewarded with a 360 degree view of some of the tallest peaks in NZ, including Aoraki/Mount Cook.
Attempting this hike depends on your interest, experience level and the weather.
There are 28 bunks in the hut. Booking ahead is required from mid-November to the end of April and costs $45 NZD per person per night.
Our Experience: We had 2 beds reserved and paid for, but when we went to the visitor center in the morning they strongly cautioned us against it. High winds, rain and icy conditions; and our experience with ice axes is minimal.
Sealy Tarns Track
- Distance: 3.2 miles (5.15 km), out and back
- Elevation gain: 1,778 ft (542m)
- Difficulty rating: Challenging
- View trail notes on DOC
The rangers told us we could do the 4-hour return trip up to the freshwater lakes of Sealy Tarns instead. It’s 2,200 steps on a walkway up and will get you about halfway to Mueller Hut, but it still offers great views of Hooker Valley.
You can rent crampons, ice axes and sleeping bags (and other gear) from Alpine Guides, located in Mount Cook Village. (Though they aren’t guaranteed to have everything you need in stock.)
- Crampons = $15 per day
- Ice ax = $15 per day
- Sleeping bag and liner = $25 per day
Note: If you plan to stay overnight at the Mueller Hut, you will add an extra day to this itinerary.
Tasman glacier walk
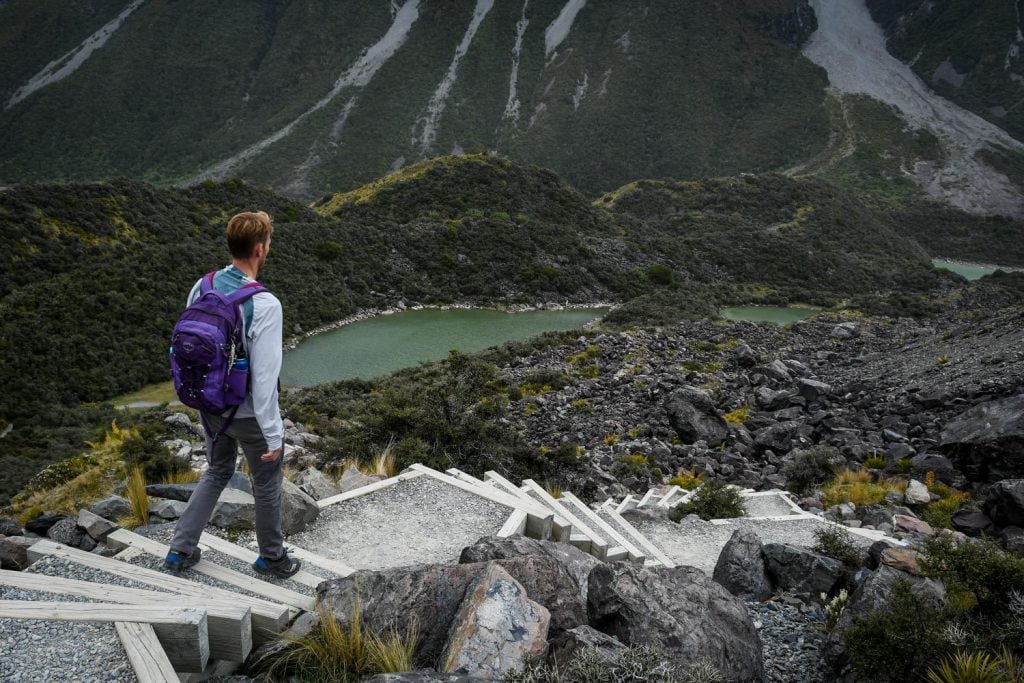
- Distance: 0.8 miles (1.3 km), out and back
- Elevation gain: 269 ft (82m)
- Difficulty rating: Easy
- View trail notes on DOC
If you’re looking for something much easier than hiking up to a mountain hut, the Tasman Glacier walk is a nice viewpoint that only takes about 15 minutes to reach.
The path is mostly stairs, but it’s not difficult — all abilities are able to make it to this viewpoint.
Midway through there is a platform and you can see the “blue lakes” that used to be bright blue from the glacial water that fed them. The glacier has receded and no longer feeds them, so they are fed with rainwater, making them a blue-green color.
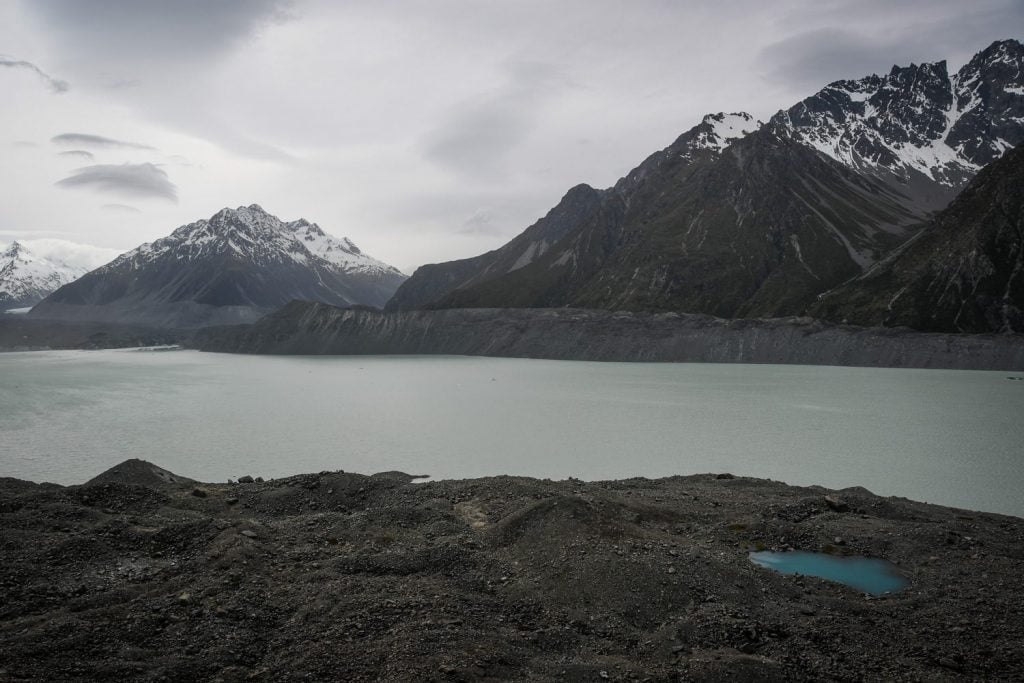
Near the beginning of the trail you’ll see a path to the right to Tasman Lake. This is where you can get right up to the water and see icebergs up close.
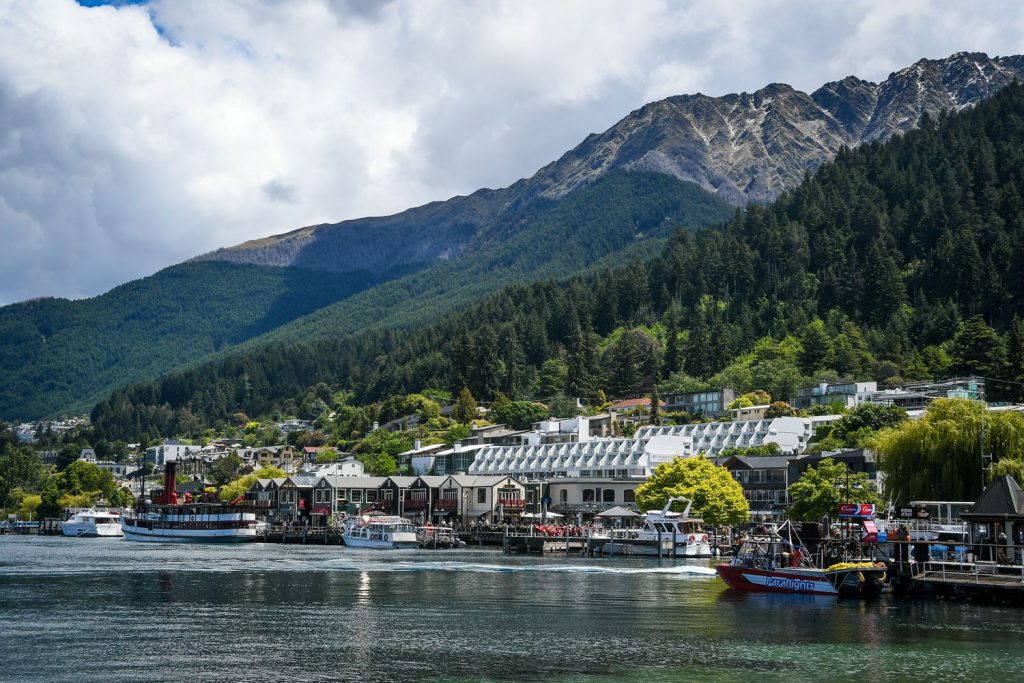
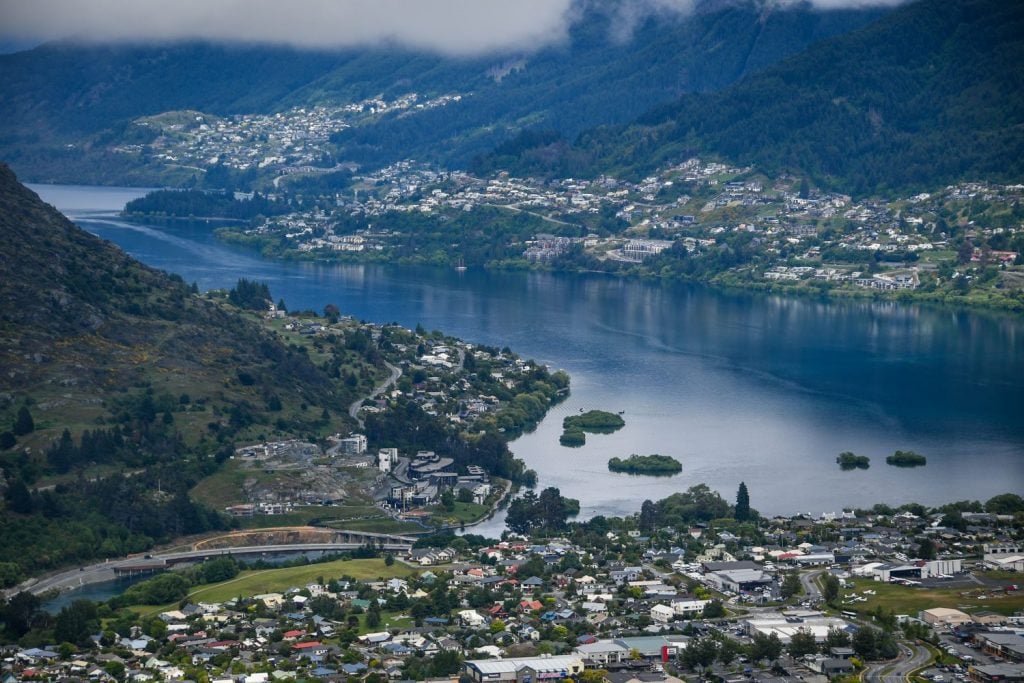
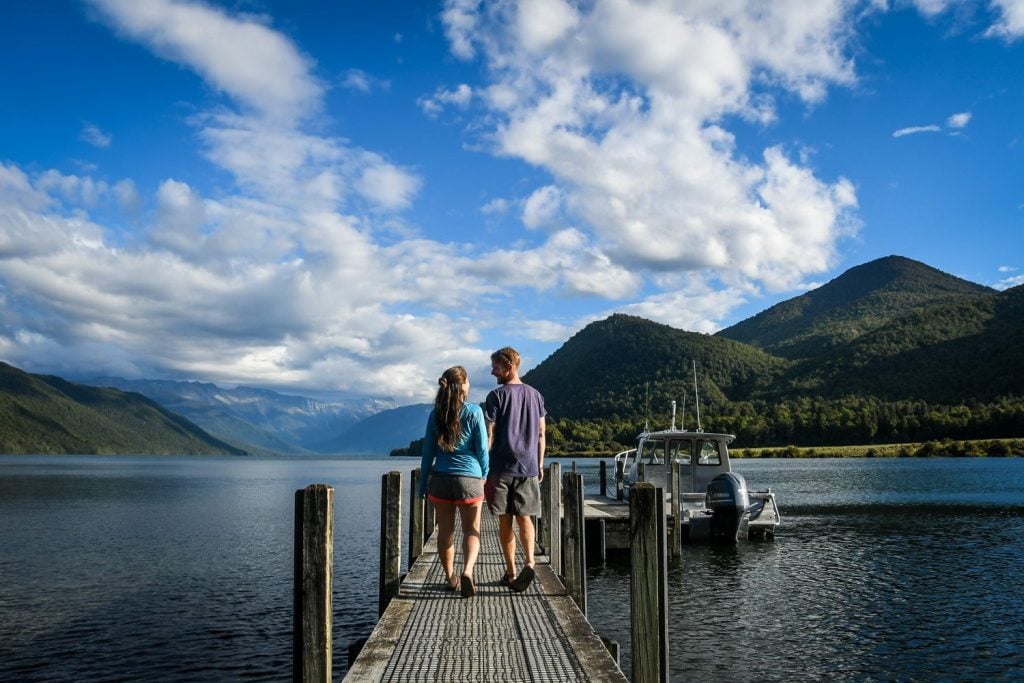
Queenstown
Once you’re done exploring around Mount Cook, it’s time to head further south to Queenstown. It’s a 3-hour drive on Google Maps but it might take 4 hours. That’s just the way New Zealand’s roads work.
Along the drive you can take a rest at Lindis Pass Viewpoint and take in the view from two massive valleys. Continue on Hwy 6 south until you make your way into Queenstown.
You might be pretty exhausted after your drive in, so tonight you might just want to take it easy. Check into your holiday park (we liked Queenstown Holiday Park Creeksyde), then maybe head down to the harbor to watch the sunset.
If you’re feeling up for it, you could grab a Fergburger (more info below) or check out our list of nightlife in Queenstown.
Day 4-5: Queenstown, Glenorchy, & adventure activities
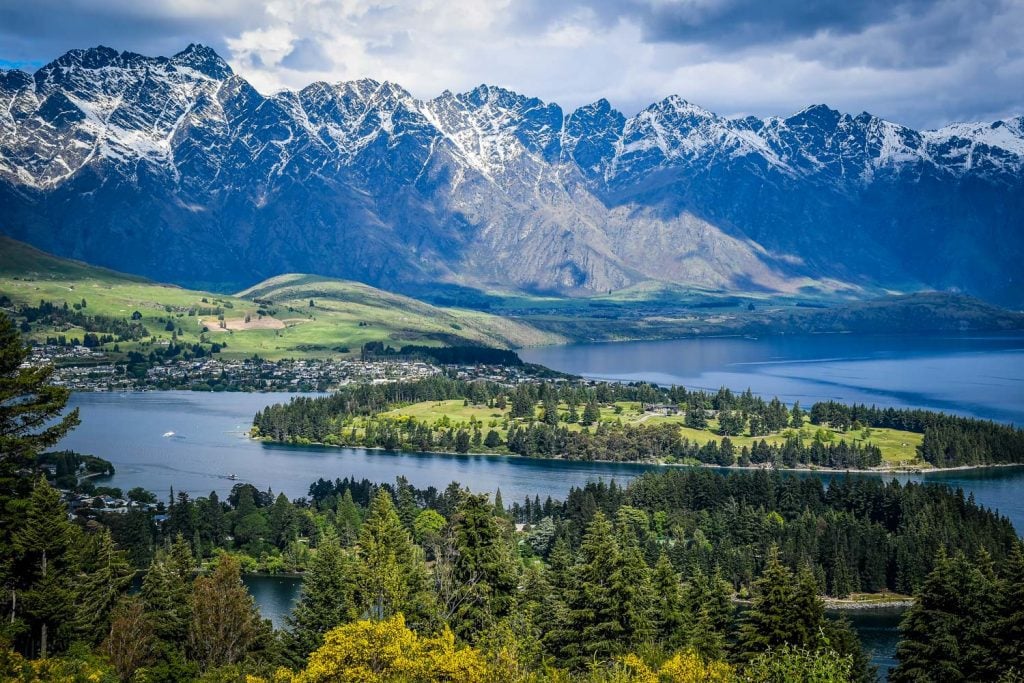
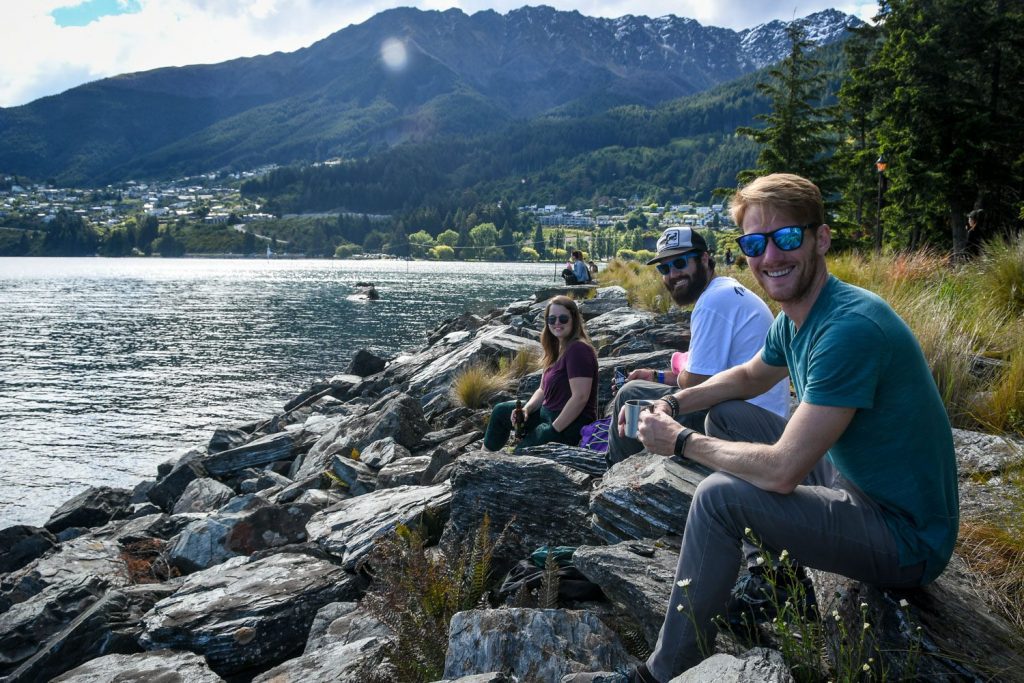
This town of just over 15,000 residents is touristy, yes, but for good reason. Situated on the shores of Lake Wakatipu and flanked by snowy peaks, there’s no denying the beauty that surrounds Queenstown.
It makes for the perfect hub for all types of adventure activities and day trips. Queenstown also has a pretty decent nightlife scene if that’s your thing (probably the best you’ll find on the South Island).
With all the things to do in Queenstown, we’d recommend staying at least 2 days. And if you have time to spare, you could add an extra day here.
Our advice: Come to Queenstown with a game plan. There are so many adventure activities in this area that it can be overwhelming if you don’t know what you want to do. Also, being that it is a popular tourist hub, activities book out quite quickly, so it helps to plan a bit in advance.
For this South Island Itinerary, we’ve separated your time in Queenstown in two days laid out below:
Day 4 at a glance:
- Drive to Glenorchy
- Stop at Bennett’s Bluff Viewpoint
- Bob’s Cove
- Visit the General Store and Wharf
- Lunch in Glenorchy
- Moke Lake
- Fergburger
- Lakefront and Queenstown Garden
Total drive time: 2.5 hours | Distance: 106 km (66 miles)
Day 5 at a glance:
- Adrenaline activities: bungy jump/skydive/shotover boat ride
- Visit Arrowtown for ice cream or dinner
- Drinks at night in Queenstown
Total drive time: 40 minutes | Distance: 40 km (24 miles)
You can mix and match your days in Queenstown whichever way you like.
Also, it’s a good idea to look at the weather forecast for Queenstown and Milford Sound and plan out which days are best spent outside. If you want to do more adventure activities, you can add a few extra days here as well.
Psst! Don’t miss our complete guide to Queenstown with plenty of things to do and see to fill your days.
Drive to Glenorchy
About 45-minute drive from Queenstown along the shoreline of Lake Wakatipu with views of the Tooth Peak mountains.
Bob’s Cove: About 14 km out from Queenstown, pull off to hike the 20-minute one-way track to get a great view of the cove and Lake Wakatipu.
Bennett’s Bluff Viewpoint: Along the road 30 minutes (24 km) from Queenstown. It’s not a big pull out area so be careful.
Glenorchy General Store: Sells everything you can think of from milk to fruit to sweaters to books on Lord of the Rings filming locations. It is a cafe and bakery too, so grab a pastry and sit on the picnic tables outside.
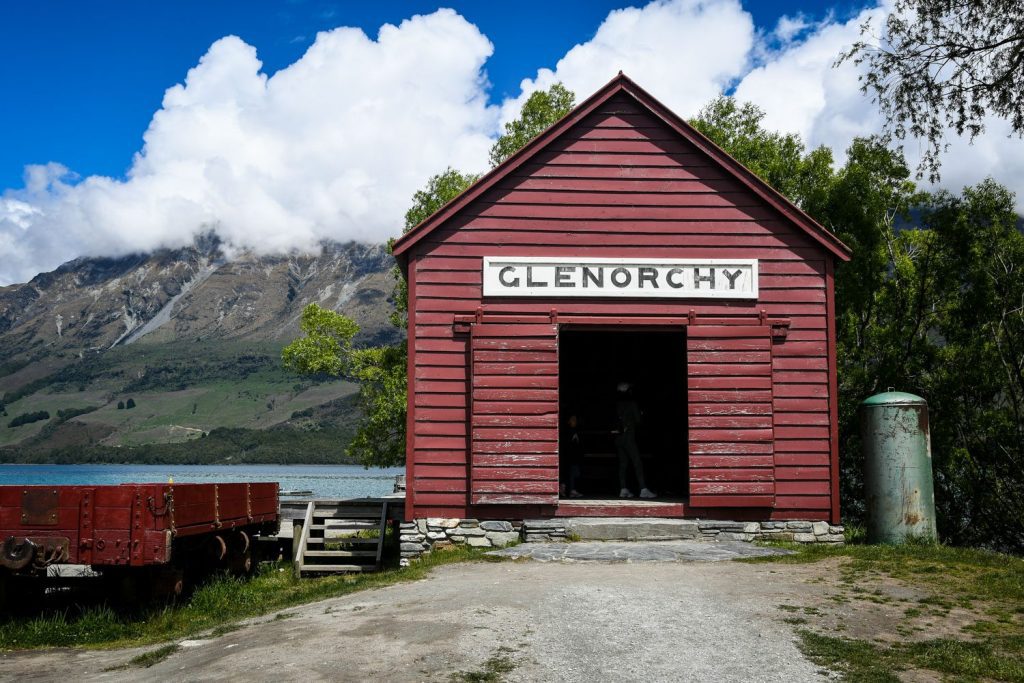
Glenorchy Wharf: Walk inside the historic red barn and read about the history of the area. Walk out on the dock to get amazing views of the surrounding mountain ranges.
Moke Lake
Once you’ve had enough of Glenorchy, head back to Queenstown. When you get about 7 km away from town, turn uphill to the left. Follow the directions for about 20 minutes to through sheep-filled fields to the hidden Moke Lake and campground. Hike around for a bit, or if you want to camp there, we have instructions below.
Queenstown waterfront and garden
Take your burger down to the lakefront and devour it there. After you conquer your beast burger, walk it off in the Queenstown Garden. It’s a beautiful loop through the botanical garden and shoreline. Check out the lawn bowling in the center of the park.
Visit Arrowtown
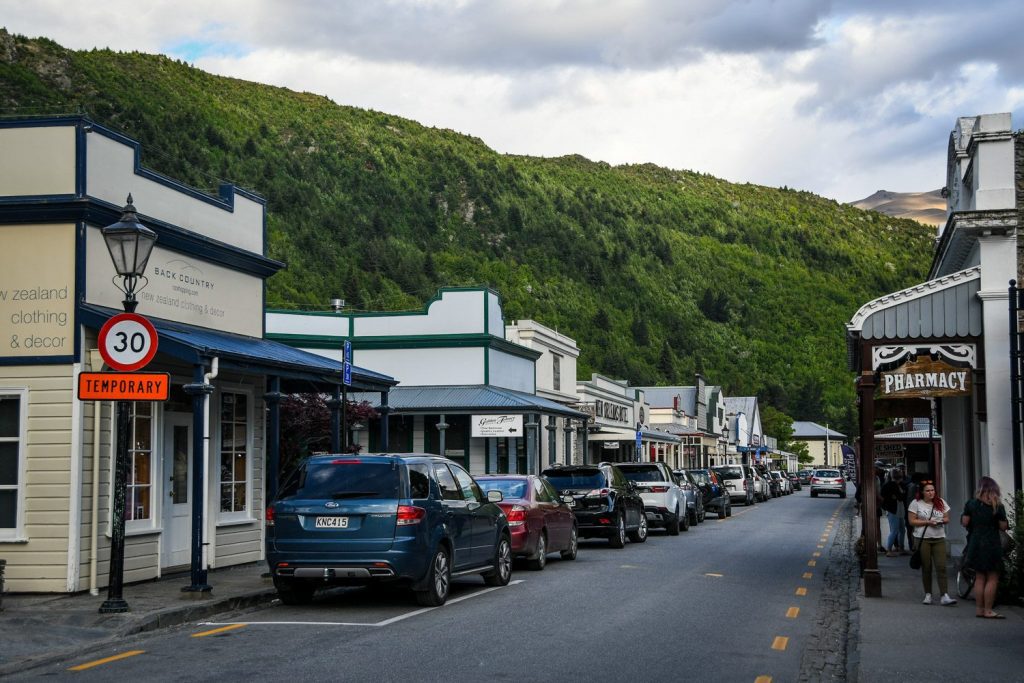
Take a 20-minute drive to historic Arrowtown. Once a thriving mining town, today it is filled with fancy restaurants, wine bars and ice cream shops. Window shop while taking in the old time feel of the city, and treat yourself to an IPA or red wine at the charming The Fork and Tap.
Rainy day activities in Queenstown
Reading Cinema Theater: Catch the newest movie at the local movie theater. It was a little rainy (and snowy!) when we first arrived to Queenstown and this was a nice way to spend the day.
Tim Wilson Gallery: View beautiful works of art that we will never afford to own. Tim Wilson, a Kiwi himself, is extremely talented and has an amazing way of painting landscapes around New Zealand.
Adrenaline activities near Queenstown
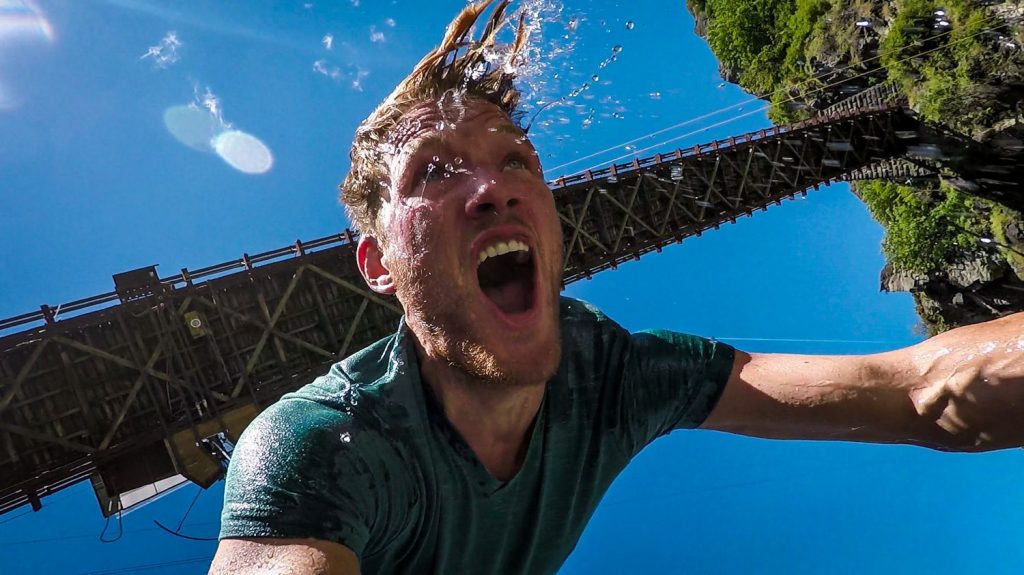
Bungy Jumping: Jump off a bridge where bungy was invented or launch yourself out of a catapult. Either way, there are plenty of companies to go with.
It’s one of our top things to do in New Zealand and we’ll tell you which company we chose and why in that article.
Skydiving: Have you ever wanted to jump out of a plane? New Zealand is one of the best places to do it in the world.
Imagine free falling with views of the Southern Alps and being able to see both coasts of the South Island. Pretty incredible!
There are a few different sky diving companies to choose from so be sure to pick the best one for you.
Shotover Jet Boat Ride: Strap in for a wet and wild ride up and down the Shotover River. The jet boat driver will whip past rock walls and 360 degree spins in the river gorge. It will get your heart pumping for the entire 90-minute experience. Book your tour here.
Where to eat and drink in Queenstown
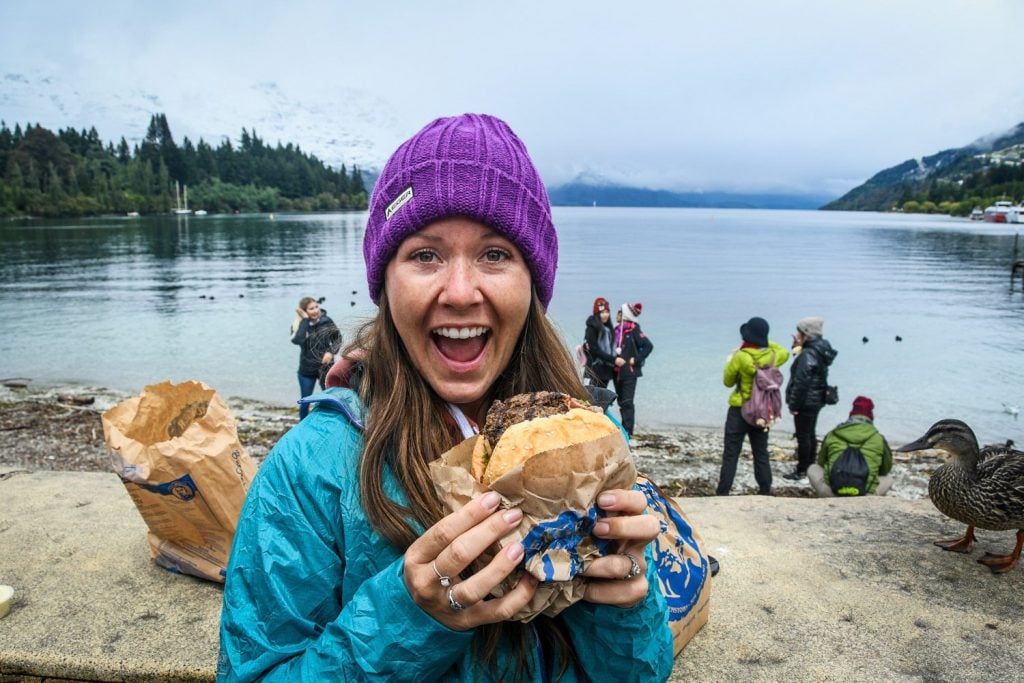
- Fergburger: These burgers are now Instagram famous, and everyone and their mom wants to try them. There is always a line out the door, but don’t worry it only takes about 15-20 minutes to order and 15 minutes to get your burger. It’s totally worth the wait!
- We recommend getting the Sweet Bambi or Mr. Big Stuff. Take a look at the menu and try not to drool. Burgers average around $15 NZD, but they are the size of your face.
- Local tip: Call in your order so you don’t have to wait in line.
- Alternative to Fergburger: We didn’t get to try it, but our friend says Devil Burger is pretty comparable to the Ferg. Do a little taste test for us and report back.
- Erik’s Fish and Chips: A Kiwi staple, order your fish and chips and head down to the lakefront.
- Atlas Beer Cafe: Located down by the wharf, this tiny bar and restaurant has amazing beers on tap and their famous steaks are no joke! Cheapest and best steak you’ll get in Queenstown.
- The Cow Restaurant: Chow down on delicious artisan pizza or garlic bread paired with a local wine or brew.
- Nightlife: If you’re looking for a wild night, head to Cowboy’s bar. Here you can play shuffleboard or ride the mechanical bull.
Camping near Queenstown
There are no freedom camping areas close to town, and if you are just driving in for the day there are only a few spots you can park for free.
There is free street parking during the day on Man Street or Hallenstein Street. From there you can walk to town, but try to get there before 9 or 10 a.m.
There are only 3 campgrounds within the city and they often book up ahead of time. Make reservations if you’re traveling in peak season.
Queenstown Holiday Park Creeksyde: This quirky holiday park was our choice for our time in Queenstown because it is eco-certified, has nice and warm common spaces with kitchens, hot water showers, and clean bathrooms.
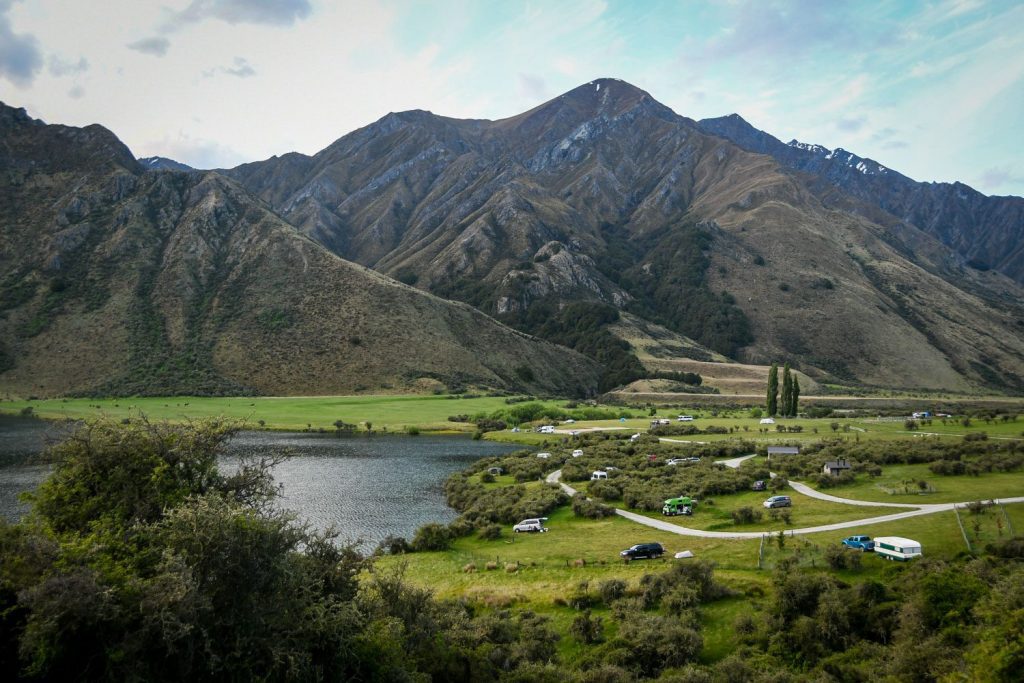
Moke Lake Campground: About a 30 minute drive from Queenstown, this was perhaps our favorite campground in all of New Zealand. The facilities are basic (as it’s a DOC site). But the location is like something out of a fairytale. Beautiful views of a lake valley surrounded by sheep. You have to drive on gravel roads in the middle of nowhere to get there. 4-wheel drive is recommended and there is no cell service.
- Cost: Moke Lake Campground is not included in the DOC pass. $13 per person (self register, need exact cash).
Psst! Both the Queenstown Holiday Park and Moke Lake made our list of best campsites in New Zealand. Be sure to check out the full list for other epic places to camp and plan your route around your favorites.
Alternative: 12-Mile Delta Campground: It has plenty of room, also $13 per person, and is about 15 minutes from town (or 12 miles “Oh I get it now…”).
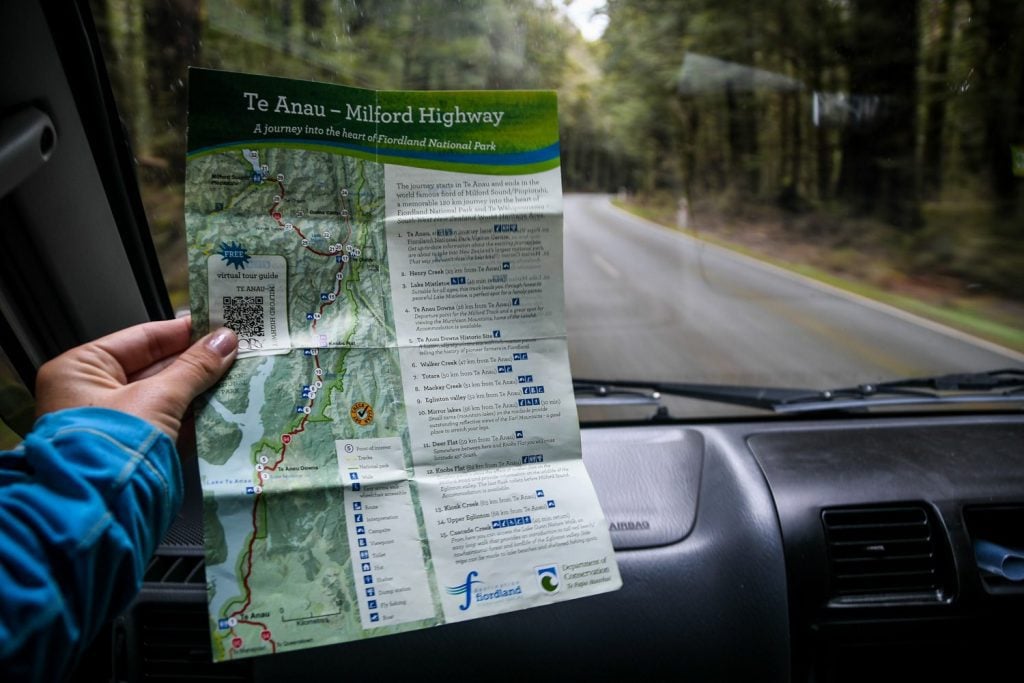
Day 6: Te Anau and Milford Road Highway
- At a glance: Spectacular views as you drive along the highway, stopping for short walks to viewpoints of lakes and mountains.
- Distance: 289 km (179 miles)
- Total driving time: 4.5 hours, but depends on number of stops
The drive from Queenstown to Te Anau and onto the Milford Sound Highway is stunning. There are tours to Milford that leave from Queenstown (there are a few good tours here), but we highly recommend you drive on your own because there are so many places to stop.
Lucky for you, it just so happens that we have a guide with everything you need to know to plan the perfect Queenstown to Milford Sound road trip, including can’t-miss stops, essential tips, and how much time you *actually* need (spoiler alert: it’s NOT what Google Maps says).
Tip: Before you leave the Queenstown area, make sure to stock up on food at the Frankton Countdown grocery store because there aren’t very good options for food in Te Anau and there are no services on the Milford Road Highway.
Remarkables Lookout Point
About halfway up the road to the Remarkables, Queenstown and Lake Wakatipu Lookout is a beautiful view over Queenstown.
The Remarkables resort is supposed to have a nice view as well. However, when we drove up it was shrouded in clouds unfortunately.
Tip: Use 2nd gear (if you have it) going up, but be sure to switch when you’re parked, and low gear going down.
The drive along Hwy 6 on the shore of Lake Wakatipu is called the Devil’s Staircase and it is stunning. Be careful driving because many people will pull over on the side of the road for a picture, and so should you but make sure it is safe.
Te Anau
Stopping in the Te Anau Visitors Center is worthwhile because they are very informative of things to do around Te Anau and on the Milford Road Highway.
This will be your last stop for groceries, petrol and cell service before you head onto the highway. You should plan on at least 2.5 hours from Te Anau to Milford Sound (forget what Google maps says) because of all the stops, time waiting at Homer tunnel, and other travelers.
While in Te Anau, one of the attractions we found fascinating was the Ata Whenua – Shadowland film at the Fiordland Cinema. For $12 NZD, it’s a 32-minute video mostly taken in a helicopter around the fiordlands.
We couldn’t peel our eyes away from the screen as the video panned over icy mountain passes and dropped down massive waterfalls. It was like watching Planet Earth, and if you’re into that, we would recommend the video before you head up the highway.
The film is shown hourly. There is a bar and sitting area outside the cinema that you can wait for the next showing.
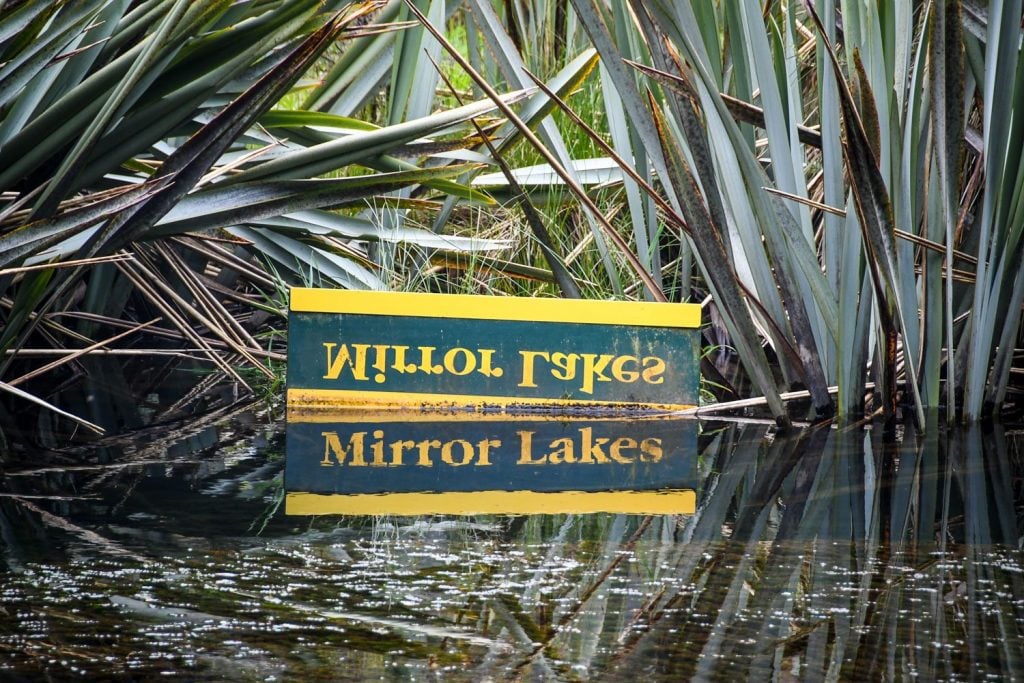
As you work your way north on the Milford Sound Highway, there are many nice stops like Te Anau Downs, Lake Mistletoe Walking Track, and Mirror Lakes.
Where to Stay
Cascade Creek campsite: The closest campsite to Milford Sound. It is $13 NZD per person to camp, but it is free with the DOC Pass.
At the campsite there is the Lake Gunn Nature Walk, a flat 20-30 minute loop through giant mossy trees. We swore we could hear elves signing from the Lord of the Rings, but maybe it was just a long day of driving.
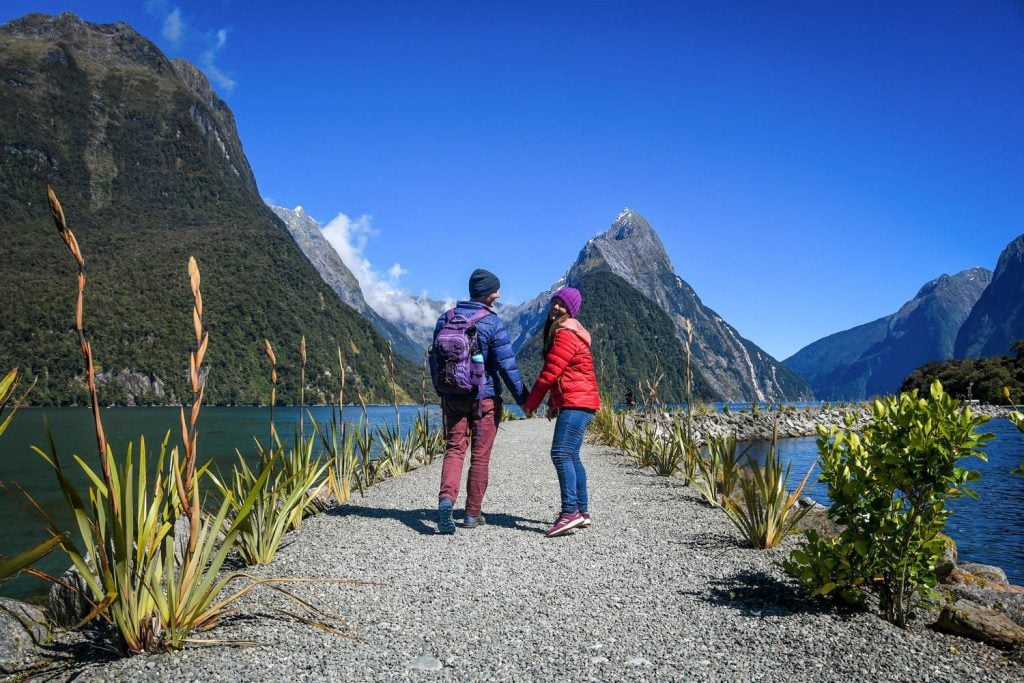
Day 7: Milford Sound and Key Summit Hike
- At a glance: Milford Sound boat cruise or kayak tour in the morning and then 360 degree views of the mountain ranges from Key Summit.
- Distance: 235 km (146 miles)
- Total Drive Time: 4.5 hours
From Cascade Creek Campsite you should plan on at least an hour drive (maybe even 1.5 hours) to get to your Milford Sound cruise or tour.
The Homer Tunnel is only 1-way and has traffic lights, which means delays can be up to 20 minutes during peak hours. In the early morning, we had to wait about 6 minutes so it wasn’t too bad.
Note: the Milford Sound parking lot is still a 10-minute walk (300 meters) down to the port. Factor that into your time before your tour.
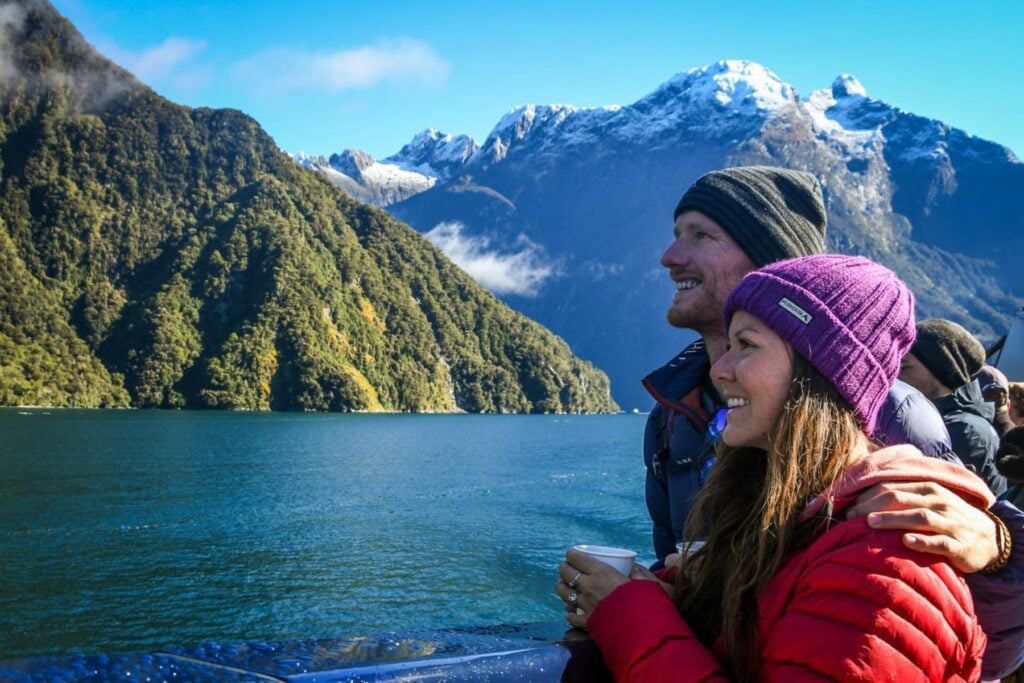
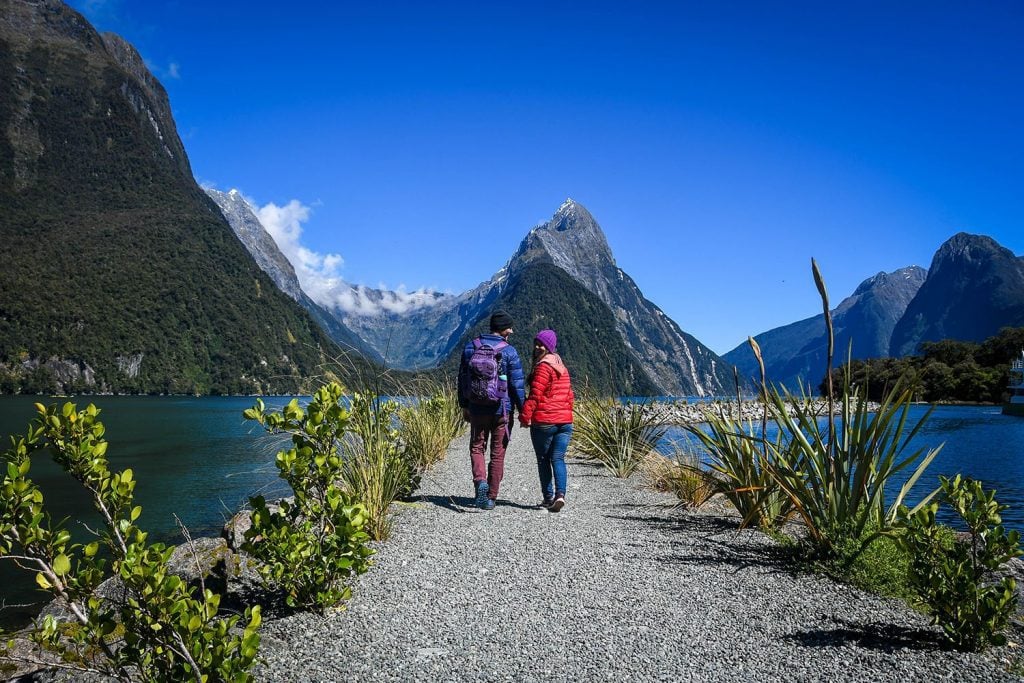
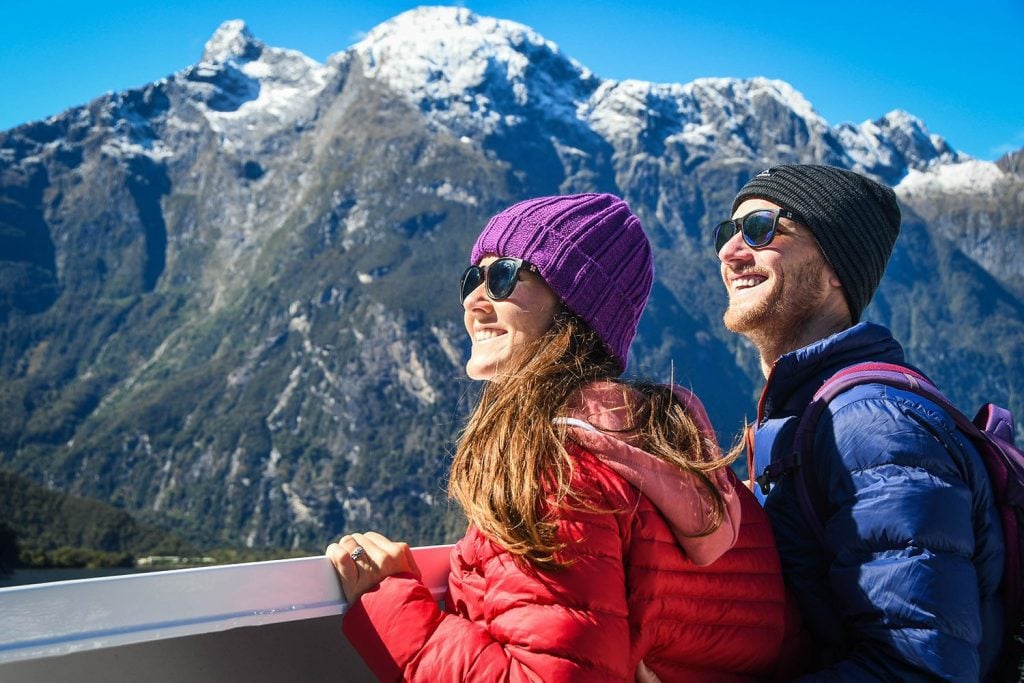
Milford Sound is one of those bucket list places that totally lives up to the hype. The straight up rock walls, the massive waterfalls, and the timid wildlife… It all makes the 2-hour journey down and back the fjord seem to fly by quickly.
We put together a detailed Milford Sound guide with tons of tips for visiting this legendary natural attraction.
Milford Sound tours
Make sure to book your Milford Sound tour a day or two in advance. It will most likely be sold out if you try to book at the port and there is no cell service along Milford Road to book along the way.
We went with Go Orange Cruises who then transferred us to Real Journeys, but you can compare prices of all tours here.
The cruise ship we took had an inside sitting room with free coffee and hot chocolate, but most people hung out on the open air top deck. The captain was on the intercom telling us facts about the area, history and spotting wildlife.
If you want a more intimate tour, book the Milford Sound Encounter Nature Tour. It’s a bit longer than the regular cruises and you get to be on a smaller boat. You’ll get up closer to wildlife and waterfalls (enough to get wet).
For the active and adventurous travelers, try a kayaking tour of Milford Sound. We really wanted to do this tour as well, but just did not have enough time.
We have a whole guide to booking the best Milford Sound cruise that will help you decide which tour is right for you.
Milford Sound viewpoints
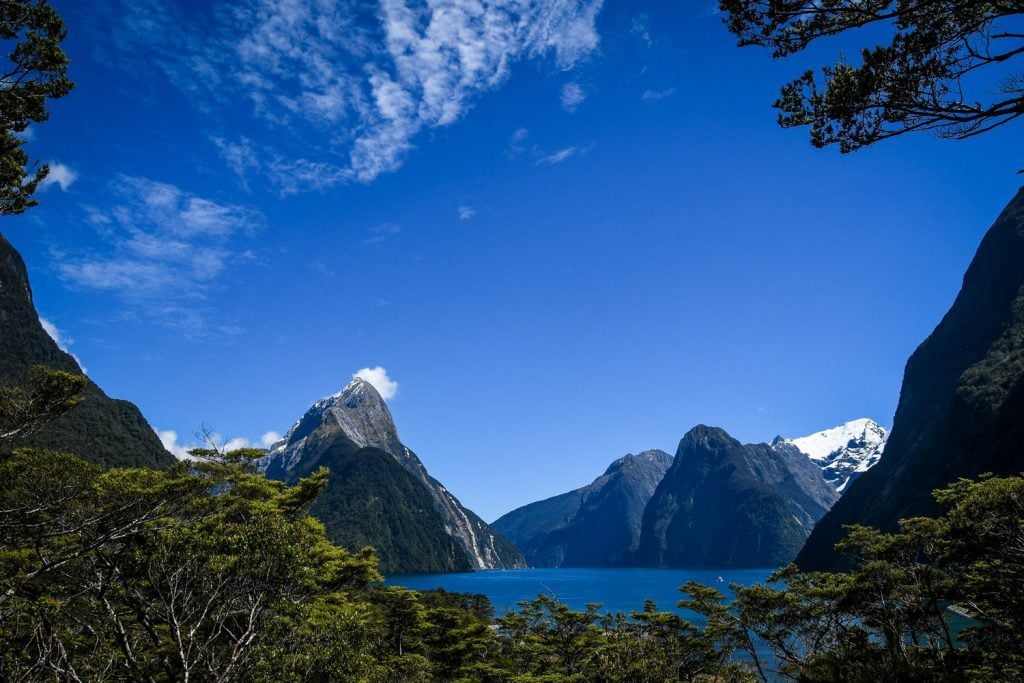
Once your cruise is over, we recommend walking to the end of the port and on to the jetty or breakwater path that protects the port. You’ll be able to get some pretty incredible shots of Mitre Peak from here.
Next head to the lookout behind the parking lot near the information center. It’s a 10-minute return to the viewpoint with a pretty nice view of the fiord.
Once you are done gawking at the beauty of Milford Sound, it’s time to head back down the Milford Road and stop at any of the locations you passed on the way up.
The Chasm
About 10 minutes south from Milford, The Chasm Walk is worth a stop. Just as it sounds, it’s a deep crack in the earth with the raging Claddau River flowing through. It’s about a 10-15 minute loop trail.
Lake Marian Falls
About 12.7 km south from the Homer Tunnel, turn left on Lower Hollyford Road and continue for about 1 km until the car park. The Lake Marian Fall Track is a short hike over a suspension bridge and up about 10 minutes to a series of beautiful waterfalls.
After the falls, you could continue up the steep advanced Lake Marian Track 1.5 hours one-way to Lake Marian. But if you don’t have a lot of time, we recommend the Key Summit Hike.
Key Summit Hike
- Distance: 4.8 miles (7.72km), out and back
- Elevation gain: 1,374 ft (419m)
- Difficulty rating: Moderate
- View trail notes on DOC
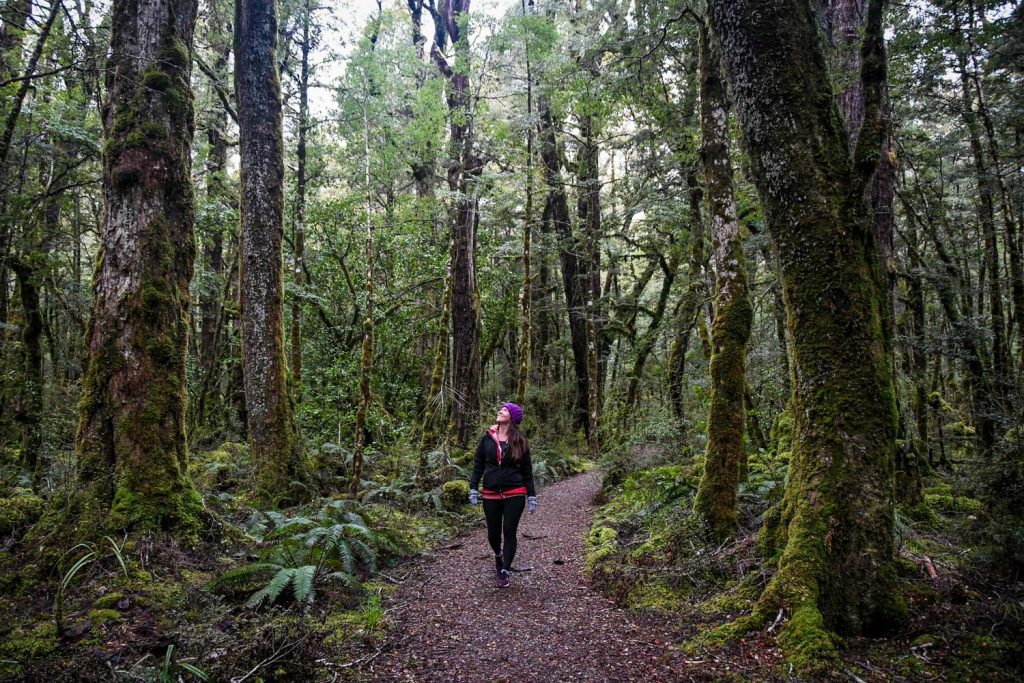
This 3-hour return hike is a relatively easy trail for all abilities. You go through a series of switchbacks amongst the forest and then the last 30 minutes is mostly a flat “nature loop” on boardwalks.
From the top, you get a 360 degree view of the surrounding mountains that create the fjordlands. You can even see Lake Marian and the hanging valley it sits in.
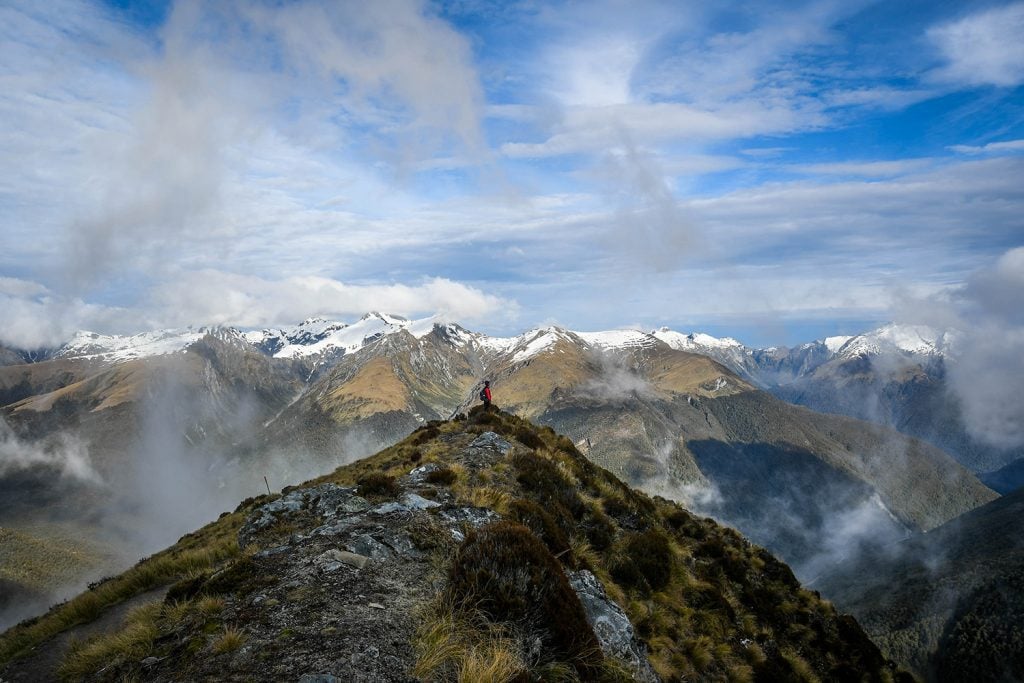
Have more time? If you are an avid hiker and have more time to add to your South Island New Zealand itinerary, we’d highly recommend looking into the Routeburn Track as it’s one of NZ’s Great Walks and shares the trailhead with the Key Summit track.
Where to Stay
Today becomes a long day after all the excitement of Milford Sound and the Key Summit. We recommend getting as far back towards Queenstown as you can.
A good place to stop and spend the night in the middle is at Lumsden Freedom Camping. It’s a free place to camp/park overnight with a kitchen station and flush toilets. Make sure to read the instructions on where you can park on the Rankers App.
It’s more or less a parking lot near a historic train track, but clean bathrooms and it’s free. Would we recommend it? Yes, if you’re looking for a free place to camp on your way back from Milford Sound.
Day 8: Wanaka
- At a glance: Arrive in Wanaka and explore around this cute lakeside town
- Distance: 161 km (100 miles)
- Total driving time: Lumsden to Wanaka – 2.5 hours
Make your way back from the southern fiords through Queenstown and up the scenic Crown Range Rd.
If it’s wintertime, you could hit the slopes of Cardrona Alpine Resort, or if it’s summer drive up there for the viewpoint, otherwise continue on to Wanaka.
This charming lakeside town quickly draws visitors in and begs them to stay longer than they’d planned. With epic nature to be explored just steps from the center and an inviting small town feel, it’s hard not to fall for Wanaka.
Things to Do in Wanaka

#ThatWanakaTree: Probably the most iconic image of Wanaka is now a viral sensation. The lakefront viewpoint is just west of the city so you could easily walk the 1.5 km from the town center or park at the Wanaka Rotary Playground. It’s a short walk from there, just follow everyone else.
Ethical Travel Note: This famous tree is very fragile. In fact, some tourists have broken off branches while posing in the tree. Please don’t ruin it for everyone and stay on shore.

Wanaka lavender farm: Just a short drive from town you’ll find the beautiful fields of the Wanaka Lavender Farm. The peak season is mid-December through February, but honey tasting, lavender products, alpacas, lawn games, and the lavender garden are open all year round ($2 for adults, free for children under 15).
Hike up Mount Iron Track: This 1.5 hour loop hike overlooks town, the lake and Wanaka valley.
Go kayaking, SUPing or swimming in the lake: Rent a kayak or SUP, or take a kayak tour on Lake Wanaka. There are a few places around Wanaka where you can go swimming, check out this list of swimming holes.
Rippon Vineyard: No better way to end a day of exploring than a wine tasting. Rippon Cellar Door is open from 11 a.m. to 5 p.m. and they don’t have a set price for wine tastings. They simply ask if you want you can contribute to their Habitat Restoration program. Groups of 7 or more need to make a reservation.
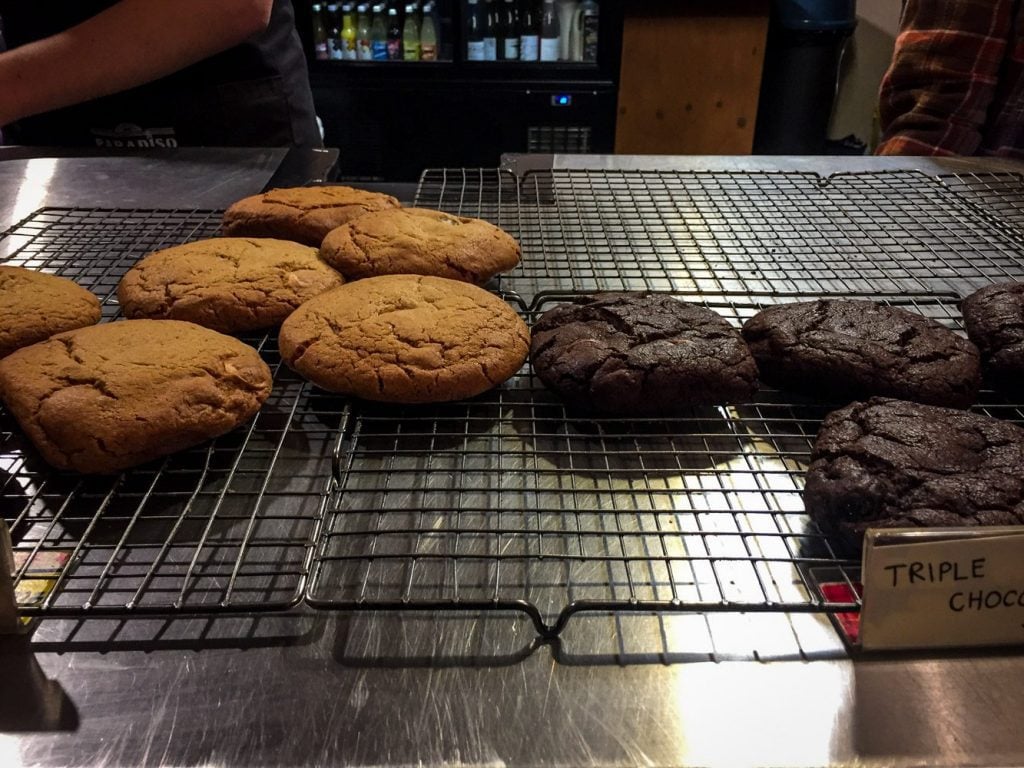
Cinema Paradiso: Great rainy day activity (or in my opinion, any day activity). This local movie theater has couches and regular movie seats, and even the front half a car for your own drive-in experience. They have an intermission for each movie, in which you must get the freshly baked cookies. Be sure to get tickets in advance.
→ Related Reading: 75+ Best Travel Movies to Inspire Your Wanderlust
Where to eat and drink in Wanaka
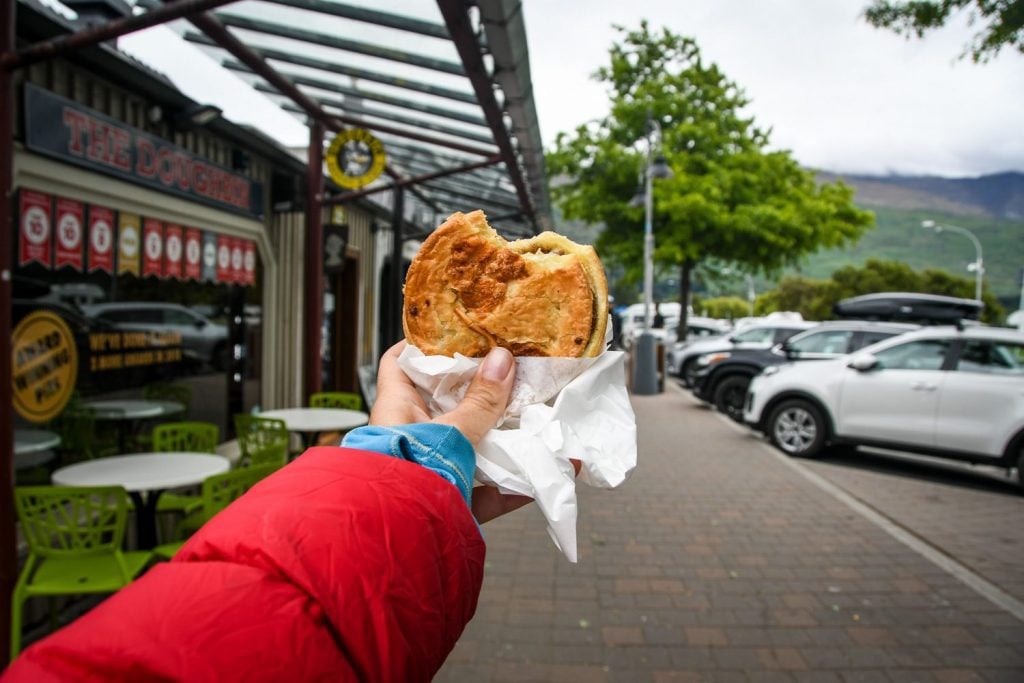
- The Doughbin Bakery: Best meat pie in New Zealand (and we sampled a lot!) Try the lamb and mint or the curry chicken. Eat in the cafe or take it to go and stroll the waterfront.
- Kai Whakapai Eatery: Meaning “food made good”, this popular taproom/restaurant sits right on the corner of the main street in town and close to the wharf. Typical New Zealand bar food and light bites served with tasty craft and local beers.
- Cork: This charming bar has over 100 different wines, craft brews, and signature cocktails to choose from. Try to swing by when they have live music.
Where to Stay in Wanaka
- Wanaka Lakeview Holiday Park: we stayed here for a night and it was nice, but busy. There are two kitchens for cooking meals at night, and the facilities are clean.
- Cost: $21 NZD per person per night.
- Albert Town Campground: Basic camping on the banks of the Hawea River. Public toilets and water available.
- Cost: $7 NZD per person per night.
Day 9: Hiking around Wanaka – Roys Peak vs. Isthmus Peak
- At a glance: Long day hike around Wanaka
- Distance: 73 km (45 miles)
- Total driving time: At most 1 hour
In Wanaka, there are so many different hikes to choose from, but the most popular hike is Roys Peak.
After hearing it was infamous for being crowded, we wanted to get a second opinion. We went to the Wanaka iSite (Visitors Center) and asked the woman behind the desk her opinion between Roys or Isthmus Peak.
She said, “Well, both hikes have beautiful views. Both are steep and take around the same amount of time. Roys is busier. Much busier.”
When we asked her which she would recommend she just answered, “It depends on whether you want to hike with dozens of other people or have the trail more to yourself.” So she didn’t want to commit to choosing one, but the way she said it kind of let us know her pick!
If you want to do Roys, the trailhead is much closer to Wanaka. The Isthmus trailhead is about 30 minutes drive away. Each hike takes about the same amount of time, 5-6 hours return.
We’re not saying Roys Peak is a bad choice, but when we are in nature, we want to be surrounded by (surprise!) nature, and not selfie sticks.
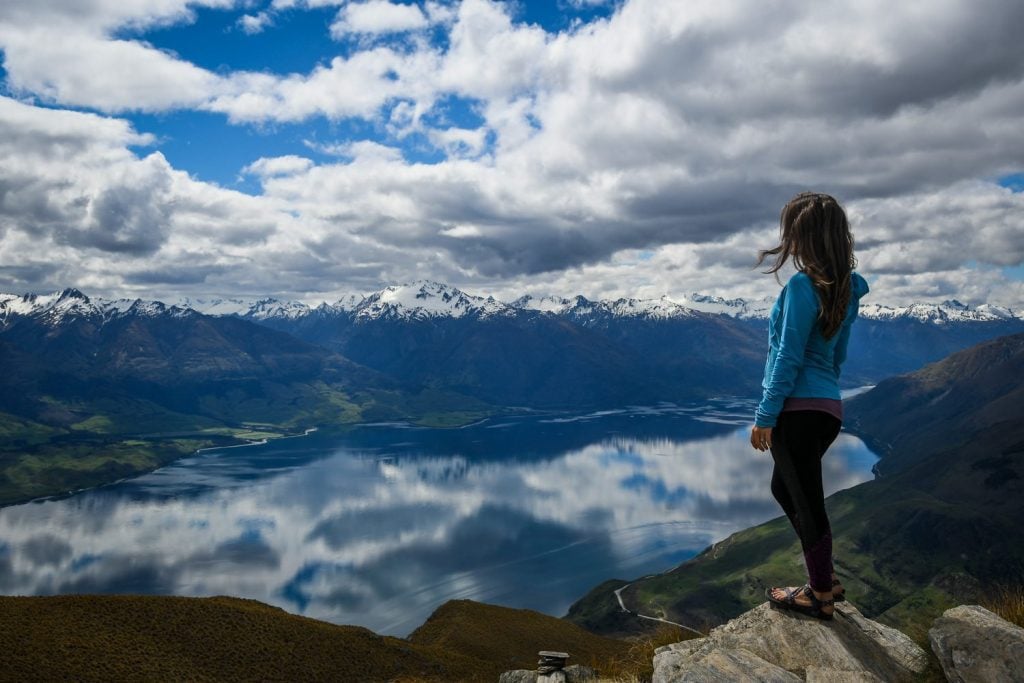
We had a great time hiking Isthmus Peak and the views are stunning. Not only do you get to see Lake Wanaka at the top, but you’re staring at the beautiful blue-green Lake Hawea the entire hike up.
We would also recommend doing Isthmus Peak if you’re following this itinerary since you will be heading to the Haast Pass next, cutting down your gas and driving time.
How to Hike Isthmus Peak
- Distance: 9.7 miles (15.6 km), out and back
- Elevation gain: 3,677 ft (1118 m)
- Difficulty rating: Challenging
- View trail notes on DOC
Drive north on Hwy 6 along Lake Hawea. Just before the road turns west toward the isthmus of the two lakes, there is a small lot to park in. (It’s easy to miss, so watch for it! It’s also not the pin on Google Maps).
In the lot there is an outhouse and signs to the path. If you don’t want to use the outhouse, there are public toilets at Craigburn Beach on Lake Hawea.
At the beginning, there are a few gates you have to cross through (meant to keep livestock out).
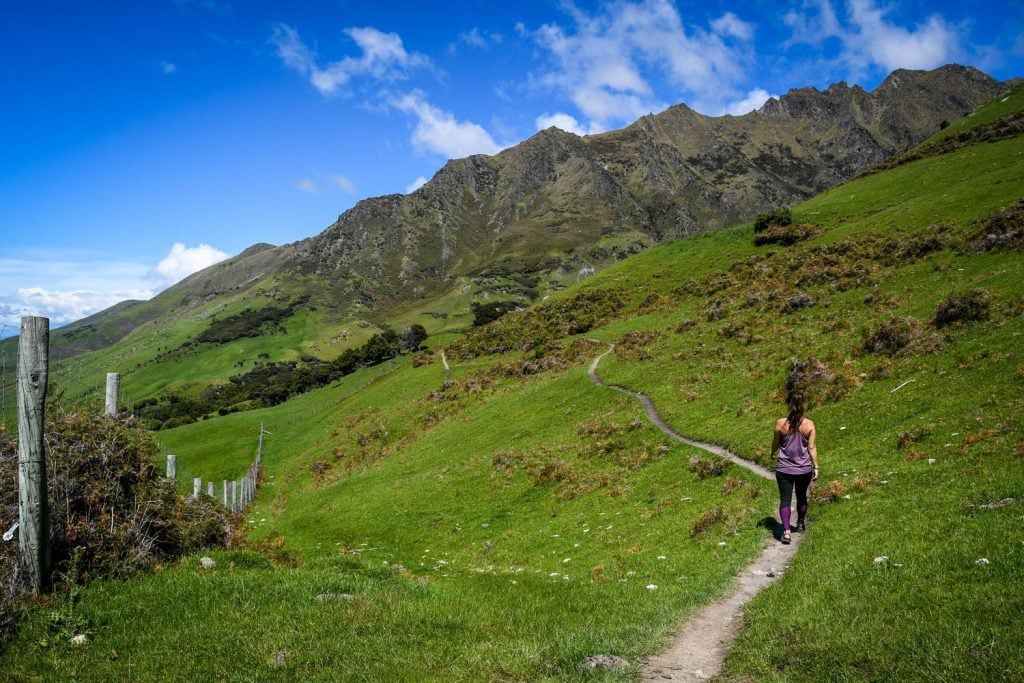
The hike is incredible! Seriously the views don’t stop the whole way up!
I told Ben I was going to try to not take too many photos at the beginning of the hike… Five minutes in I had the camera out and was already snapping away. It kept getting better every 100 meters.
It’s a steep hike, especially at the start and takes a good chunk of your day but it is so worthwhile. Bring enough water (at least 2 liters/person) & snacks.
Hiking time: For us it was 2.5 hours ascend, 30 minute lunch break, 1.45 descent – plan for 5-6 hours.
Where to stay
After the hike, continue the scenic drive up north on Hwy 6, through “the Neck” and camp at Boundary Creek Campsite. Toilet and sinks available. $8 per person per night or free with the DOC Campsite Pass.
Day 10: Drive Haast Pass to Franz Josef
Option to stay overnight at Brewster Hut
- At a glance: Big day of driving over Haast Pass, stopping at waterfalls, rivers and lakes.
- Distance: 237 km (147 miles)
- Total driving time: 4 hours + 1 hour of stopping at sights
Haast Pass is a playground for roaring rivers and massive waterfalls. Today might seem like a sightseeing frenzy but each stop gets better than the last.
Over the pass, you are entering the West Coast of New Zealand, one of the sparsely populated and rough areas in all of NZ. Be prepared for drive times to be longer than you think and be cautious because emergency crews take longer to arrive in this area.
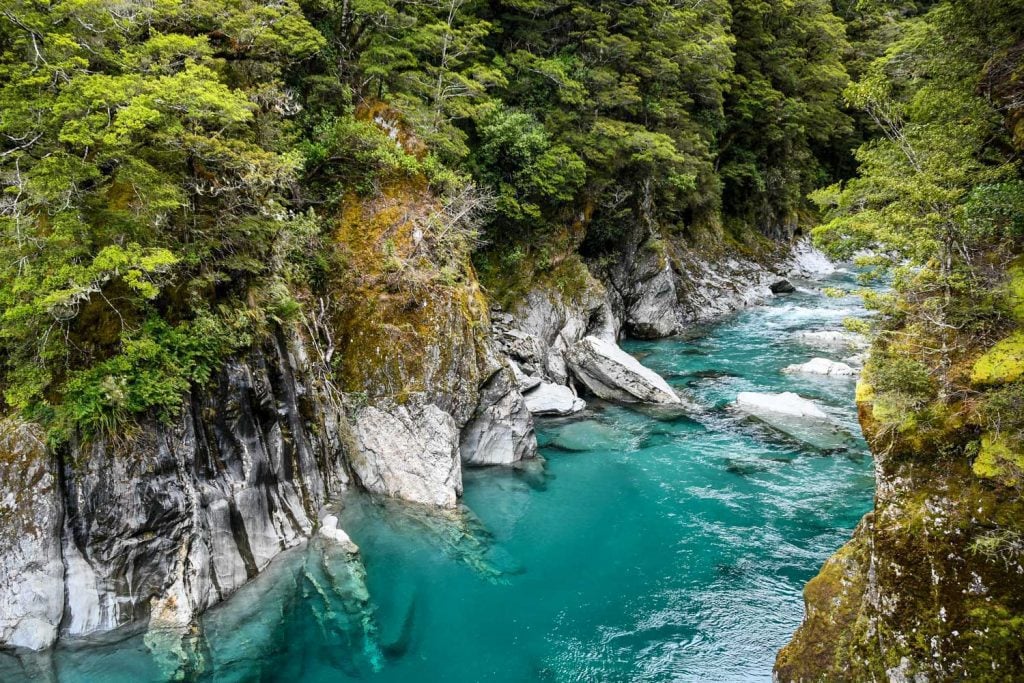
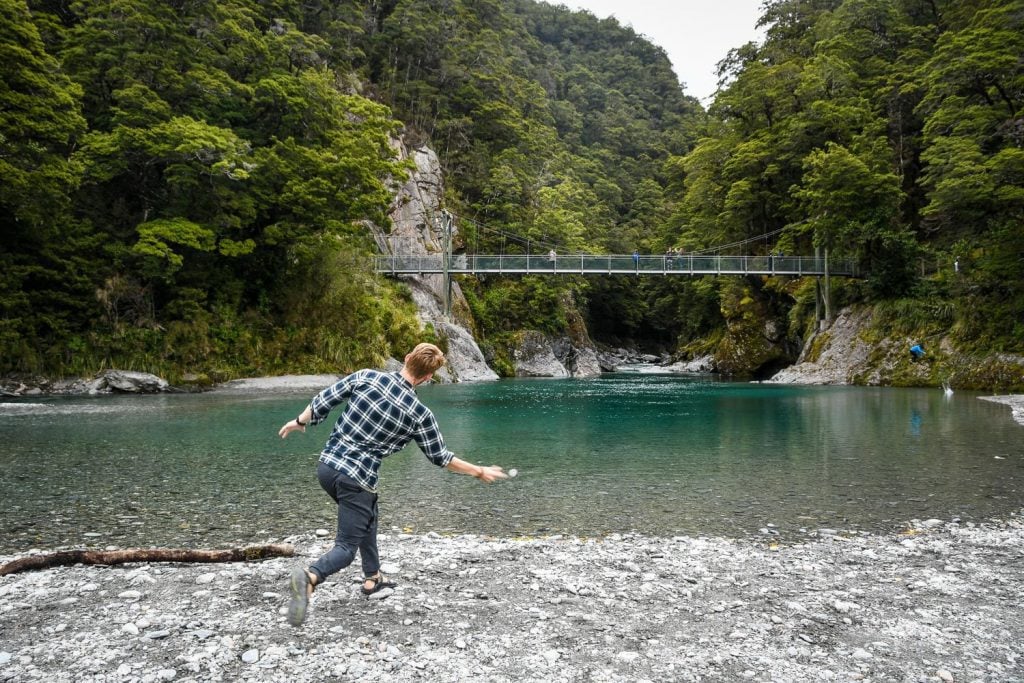
Blue Pools Walk
- Distance: 2 miles (3.2 km), out and back
- Elevation gain: 282 ft (86 m)
- Difficulty rating: Easy
- View trail notes on DOC
One of the best short walks in the South Island of New Zealand! This relatively flat walk brings you through the forest and opens up at a suspension bridge crossing the Makarora River.
The second swing bridge is the viewing platform for the Blue Pools. If you’re feeling brave, dip your toes in by the river, the water is ice cold! The hike takes a total time of around 1 hour.
Fantail Falls
Short drive from the Blue Pools is the 23-meter Fantail Falls. View this waterfall from a short distance, because the Haast River crosses in front of it.
Plenty of smooth rock and river cairns people have created. This is also the trailhead for the 6-hour return hike up the Brewsters Hut.
Brewster Hut (adds an extra day)
- Distance: 3.3 miles (5.3 km), out and back
- Elevation gain: 3,156 ft (962 m)
- Difficulty rating: Challenging
- View trail notes on DOC
Sitting below the giant mountains and glaciers of the Mount Aspiring National Park is the 12-bunk Brewster Hut. We’ve written about our experience hiking to the hut in our West Coast article (scroll to #3!), including a description of the trail and what to pack.
Note: If you have time to overnight here, we recommend it, however it would add a day to this itinerary.
Gates of Haast
A powerful river flowing through monstrous boulders spanned by a steel bridge. It’s beautiful to drive over, but there is not really a good spot to pull over and get out. Unless you walk from the Thunder Creek Falls pull out.
Thunder Creek Falls
Literally a 2-minute walk to an impressive 92-meter waterfall. That’s it, short and sweet.
Roaring Billy Falls
Yet another loud waterfall that seems to appear out of the woods. The parking lot here is small and therefore you might be forced to skip it.
Matheson Lake
Turn left out of Fox Glacier and head straight for Lake Matheson. This reflective lake is a postcard waiting to happen.
Capture the lake and the snow-capped mountains in the distance as you make the 2.6 km loop around the lake. The easy walk would take you 1.5 hours.
Franz Josef Glacier
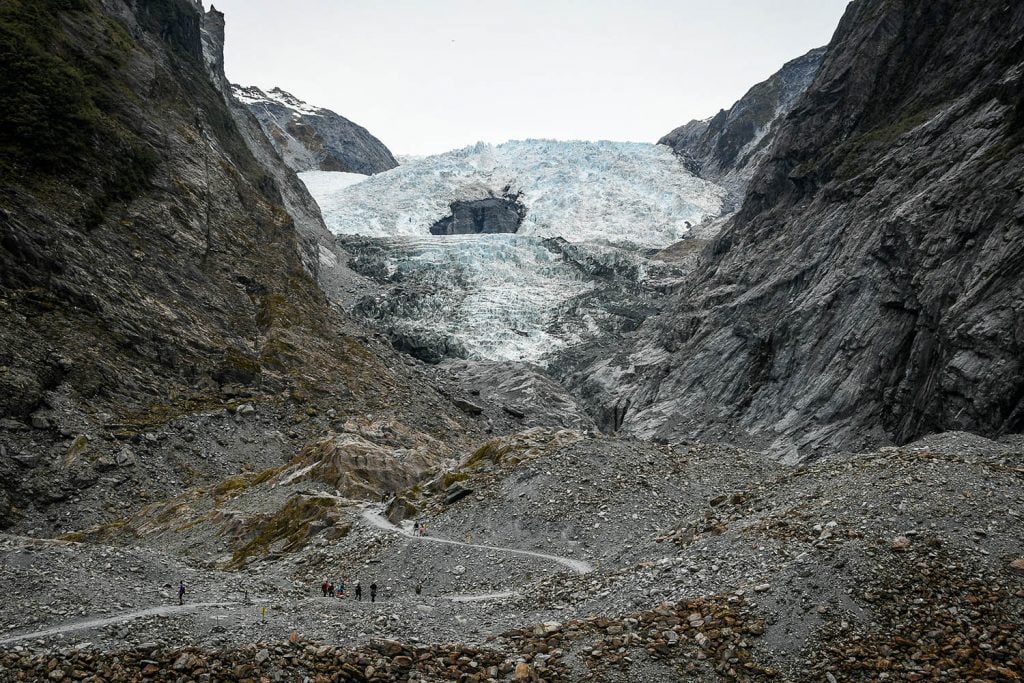
Make sure you plan on saving time for this 5.4 km (1.5 hour) return flat hike to Franz Josef Glacier. You can do it on your own or we would recommend doing the afternoon tour with Glacier Valley Eco Tours.
Glacier Hot Pools
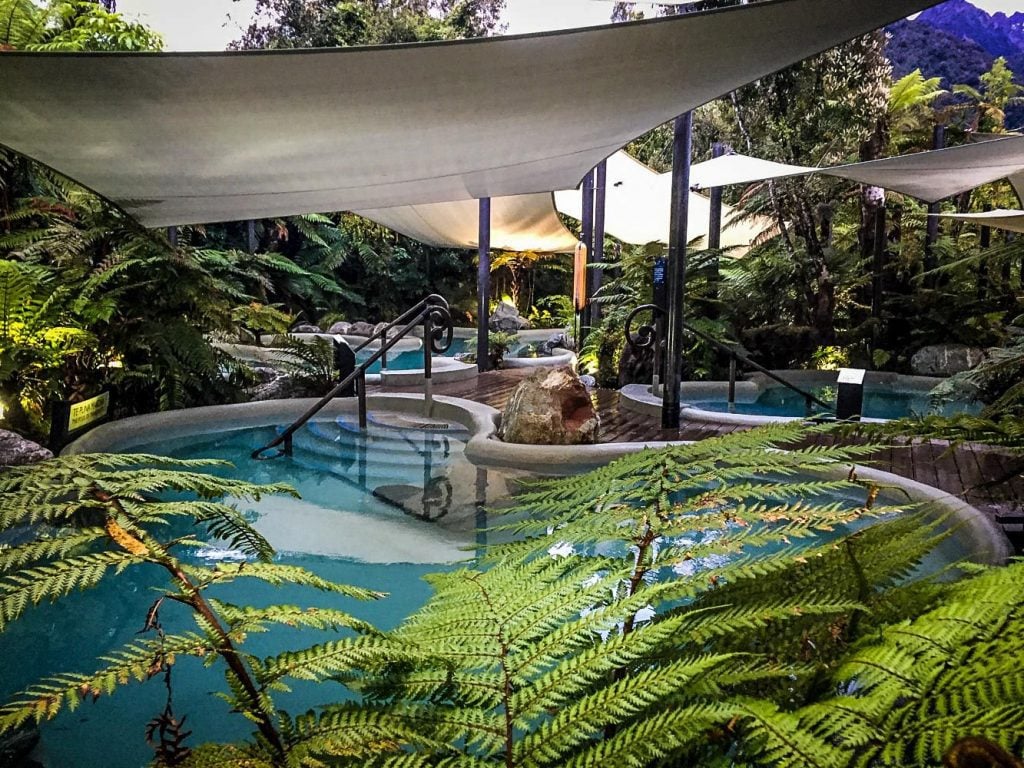
Wow, what a day! The best way to cap off this epic day on the South Island of New Zealand it so soak in a hot pool.
Waiho Hot Tubs offers a luxurious soak that’ll be well-earned after a day of adventuring around Franz Josef. You’ll need a reservation for your hour-long time slot. See their website for pricing and availability.
Be sure to book ahead of time!
Tatare Tunnels Walk
If you want an off the beaten path adventure, this 80-minute walk through old tunnels is a decent place to see glow worms for free! These tunnels were used by miners to transport water, but are now abandoned (though it is possible that your feet will get wet!). Be sure to bring a headlamp, and check out the DOC website for more information!
Glow Worms Nightwalk
The Terrace Walk, on the south side of Franz Josef, is a dark forest covered path that at night you’ll be able to spot the blue hues of glow worms. 30-minute return walk or just go in and turn around when you’ve seen enough glow worms.
Where to Stay
Rainforest Retreat Holiday Park, trust us, you won’t regret staying here.
Day 11: Helicopter Ride and then drive to Hokitika
- At a glance: Fly over the glaciers in the morning, visit the kiwi center and then drive up to artsy Hokitika.
- Distance: 200 km (124 miles)
- Total driving time: 3 hours
This will be one of the most diverse days in the whole South Island Itinerary. So get ready for a wild ride.
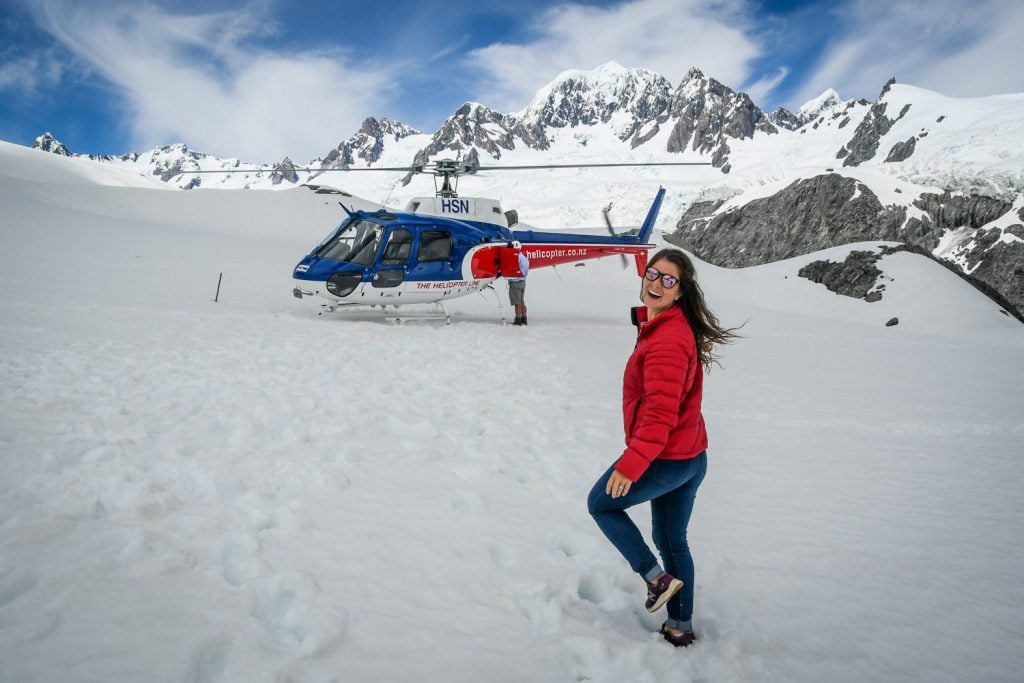
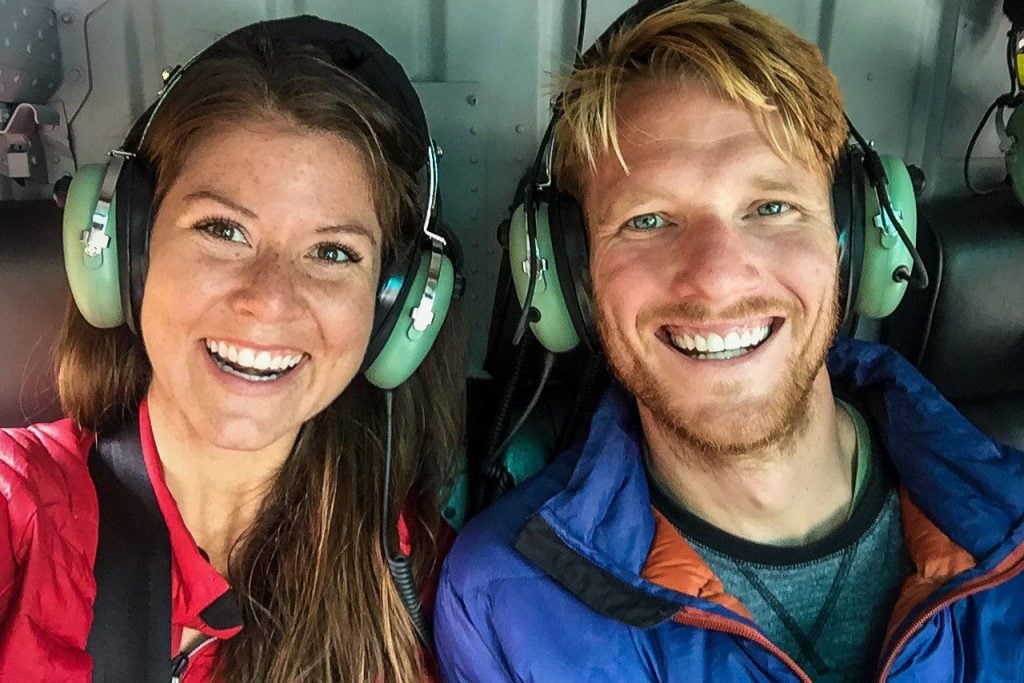
Helicopter Ride over Franz Josef Glacier
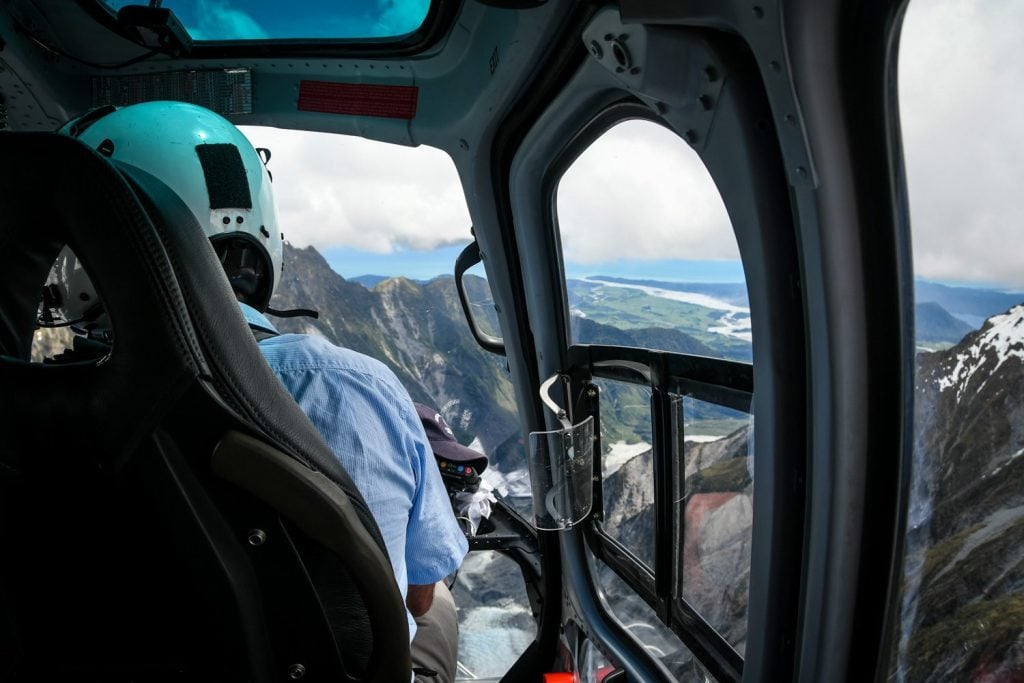
Since you walked up to the glacier yesterday, you might as well fly over it today. Schedule your flight for early in the morning just in case the weather is not cooperating and gets delayed.
We did the 40-minute scenic flight with Helicopter Line, but many of the companies have similar services. Read about our experience in our West Coast article.
White Heron Sanctuary Tour
If you like to keep your feet on the ground (for the most part) and are into rare birds, we recommend the White Heron Sanctuary Tour. The tour will take you to the only breeding area for the White Heron in all of New Zealand.
Note: Before you head to Whataroa, be sure to visit the Wildlife Centre to see the kiwi bird.
West Coast Wildlife Centre
Kiwi birds are very rare to find in the wild. Especially since their population numbers have decreased due to invasive mammals.
Head to the West Coast Wildlife Centre to learn about the program that is rebuilding the population and see two of the famous kiwis in a nocturnal housing. Check out the backstage pass tour for a look into how the rangers are hatching these rare birds.
Ross Gold mines
The West Coast of New Zealand has a gold rush similar to what happened in the west coast of the U.S.A. and the tiny town of Ross was a hot spot for gold. Try your hand at panning for gold or take a short hike to spot gold rush artifacts.
If you want a great spot to stop for the night, the new Ross Top 10 Holiday Park is awesome. Right up on the beach, this modern holiday park has a kitchen and laundry facilities, as well as container home (tiny home) style hotel rooms you can rent.
But if you have more time in the day we recommend continuing on to Hokitika, and if you want you can backtrack 20 minutes to Ross Top 10 Holiday Park.
Jade Carving at Bonz N Stonz Studio
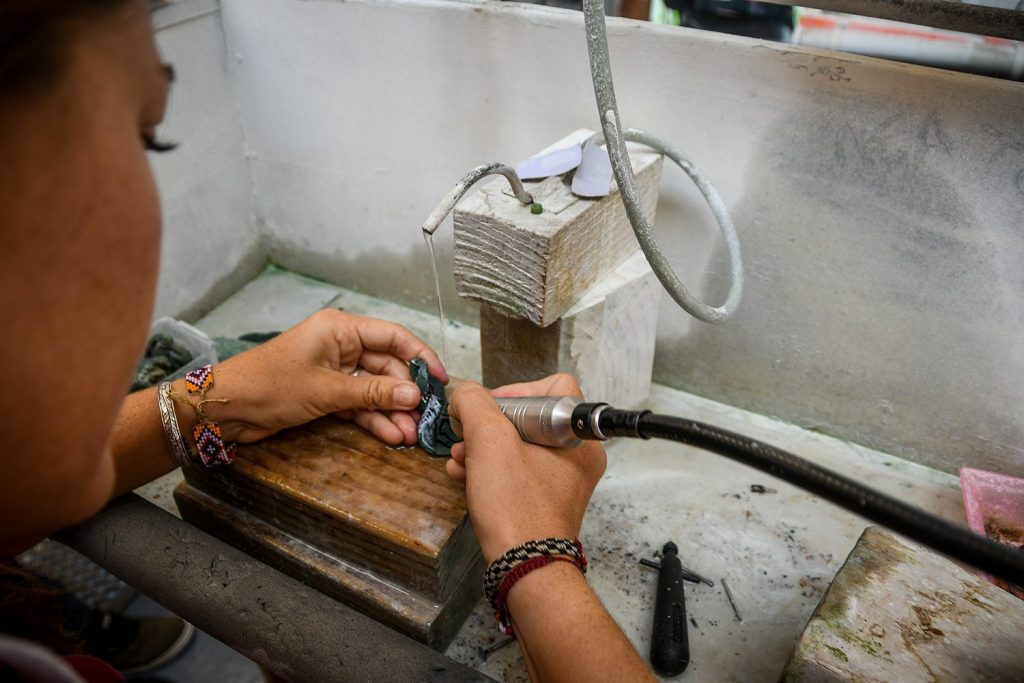
Take home a very special souvenir from your time in the South Island New Zealand by carving a jade necklace. Design, cut and sculpt a jade necklace with the help of a local teacher.
Be sure to come with an idea in mind to speed up the process a bit because it took us over 4 hours from start to finish. Check out Bonz N Stonz for some inspiration and to book your carving.
Hokitika Gorge

End the day by driving 30 minutes inland from the city to Hokitika Gorge. The Hokitika River is fed by glaciers and has a baby blue hue to it because of the rock flour.
The 15-minute round trip walk is stunning, but watch out for the sandflies. A little bit of baby oil helps keep the sandflies from biting.
Do you have less than 2 weeks in New Zealand?
Head back to Christchurch through Arthur’s Pass (Hwy 73)!
We didn’t take that route, but I have some places in mind for our next visit! My parents and brother crossed that way and really enjoyed it.
Arthur’s Pass is supposed to be beautiful and here are a few things to see along the route:
- Devil’s Punchbowl Waterfall: Hike 1 km from the highway and reach a massive 131-meter waterfall. Hike: Roundtrip 2 km, 90 meter elevation change
- Castle Hill: Huge boulders scattered throughout the hill. This area is also called Kura Tawhiti, and is a sacred area, so be respectful and stay on the track.
- My brother recommended the Cave Stream Hike, but make sure the weather is okay before doing it because I think the water levels can rise a lot (and you walk through the water). Prepare for the hike with more information here.
Day 12: Pancake Rocks, glow worm cave rafting and seals
- At a glance: Last day on the West Coast. Our favorite tour in the South Island Itinerary and a bit of driving to get to Abel Tasman.
- Distance: 386 km (240 miles)
- Total driving time: 5.5 hours
Make sure to start your day early because there is a lot packed into it.
Double check on the weather in Abel Tasman. If it looks to be rainy, we would say it is not worth the drive and stay in Nelson. However, if you have extra days in your itinerary, we would recommend doing some hikes around Abel Tasman. More on that on Day 13.
Punakaiki “Pancake Rocks” and BlowHoles
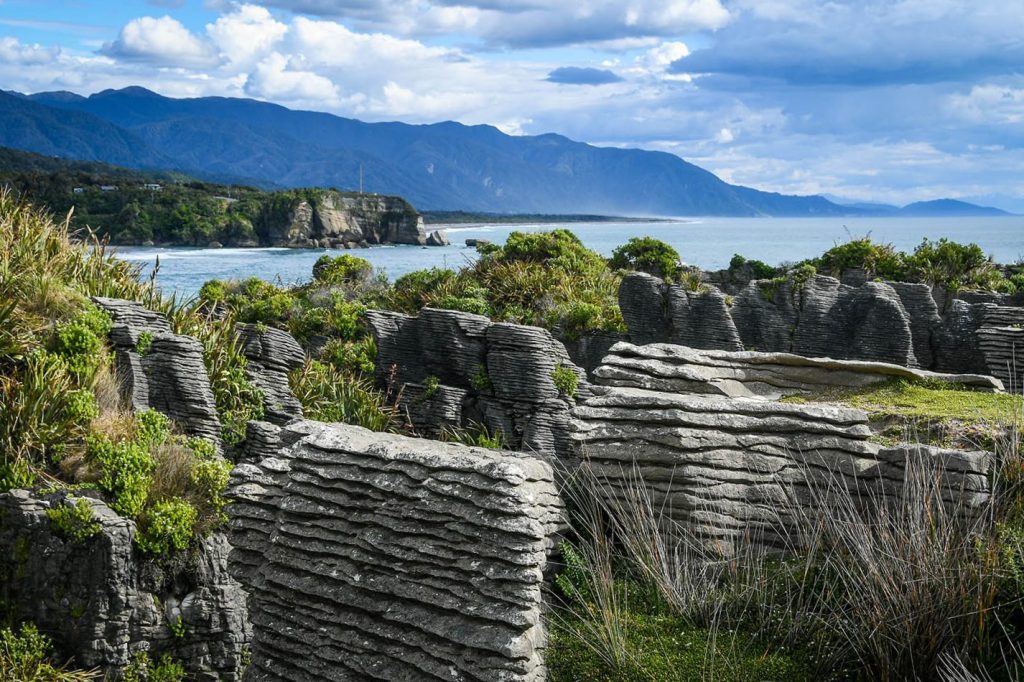
About an hour and half north of Hokitika is one of the most famous landmarks on the West Coast, Punakaiki or “Pancake Rocks”.
It’s a 20-minute loop walk around these limestone formations. And at certain times of the day, the tides splash up water through blowholes.
Truman Track
- Distance: 0.8 miles (1.3 km), out and back
- Elevation gain: 118 ft (36 m)
- Difficulty rating: Easy
- View trail notes on DOC
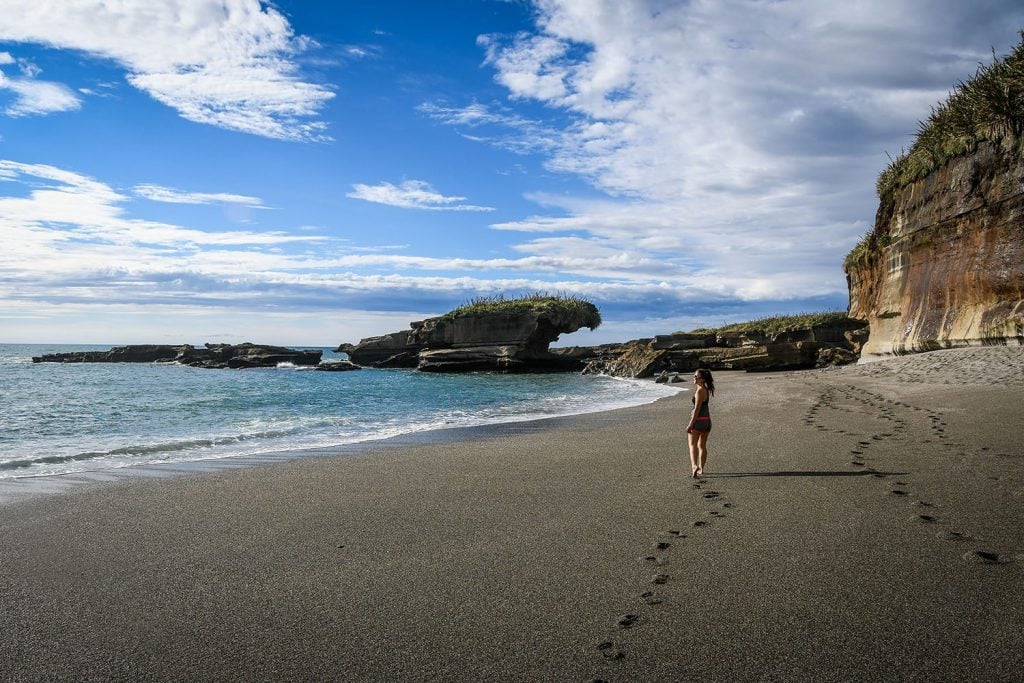
Just a 10-minute drive north of the Pancake Rocks is the 1.3 km return track (30 minutes) through a subtropical forest emerging onto a white sand beach. The Truman Track is a nice walk and worth the stop, but make sure you have enough time to get to the glow worm cave tour next!
Underworld Caving and Glow Worm Rafting Tour
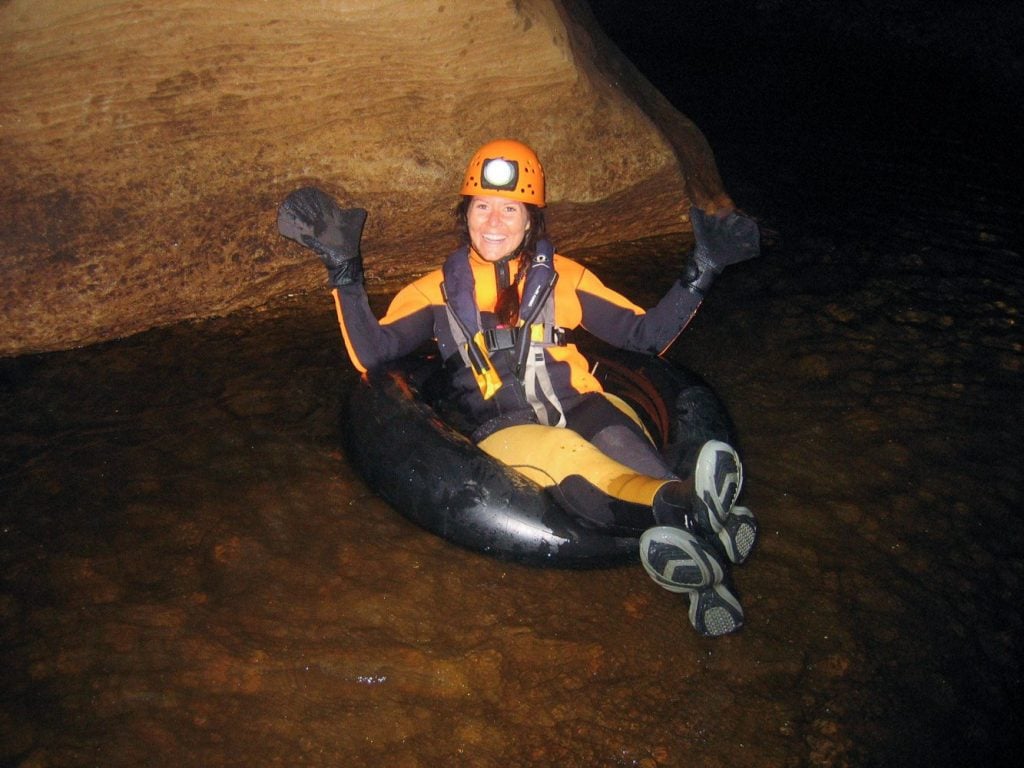
The Underworld Rafting tour was our favorite tour we did in this South Island itinerary!
A 4-hour tour may seem long, but you’re doing so many different things. From exploring huge cave rooms to floating on your back and looking up at millions of glow worms to tubing down rapids of river, time seems to fly by.
Read more about our experience in our West Coast article (#1 on the list!) and be sure to book your tour in advance.
Tauranga Bay Seal Colony
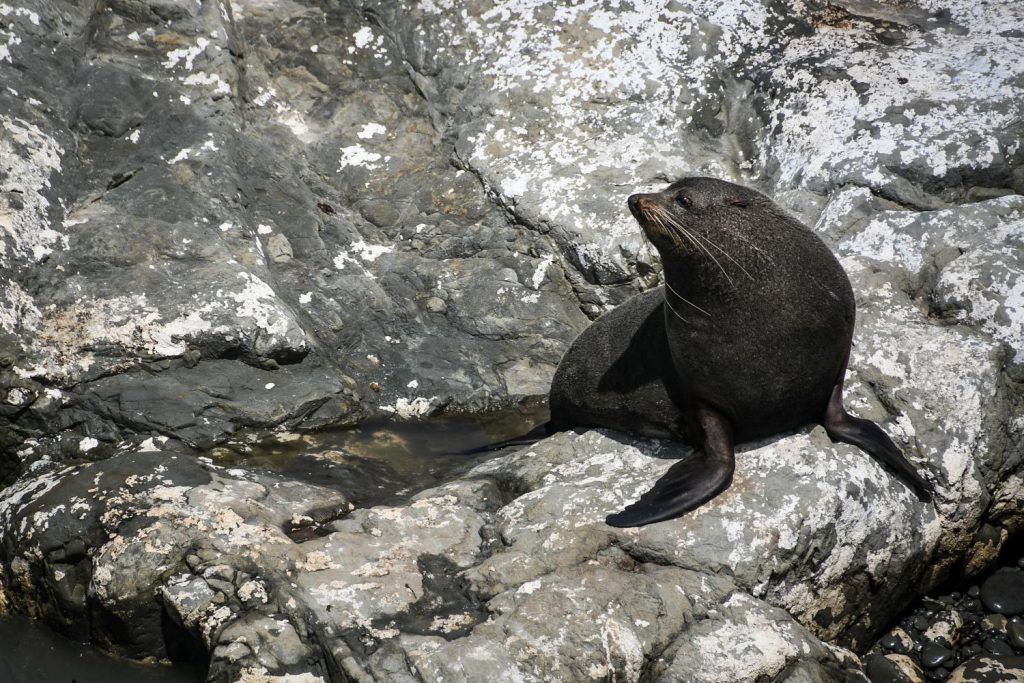
Next, make your way up Hwy 6 and head to the seal colony at Tauranga Bay. It’s a short walk (500 m, 15 min) to the view platform to watch the seal breeding colony.
If you have more time, continue walking another 2.5 km to the Cape Foulwind Lighthouse (to be honest, the views of the beach are more impressive than the lighthouse).
If you had enough excitement for the day, we would recommend the Carters Beach Top 10 Holiday Park in Westport. It’s a very large campground, has a huge kitchen and clean facilities. And it’s steps away from Carters Beach.
Lake Rotoroa
Say goodbye to the West Coast and start heading inland on Hwy 6 toward Nelson and onward to Abel Tasman. A good stopping point along the journey is at Lake Rotoroa.
Enjoy the view of the glossy lake sitting still below the colossal mountains of Nelson Lakes National Park. There are many hikes starting from the lakeshore if you’re keen to go adventuring.
Where to stay
Sometimes you’ll find campgrounds that seem like hidden gems, Kina Beach Reserve Camping is one of them.
Situated right on the shore of Tasman Bay, this campground is only $5 NZD per person. The drop toilets are okay, but the owners are very kind. Find it on the Rankers App.
Day 13: Abel Tasman
- At a glance: Explore around Abel Tasman National Park
- Distance: Up to 75 km (46 miles)
- Total driving time: Up to 1.5 hours
When researching what to do around Abel Tasman, it can get confusing. Basically, it’s a national park where all the hiking is along the eastern shore, in and out of bays.
There are two ways to enter Abel Tasman: From Takaka or from Marahau. Think of access to Abel Tasman as the letter “C”, with Takaka as the top of the “C” and Marahau as the bottom of the “C”.
Here is our recommendation:
- If you’re wanting to do a full-day kayak and hiking tour on the Abel Tasman track, you have nice weather, and are able to spend $165-$200 NZD per person, start from Marahau.
- If you’re on a budget, the weather isn’t great, or you want to explore more than just the national park, start from Takaka.
- We choose Takaka because of those reasons, but it is really up to you.
Drive early up over the windy Takaka Hill and into Takaka. Be sure to stop off at Hawkes Lookout for a great view of the valley. There are plenty of things to do around Takaka, near Abel Tasman and we’ve outlined a few of the highlights below.
Kayak and hike Abel Tasman from Marahau
Book your tour in advance to make sure they are running trips. There are many kayak companies, like Kahu Kayaks and Abel Tasman Kayaks. Each of them offer different types of trips like half-day to full-day. If we were to go to Abel Tasman again, we would do a full-day trip.
Most trips are a combination of kayaking for a few hours out into the park (or possibly ride in a water taxi), have lunch in the jungle or on the beach, and hike a few hours back to Marahau. We heard from other travelers that the tour is pretty epic and we’ll be doing one next time we come to New Zealand.
Ngarua Caves
This large and built-up cave has guided tours hourly during summer months from 10 a.m. to 4 p.m. In the winter you must make a booking ahead of time.
It costs $20 NZD for adults and $8 NZD for children ages 5-15 years old.
Te Waikoropupū Springs
Known to be the clearest freshwater springs in the world and the largest cold water spring in the southern hemisphere, this is a sacred spot for the Māori people. Take the short 20 walk around the springs and be respectful and do not touch the water.
The Grove Scenic Reserve
This 40-minute return easy hike will bring you though carved limestone rocks that have been taken over by large northern rātā trees and palm trees. The turn around point is a viewing platform that looks out over the open fields and bay.
Drive to Tata Beach and Wainui Falls Hike
- Distance: 2.1 miles (3.4 km), out and back
- Elevation gain: 344 ft (105 m)
- Difficulty rating: Easy
- View trail notes on DOC
Walk along the beach of this sleepy beach town. You can rent kayaks from Golden Bay Kayaks or take a guided tour.
If you continue driving along Abel Tasman Drive, the windy road will lead you to Wainui Bay. To your right you can turn off toward Wainui Falls and make the 3.4 km, 1 hour and 20 minute return easy hike if you have time.
Anatoki Salmon Fishing
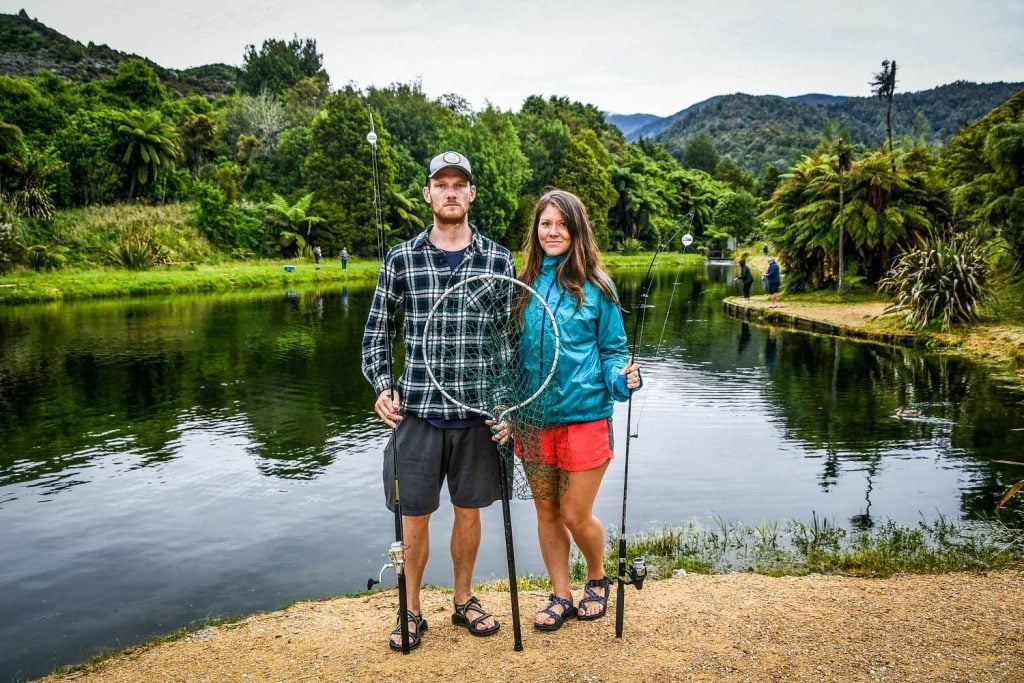
Catch your own Chinook Salmon! Okay, so you’re not fishing out in the wild on a river. It’s from a farm fed lake that is stocked, so it’s pretty easy.
Well, kind of. You still have to catch and reel in your own fish, which took us about 15 minutes.
After catching your meal, you bring your fish to the cook. It’s $26 NZD per kg and they have various ways they can prepare it, like smoked or raw sashimi.
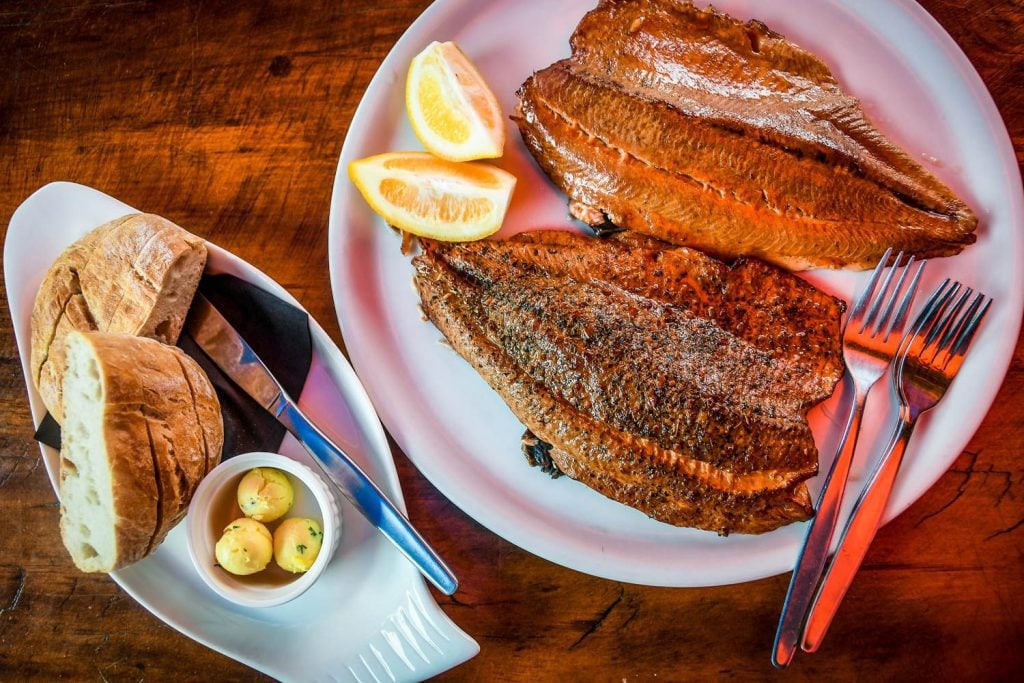
We caught a 1.2 kilo fish (which the cook said was average) and you can check the average fish sizes on their helpful website. The fish and a side of garlic break was enough to feed three of us for lunch.
Harwoods Hole Track
- Distance: 3 miles (4.8 km), out and back
- Elevation gain: 249 ft (76 m)
- Difficulty rating: Easy
- View trail notes on DOC
If you’re up for an adventure, take the 45-minute one-way tramping track to Hardwoods Hole, New Zealand’s deepest vertical shaft. Basically it’s a giant hole in the ground!
We didn’t get a chance to go, but a local said it’s a pretty cool sight. Be careful though, read all the directions and warnings on the DOC website. Don’t get too close to the hole’s edge! This hike is not recommended for children.
Where to Stay
Pohara Beach Top 10 Holiday Park: Right up on the beach, equipped with a kitchen and clean facilities. There are plenty of little cabins if you want a break from your campervan.
If you want a free campervan site, check out the Waitapu River Campervan Park, you can find it on Rankers App. Only one drop toilet and a big muddy lot, but it’s free. Don’t park too close to the river as it can rise in the night.
Day 14: Nelson, vineyards in Marlborough, and drive to Kaikoura
- At a glance: Walk around Nelson and sample wines from New Zealand’s famous vineyards
- Distance: 352 km (218 miles)
- Total driving time: 5.5 hours
Nelson
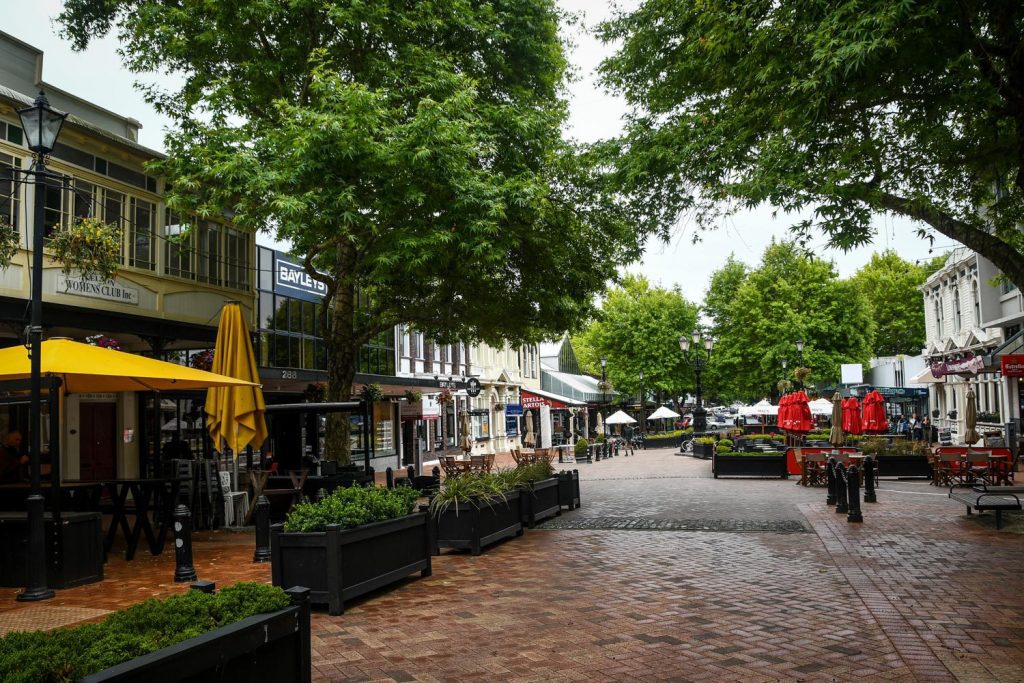
Head out of Abel Tasman and drive along the coast to Nelson. Park along the Queen’s Garden for cheap street parking. Stretch your legs and walk around the beautiful Queen’s Garden botanical park.
Walk south on Trafalgar Street heading toward the Christ Church, walking by many restaurants and cafes.
On Saturdays there is a farmer’s market in Montgomery Square from 8 a.m. to 1 p.m. And on Sundays there is a recycled treasures and vintage collectables market in the same spot and time.
Marlborough Wine
When traveling in New Zealand, we really got into New Zealand wines. We’re not always big wine drinkers (okay we do drink wine, but we’re not picky) and we tend to go in wine phases.
Plus, since it’s hard to keep beers cold in a campervan, red wine is a great alternative because it doesn’t have to be cooled down.
We typically only drink red wine, but when our friend back home turned us on to the Sauvignon Blanc white wines of Marlborough region, we have been itching to try them out from the source.
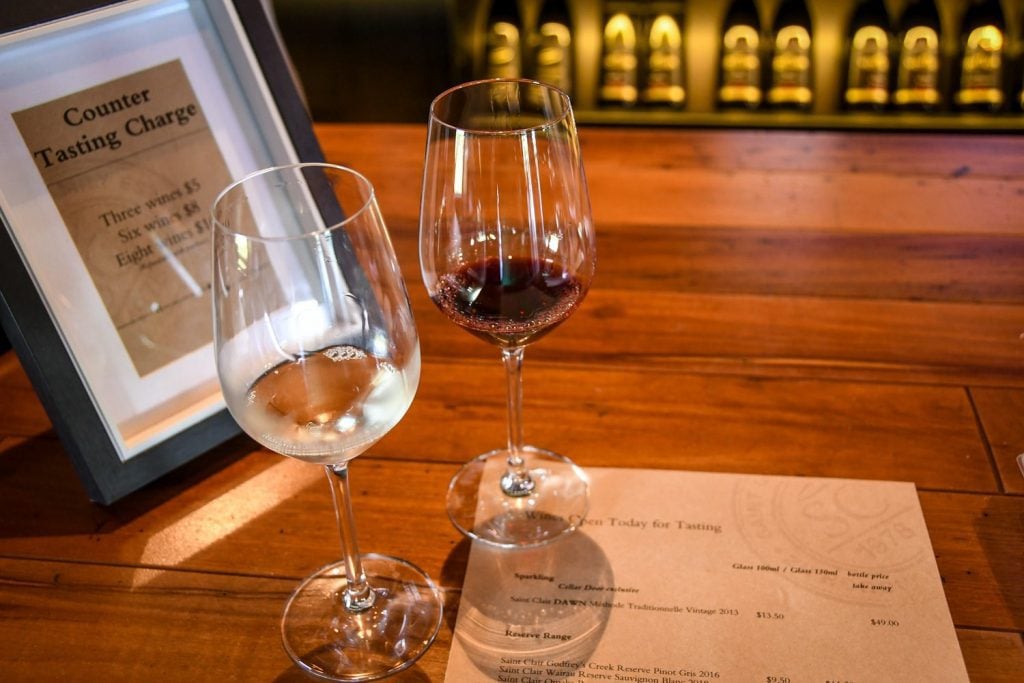
Saint Clair Family Estate Winery
There are loads of wineries to choose from when driving from Nelson to Kaikoura and I’m sure they are all good. There are even wine (and beer) tours that will shuttle you around from one tasting to the next.
We settled on the Saint Clair Family Estate Winery just outside of Blenheim, and we were pleasantly surprised.
They had various tasting amounts: a tasting of 3 wines for $5, 6 wines for $8, 8 wines for $10 (one complimentary tasting if you purchase a bottle of wine). We split a tasting of 8 wines and bought a bottle. If you want to enjoy it in their lovely outdoor seating area (you should if the weather is nice!), there is a fee.
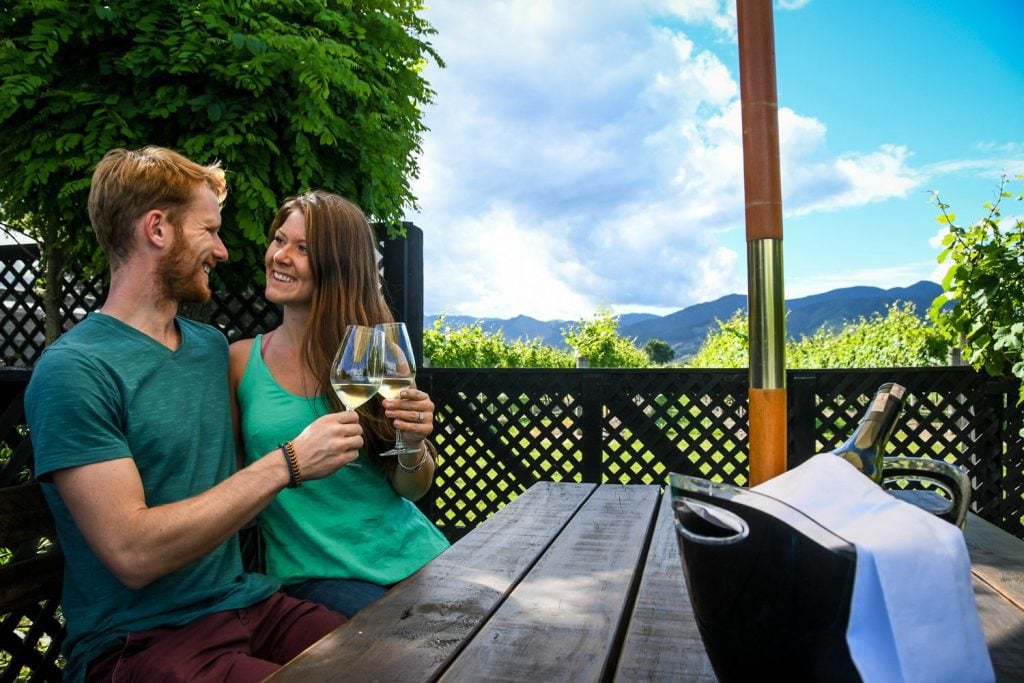
Our bottle was about $25 NZD and the fee to open it on-site was about $6 (varies depending on the wine you choose). So it ended up being about $20 USD for 8 tastings and a bottle of one of the best white wines I’ve ever tasted, in a beautiful vineyard setting. Not bad at all!
Note: With this South Island Itinerary, you still have about a 2-hour drive to get to Kaikoura, so please drink responsibly. For us, we went to Kaikoura first, then on our way back up to catch the ferry in Picton to the North Island, we visited the vineyard and stayed in Blenheim.
But if you do spend the night near Blenheim or Picton, we heard great things about the Queen Charlotte Track, even if you do a little bit of it. We will be visiting this hiking trail the next time we’re in NZ.
Bonus stop: Ohau Point on Hwy 1 there is a lookout point to spot a seal colony. It’s easy to miss the small parking lot on the ocean side, but it’s worth a 5-minute stop.
Where to Stay
Kaikoura Top 10 Holiday Park – Big kitchen, clean bathrooms and showers, game room and movie room. And a hot tub!
Day 15: Dolphin encounter and whale watching tours
- At a glance: Swim with dusky dolphins in the ocean at sunrise and take a whale watching tour before heading back to Christchurch
- Distance: 181 km (112 miles)
- Total driving time: 2.5 hours
Kaikoura Dolphin Encounter
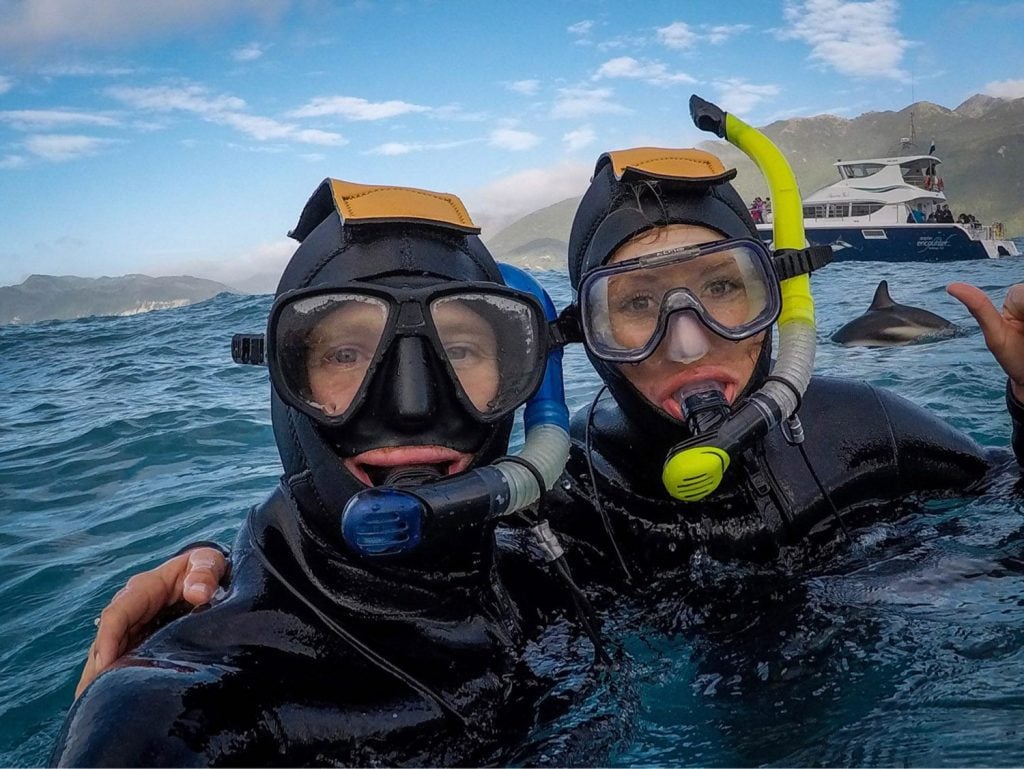
It’s an early wake up call, but totally worth it because you get to swim with wild dolphins in their natural habitat. We loved this tour and highly recommend it to all travelers to the South Island.
Kaikoura Dolphin Encounter will get you all suited up with 7mm wetsuits to endure the cold oceanic waters. They have special techniques for how to attract the dolphins once you are in the water, and it’s pretty hilarious.
We share our experience and our tips in our Dolphin Encounter article!
Ethical Travel Tip: It is always good to question animal tourism activities. We did a lot of research on this company and we support what they are doing. They are the only company in the area that does these dolphin tours and they do not bait the animals. We had to boat out far to find the pod of dolphins. Dolphin Encounter has a foundation that supports marine and environmental programs.
After the swim, grab lunch at Coopers Catch. They have a huge serving of fish and chips for $8 NZD. Then hop across the street and get a cone at Poppy’s Parlour for homemade ice cream.
Whale watching
Join an afternoon tour to go spot the giant sperm whales. This is the only company in the region that goes searching for the whales and they do a great job.
The captain of the boat describes the history and biology of the sperm whales, while describing the process they use to follow the clicks these massive creatures make to communicate.
Check-in times for the tours are 7:15 a.m., 10 a.m., 12:45 p.m., and 3:30 p.m. (Nov-Mar only). Plan on 3.5 hours for the tours starting at check-in.
They have a 95% success rate of seeing whales, and on the unfortunate event you don’t get to see one, they will refund you 80% of your ticket.
Adult tickets are $150 NZD and children (3-15 year old) are $60 NZD. Be sure to book your tour in advance!
Flying out of Christchurch?
After your last tour of the day, head down to Christchurch for your flight out. If you’re continuing your New Zealand journey to the North Island, head back up Hwy 1 to Picton to catch the ferry.
If you plan on staying the night in Picton, there is a free campsite called Collins Memorial Reserve, but try to get there early because there are only 12 spots and it is monitored regularly.
Taking the Ferry to the North Island?
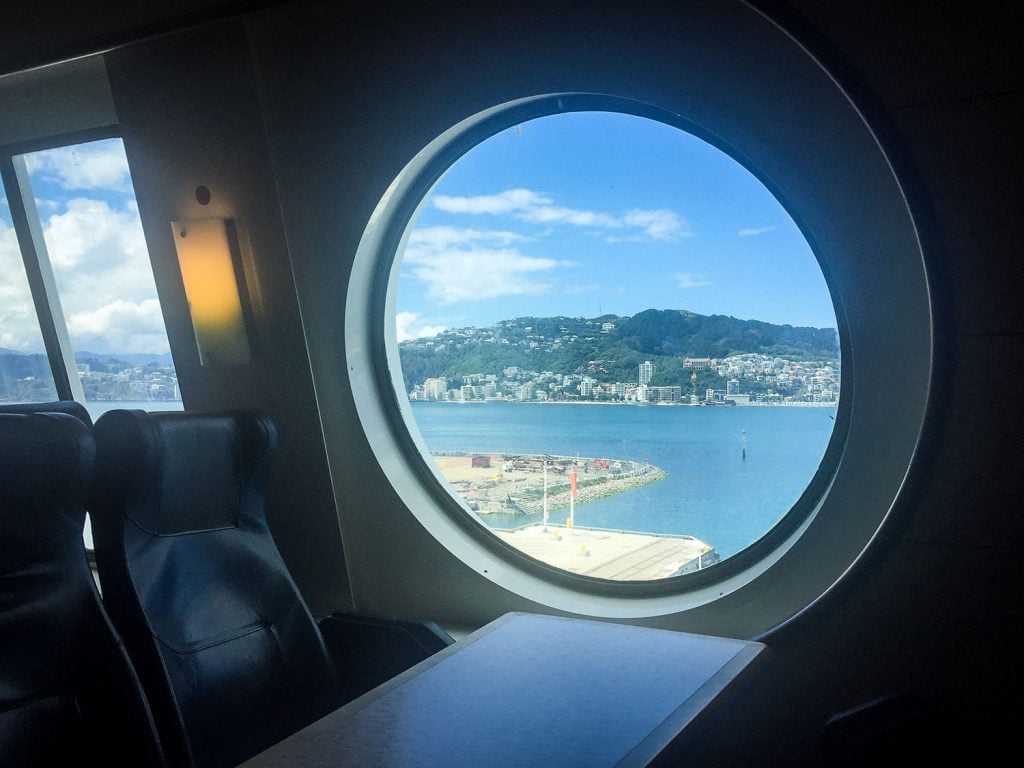
The Cook Strait Ferry operates between the North and South Islands in New Zealand, connecting the cities of Wellington and Picton. The ferry service provides both passenger and vehicle transportation, making it a vital link for travelers exploring both islands.
Not only is it an efficient way to get from one island to the other (especially if you are traveling by campervan or car), the ferry is an iconic journey across the Cook Strait with incredible views. Many people believe it’s the most scenic ferry crossing in the world!
There are two companies that run ferries (Interislander and Blue Bridge) and they are quite similar, both in price and ride. Both ferries leave from Picton and take about 3 hours to reach Wellington.
Interislander Cook Strait Ferry
Port address/Vehicle Check-in: 3 Auckland St, Picton 7220, New Zealand
Ferries tend to fill up fast. Make sure to book a few days in advance and at least 1 week ahead of time during peak season (Dec-Feb).
Bluebridge Cook Strait Ferry
Equally as good as the Interislander.
Port address/Vehicle Check-in: 1 Lagoon Rd, Picton 7250, New Zealand
New Zealand Travel Tips for First-Timers
If this is your first time visiting New Zealand, you’ll want to read our essential New Zealand travel tips. This guide is packed with helpful information like the best time to visit, how to get around and important things to know before you go.
How many days do you need in South Island New Zealand?

We had the exact same question when we first started researching New Zealand.
This South Island New Zealand itinerary is for 15 days exactly. Although it will be a bit fast, we feel like it is probably the best introduction to New Zealand you can get.
If you have a different timeline in New Zealand, here are our recommendations for your custom itinerary:
1 week on the South Island
Try to fly in and out of Queenstown if you can. Travel around Queenstown, Milford Sound, Wanaka, Haast Pass and Franz Josef, then fly back out of Queenstown.
10 days on the South Island
Follow this itinerary, but cut out the section in the north (Abel Tasman & Nelson). To save time, you could skip a few activities in the West Coast (but we really recommend not to) and cut across the island via Arthur’s Pass or Hwy 7 back to Christchurch.
2 weeks on the South Island
Perfect! Follow this itinerary and you’ll be fine. If you want to stay overnight at a mountain hut, you might want to plan that into your trip.
3 weeks on the South Island
Follow this itinerary, but add on extra adventures like overnights at Mueller Hut and Brewster Hut. You could spend an extra day in Queenstown or Wanaka, a couple days in the Catlins, or tack on another day trip in Abel Tasman National Park. Arthur’s Pass is another great spot to explore (especially if you plan to return to Christchurch).
Choosing your campervan or car rental
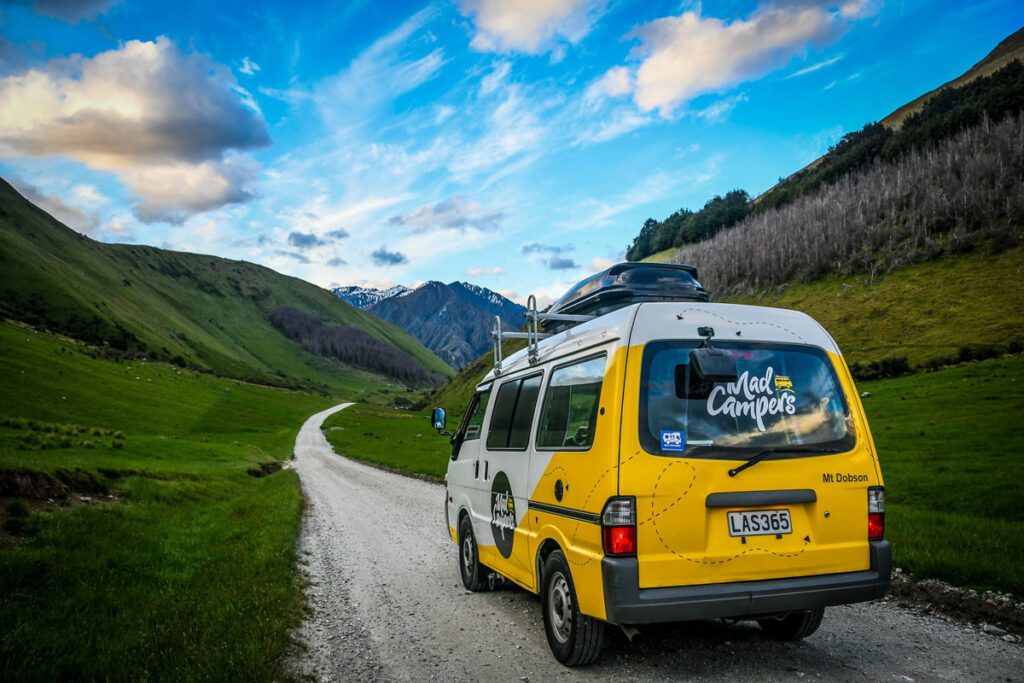
One of the best ways to travel around New Zealand is in a campervan. That’s how we traveled for 5 weeks, and how we set up this itinerary to be followed.
If you’re wanting to do a campervan trip, we have a guide to the best campervan rentals in New Zealand. This walks you through your rental options, what to look out for, and we’ve even included an exclusive discount for our readers!
We also put together a HUGE guide to planning your New Zealand campervan trip with tons of insider tips and advice. Make sure to give it a read before booking your trip!
Alternatively, you can still follow this itinerary using a car rental and staying in hotels and Airbnbs along the way.
Renting a car in New Zealand is different from many other countries. Even if you’re a pro at car rentals you might be surprised by a few things. We put together a huge guide to New Zealand car rentals to share all of our insider information with you.
Be sure to book your rental car and any rental gear before your trip begins. And don’t forget travel insurance! Picking a policy that covers your rental car is often cheaper than buying a separate policy through the rental company.

What to pack to for this South Island New Zealand itinerary
We created an entire campervan packing list that is packed full of tips! Our packing list details everything we packed for New Zealand (plus those things we wished we would have brought!).
You can download this 7-page PDF totally FREE! No catch. Just give us the best email to send it to.
New Zealand packing tips
- Less is more: Overpacking is always something we try to avoid. But it is especially important to pack light for a campervan trip, as you will be living in a tiny space. Every square inch counts, and you will be living in clutter if you don’t pack light.
- Keep it casual: New Zealand isn’t really the place to bring your fancy clothes. (Unless you’re an Instagram model. In which case, teach me how to pose, pretty please!)
- Bring layers: Weather in New Zealand is highly unpredictable and can change on a dime. You may encounter snow, rain and humid sunshine all in the same day. Pack layers and a rain jacket to be prepared for it all!
- Packing cubes are your friend: Having a place for everything in a campervan will make your life exponentially easier. We use packing cubes no matter what type of trip we’re on (umm, they compress AND organize!). But they are especially helpful for organizing clothes and toiletries in a campervan.
- Baby wipes & dry shampoo: These items work wonders between showers when living out of a campervan. Your travel partner will thank you!
- Don’t worry if you forget something: Most toiletries and clothing items are easy to pick up in New Zealand. For the cheapest prices and biggest selection, we’d recommend going to The Warehouse.
South Island vs. North Island

If it is your first visit to New Zealand and you only have time to see one island, our personal preference would be to visit the South Island.
As we mentioned above, the North Island has plenty of great sights and some cool nature, but the South Island is packed full of epic nature and even more beautiful sights (in our opinion).
Since we are avid hikers, the South Island had a particular draw for us as well as most of the best hikes in New Zealand are in the south.
However, if you are looking for a beach vacay, the North Island is where it’s at. The beaches on the Southwest coast of the North Island are rugged and remind us a bit of the Oregon Coast, while the island of Waiheke has gorgeous beaches for relaxing and just north of Auckland are good surfing beaches.
If you’ve already visited the South Island and are looking for something different, we have a North Island itinerary just for you! It has all the highlights, just like this one, packed into a 2-week road trip.
Plan your trip to New Zealand
We have TONS of resources on travel in New Zealand and destinations throughout the country. Check out our Ultimate New Zealand Travel Guide for all the answers to your most burning questions, and read some of our favorite articles below.
- Start with our guide to the best time to visit New Zealand so you can pick the perfect season for your adventure.
- Don’t miss these essential New Zealand travel tips — seriously, some of these will save you major headaches!
- Get inspired with our list of exciting things to do in New Zealand for first-time visitors.
- Planning your route? Our ultimate campervan trip planning guide covers everything you need to know before you hit the road.
- Trying to find the best rental? We’ve done the research for you and created a guide for the best campervan rentals in New Zealand.
- Lace up your boots and hit some of the best hikes in New Zealand — complete with local tips!
- Visiting Milford Sound? Check out our Milford Sound travel guide, including essential planning tips.
Want the perfect New Zealand itinerary planned for you?
We traveled in NZ for about 5 weeks and were able to visit most of the highlights of the country, including both the North and the South Island. We did almost all of the experiences on this list!
We took our 5-week travels and condensed it down to 30 days because so many people wanted a 1-month route. We’ll send you our completely done-for-you 1-month itinerary, filled with tips and advice. Just click above to get your 30-day New Zealand road trip itinerary today!
Don’t miss your chance to grab our New Zealand packing list!
In this FREE New Zealand packing list, we’ve provided packing checklists for everything from clothing and toiletries (for both women and men!) to what shoes to pack and extra medicines you may want to have on-hand just in case.
Plus, we’re sharing tons of packing hacks and tips for traveling in New Zealand that you won’t find anywhere else! And it’s completely FREE, so why not!?
Save this article on Pinterest for later!
We want to hear from you!
What do you think of our South Island New Zealand Itinerary? What do you love, what would you change, what would you add? We want to hear it all in the comments below.
Katie Diederichs is the lead writer and co-founder of Two Wandering Soles, where she creates in-depth travel guides, itineraries, and tips designed to help readers plan better trips with confidence. With a background in journalism, photography, and design, she combines thorough research with firsthand experience to deliver clear, practical, and visually driven travel content. As the primary trip planner, Katie turns complex logistics into easy-to-follow advice travelers can actually use.
This post is a fantastic guide for exploring South Island, New Zealand, with the perfect mix of adventure and nature! It would be helpful to include more tips on booking accommodations or campsites, especially during peak seasons. Still, it’s an amazing resource for planning an unforgettable trip!