
After years of documenting our travels on this blog, we’ve picked up some helpful and creative travel photography tips. If you want to learn how to take better pictures on your travels around the world, this article is packed with everything you need to improve your photography skills.
Photographs are often the best souvenir of your travels. But the worst thing is when they come out blurry, blown out, or just not all that exciting to look at.
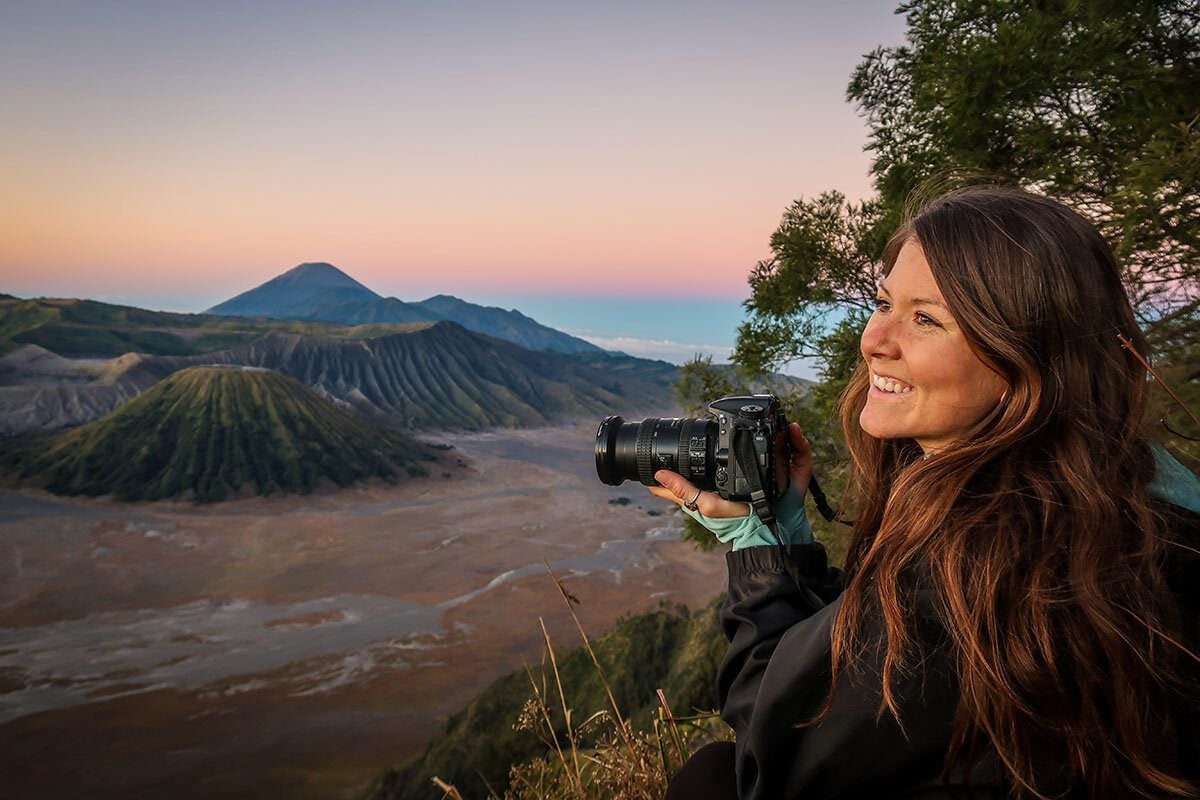
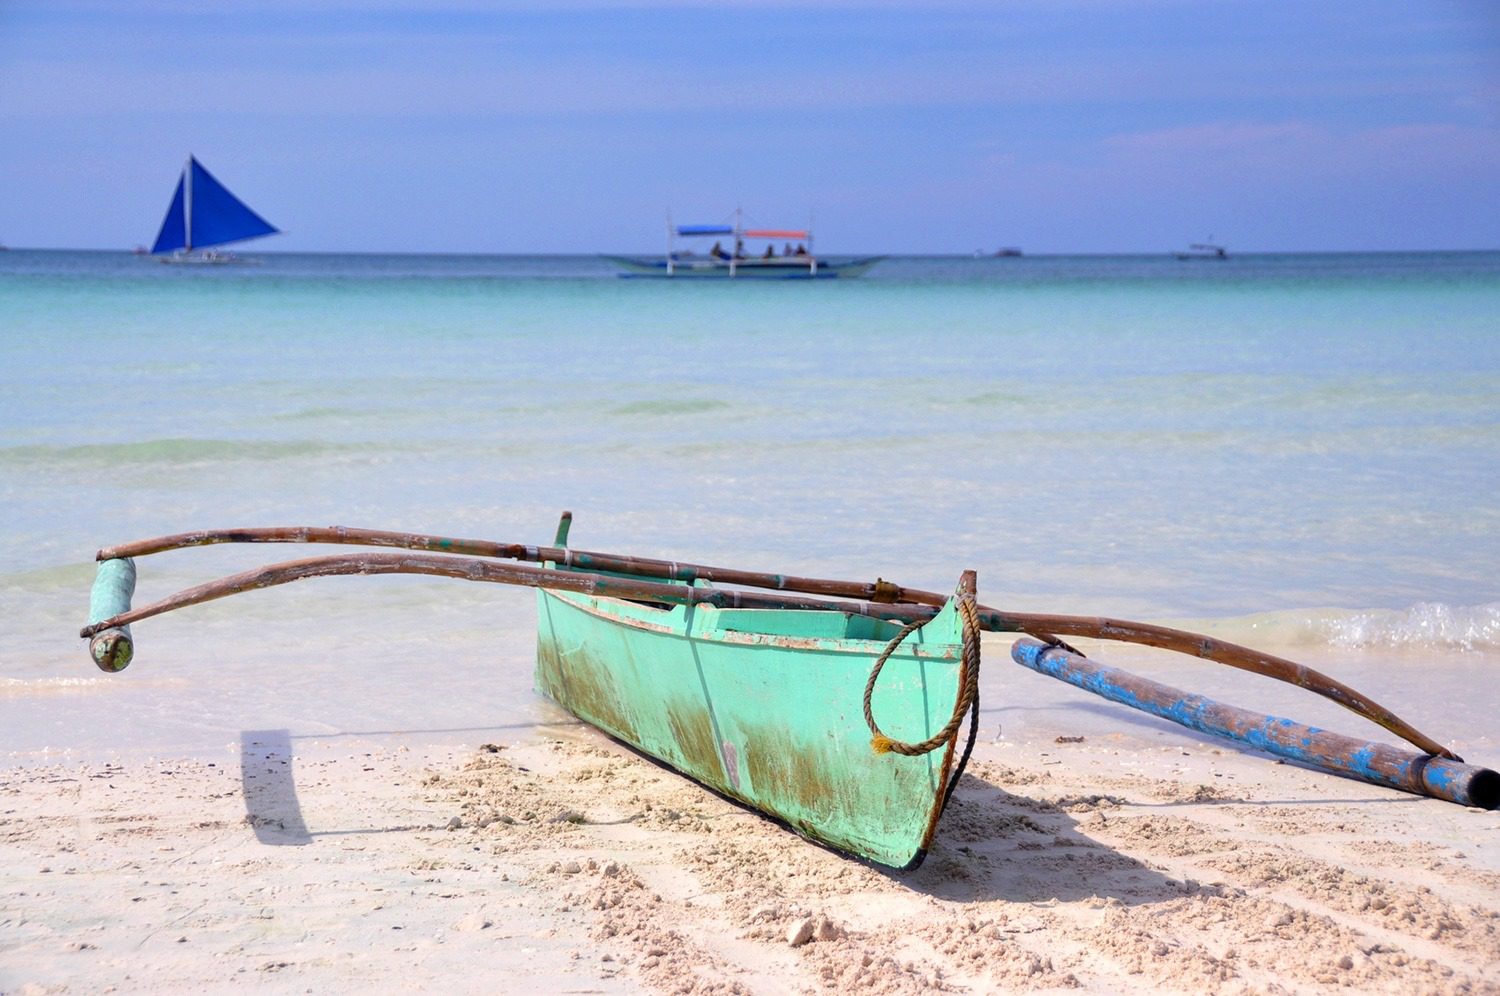
From powdery white sand beaches in the Philippines to high in the Himalayas to the thick forests of America’s Pacific Northwest, I have been privileged to take pictures in some of the most beautiful places around the world. Each place has taught me something different and has truly made me a better photographer.
I’m far from perfect and I’m certainly still growing, but I want to share what I’ve learned along the way with you.
Whether you’re a total beginner or you know your way around a camera, the practical and easy travel photograph tips in this article will show you how to take your travel pictures from average to amazing.
1. Set your camera to shoot in burst mode
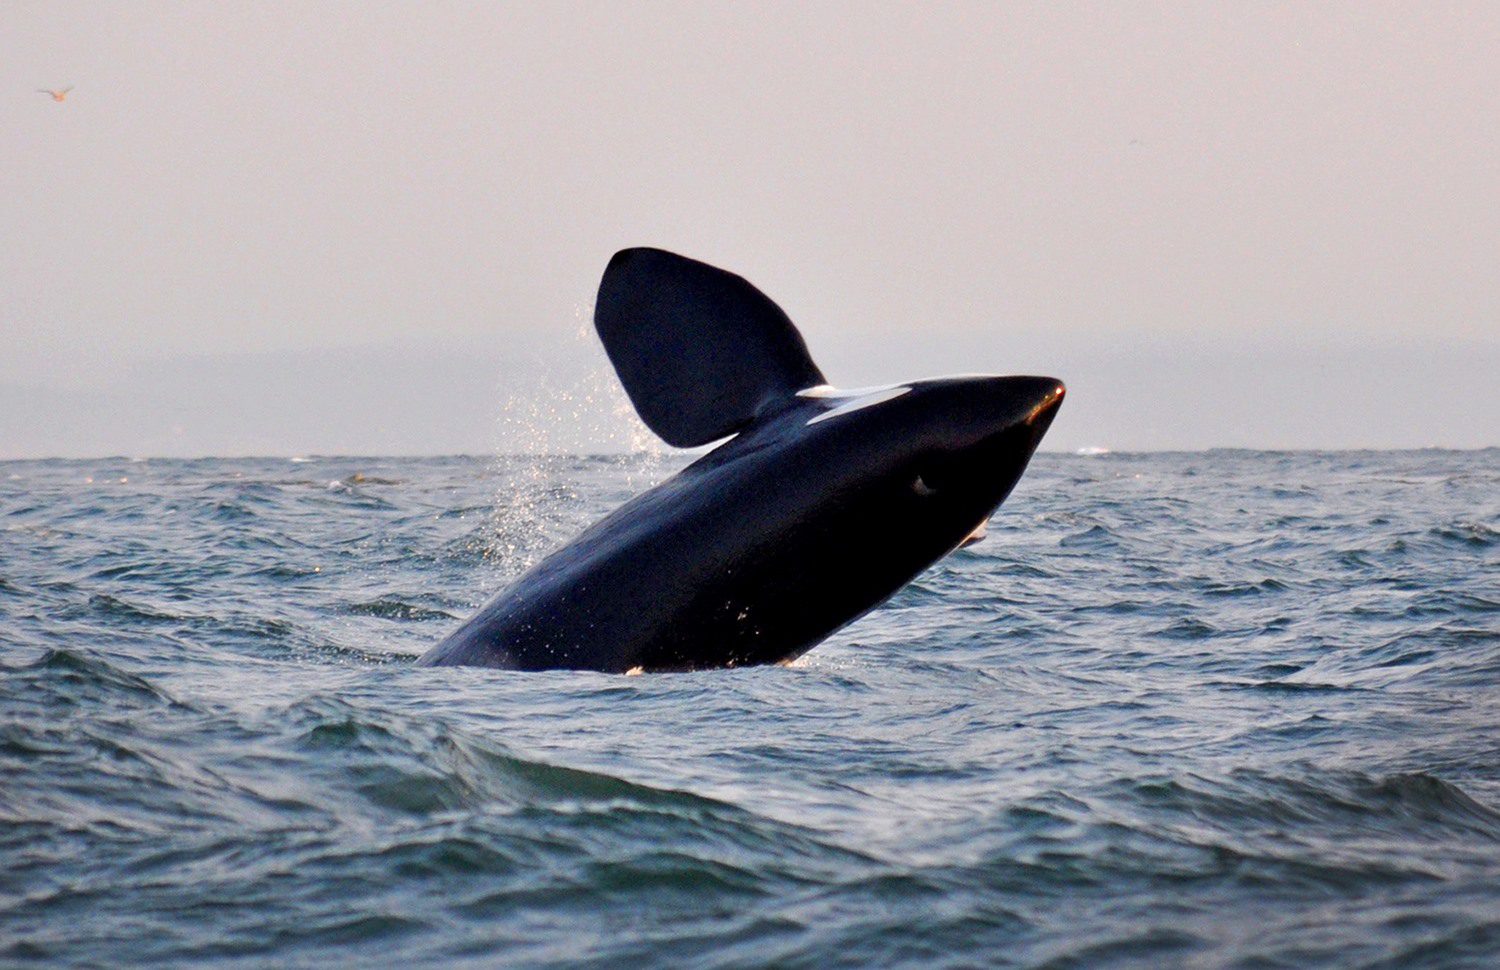
Setting your camera to “burst” mode means that several shots will be taken with a single click of the shutter. This is especially helpful when you’re trying to take an action shot, like a whale breaching the water’s surface.
Also, burst mode is a good idea when handing your camera to a stranger to take your photo. You will get several to choose from, instead of just one where you’re blinking and someone is photo-bombing in the background. I always have my camera set in burst mode so we can choose our favorite photo from a series.
Tip: Each camera is a little different, so consult your manual to learn how to set it to burst mode.
2. Carry a small tripod
A tripod will seriously up your photo-taking game. There are several reasons for this but one of the main reasons we carry a tripod is so we can get shots of epic landscapes with ourselves in the picture.
If you’re in a remote location, there might not be anyone around to take your photo. And even when there are tons of people around, they might not take shots you’re happy with.
Ben and I always joke that when we hand our camera to a stranger, there’s a 50/50 chance that it’ll turn out good. A few of our favorite shots from our travels have been taken by strangers. But most of the time I’m disappointed. (I’ll admit: I’m super picky about photos and I always have a composition in mind. It’s crazy to expect the stranger to read my mind, and not everyone feels comfortable using my big a$$ camera.)
When you travel with a tripod, you can always get a great photo of your self because you are in control.
What is the best tripod for travel?
I love my Joby tripod because it is small and super portable. Plus, it’s flexible legs allow me to wrap it around tree branches or fences (carefully, of course!) for unique angles. There are tons of nicer, more expensive tripods out there, but unless you’re a pro, the sheer bulk probably isn’t practical for travel.
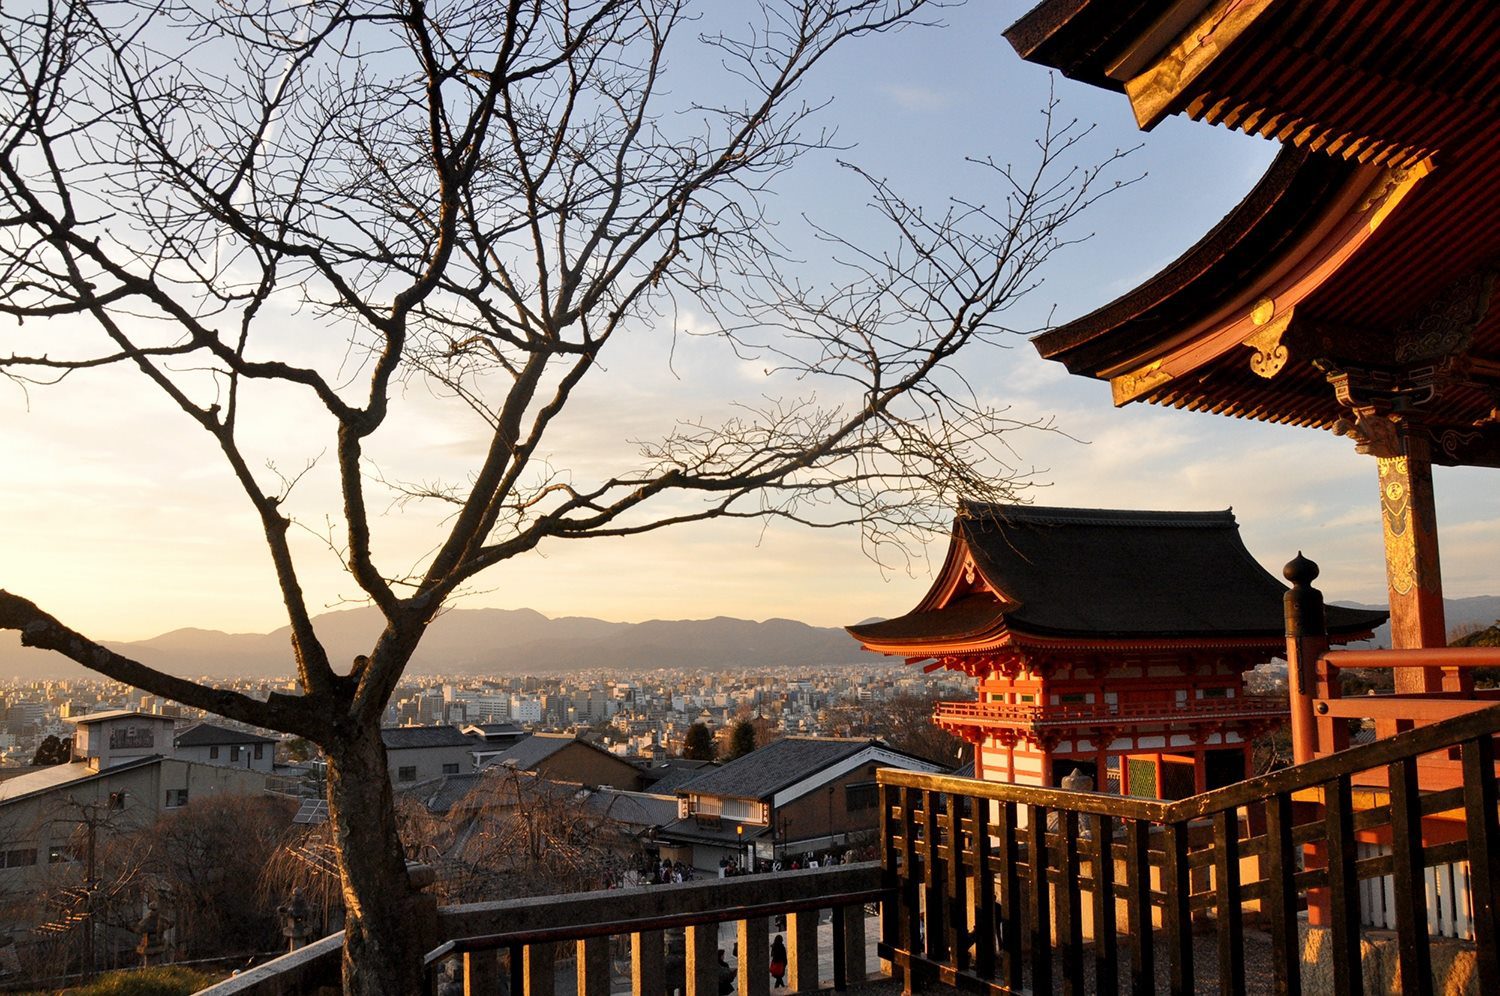
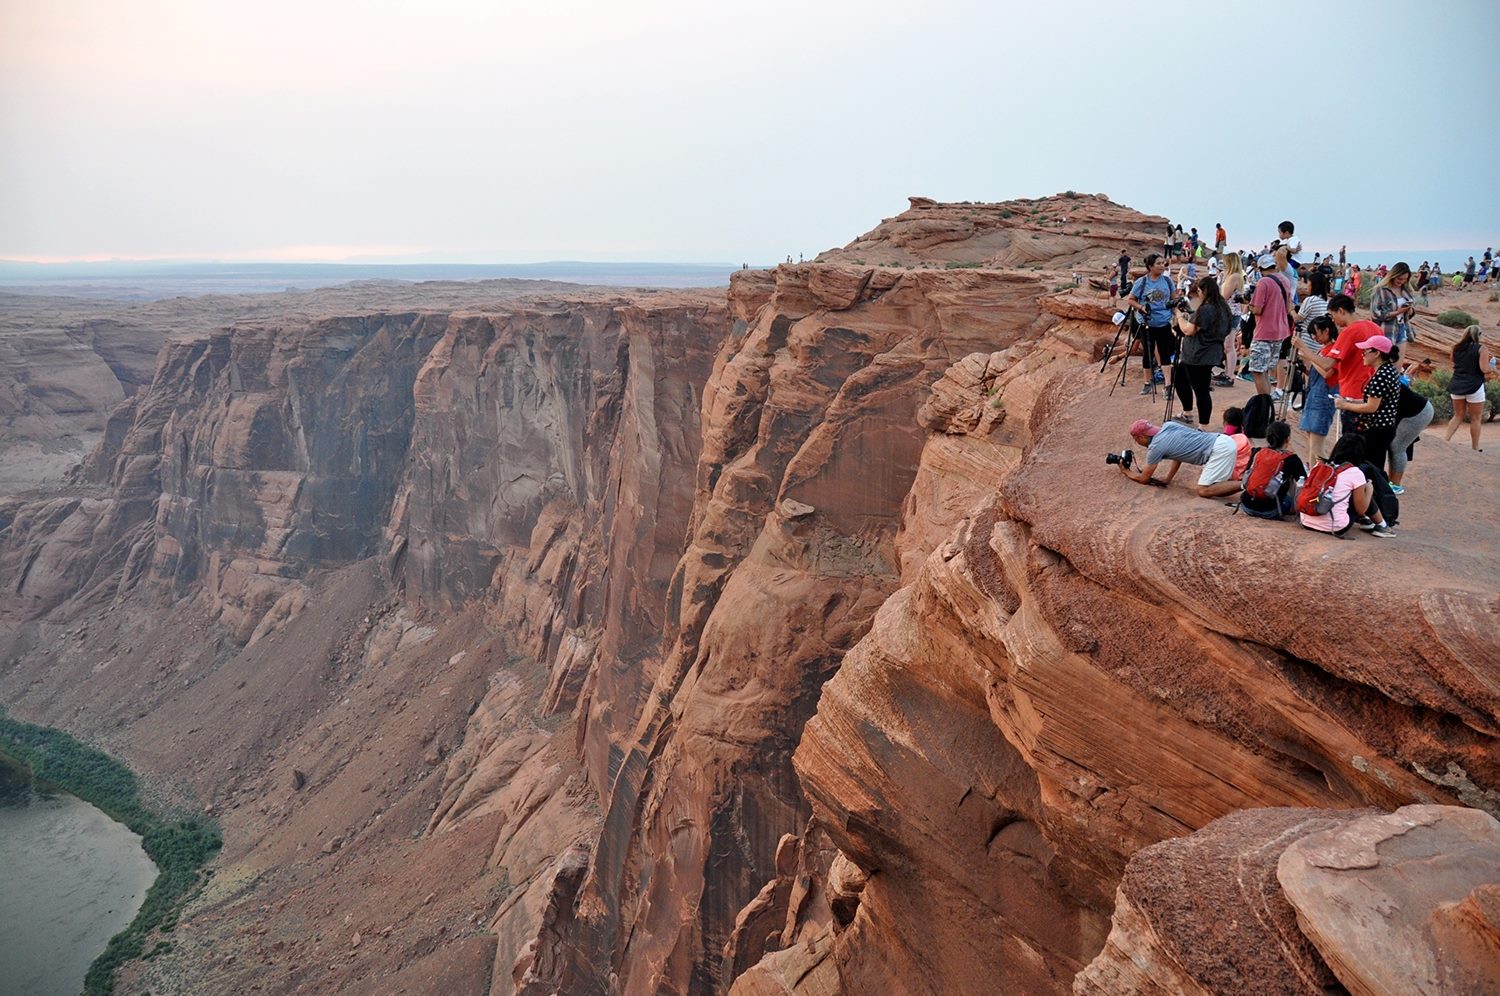
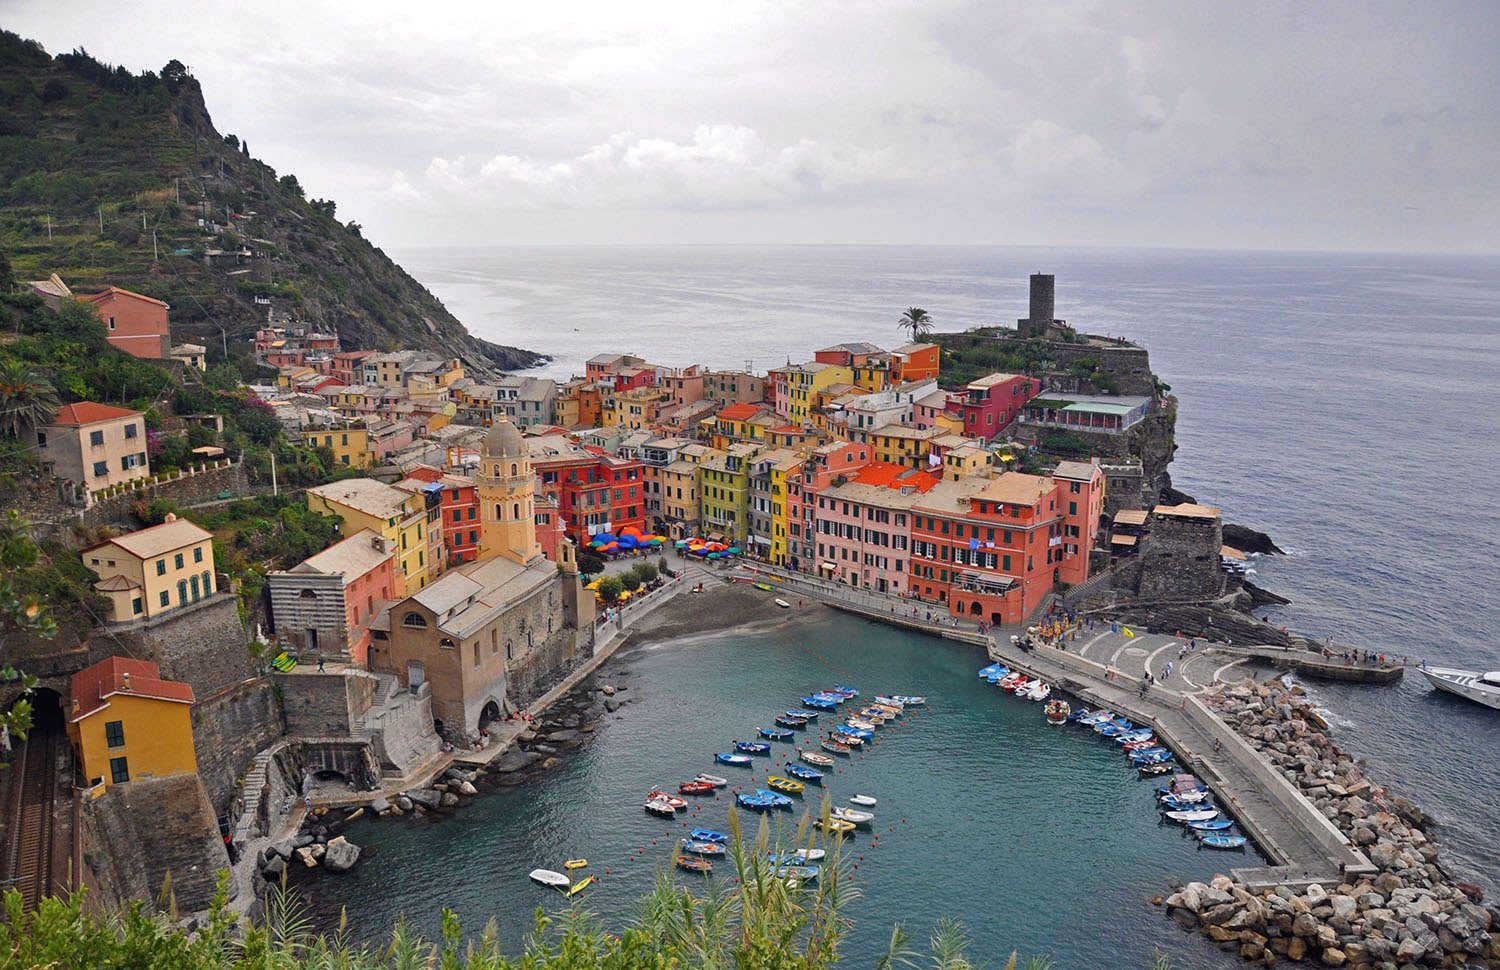
3. Have patience, especially in crowded places
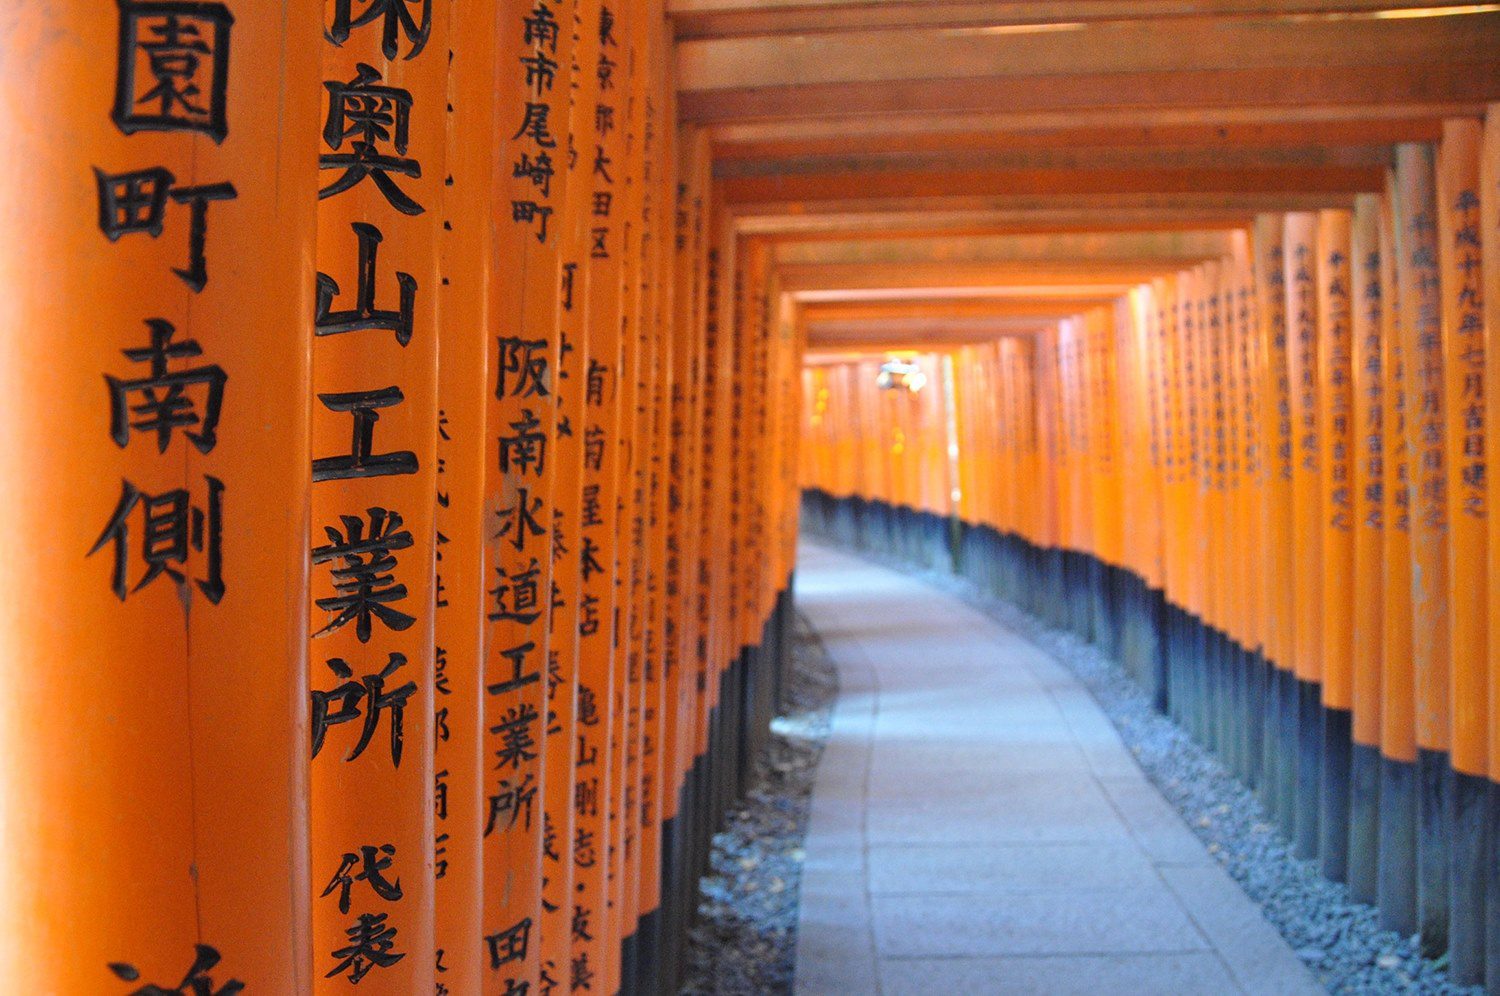
Have patience, young grasshopper. Getting epic shots in famous places takes time. You can’t expect to show up at iconic spots like the Eifel Tower or Cinque Terre and get a perfect shot on your first try. You will need to be patient with the crowds and wait for people to pass by. And you’ll likely have to take several shots to get it just right.
I’ll admit that crowds test my patience. I get easily flustered and sometimes leave before I get a picture I’m really happy with.
My advice would be to take a deep breath and wait it out if a certain shot is really important to you. You never know if you’ll be back again, after all, so you might as well wait for that perfect moment.
Consider this: In order to get the shot above of the Fushimi Inari gates in Kyoto, I had to stand in one place and wait for the exact moment when nobody was in my shot. One second before and one second after this shot, there was someone in the frame, so it took patience. And time. About 15 minutes just to get this picture.
4. Try a polarizer
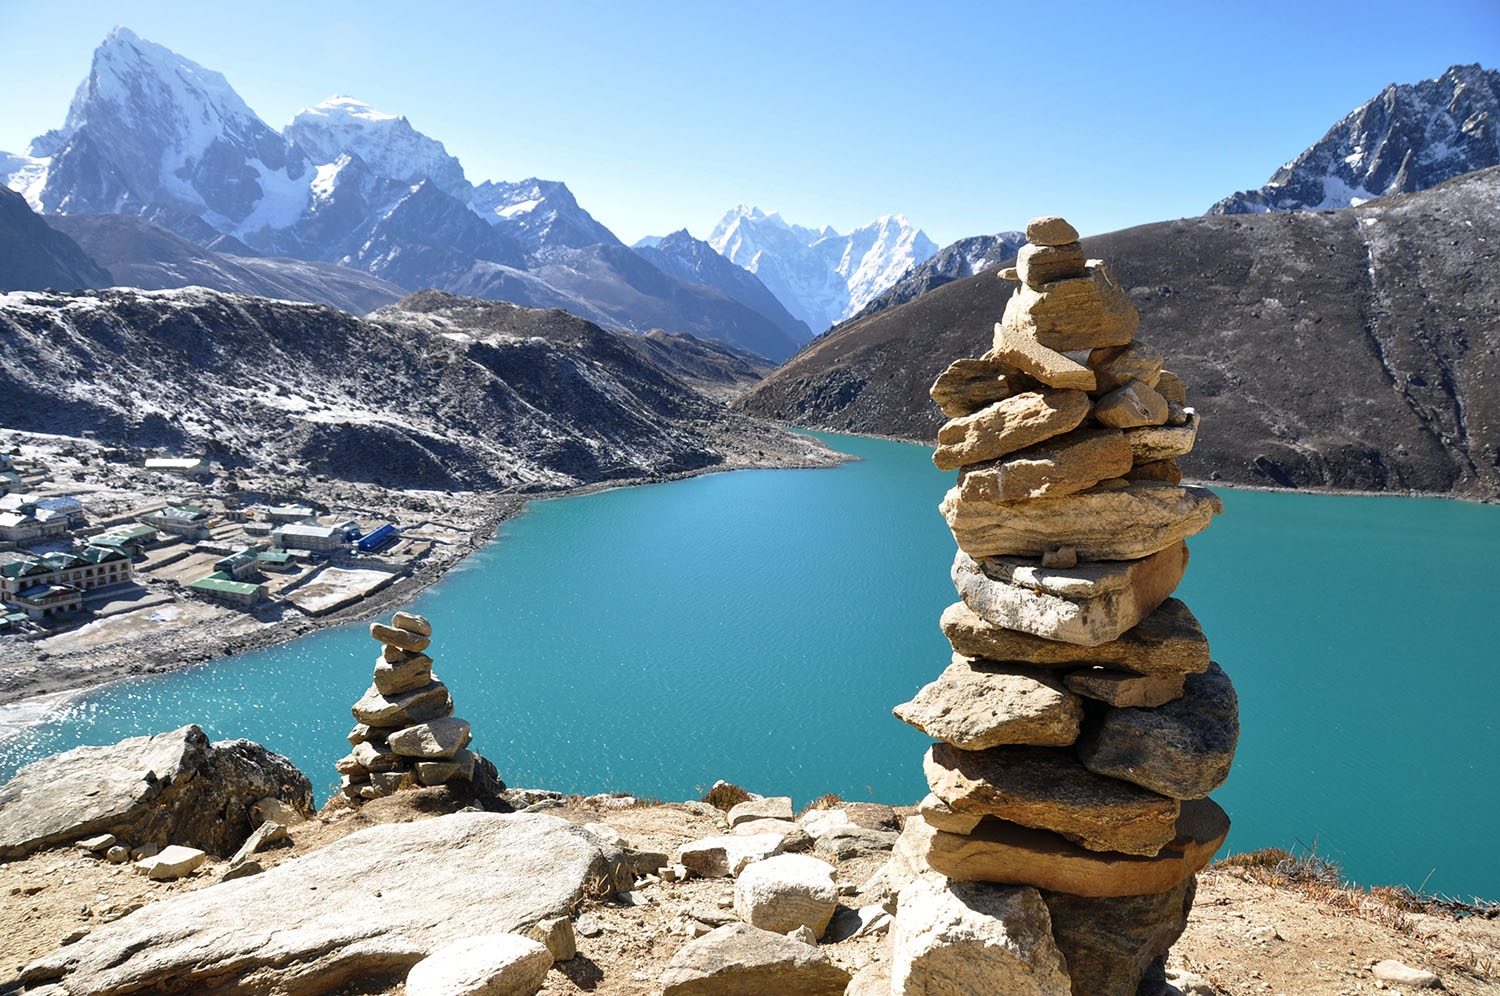
This relatively inexpensive and small item can really take your landscape shots to the next level. Polarizers work best on sunny days when the sky is blue, and will make the colors pop, like the blues in this glacial lake in the Himalayas.
For polarizers, the name brands can be quite expensive, so these would be our suggestions:
- This is a good polarizer (just make sure you get the correct size for your camera lens).
- Or if you just want to try it out and see how you like it, the Amazon version is under $1. (We’ve used the Amazon version of the UV filter and it works great.)
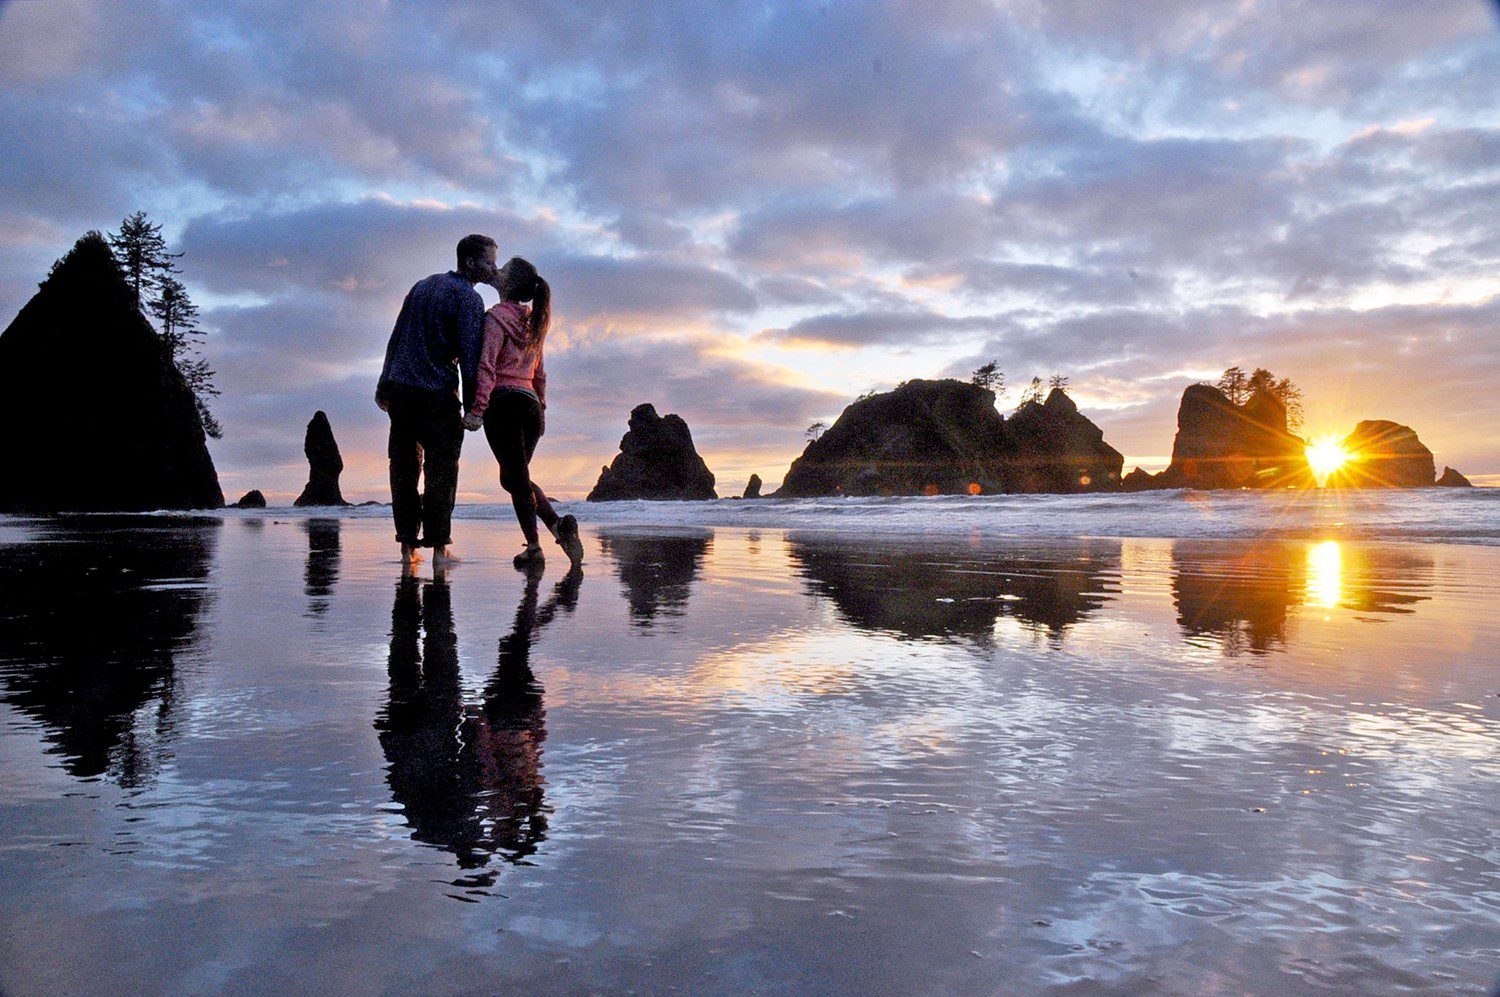
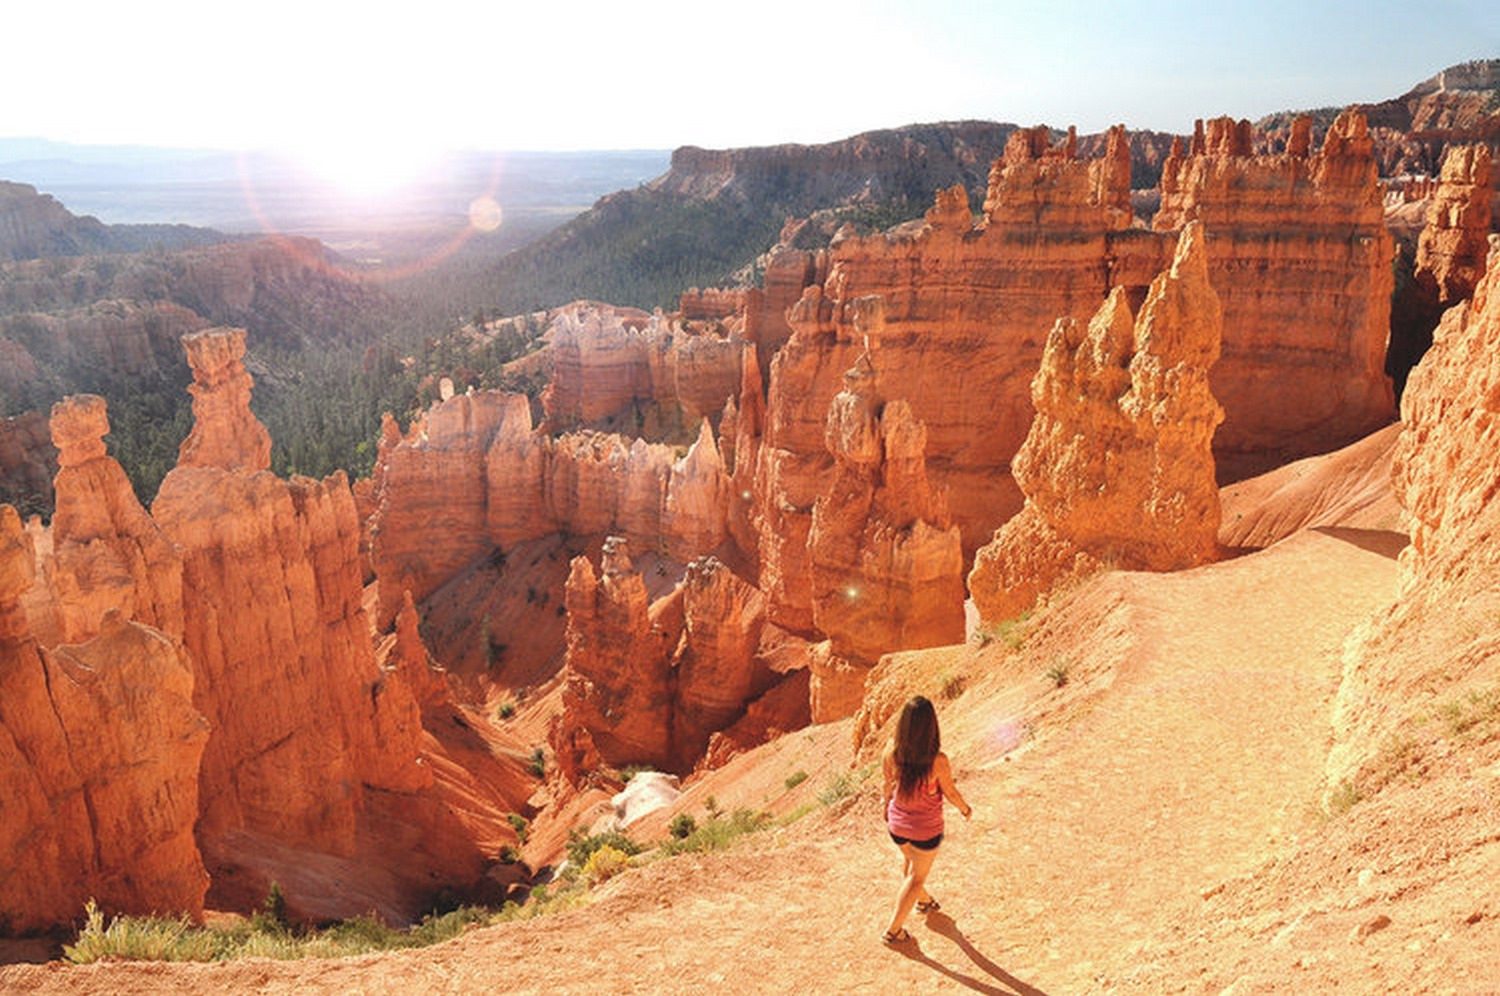
5. Shoot early and late
No matter how talented of a photographer you may be, there are certain times of the day where your shot just won’t look as good. For instance, during the middle of the day when the sun is at its peak in the sky, the light is harsh and your photos will tend to have strong shadows. Instead, aim to take photos when the sun is low in the sky and it’ll cast a warm glow instead of harsh white light.
The most ideal times of the day to take photos are in the morning just after sunrise, and during that magical “golden hour” just before sunset. Try to arrive to locations you want to shoot during these times. Of course there are many times when you can’t arrive at the ideal time, but it’s a good rule to follow whenever possible.
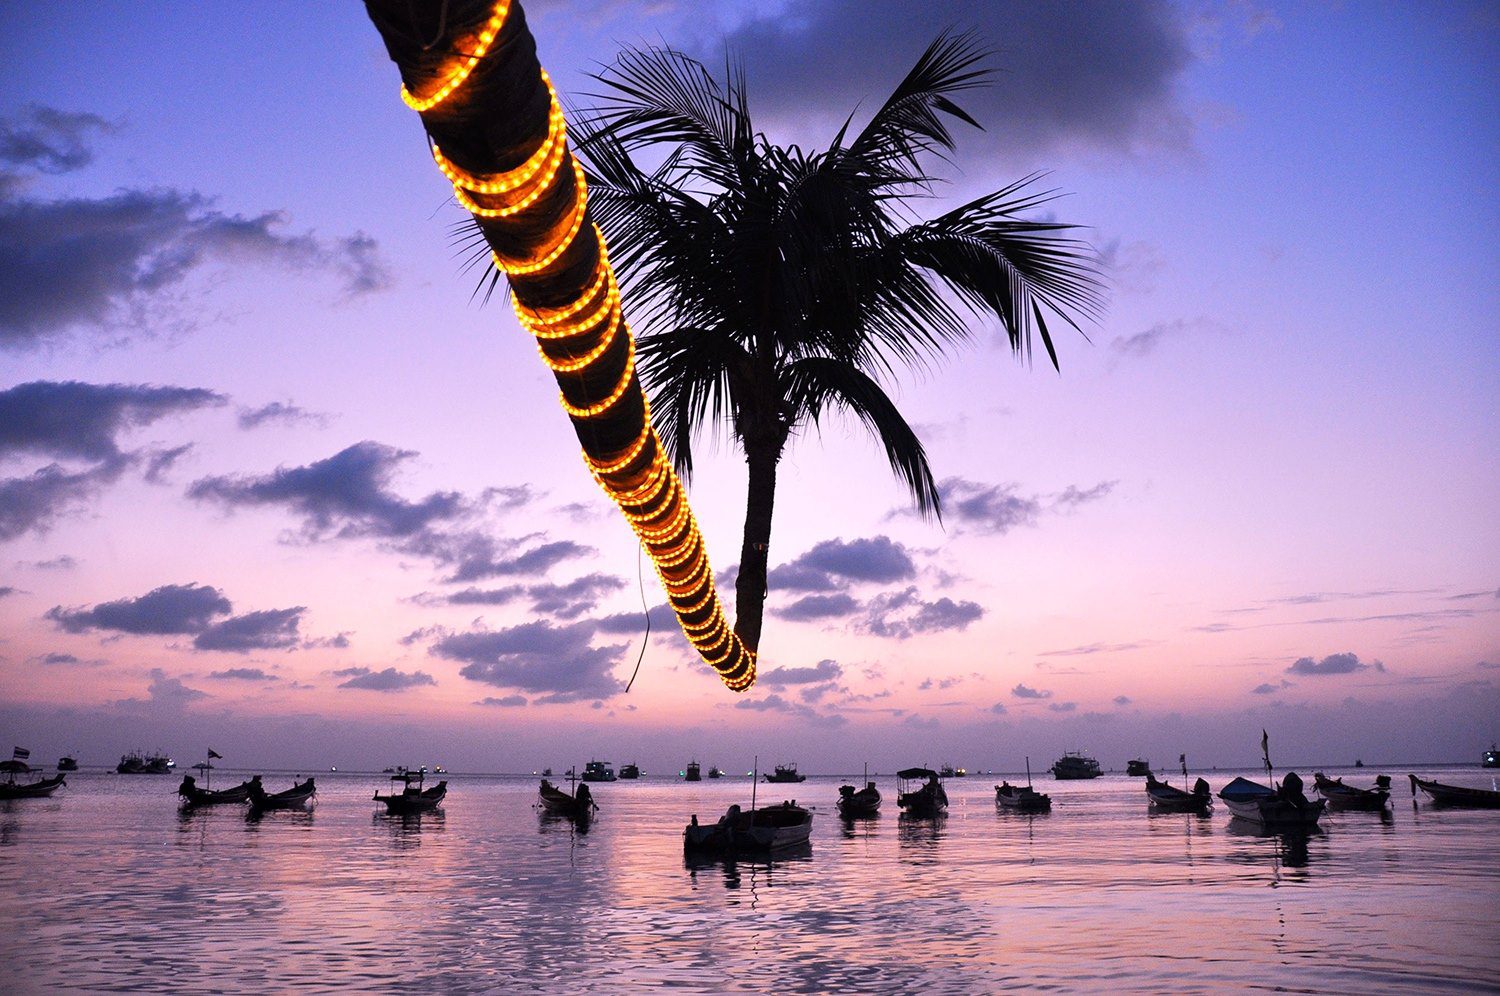
6. Plan your shots around the sun
This tip requires a little research, but you’ll be happy you did. When you’re traveling, try typing into Google “sunrise in [location]” and “sunset in [location]”.
For example, if you are visiting Yosemite, you’d find that the best view at sunrise is of El Capitan. It is facing east, so it’s illuminated in a pink glow as the sun rises. At sunset, it’s pretty, but just not as magical as in those early hours of the morning.
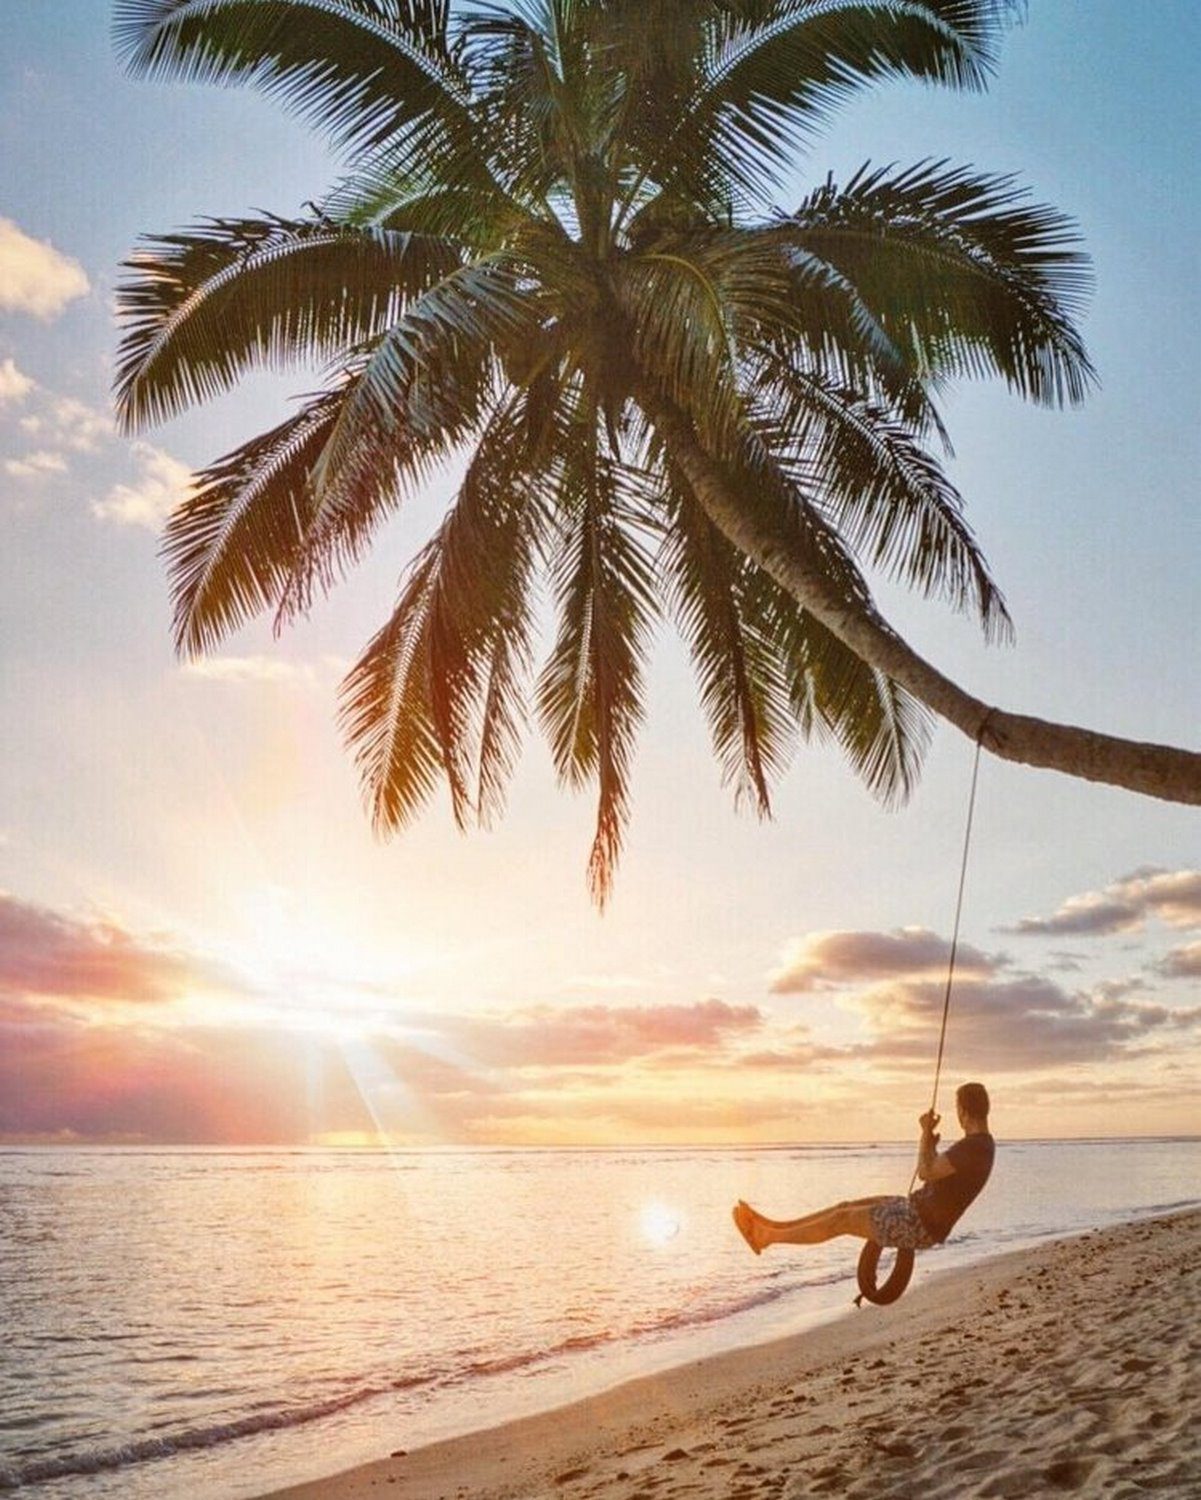
And likewise, on the island of Koh Tao, you’ll want to be on the east side of the island to witness the most beautiful sunrises and on the west side for sunset. (See picture above)
Knowing the best time of day to be at a specific viewpoint can help you plan your travels and will ensure you get the best lighting for your photographs.
7. Night photography takes patience and planning
Night photography can be super fun, but it takes a while to get the techniques down. (I’m still working on it.) Have patience, and you will improve.
Also, it takes some thought and research. You can’t just expect to step outside on any night and get great night shots.You need to plan around the moon and the constellation paths and weather.
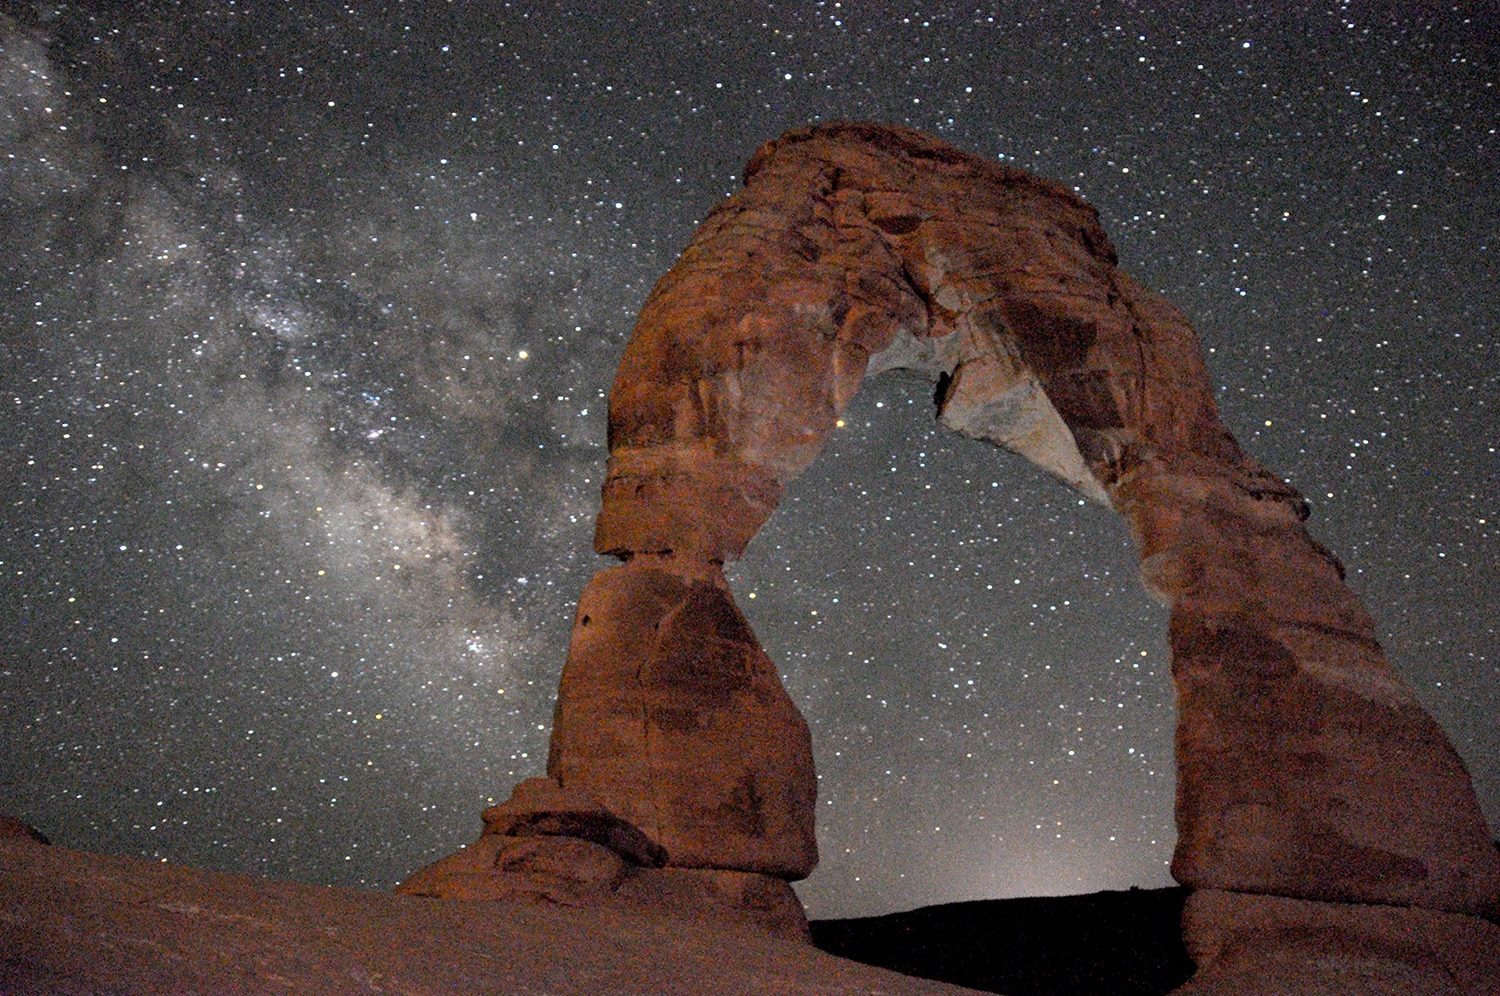
For example, when we were in Arches National Park, it just happened to be the one day of the month where the Milky Way would pass through Delicate Arch, creating a view that is famously photographed. We were there just out of luck, but many other photographers had planned their trip around this photograph.
Tip: One way to track this is by downloading SkyView app, which will tell you the exact time and course of the constellations, and will show you the chances of clouds obscuring your path.
8. Don’t be afraid of a little rain (or clouds!)
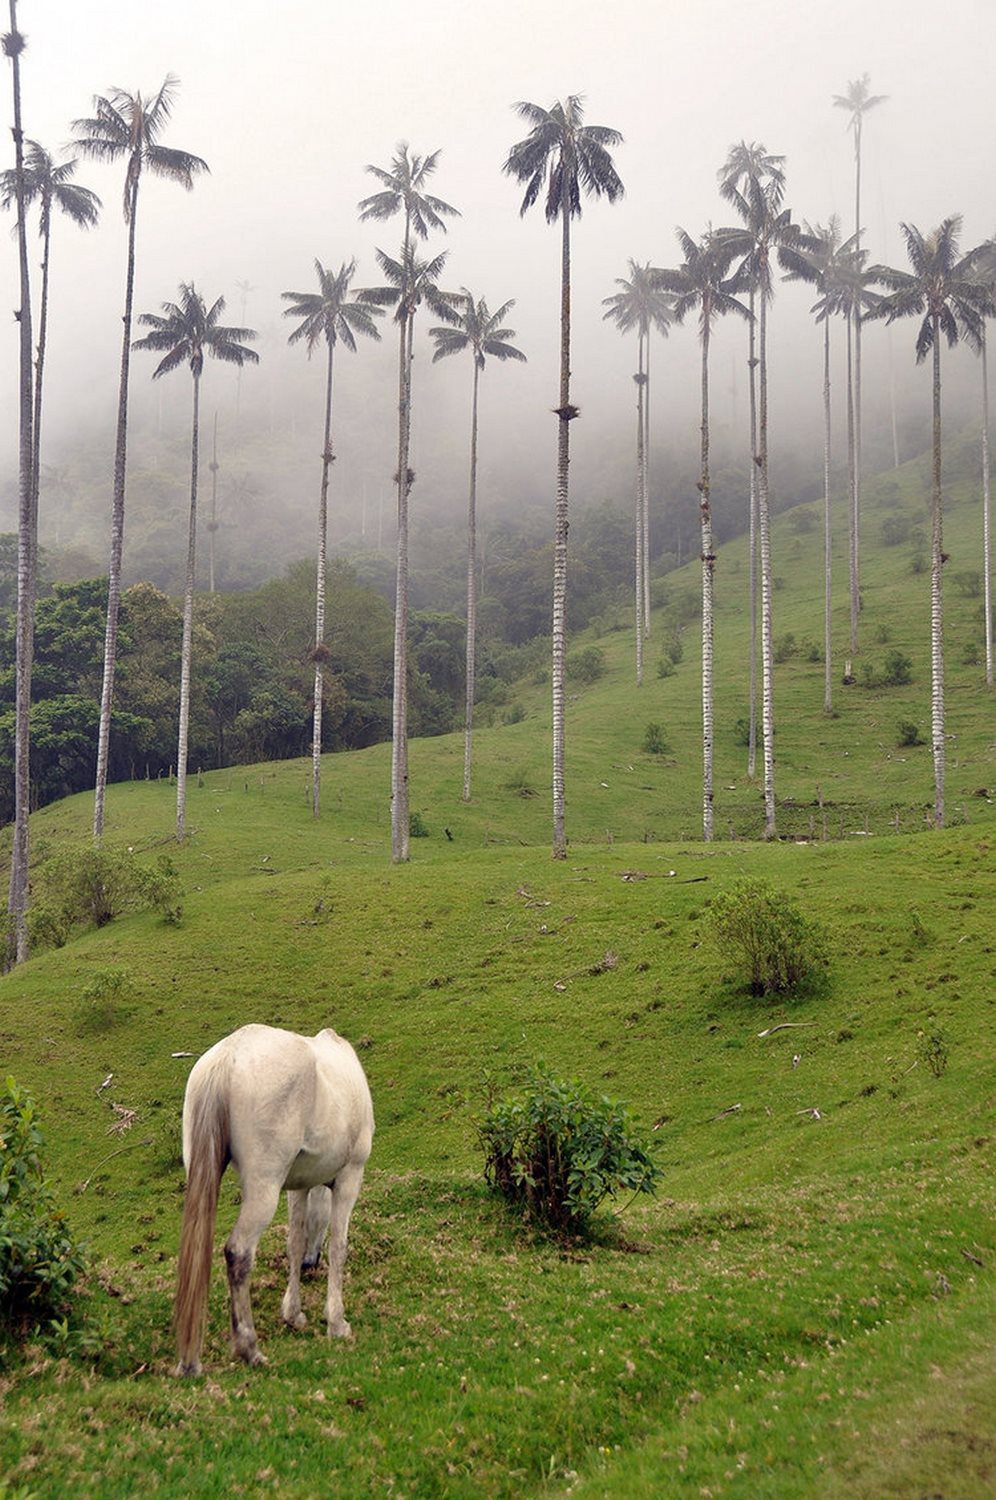
Cloudy days can sometimes be disappointing when you’re on vacation, but they often make for the most interesting photos. Clouds soften the sun’s light, acting like a natural light box, and make it possible for you to get great shots even in the peak of the afternoon. They can also create a cool, moody effect and can make your pictures more interesting than if you have a clear blue sky.
Much the same, many people get nervous to take their camera out in the rain. But rainy shots can be super interesting.
Try these ideas to get a fun, rainy day shot:
- Take a photo of people walking in the street with colorful umbrellas.
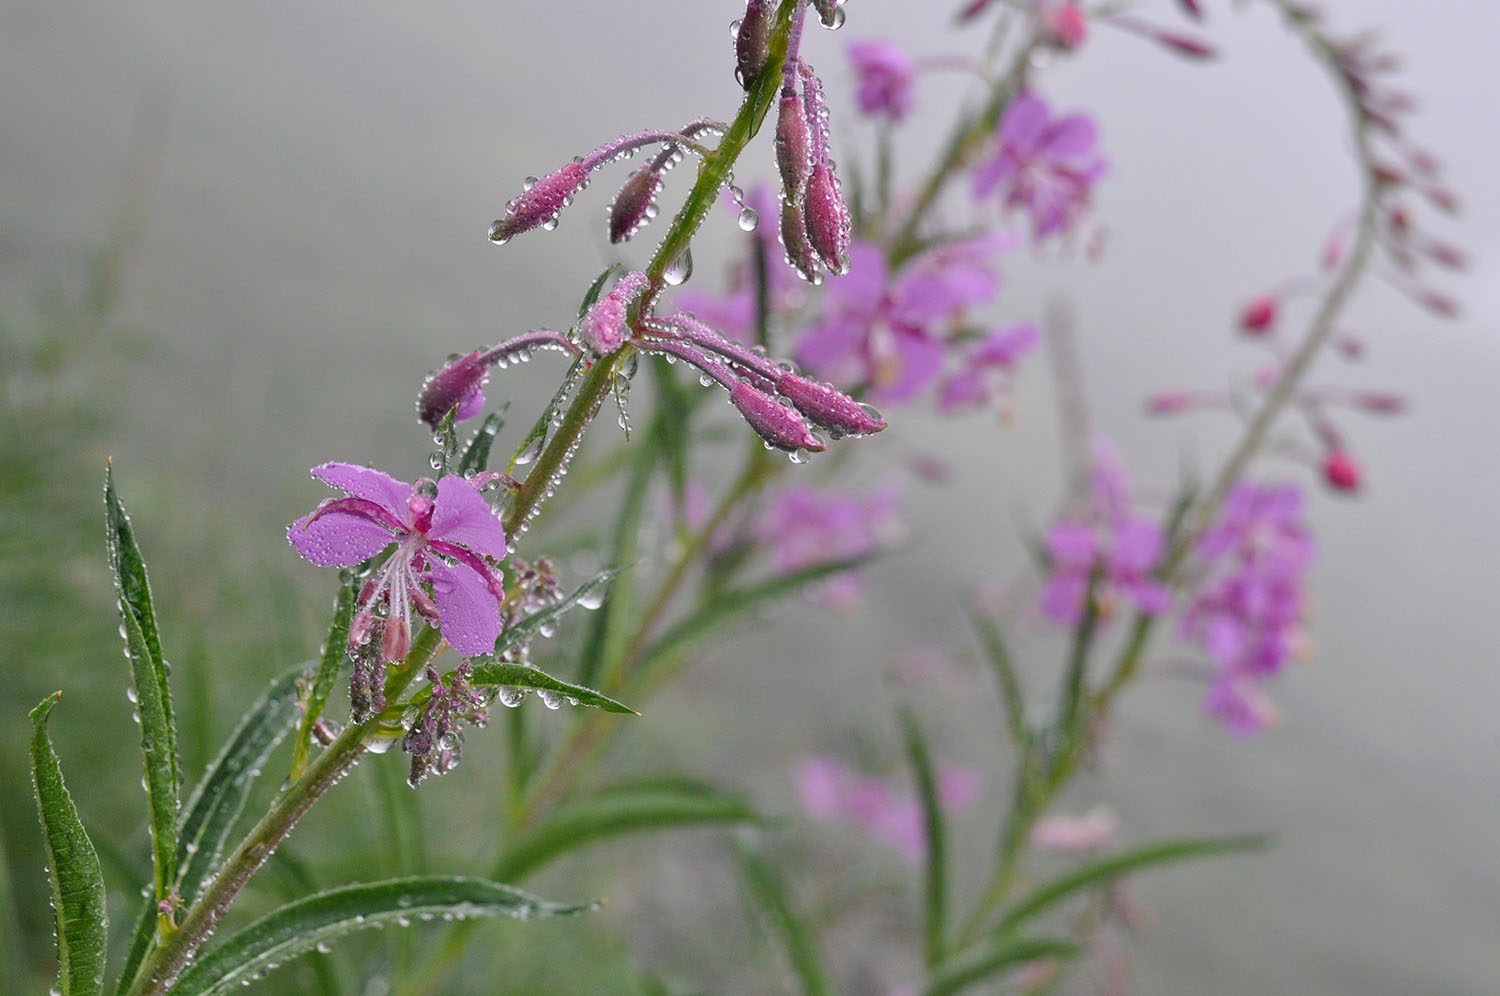
- Get a close up shot of droplets on a window, blurring the city lights in the background.
- Zoom in and get a close up of the rain droplets on flowers or another interesting surface.
Tip: If you do take your camera out on a rainy day, be sure to carry with you some protection so it doesn’t get ruined. A dry bag packs up small and can keep your camera and all other valuables dry even in the heaviest downpour.
9. Make sure your lens is clean
This might sound obvious, but time and time again, I return home from an epic trip to find that when I put my pictures on my computer there’s a spot in every. single. shot.
It has happened too many times to make excuses for, and I’m putting this tip on this list really just to remind myself to clean the damn lens. It’s a lot easier than going back in and editing the spot out of every photo. Carrying along a travel sized cleaning kit will ensure you can wipe your lens safely no matter where you may be.
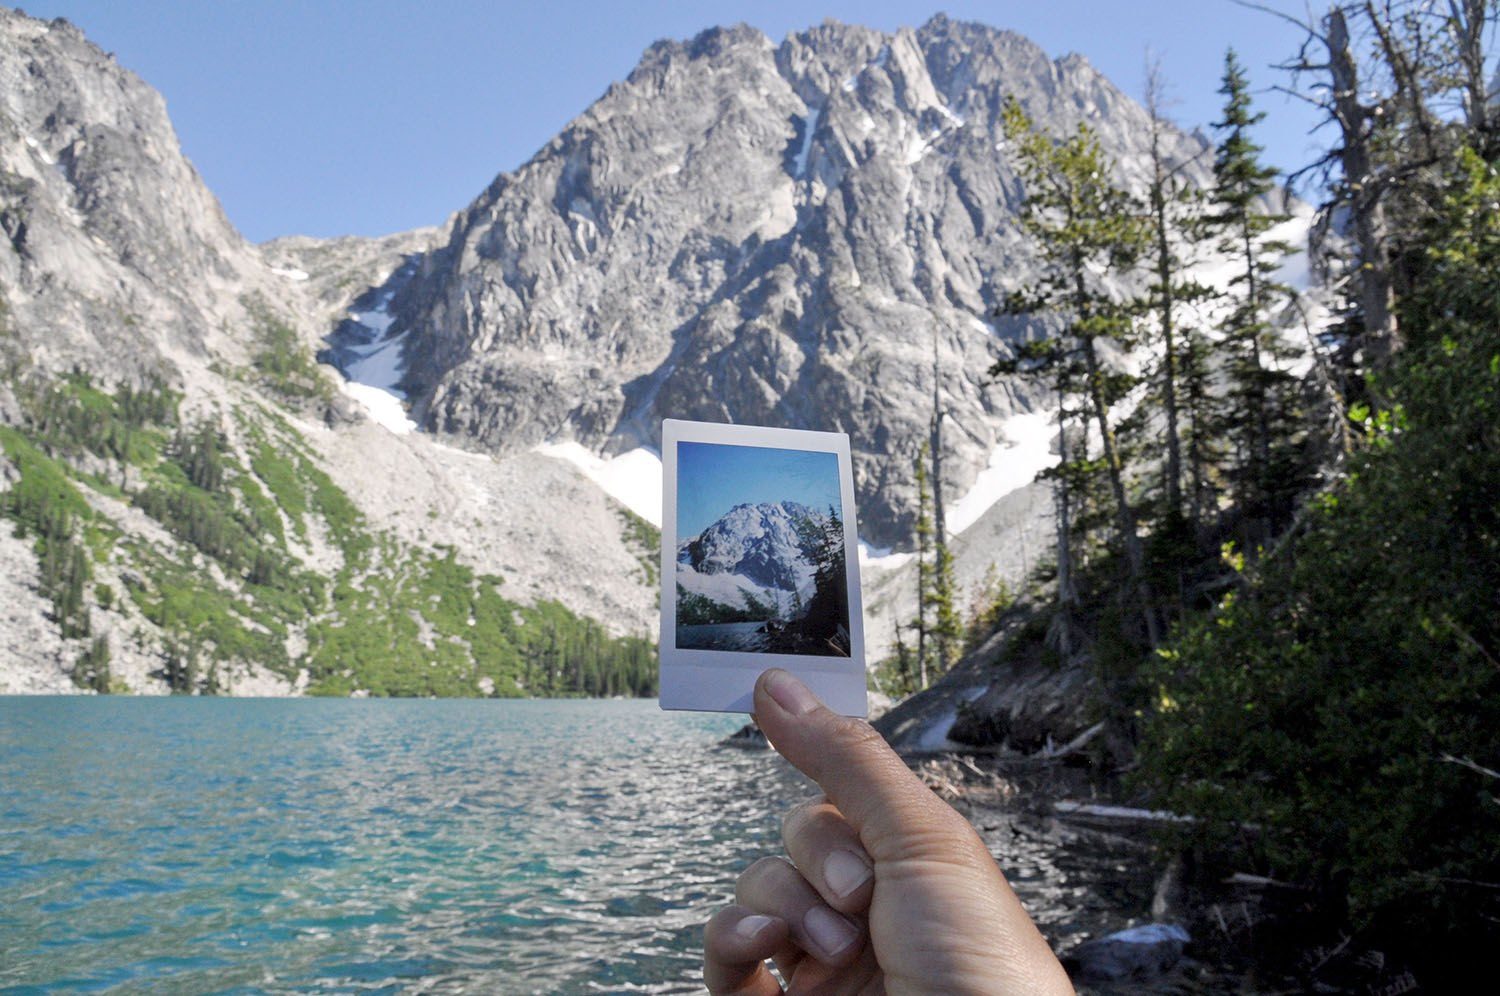
10. Get a different perspective
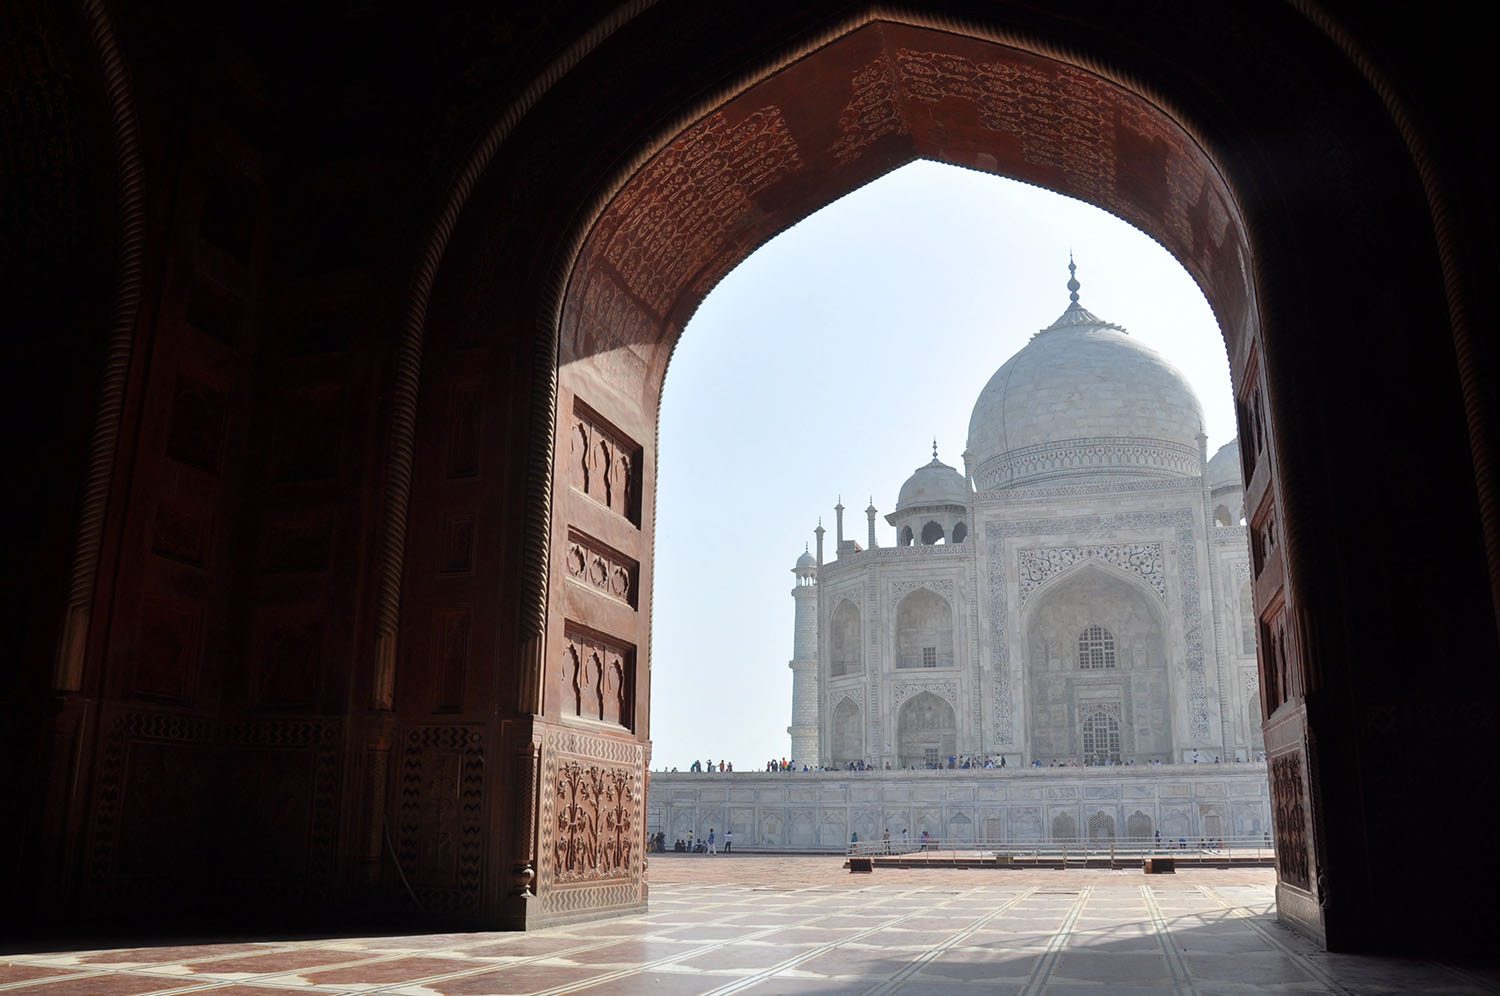
It can be a good idea to get inspiration by searching online for famous shots of iconic places. For instance, a quick Google search of “Taj Mahal” will show you the most famous angles this landmark is shot from.
But in order to really improve your photography skills, do the OPPOSITE. When everybody is taking pictures to the right, turn left. Look up. Look down. Don’t be afraid to get down on the ground and shoot from below.
Walk to a less crowded side of the landmark and take a picture from that lesser-seen angle, like the photo of the Taj Mahal above. Get close up and shoot the details. Turn around and take a picture of all the people taking pictures. (These are always super fun photos!)
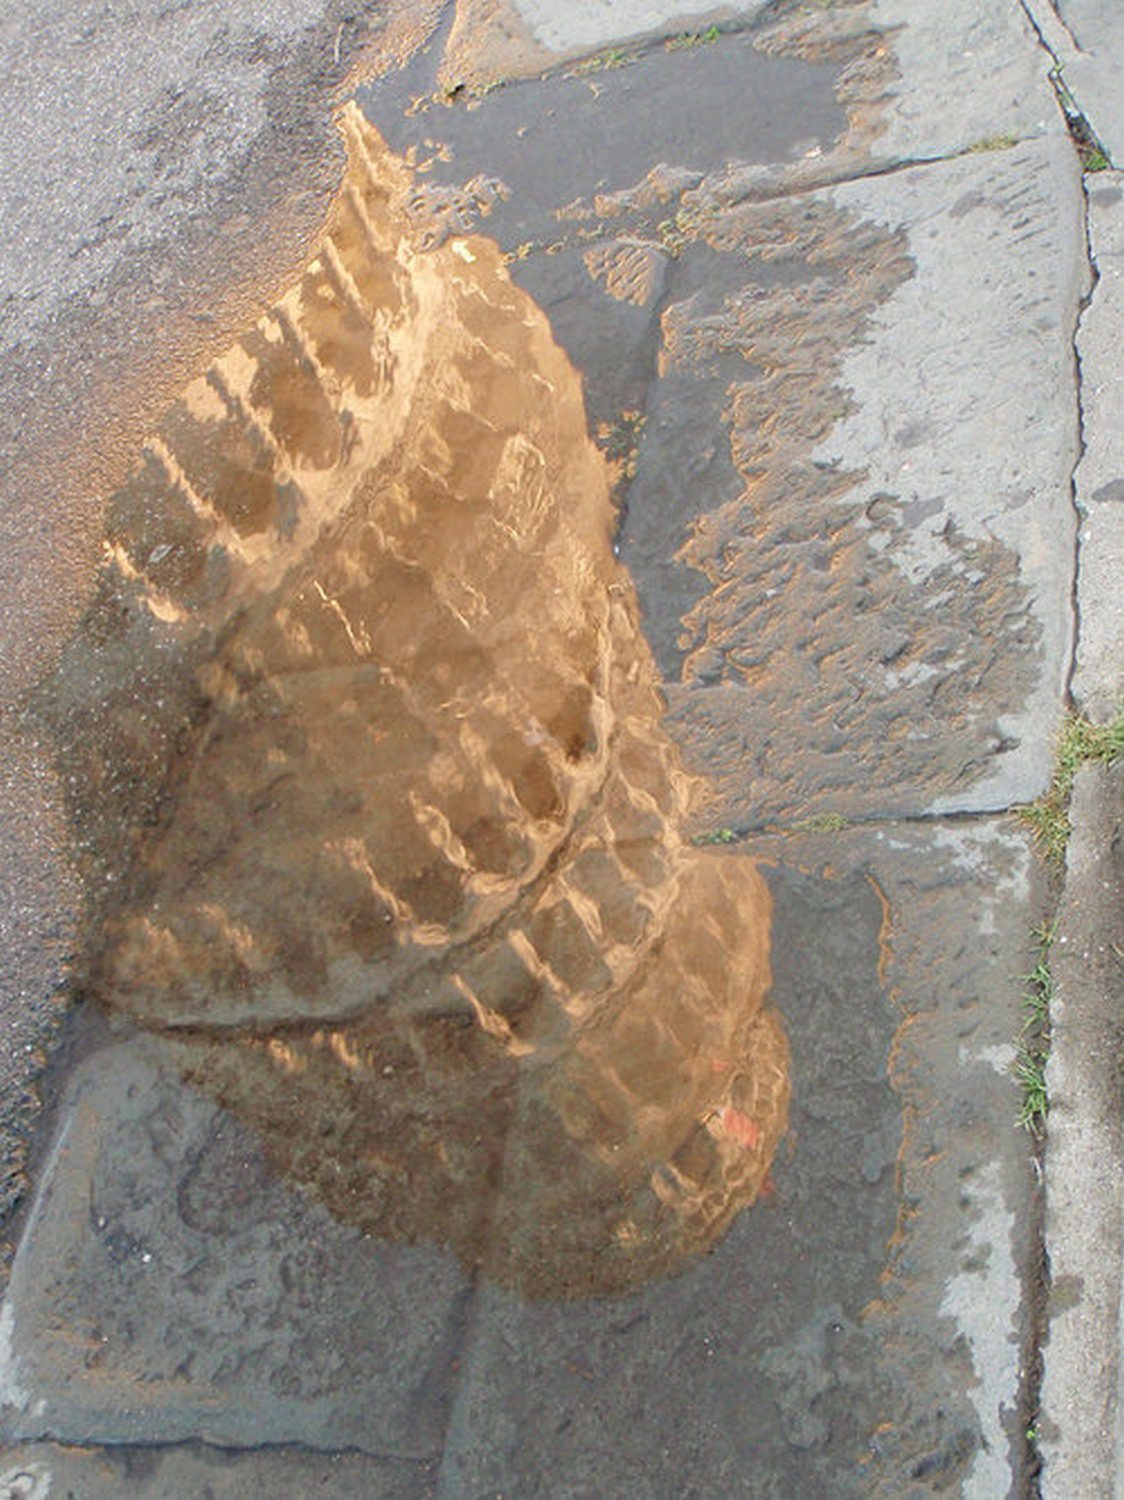
Look on the ground for reflections in puddles. Yes, seriously.
While at the Leaning Tower of Pisa, I took the typical shots of course (like “holding the tower up” – had to!), but my favorite photos from this iconic landmark are the series below of reflection shots that I never would have captured if I didn’t think outside the box of “typical photos”.
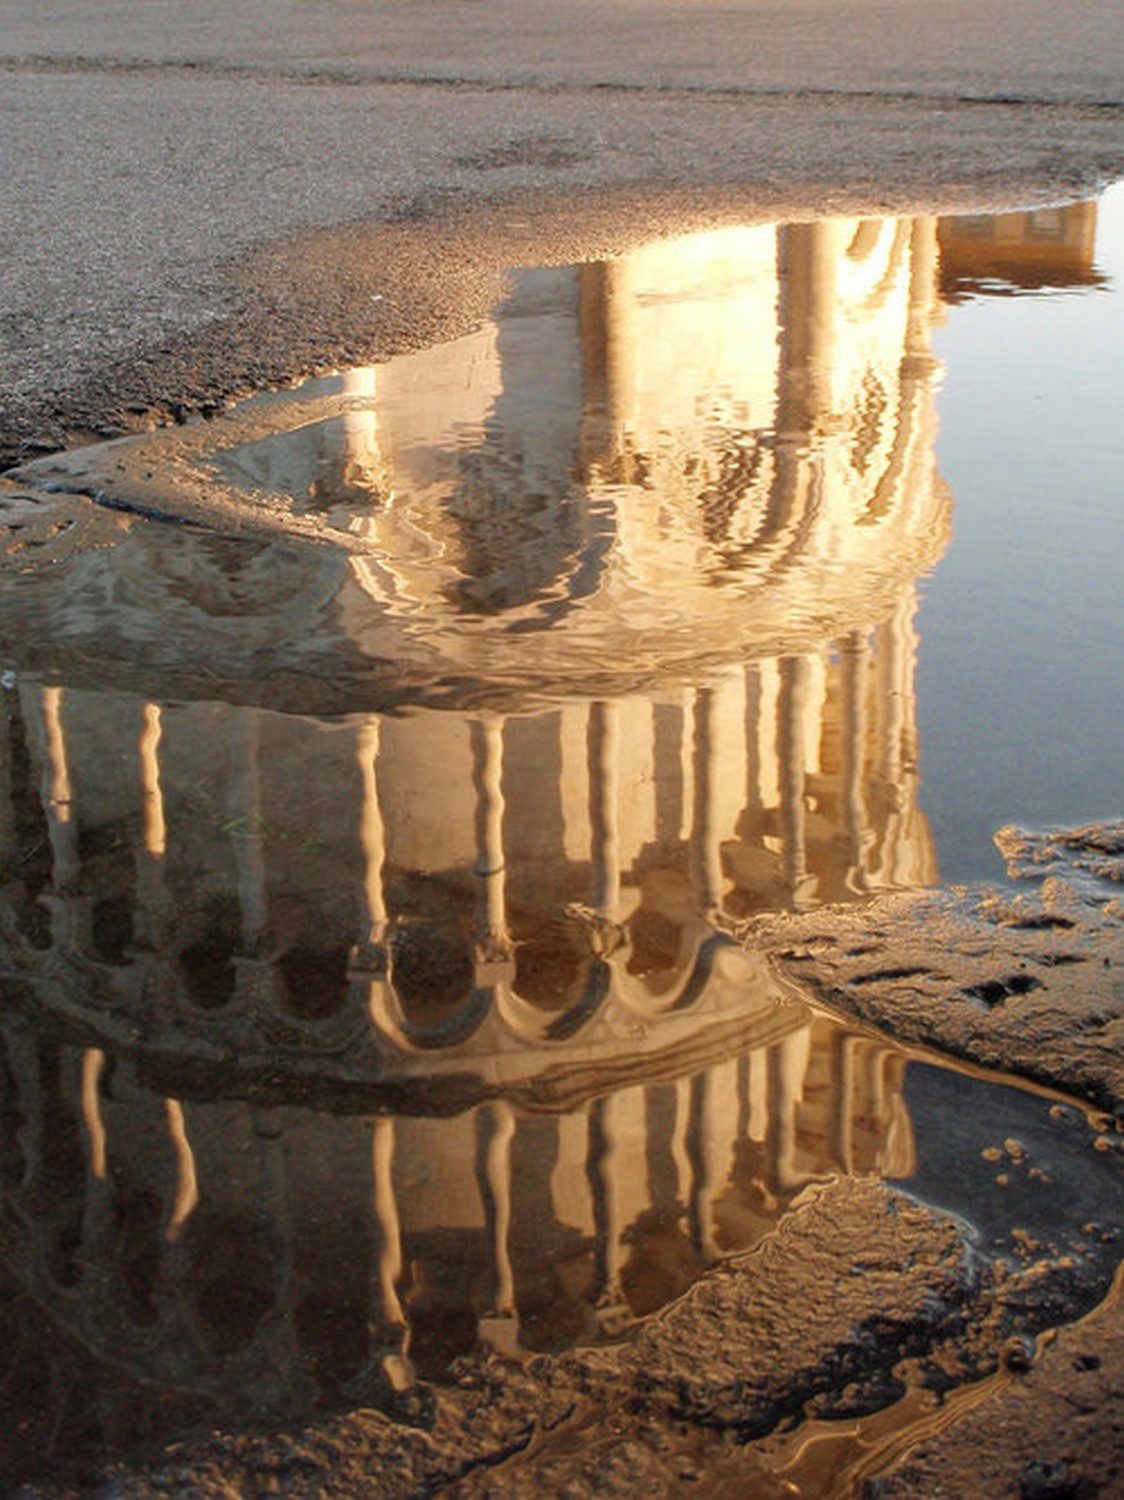
Getting a huge variety will help you discover your unique photo style, and you’ll probably wind up liking some of the obscure shots even better than the typical “money shot” that you can find plastered all over the Internet. This is what will set you apart as a photographer.
11. Take shots of the little things too
Sometimes when we travel, we get so caught up in the big viewpoints and famous landmarks, that we return from a trip with only photos in front of tourist attractions. I’m totally guilty here.
Often times though, the photos of the “small moments” are just as good, and perhaps even more memorable, than the shots we plan out.
- See a food stall with a line wrapped around the corner? Snap it.
- Are you walking down a street with a row of adorable homes in all different colors? Click away.
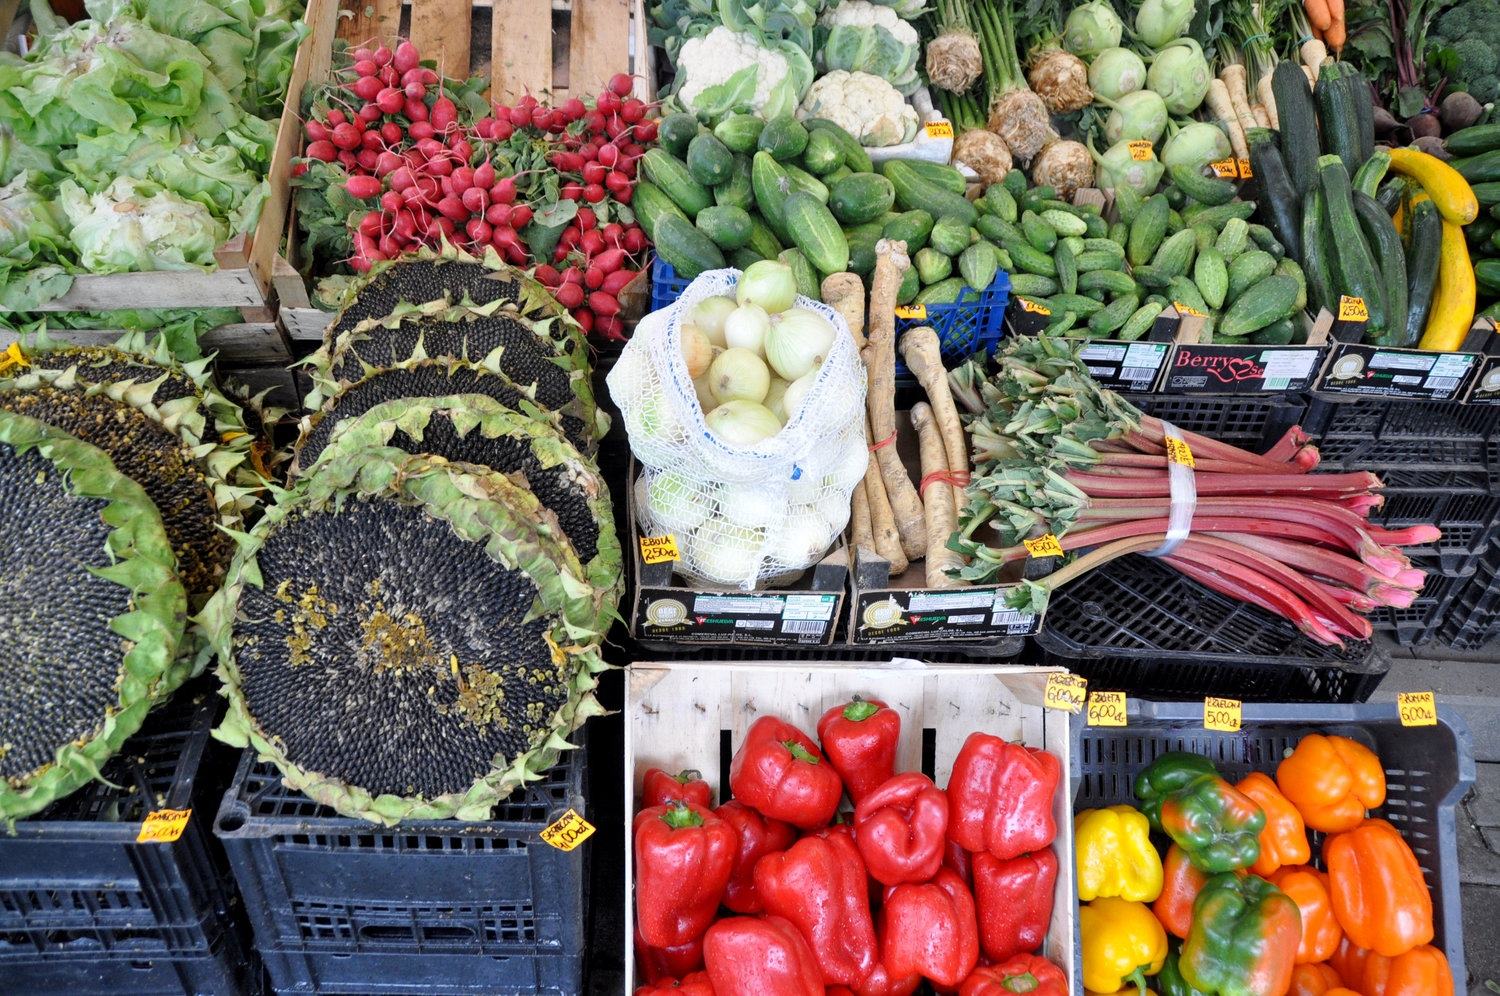
- Shopping at a local farmers market? Take a picture of all the beautiful colors and textures of the fresh produce.
- Have a delicious local meal? Capture it so you can remember the food from your travels. On a related note, this is a great guide to choosing the best camera for food photography.
And don’t forget to capture the silly moments, too.
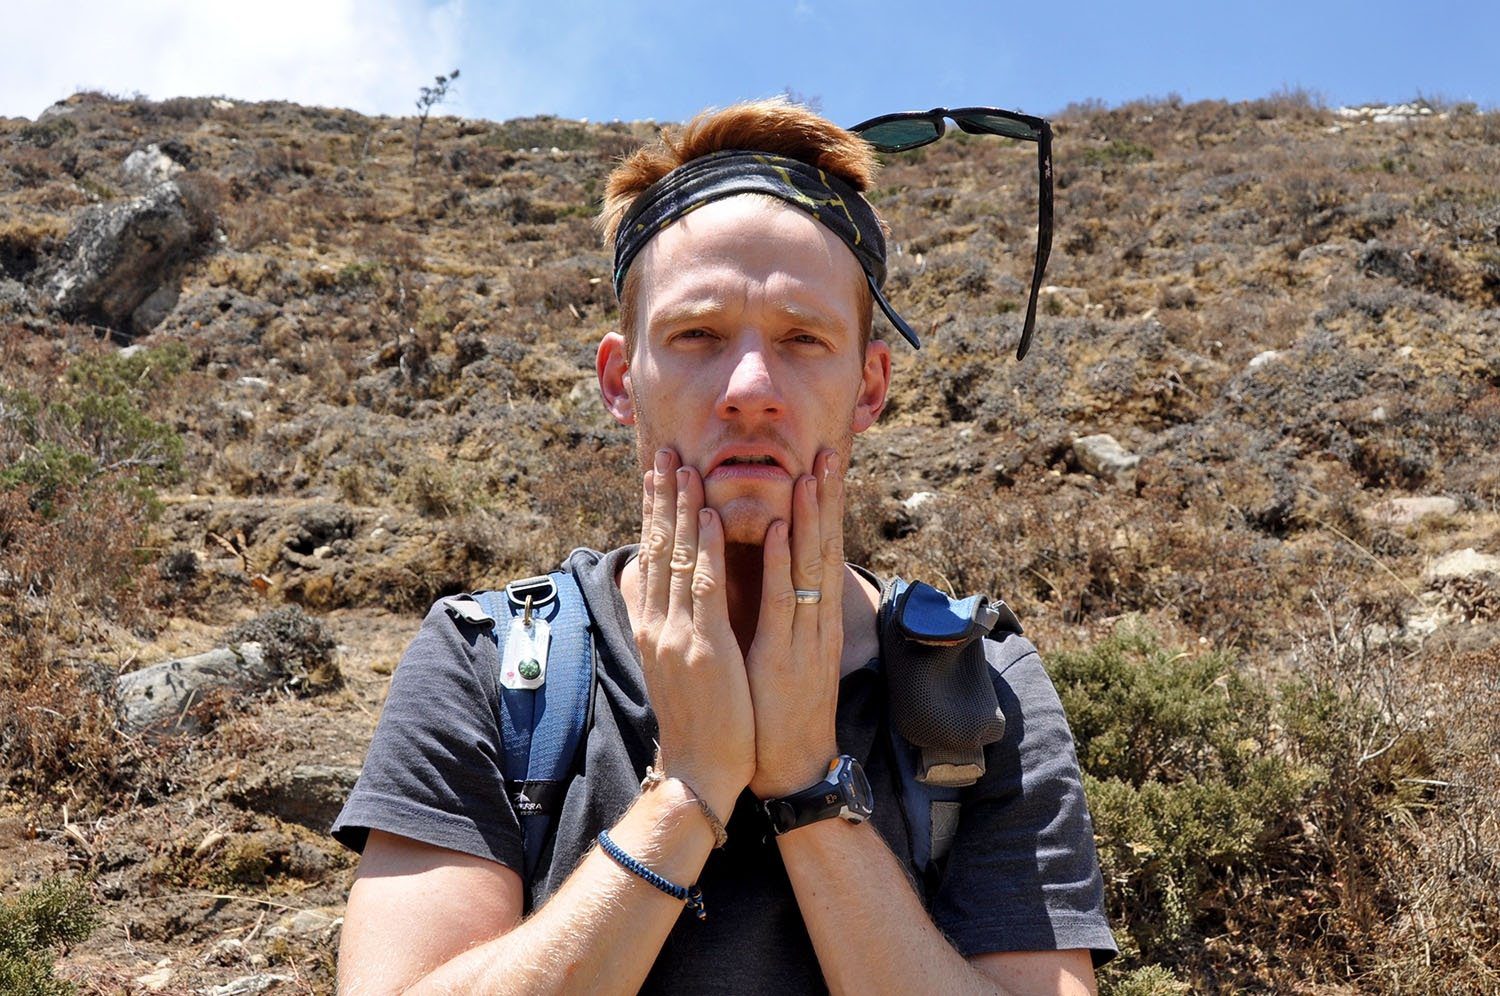
- Did your taxi driver say something funny? Capture your travel companion’s reaction.
- Catch your hunny putting on sunscreen in a super embarrassing way? You better believe I took that picture! (P.S. Look at those sunglasses!)
Remember, not every photo has to be frame-worthy. And sometimes you’ll find your favorite shots are the unexpected ones because they sum up your trip in a way the “perfect” shots just can’t.
12. Zoom in
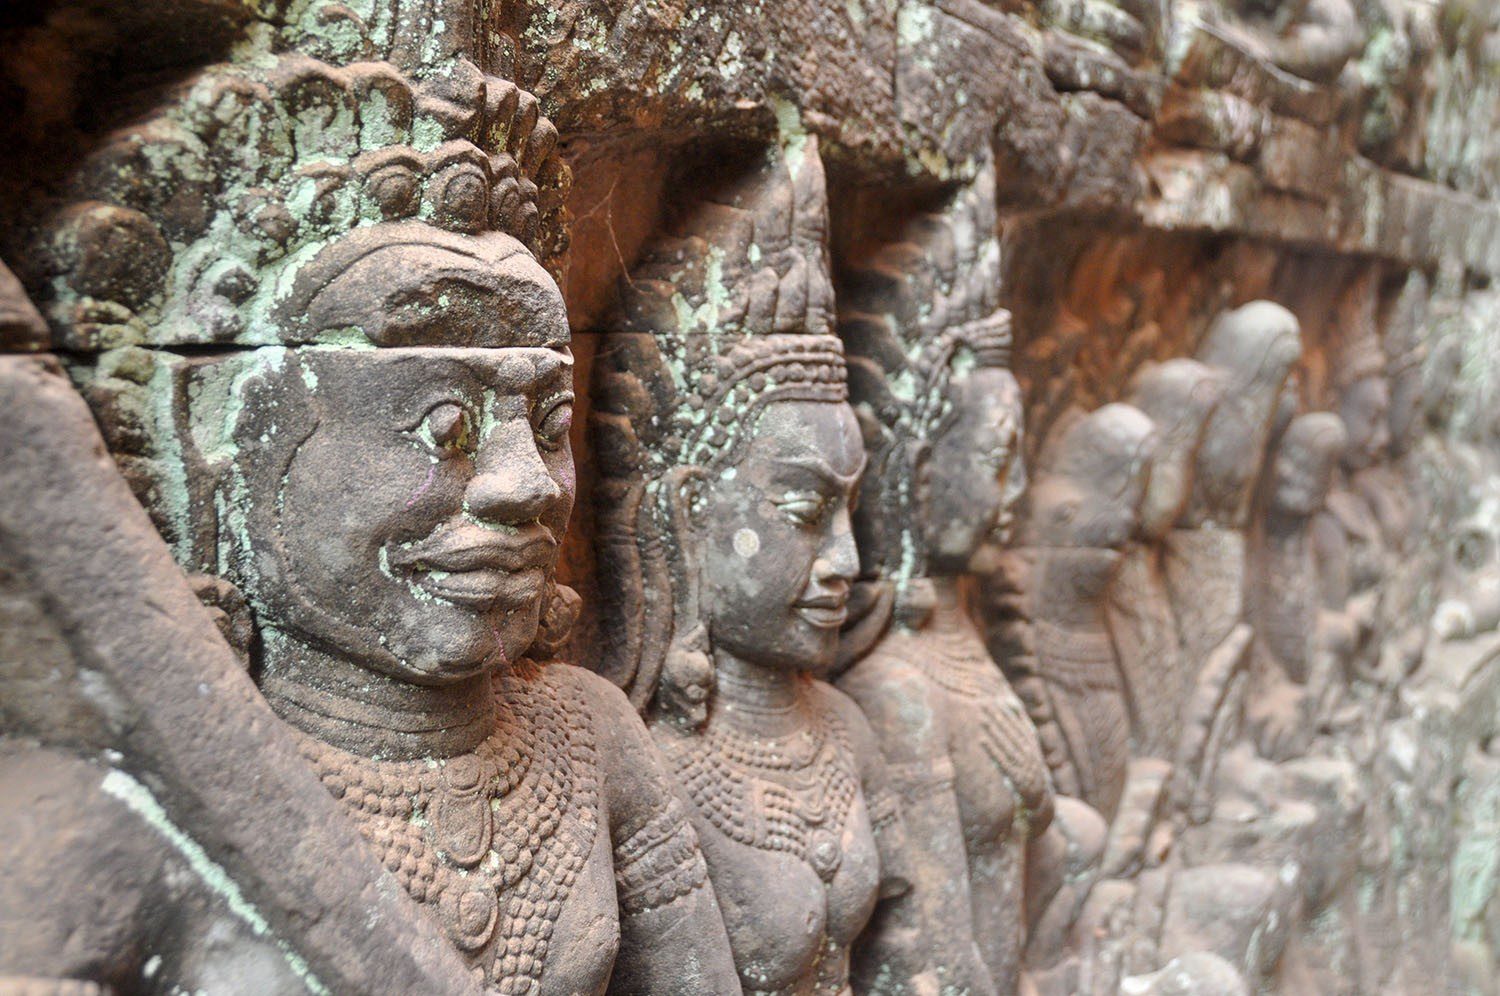
Don’t get so caught up in the big picture that you miss the details. This can be profound life motto, but it also works for photography. Some of the best shots are the super close up details.
If you’re at Ankor Wat, take a picture of the whole complex, but also get close. Capture the texture of the stone and photograph those intricate carvings. That picture will undoubtedly be more interesting than the typical shot everyone gets because it is your perspective. Nobody before you and nobody after you captured it the same with the exact focus and angle as you.
13. Know where the sun is and make it work for you
Knowing where the sun is in the sky is essential to getting a perfect shot. It is usually your main source of light, and it can completely alter your picture depending on where in the frame (or outside the frame) you place it.
If you’re taking a portrait, a general rule of thumb is to make sure the sun is shining on the person. This means that, yes, they will be looking into the sun. This can be uncomfortable around midday, so try to shoot portraits in the morning or late afternoon instead (see #5).
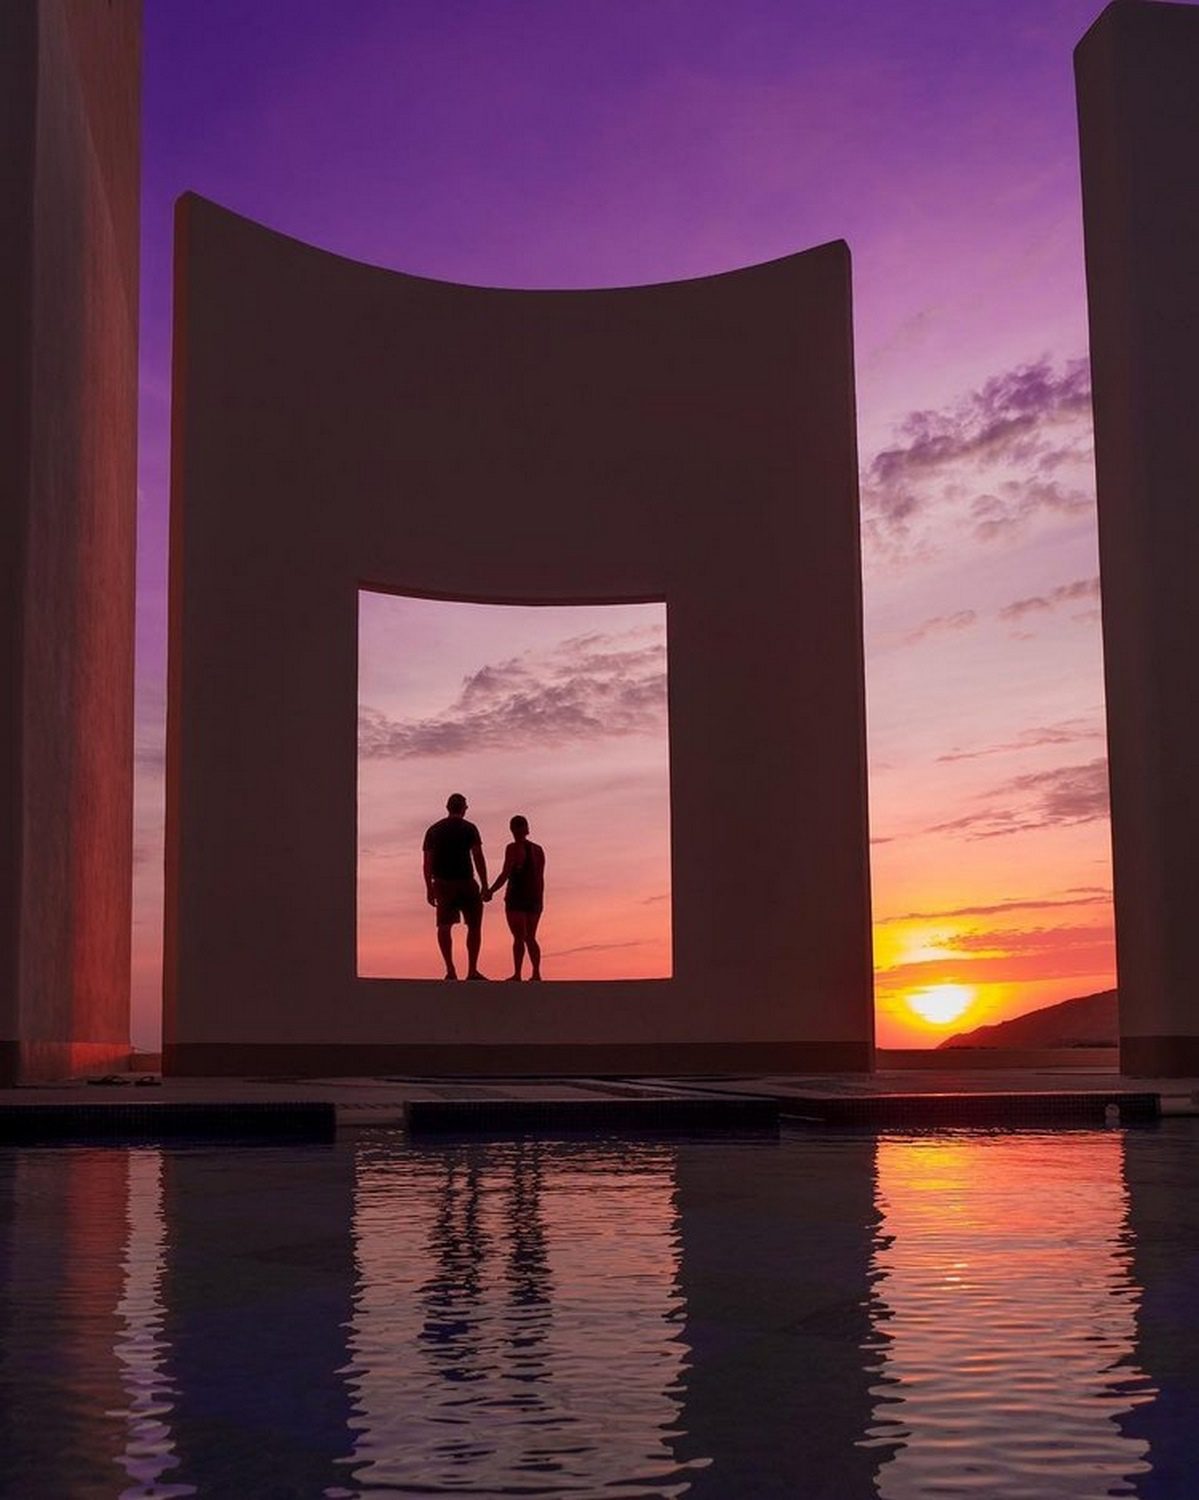
But don’t simply follow the “rules”. Instead, experiment with placing the sun in different spots in your photographs. Play around with silhouettes. The best way to really understand what effects you like is by experimenting.
14. Make sure the horizon is straight
One of my biggest pet peeves is when I’ve taken a beautiful photo, but it’s crooked and it all just looks a little “off”. Most viewfinders have faint lines in them so you can use it as a guide to get the horizon straight. The clean straight lines will take your photos from just okay to looking very professional.
15. Capture movement
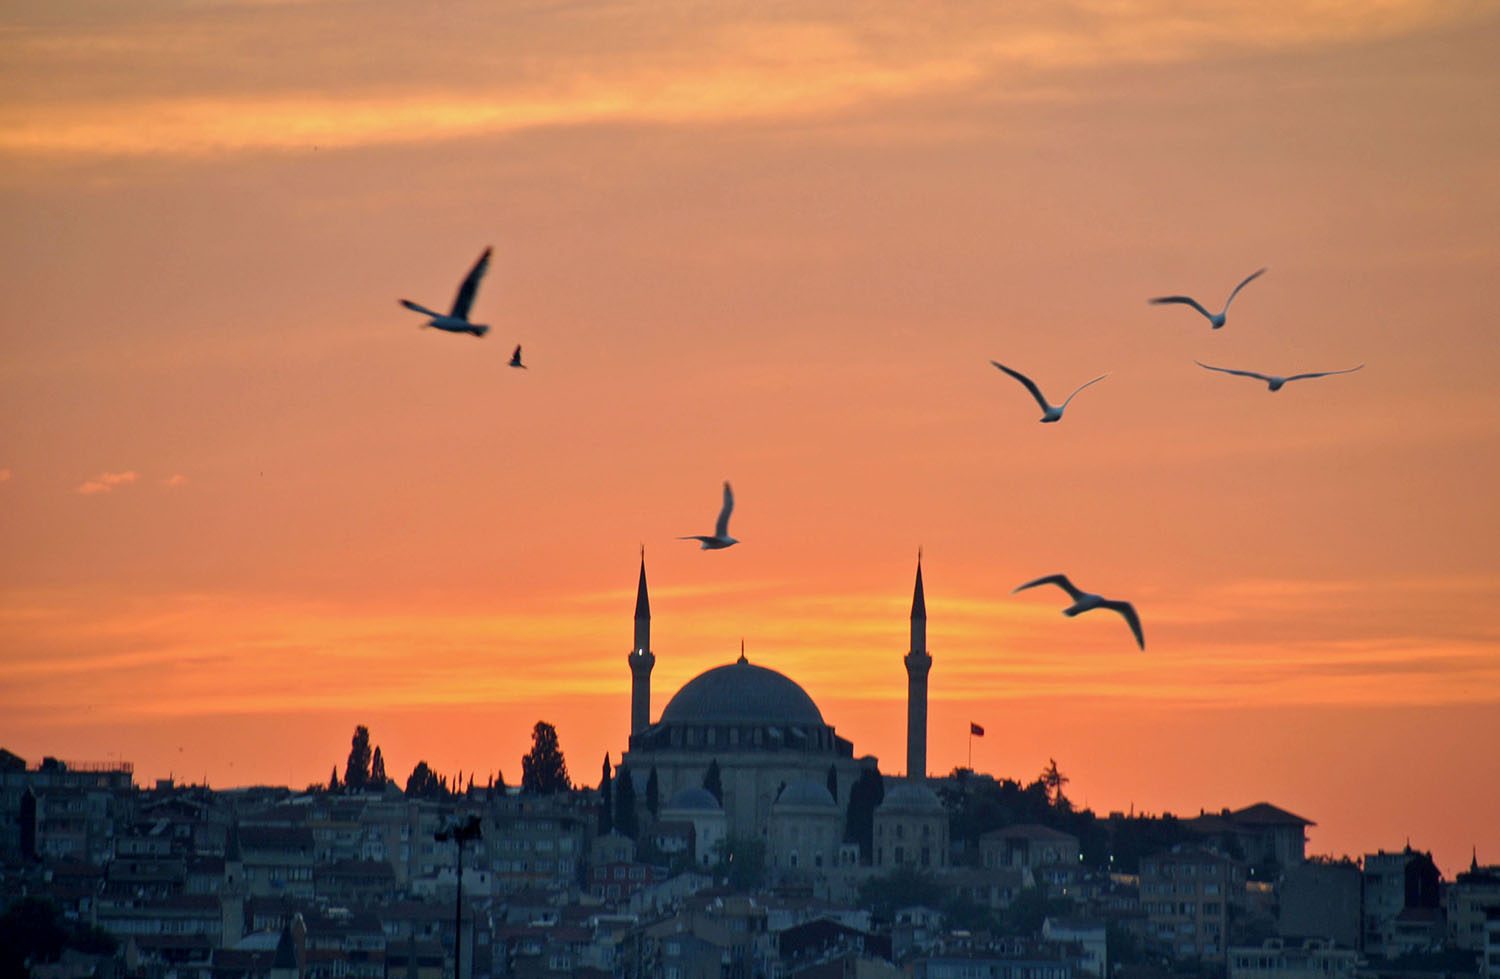
Sometimes we avoid movement because it can look messy. But movement can give your pictures life.
Think about it: a photograph of a New York City with no people in it won’t give the same feeling or dynamic as one with a crowded street with people moving. The second picture emanates the buzz of the city and helps the viewer really understand what NYC is like.
Try to capture birds in flight. Kids playing in a park. The wind blowing trees. Breathe some life into your travel photos.
Tip: If you are trying to capture movement, make sure your camera is set to “burst mode”. See tip #1.
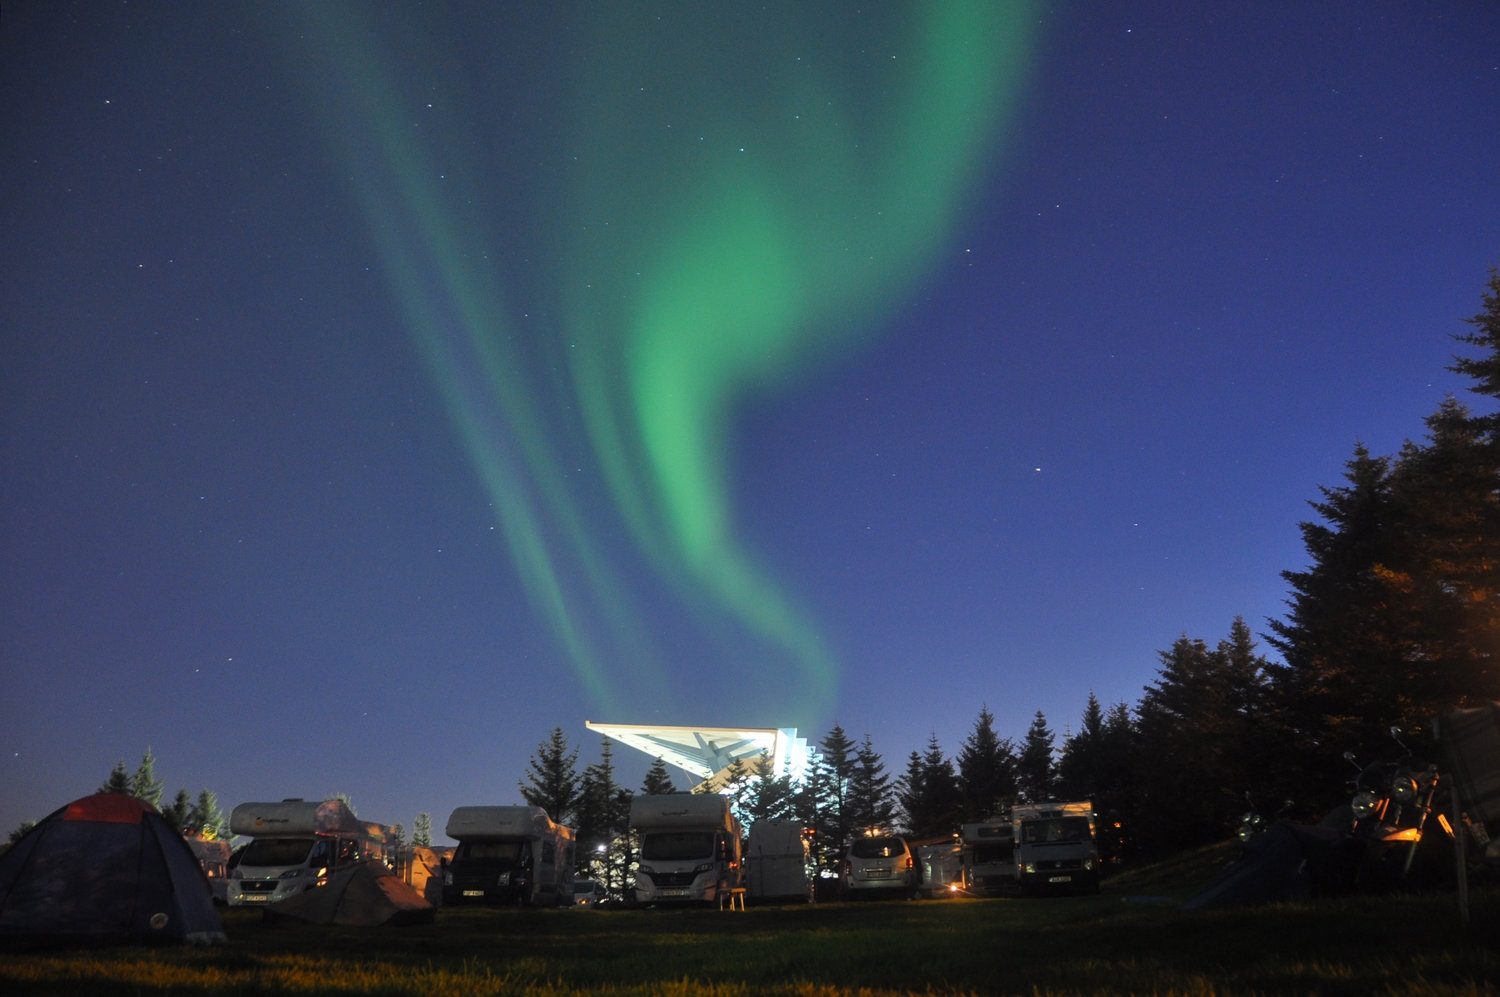
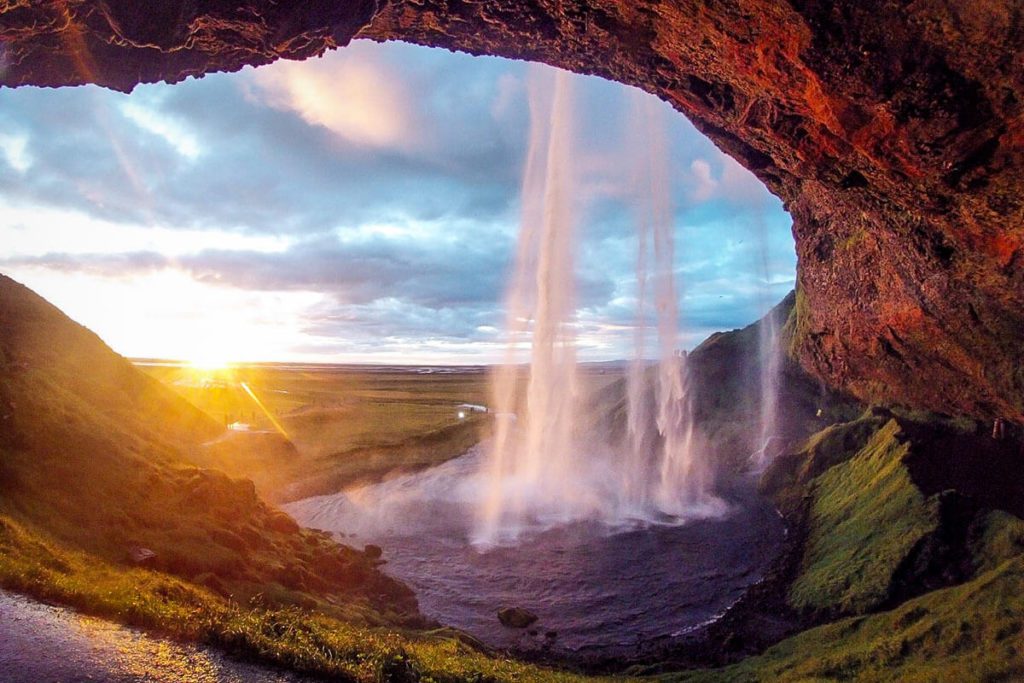
16. Open your shutter
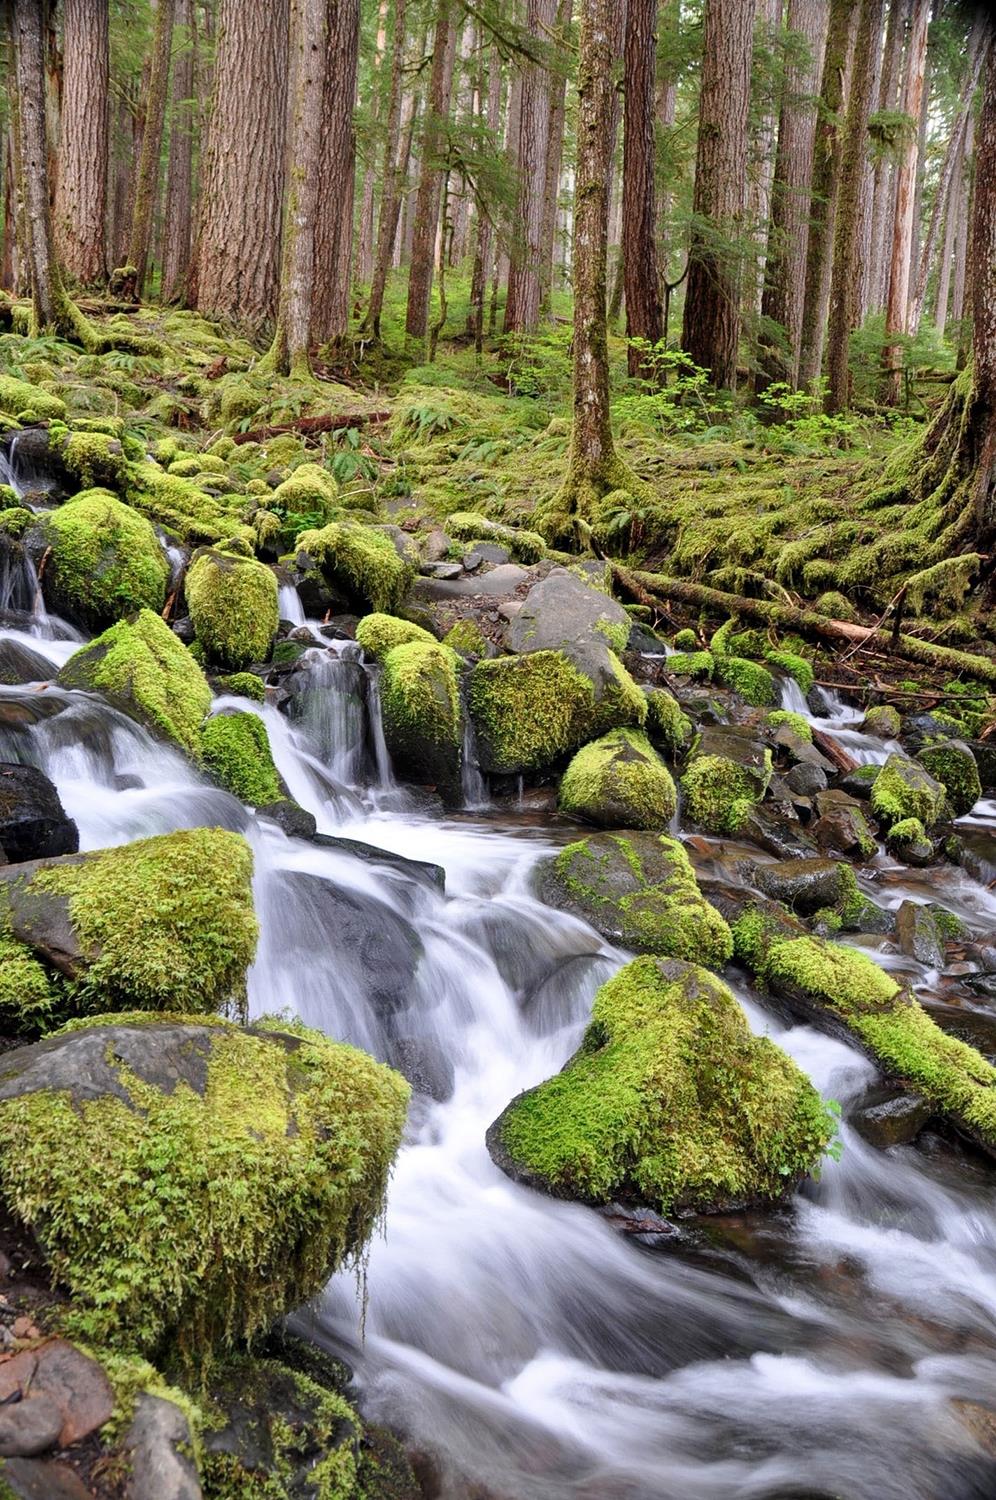
If you’re new to photography, this might sound like a foreign language to you. Think of it this way: usually when you take a photo, the lens opens for a fraction of a second. If you set the lens to stay open longer, you can get some really cool effects.
There are many neat things you can do with a long shutter speed, but on your travels, here are 2 shots you’ll surely want to try:
- You can get the typical soft, flowing effect on a waterfall (shown in the picture above).
- You can experiment with night photography and you can get pictures of the stars or Northern Lights.
In order to set a long shutter speed, you will NEED need a tripod (see tip #2), and some patience for learning the technique.
Basic rule of thumb: If you set a long shutter speed, more light is coming into your camera lens. This means you’ll need to make your aperture smaller to let in less light.
17. Rule of thirds
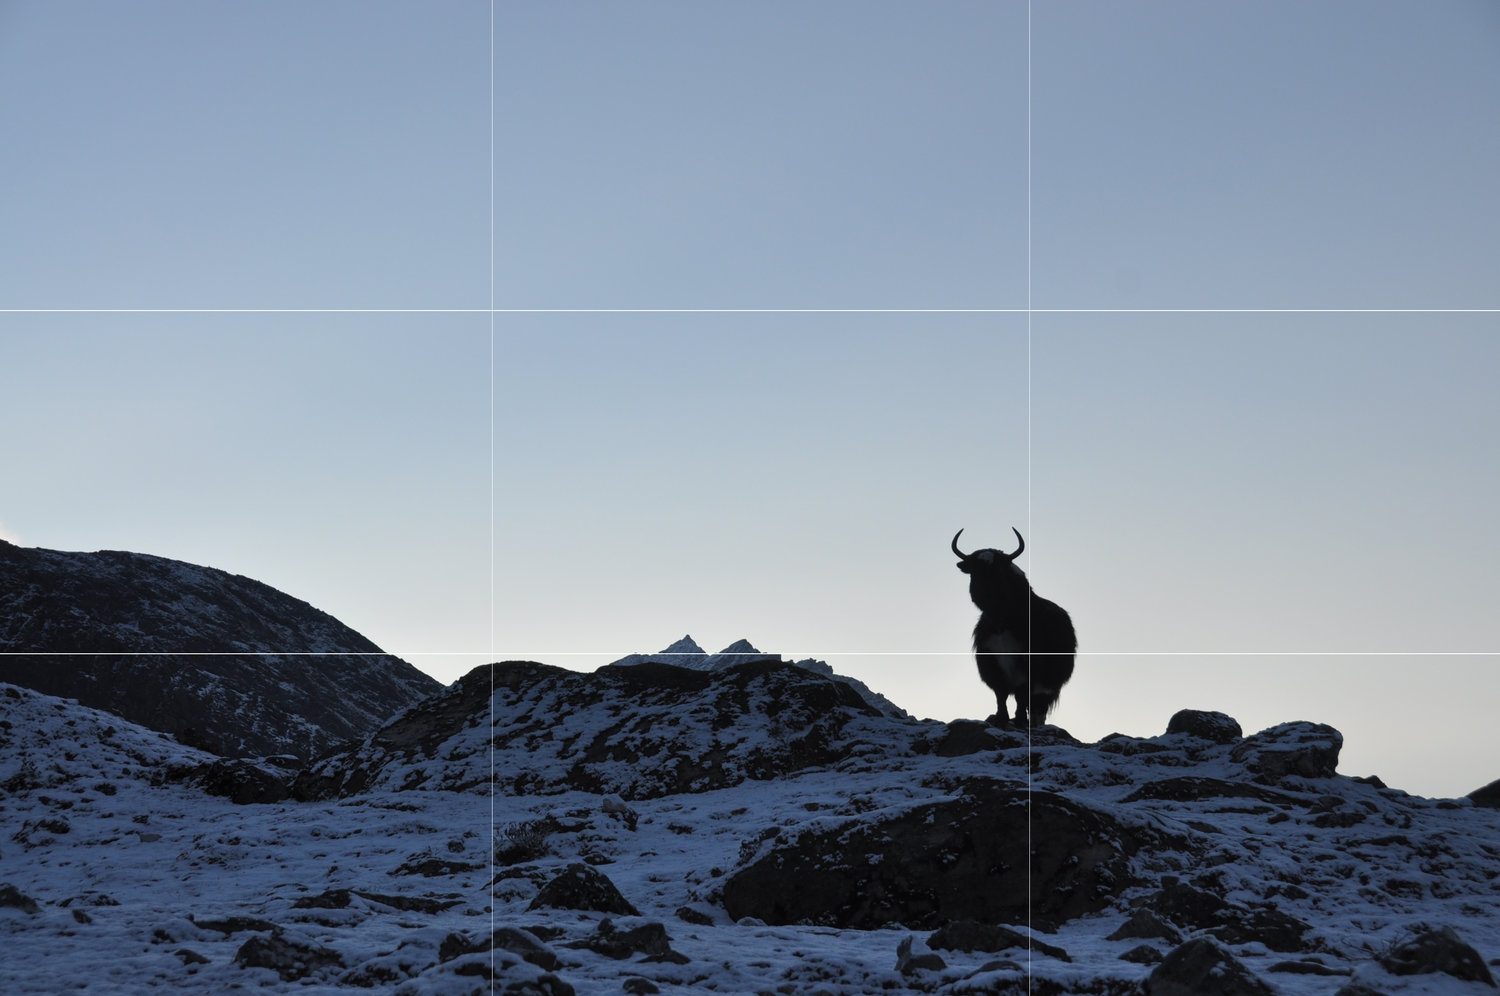
Symmetry is a beautiful thing, but it if you take all of your photos with the subject in the middle, you’re pictures are going to start to look boring.
You’ve likely heard of the rule of thirds, but it’s a good one. Essentially, this means that you will place your subject at one of the crosshairs as illustrated in the photo above.
Play around with this, but it’s not a hard and fast rule to follow for every photograph. Remember if you anything too often, it’ll start to become boring.
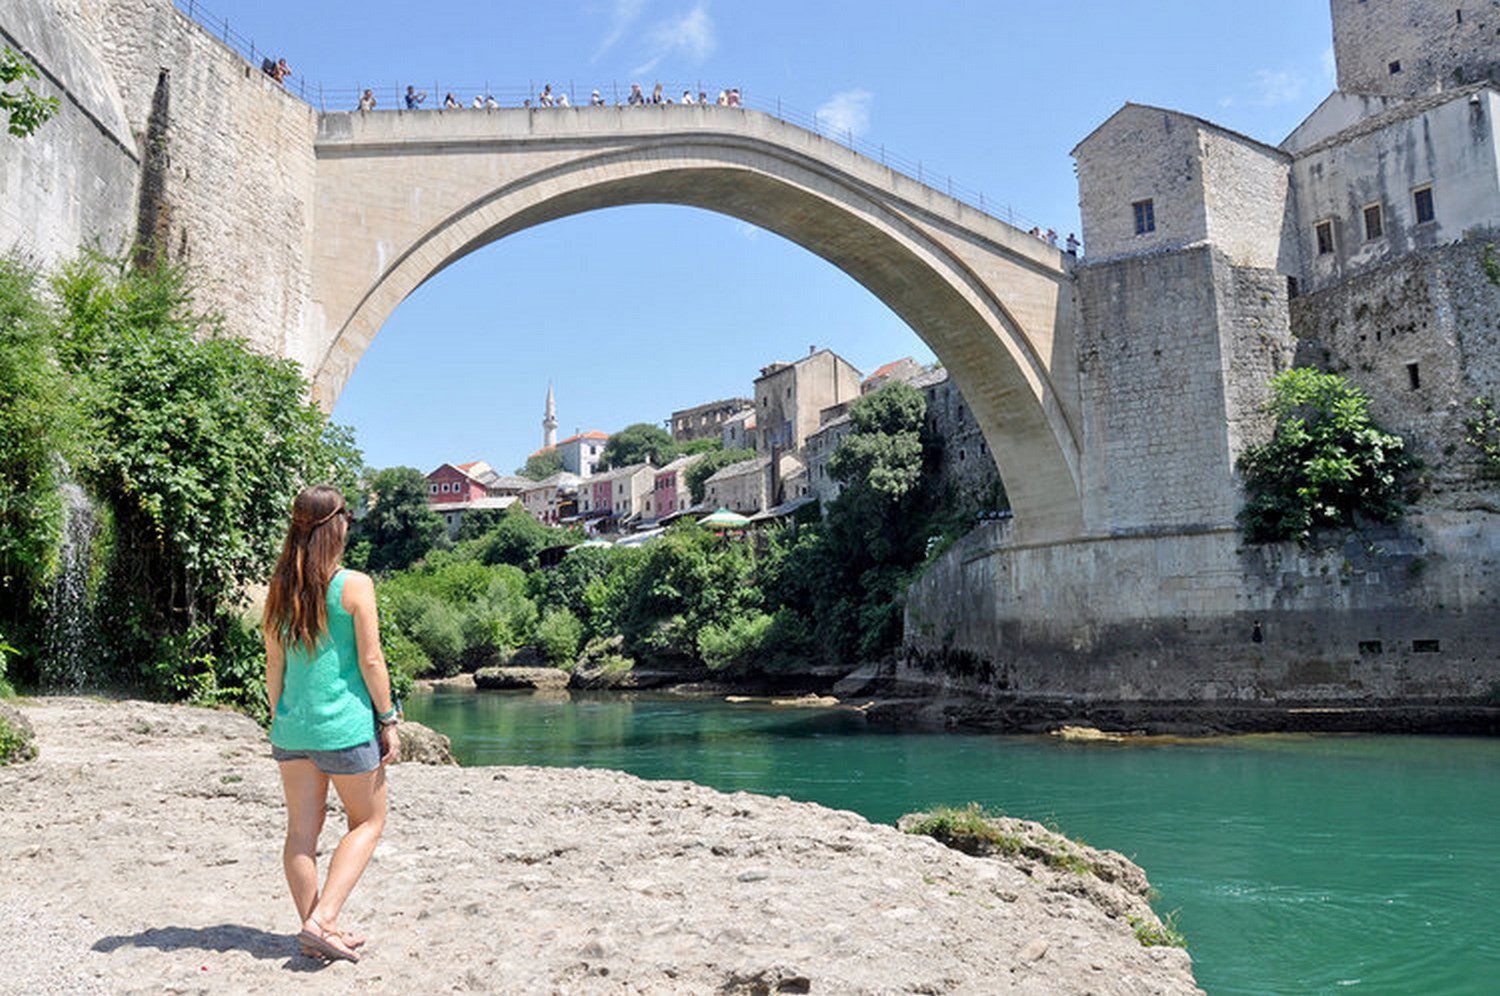
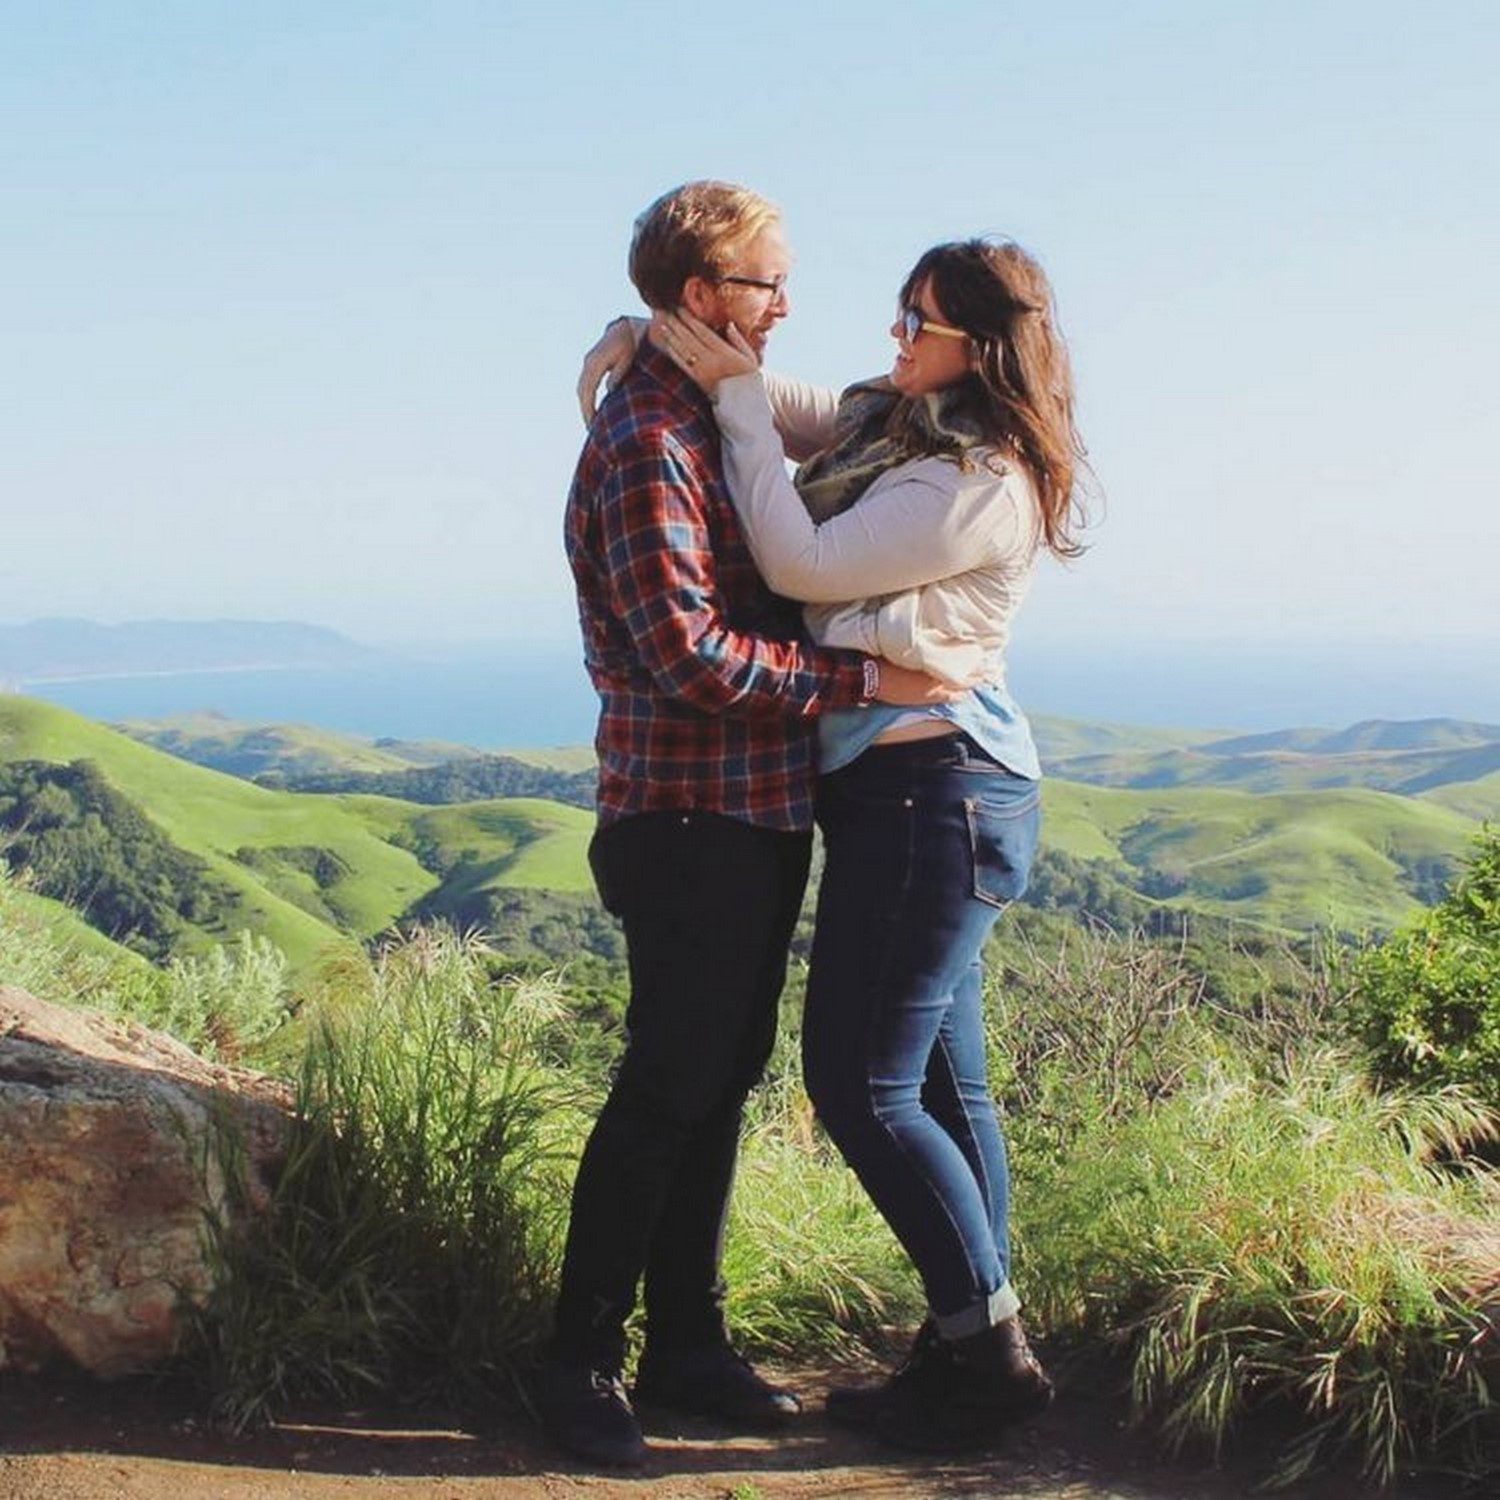
18. Get in your shots; but don’t just stand there and smile
Sometimes it is more comfortable to be behind the camera than in front of it, don’t be afraid to be a model too. Stepping into your pictures can create some really interesting shots.
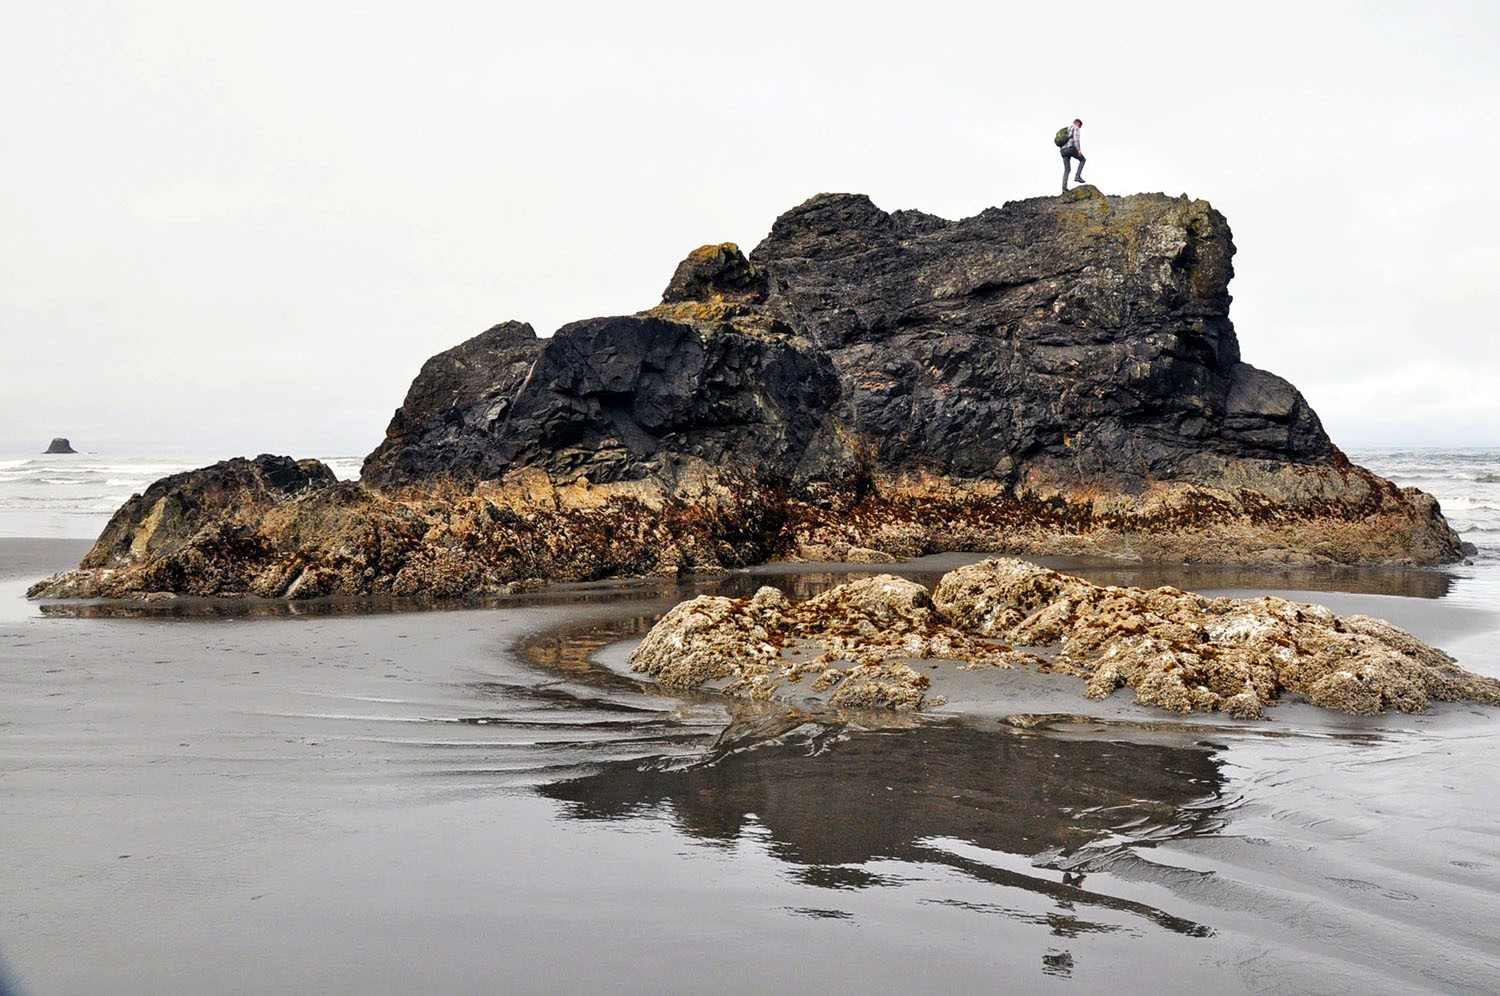
For example, standing next to a tree in California’s Redwood forest brings a new sense of perspective to the photos. Without a person in the shot, it is hard to tell just how massive these trees are.
Similarly, a person in your shot can bring emotion and movement that you just can’t get by shooting a landscape. So get in there and experiment!
Note: This is easiest if you have a travel companion or a tripod, or stumble upon a camera-savvy stranger. Check out these tips on how to take photos of yourself alone for some more advice.
19. Think about what you’re wearing
I’m not saying you should carry an unrealistic, floor-length dress along on a hike so you can get a pretty shot at the top. (Unless that’s your style, then go for it!)
But when you’re headed somewhere that you’ll want a photo in front of, avoid shirts with writing, and stay away from super busy patterns and anything too “trendy”. Also, choose colors that are neither dull nor super bright; and avoid shirts that will show sweat stains (it happens to the best of us!).
Trust me: you will regret wearing a t-shirt that says “Freshman Women Pub Crawl” in front of Machu Picchu. And if you wear a dark green shirt in a forest, you’ll blend right in and will look like a floating head.
Putting a little bit of thought into your clothing choices can make your photos much better, and will save you embarrassment down the road.
20. Get comfortable taking portraits of strangers
When traveling in a different country, portrait shots are often some of my favorites. They elicit emotion and tell a story. Whenever taking someone’s photo up close, ask for permission. You wouldn’t like it if someone came up to you, took your picture and left without saying anything. So don’t be that person.
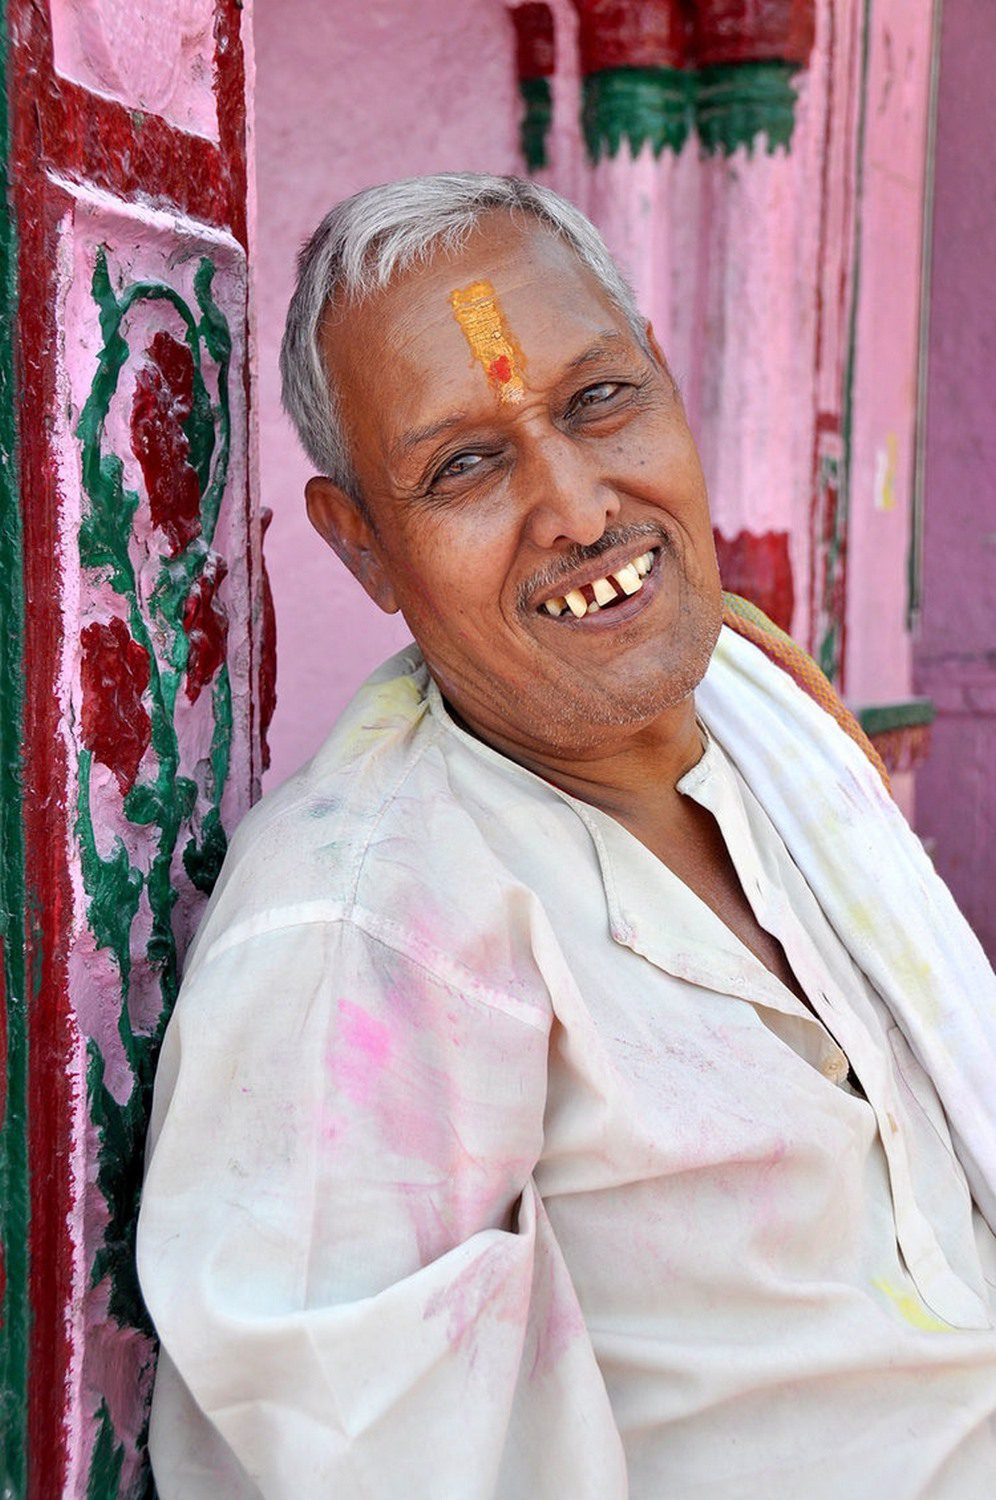
You don’t have to speak the same language to get permission. Simply make eye contact, smile, and point to your camera or say “photo?”. Most people will understand and will either nod or shake their head. Many people I have encountered happily say yes, and it is a positive interaction. If they say no, however, respect their answer and move on.
It can be a little intimidating at first, but I’m pretty sure you will find the pictures and positive interactions make stepping out of your comfort zone worthwhile.
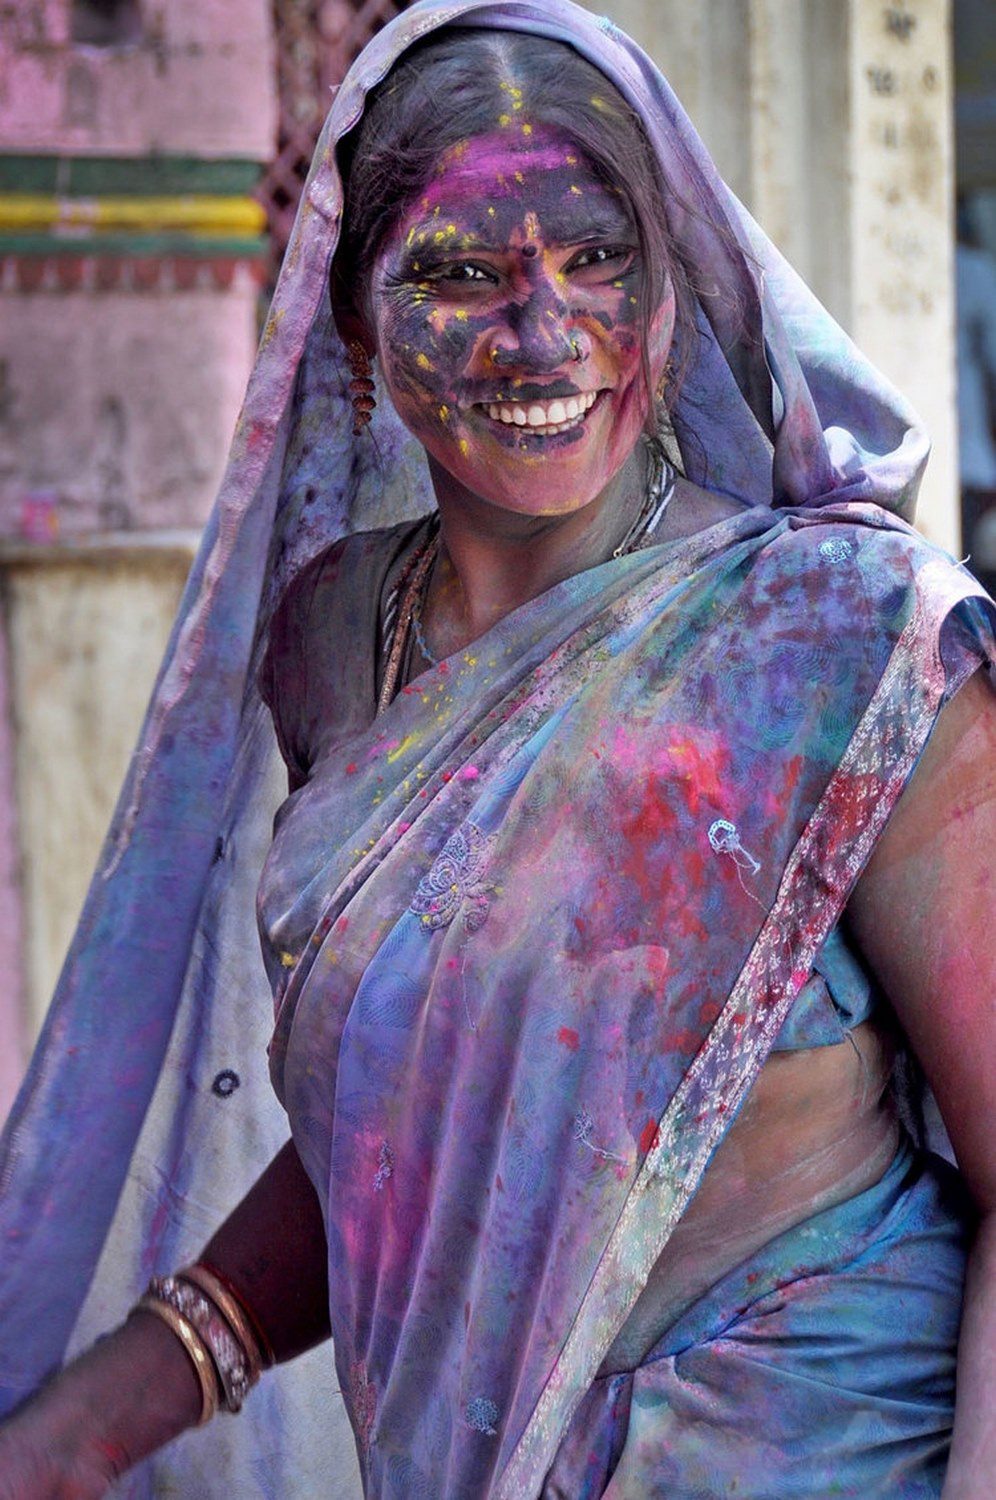
21. Find a theme
If you’re already an experienced photographer, kick up your skills a notch by creating a photo essay of sorts. Observe your surroundings and take notice of any commonalities. It could be as simple as taking photos of the beautiful doors you see all over Ireland.
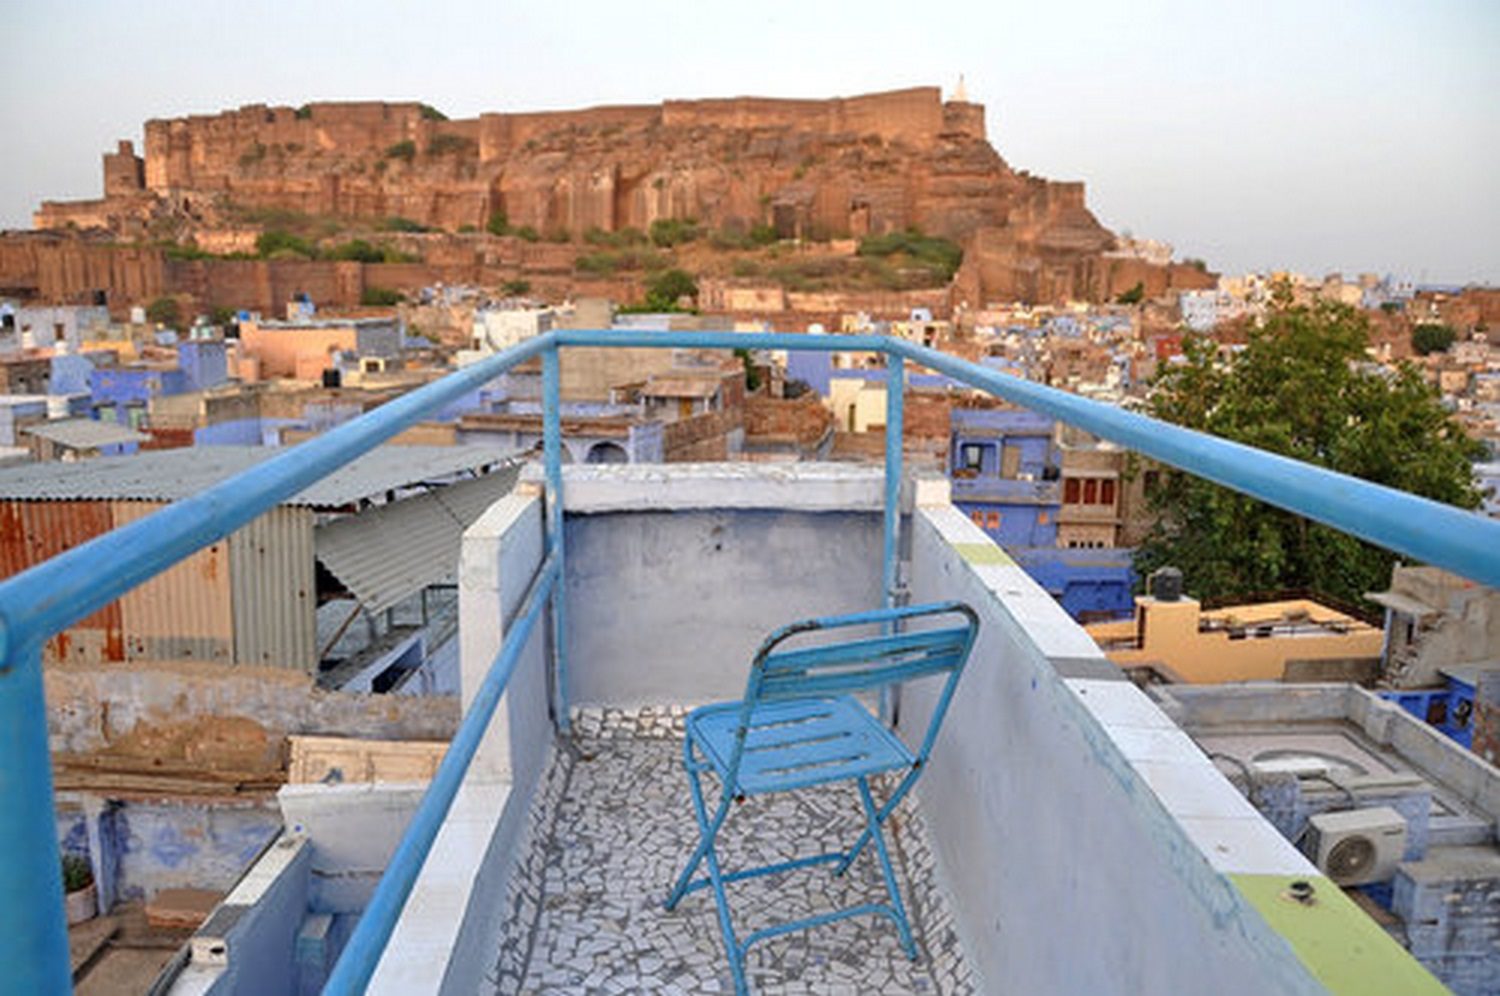
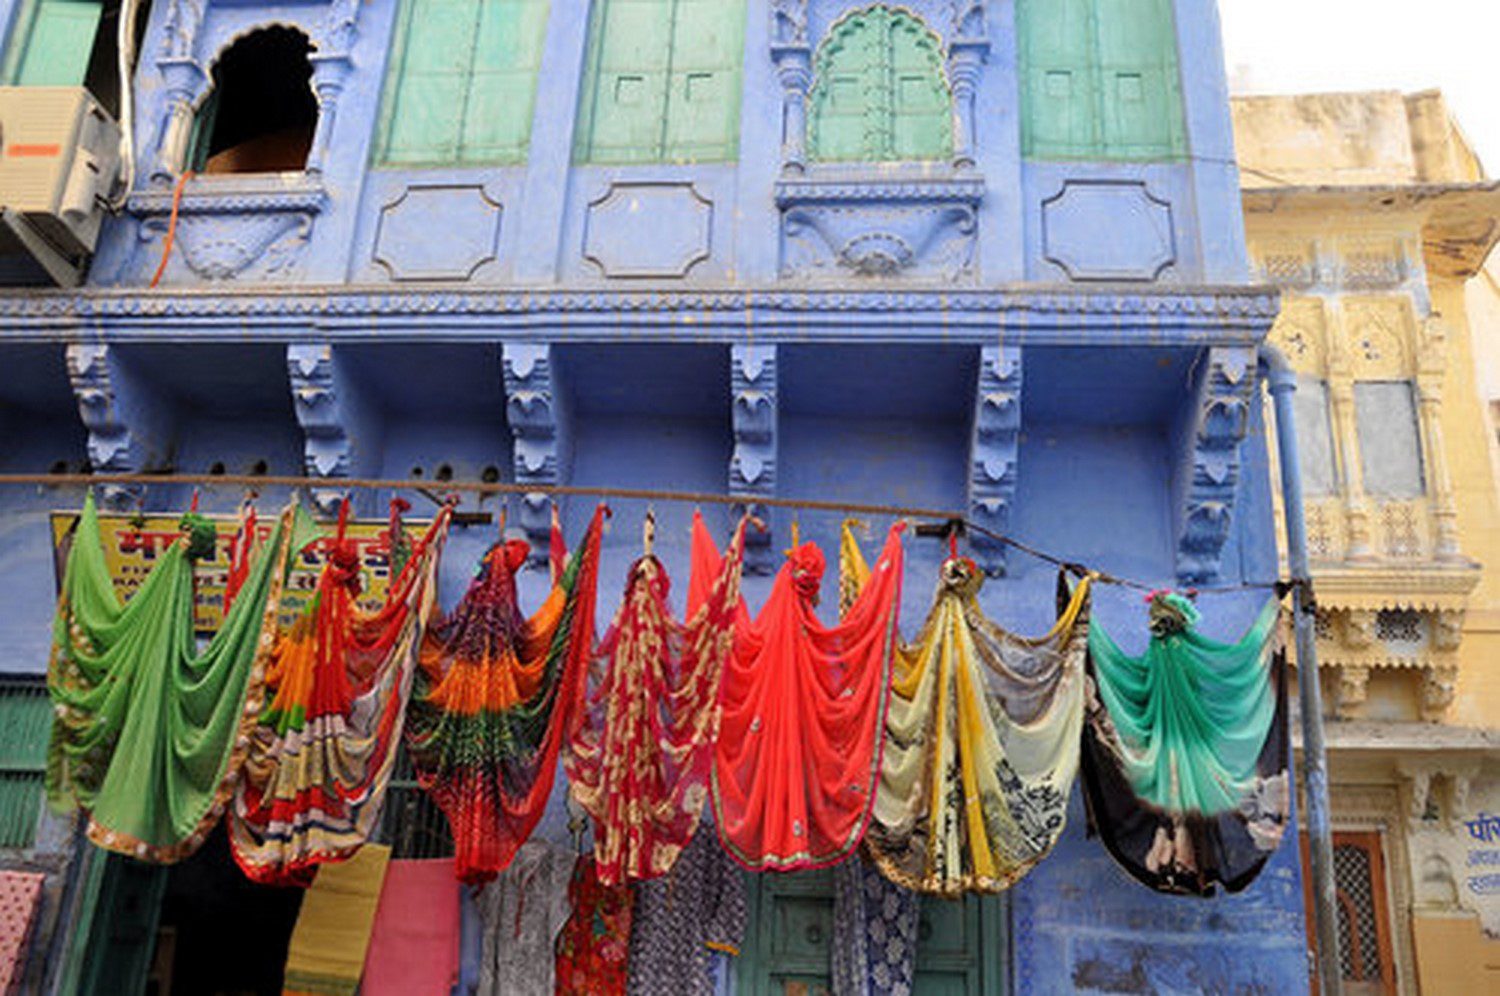
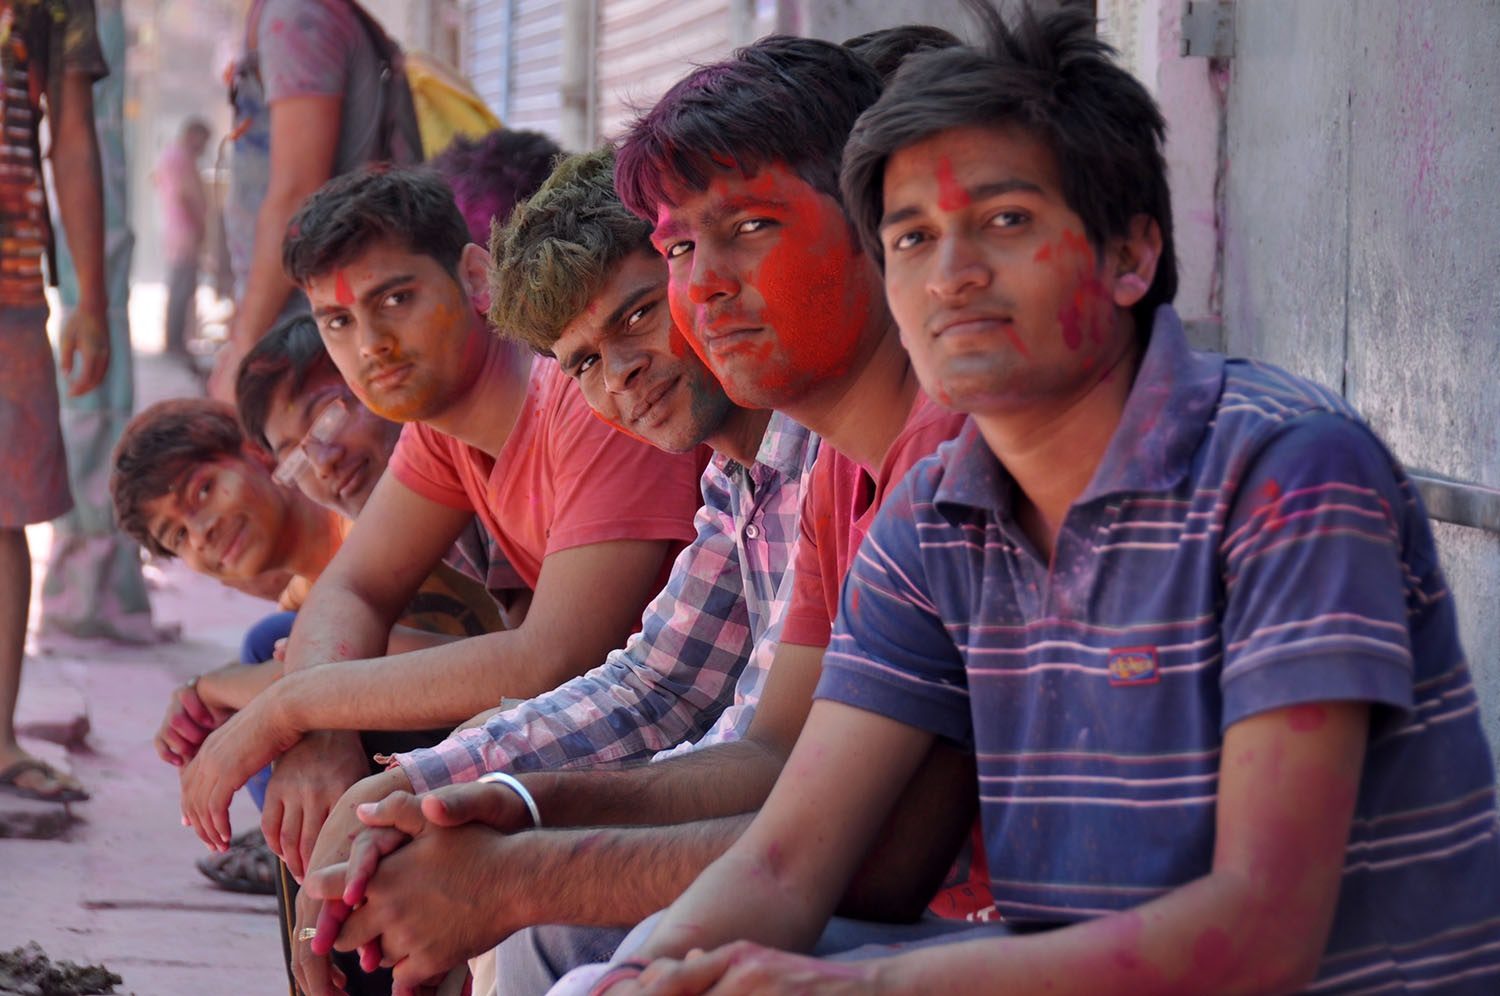
Or it could be a color.
While traveling in India, I noticed beautiful blue hues in a few different towns and tried to capture a series of “Indian Blues”.
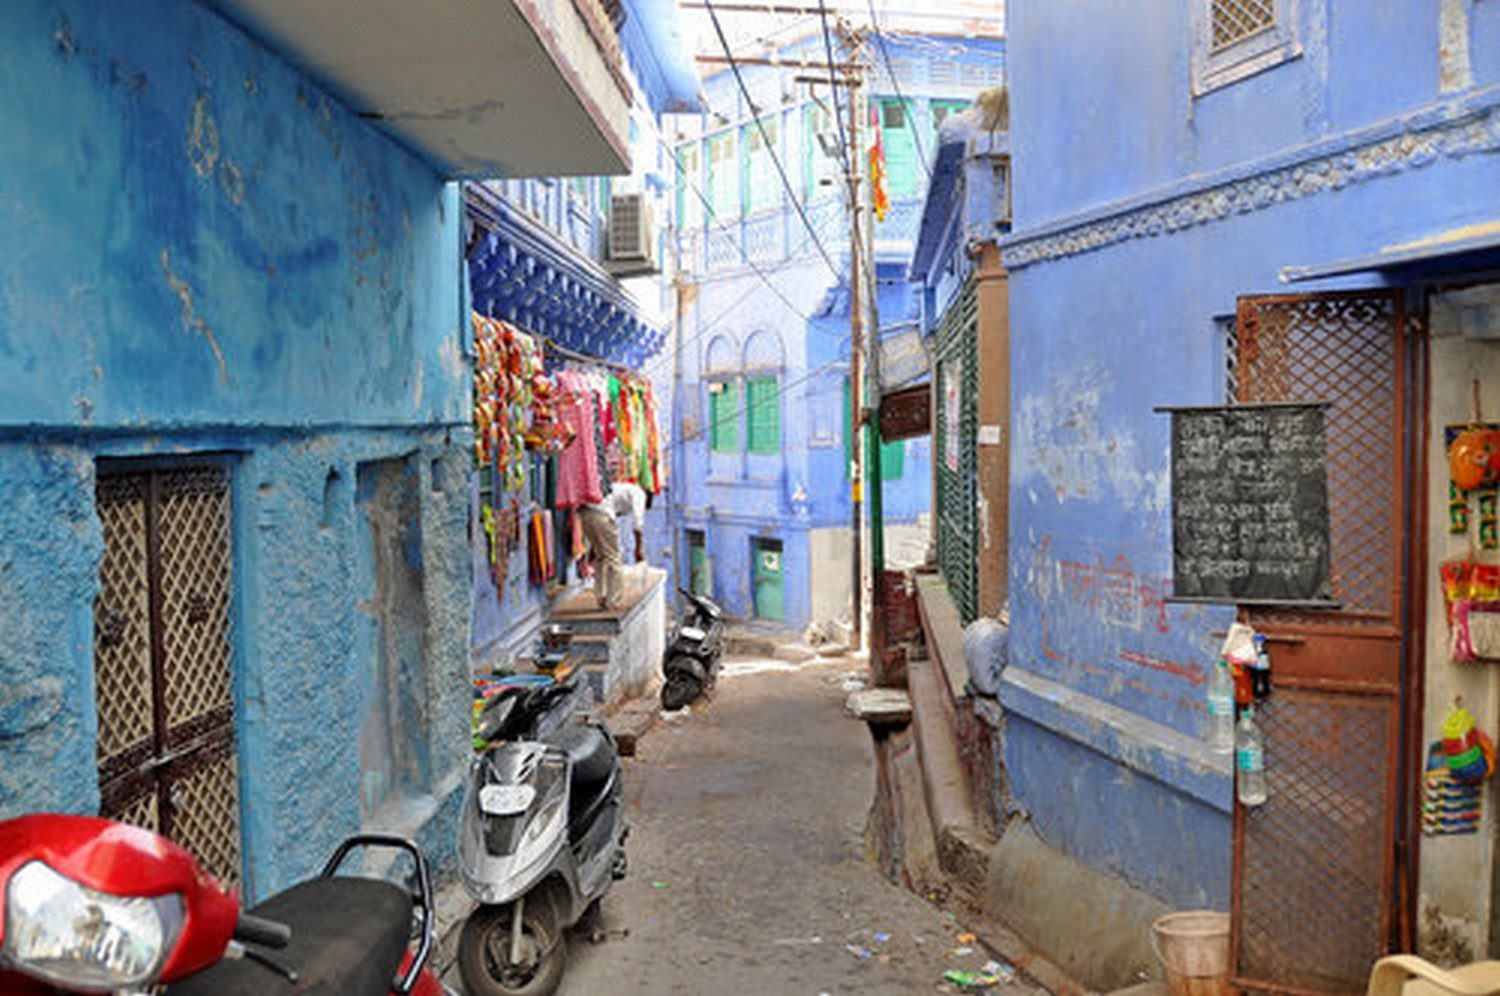
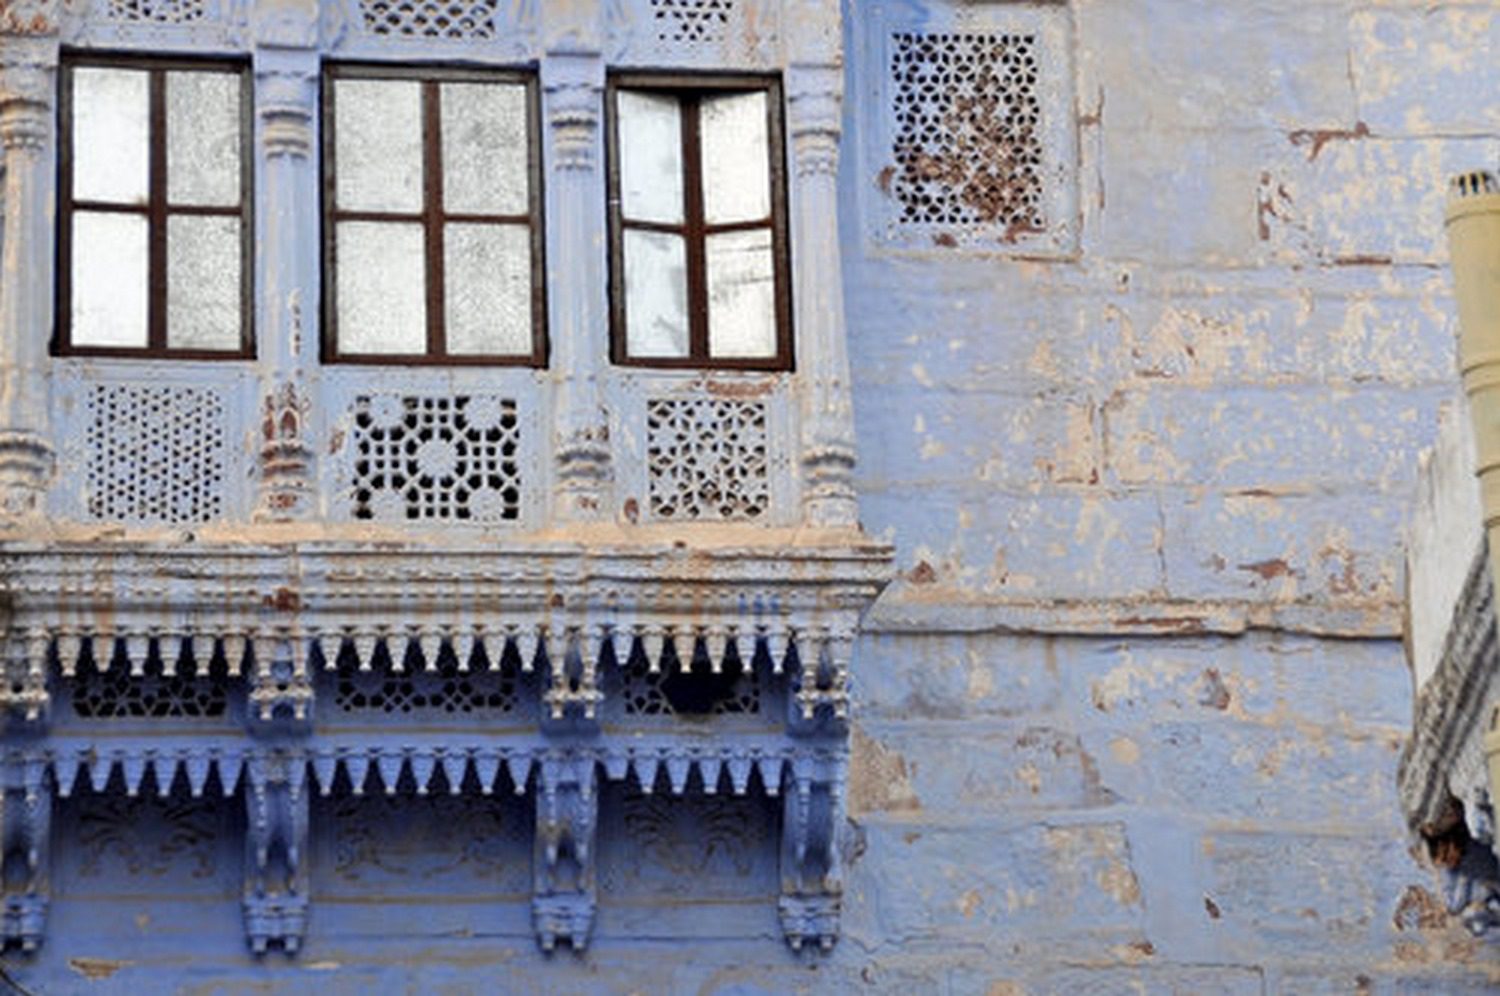
You could try to get even deeper with your theme and capture a specific emotion that you want your viewer to feel.
In Bali, perhaps you notice bright colors everywhere. You want your viewer to feel happy and energized. Seek out colorful flowers and outfits. Take photos of people moving and smiling.
In the Pacific Northwest for example, maybe you want to focus on the sheer size of the trees and mountains. You want your viewer to feel small while looking at your photos. Get a person in many of your shots to illustrate the perspective of the landscape. Keep the person the same size throughout the photos to make one series.
Tip: When you’re creating a photo series, try to shoot all photos in the same settings so they feel like they belong together.
22. Learn to shoot in manual mode
Play around with your settings and learn to shoot in manual mode. Read the manual. Really get to know your camera. Look up YouTube tutorials. Experiment with manual focus instead of simply pointing and shooting.
Knowing your camera inside and out and understanding manual mode will really improve your skills as a photographer immensely.
You can do a lot in automatic mode, but if you want to get better as a photographer, the only way to learn is by using manual settings. This will teach you about the actual process of how light enters your lens and captures an image, and you’ll come away with a deeper appreciation and understanding of photography. Plus, you’ll have a much wider range of skills when it comes to capturing photographs.
23. Change up your focus points
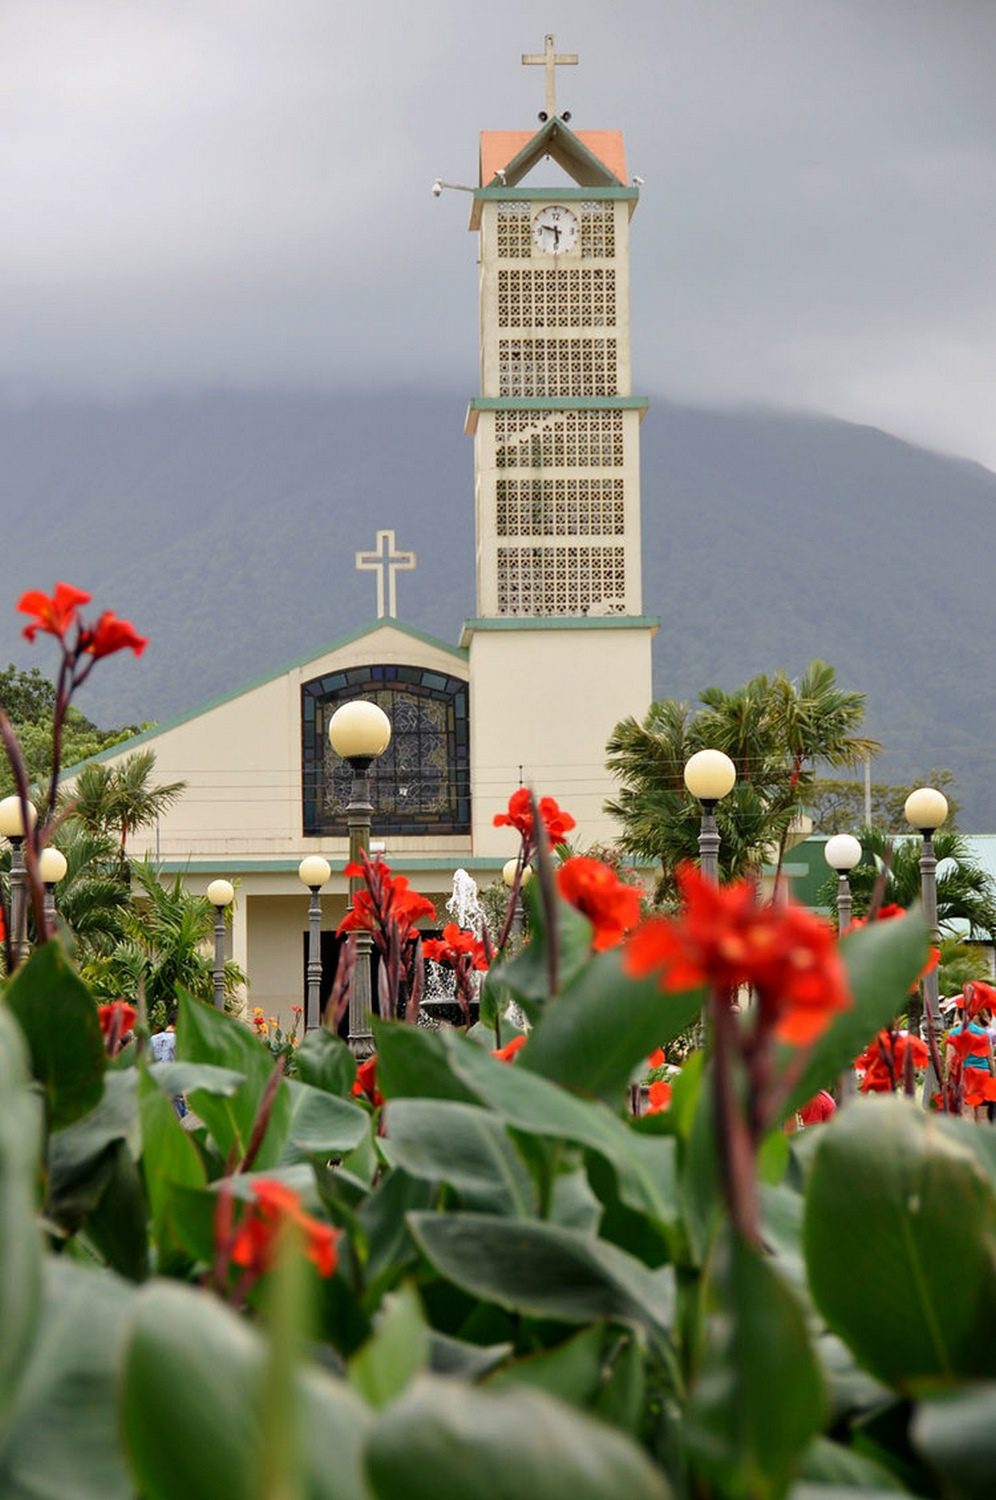
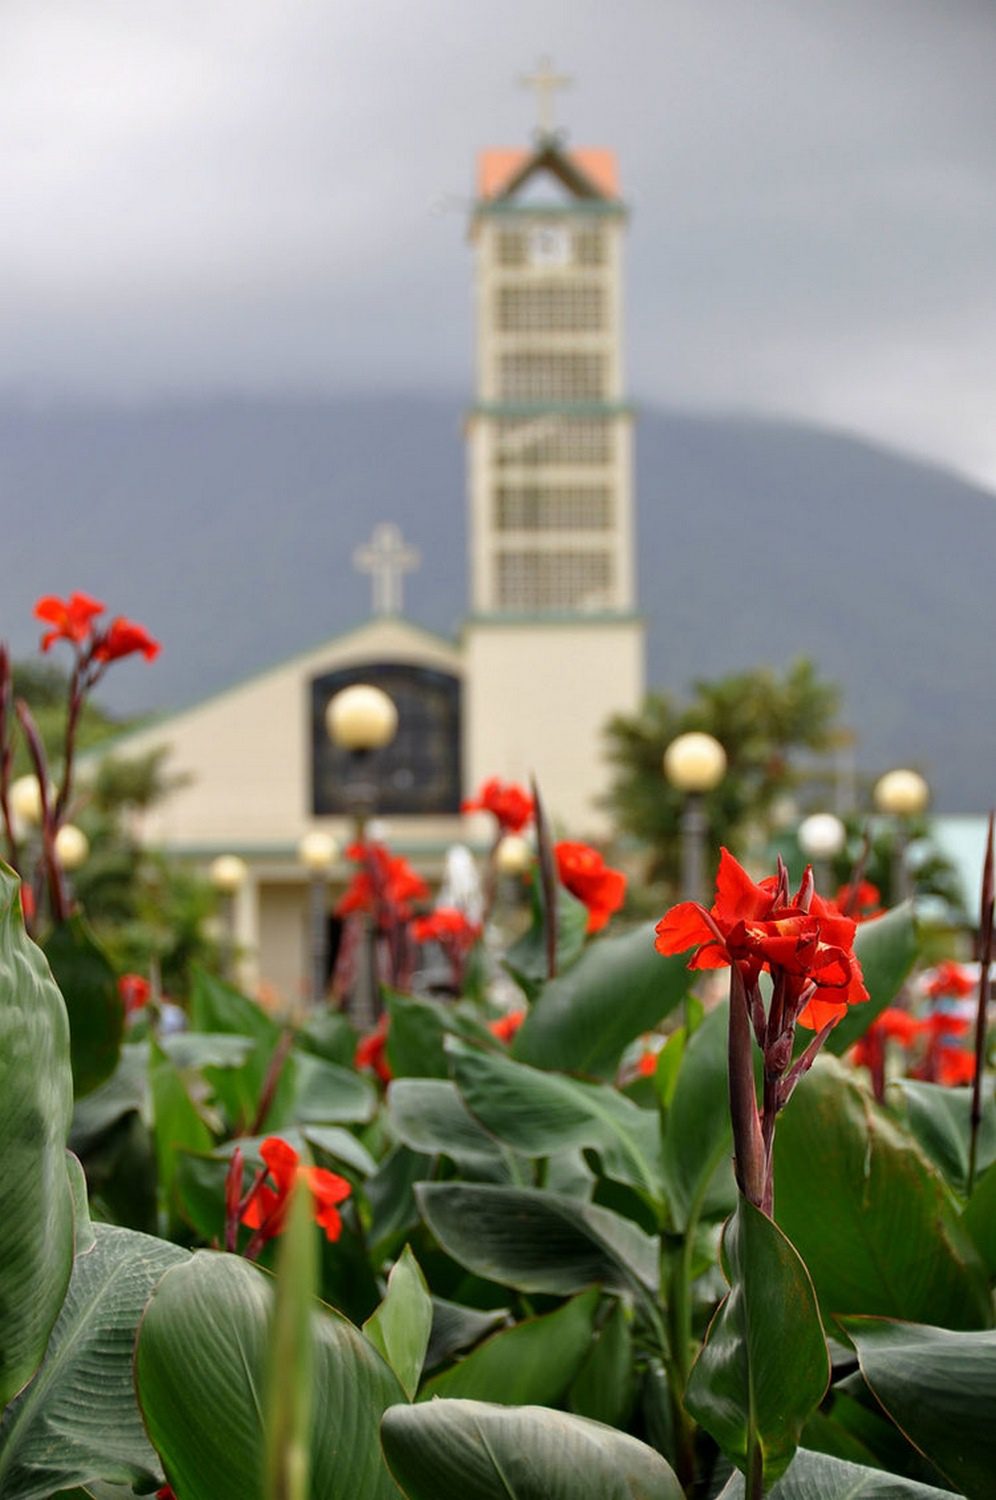
We all love photos where the subject is in focus and the background is blurred, right? Practice this technique by focusing on unexpected points, like a flower in front of a blurred church. Take another photo from the exact same spot with the flower blurred and the church in focus, as shown above. Sometimes the unexpected focal points can make the most interesting photos.
24. Understand white balance
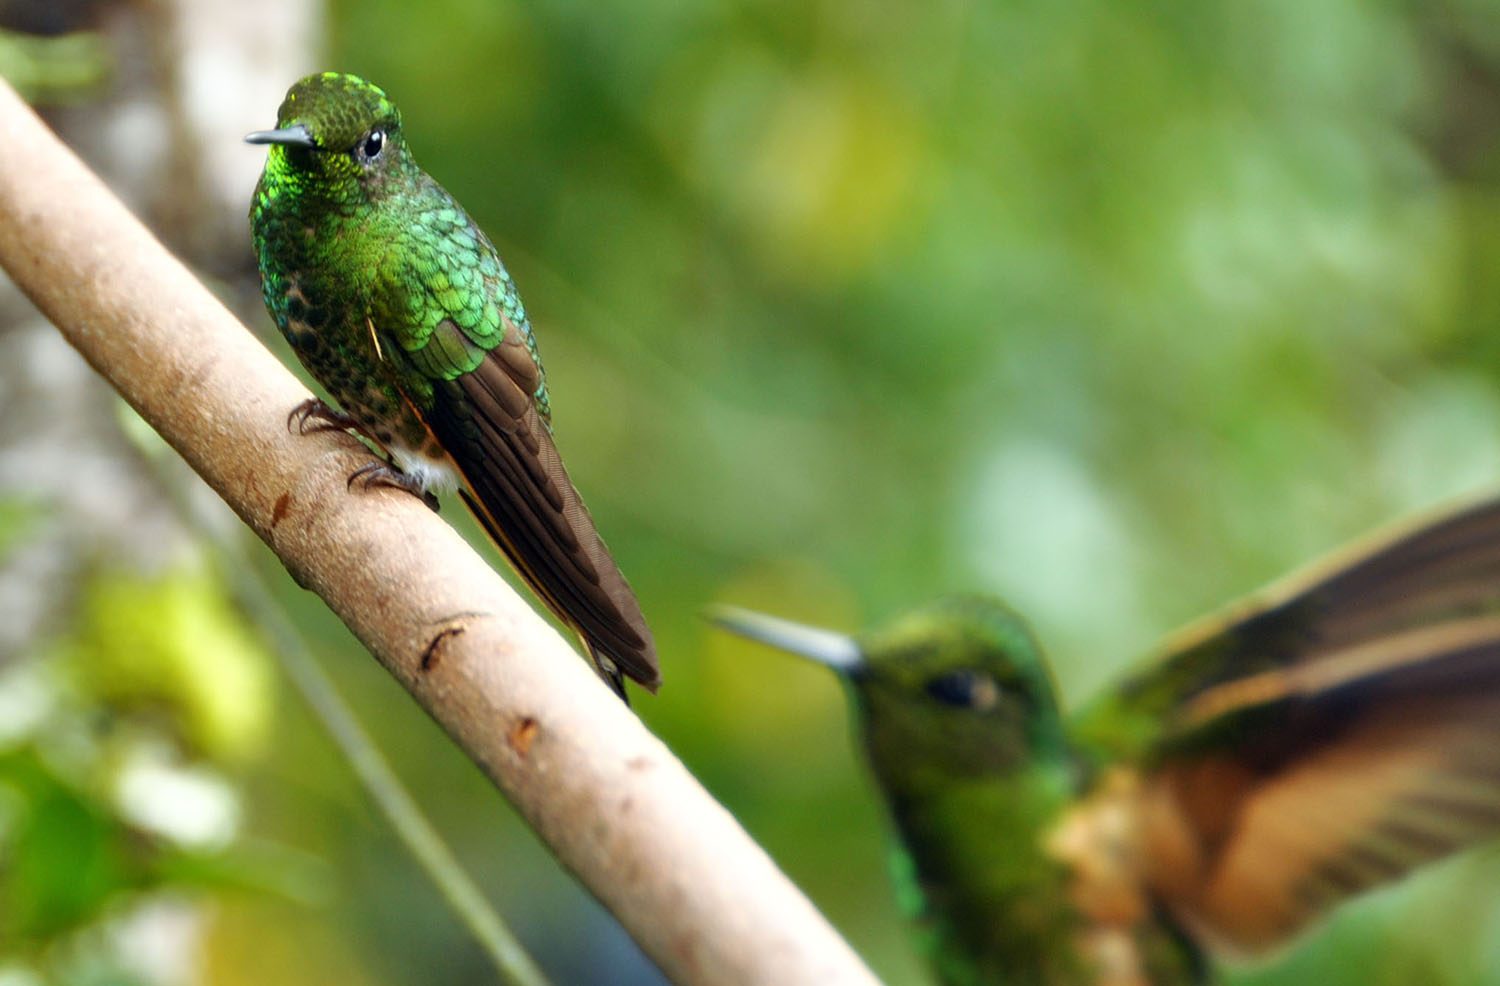
Have you ever taken a photo and the colors just look off? What’s most likely happening is the color temperature is affecting your picture. I’ll try to put it a bit more simply: Some lighting is warm, like a candle. Other lighting is cool, like heavily overcast sky. Our brains actually compensate for the light temperature and even it out, but a camera isn’t as smart as our brains and that’s why the photo may look different than what you see in real life.
This is where white balance comes in.
I typically have my white balance set on auto, but when I’m in a setting where my colors look funny, I turn my white balance off auto and adjust it so the photographs come out looking like what my eyes are seeing. (I find this happens to me most often when I’m shooting in a dense forest, like in the shot of hummingbirds above.)
This article is very helpful in explaining white balance further in depth.
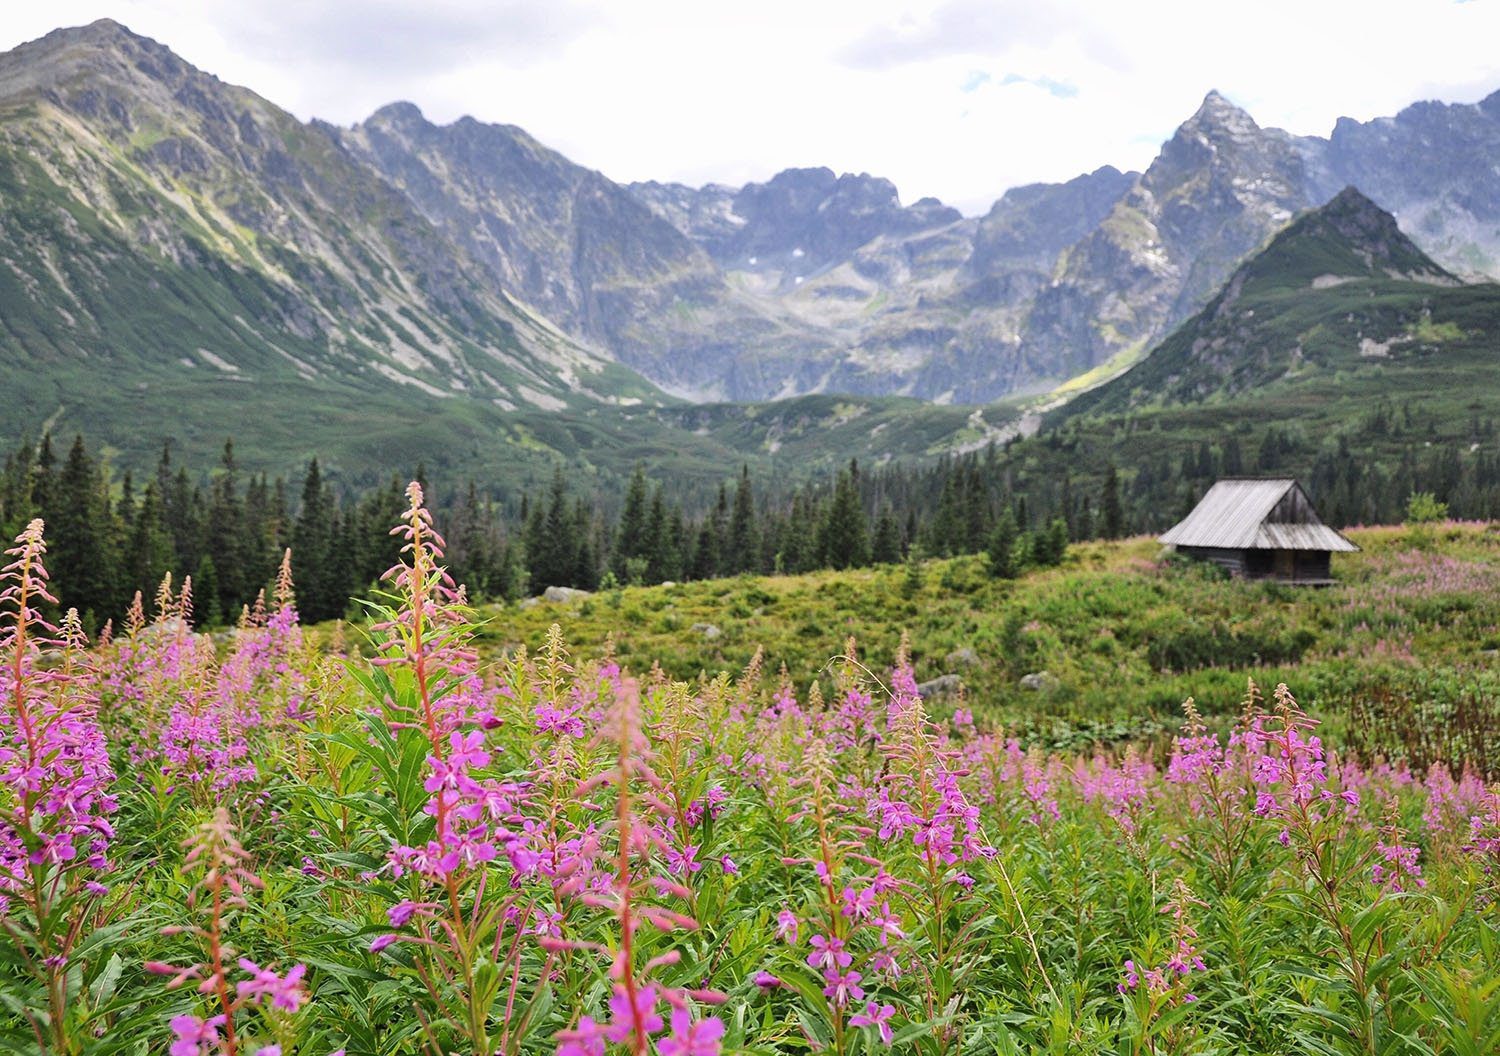
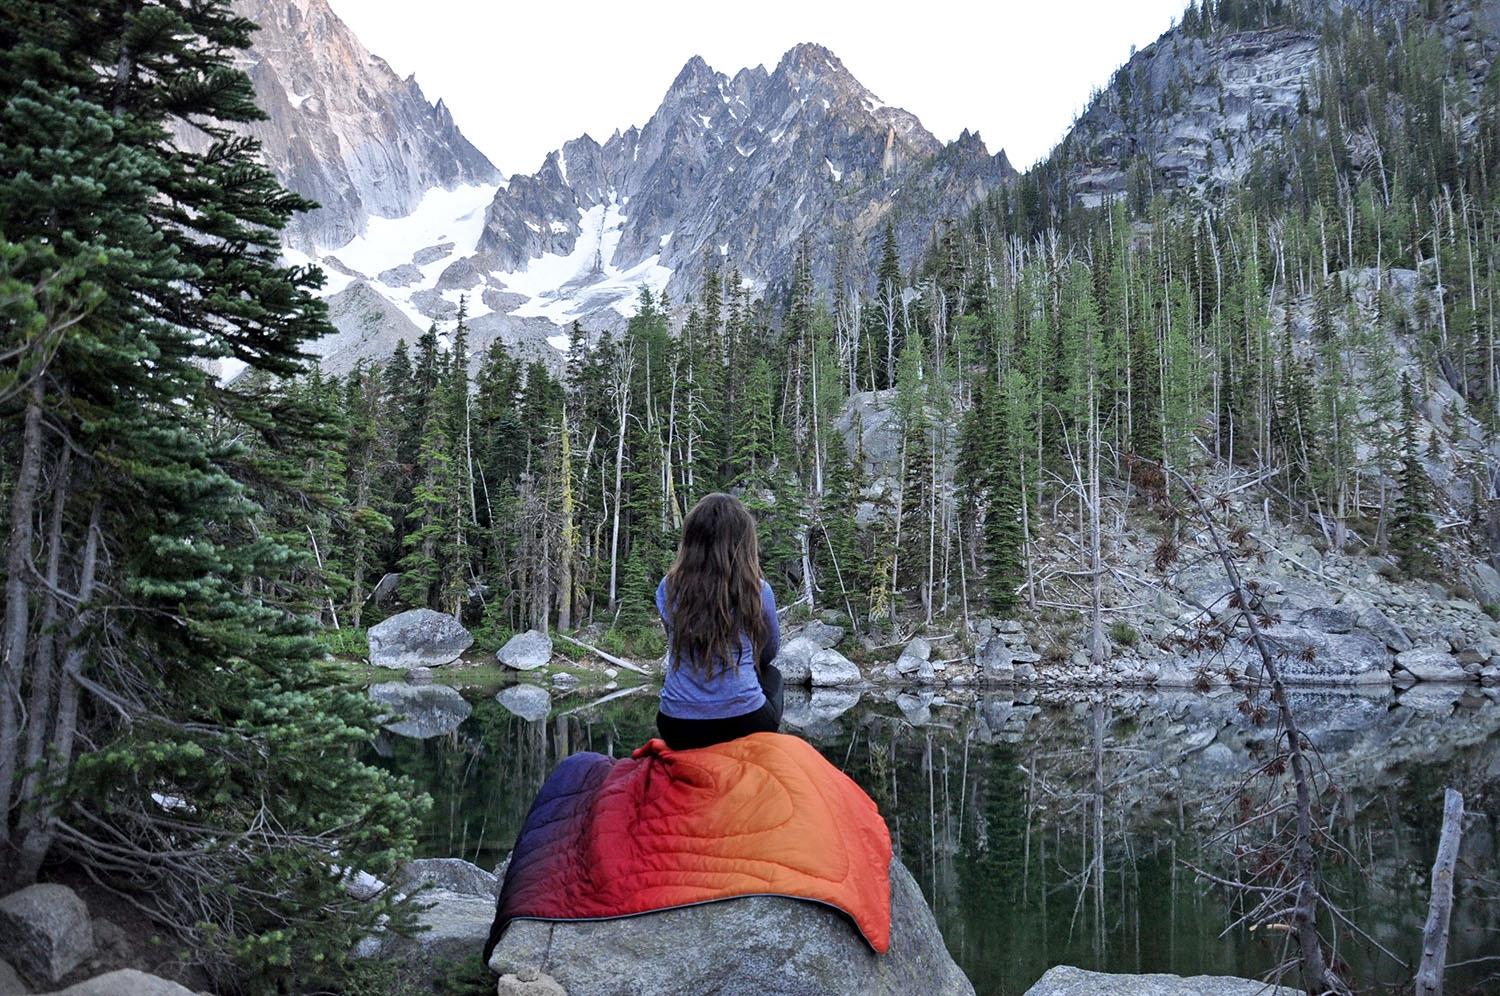
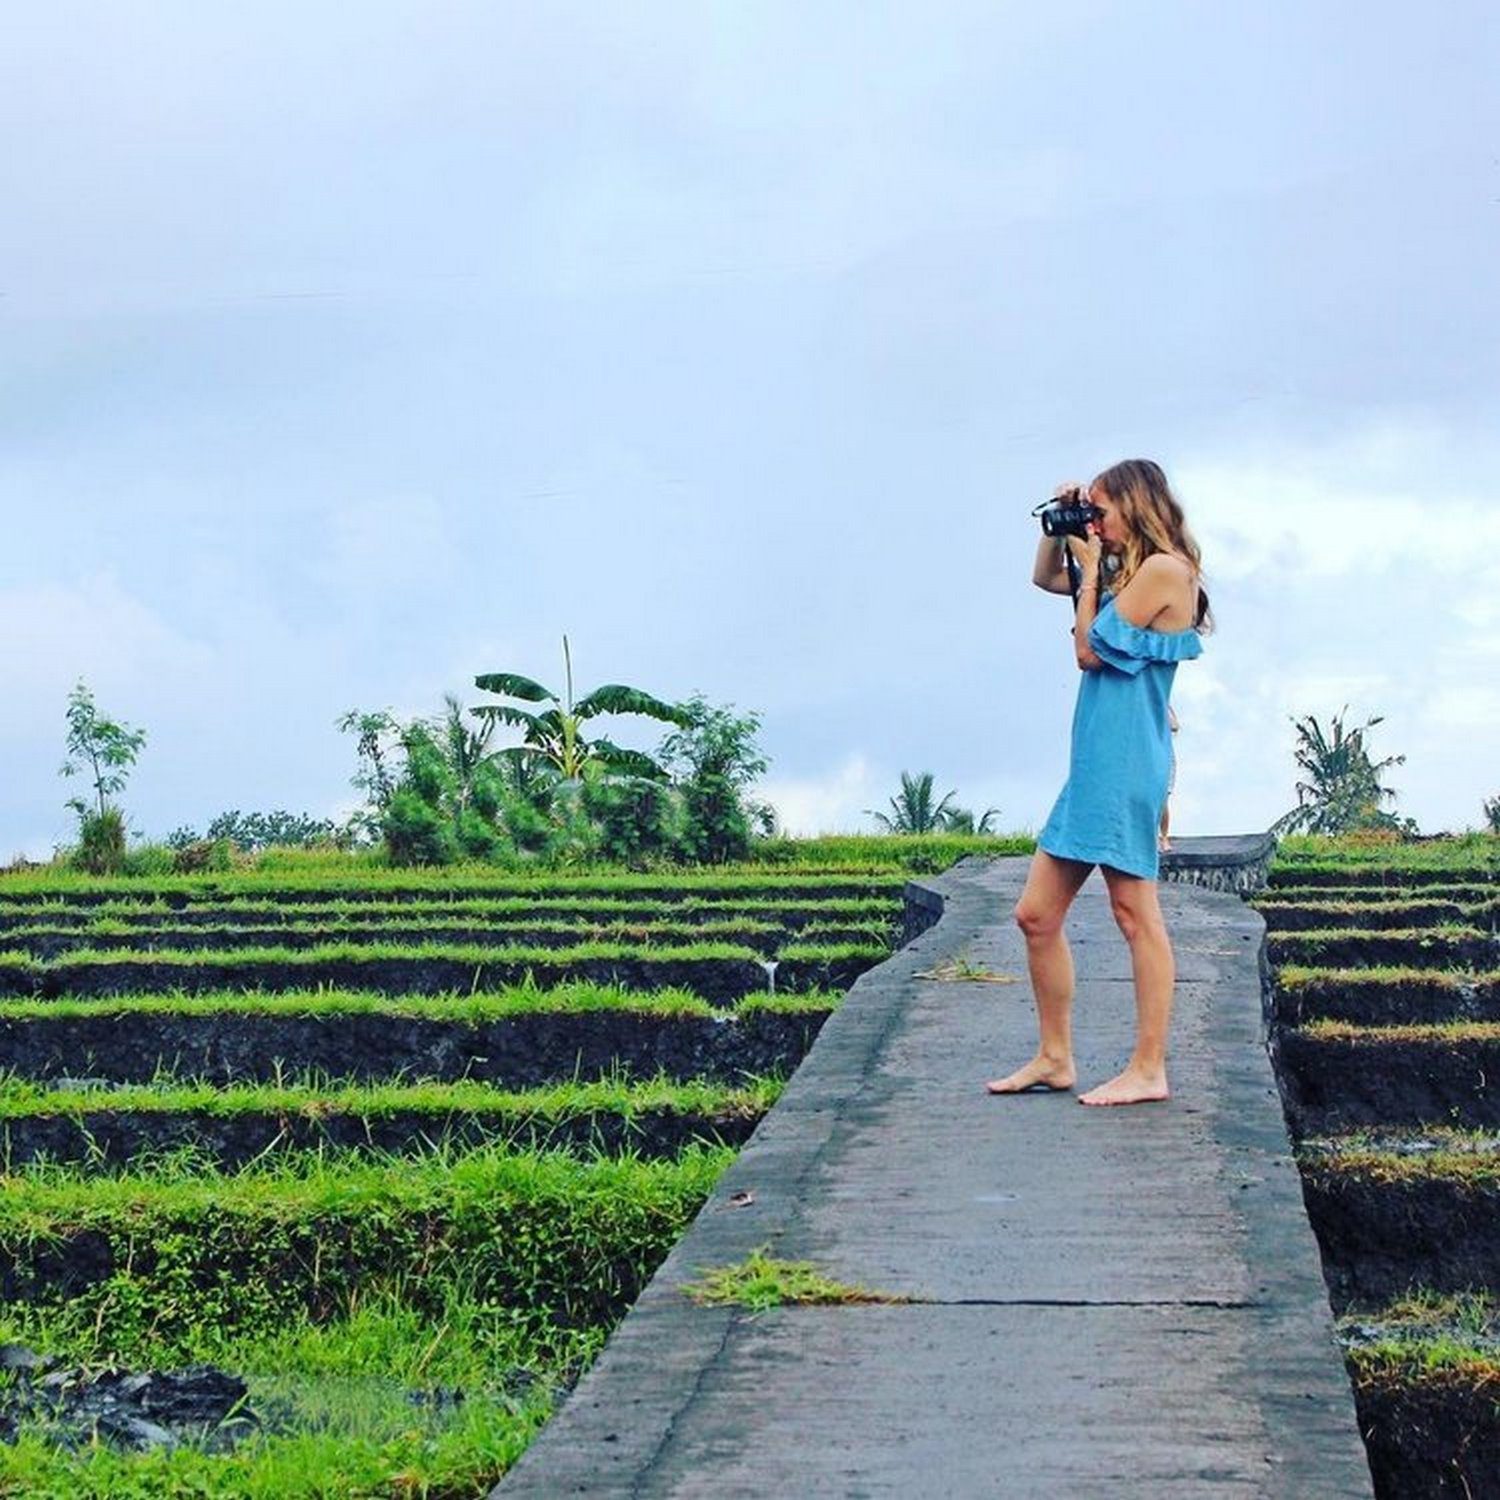
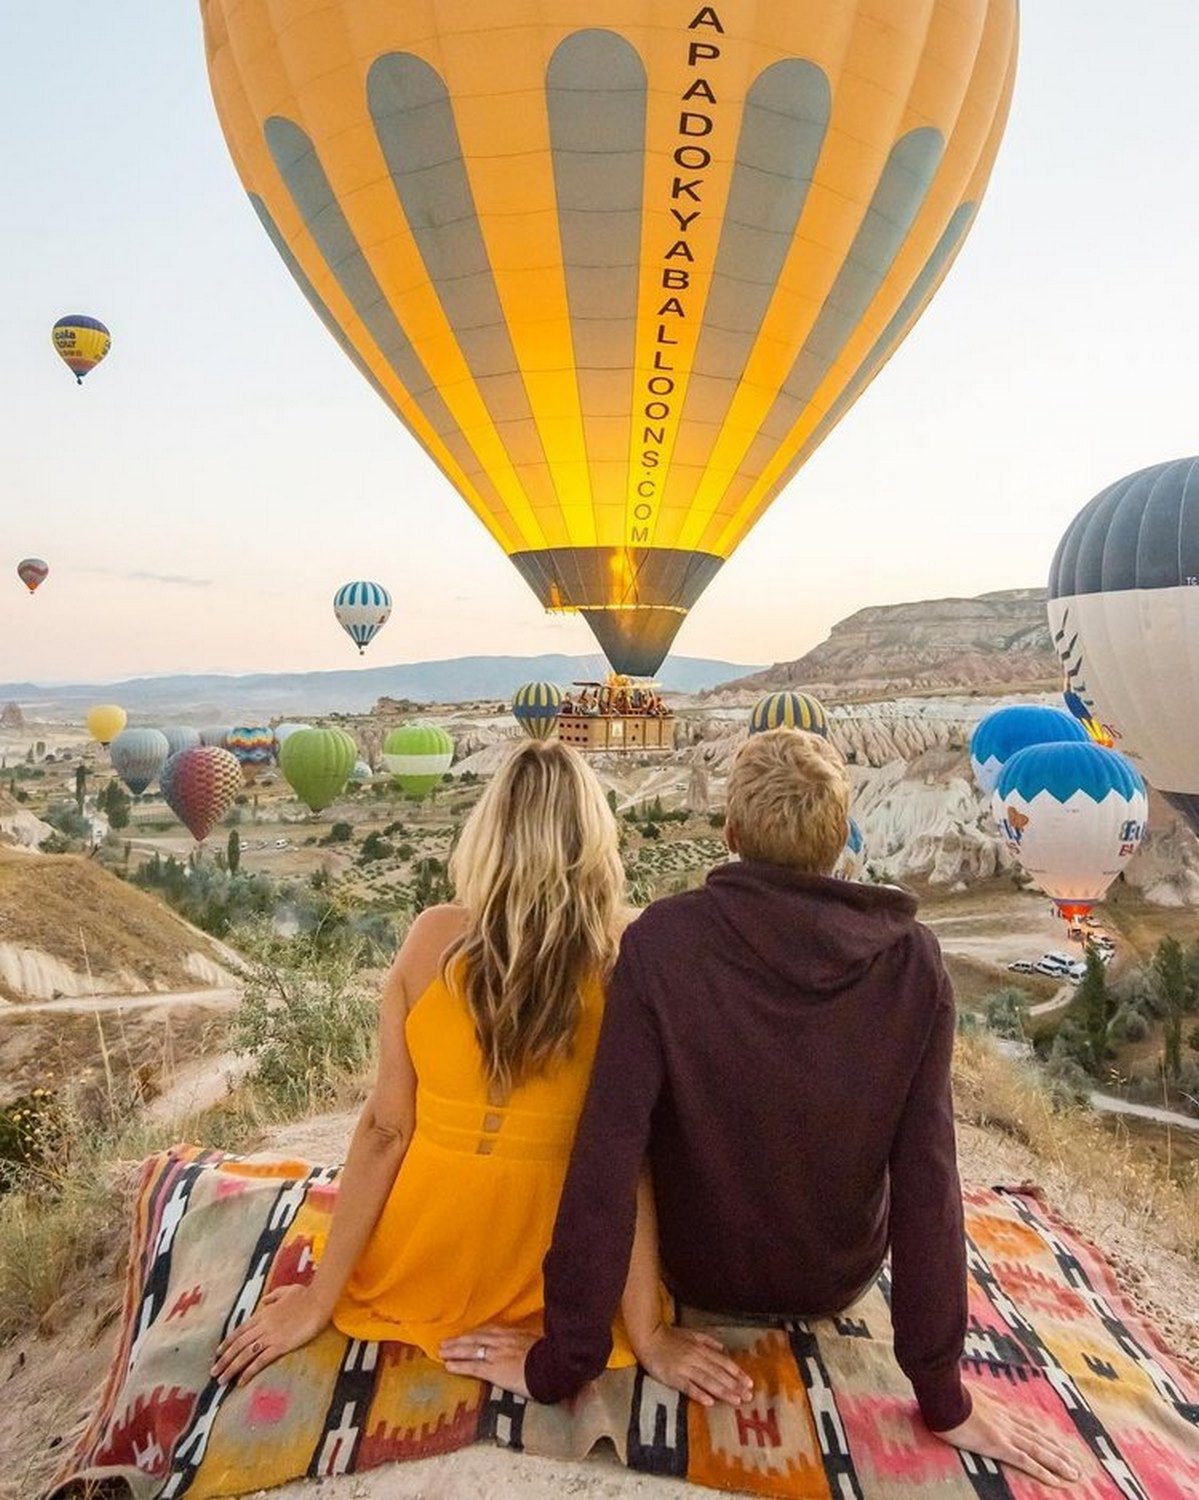
25. Use a prop
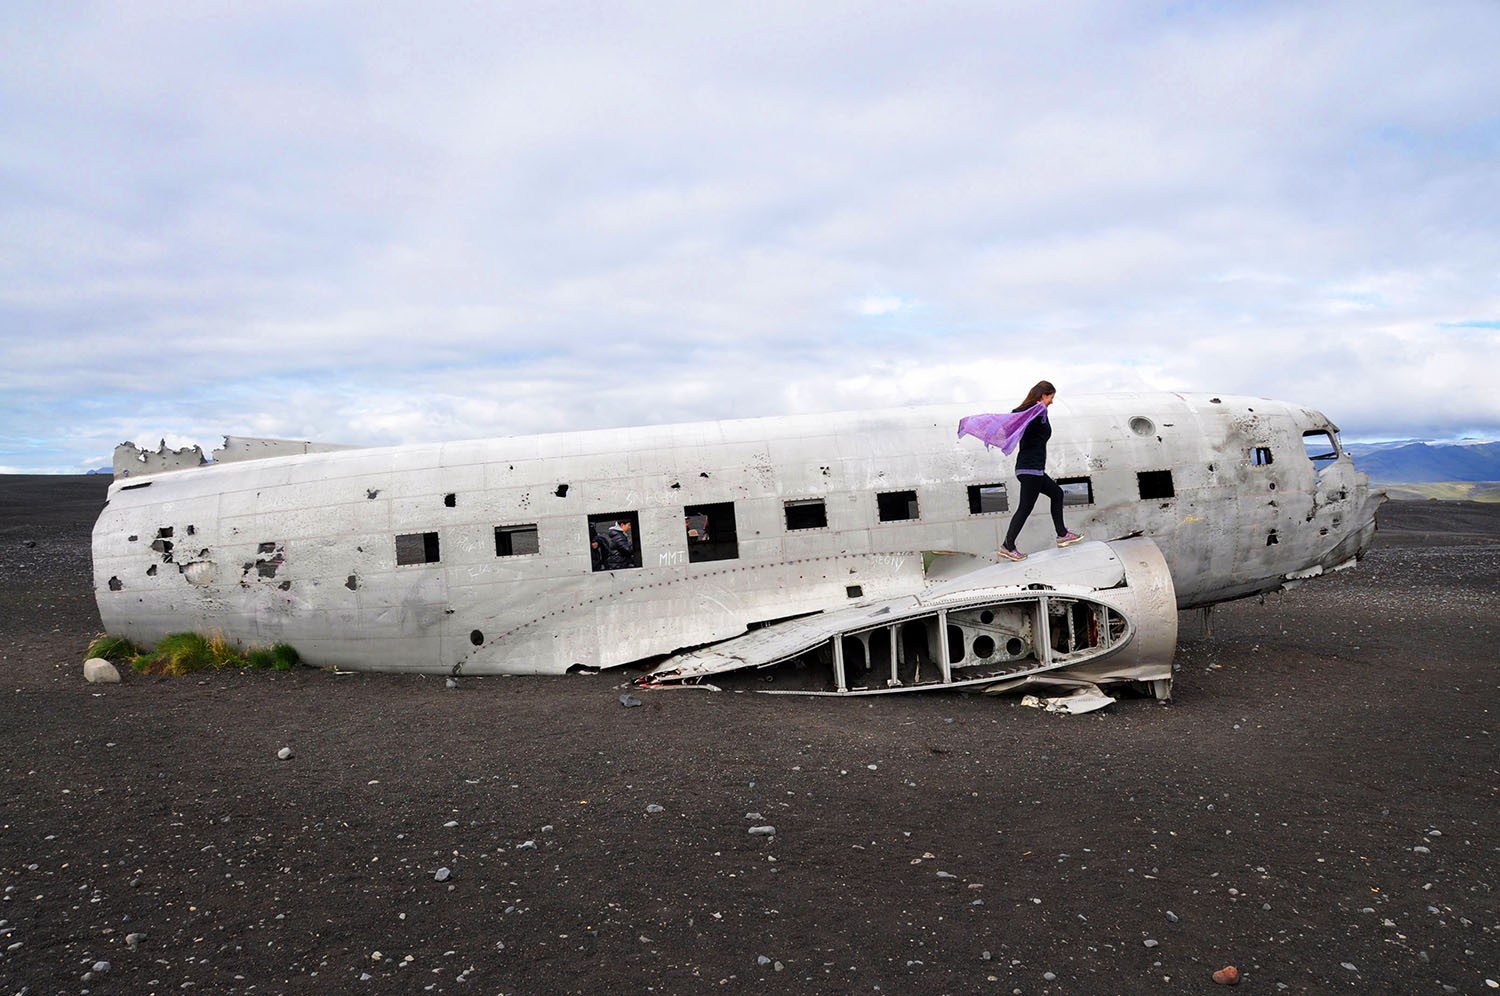
I’m not suggesting carrying around a bag of props for photos (unless you really want to). But you can bring a little color and interest into an otherwise drab landscape with a brightly colored scarf or a patterned blanket. You’re probably carrying them anyway, so try adding them into a shot or two.
26. Shoot in high quality
You might typically take photos in normal quality, but if you travel to a destination with an epic viewpoint, you may want to reconsider the quality in which you’re shooting.
If you ever intend to enlarge a photo of, say, an epic waterfall in Iceland, you’ll want to adjust your image size and quality from your normal settings. And if you’re a more experienced photographer, you may even want to consider shooting in RAW so you have the highest editing capabilities.
Know that shooting higher quality photos will mean you’ll have more editing capabilities, but it will also take up more space on your memory card. Be sure to pack extra memory cards so you don’t have to worry about running out of space.
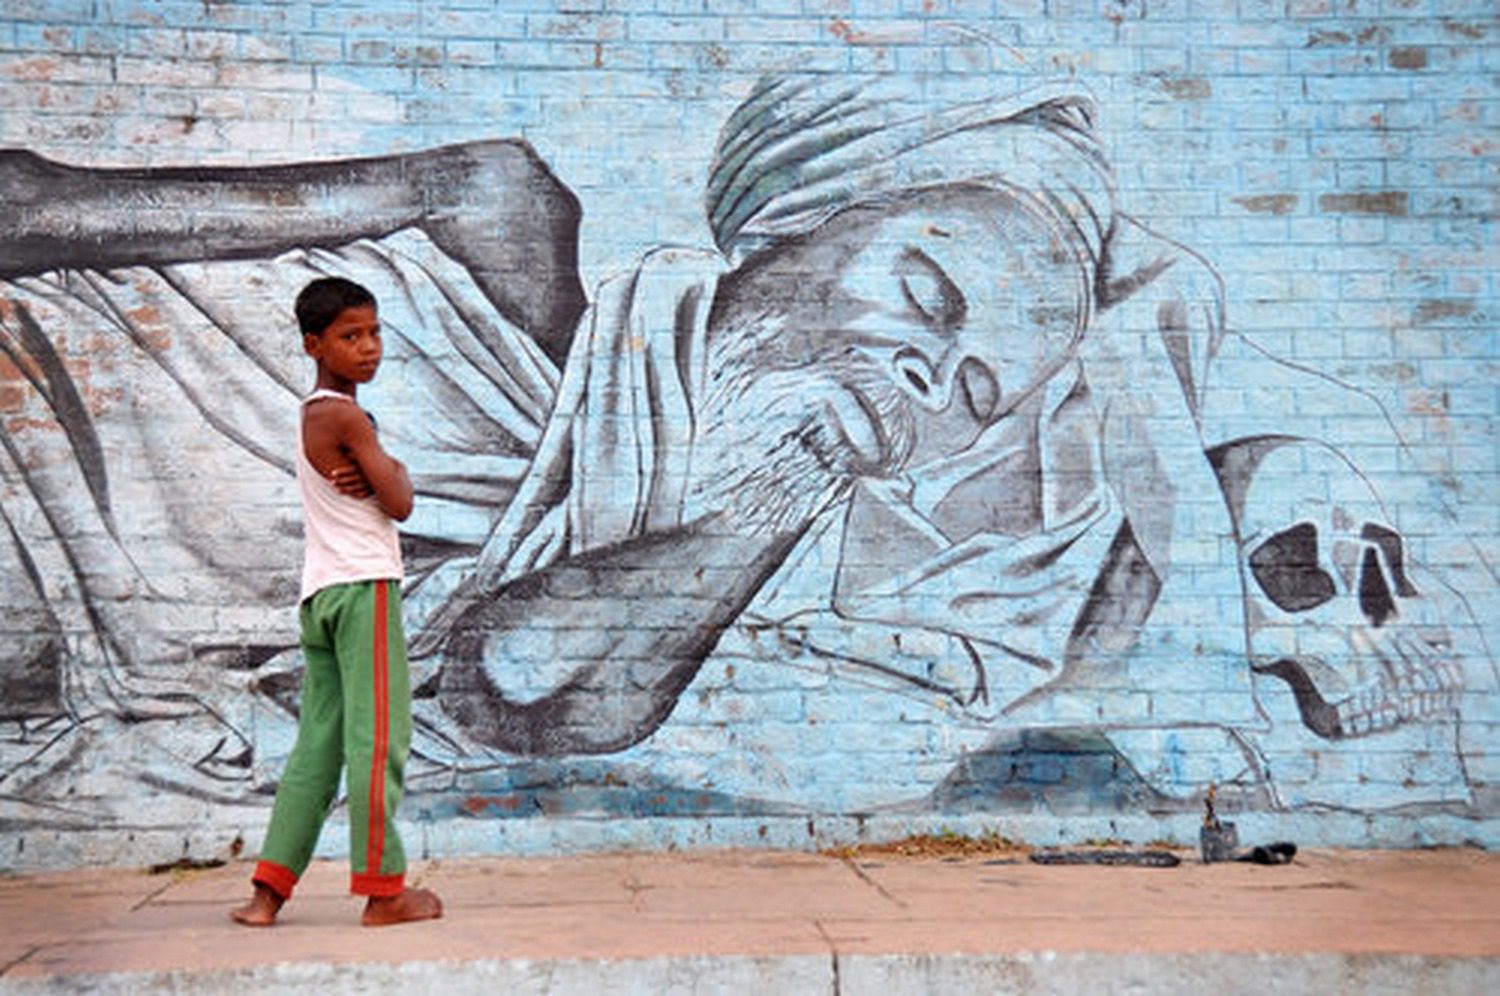
27. Change the way you look at the world
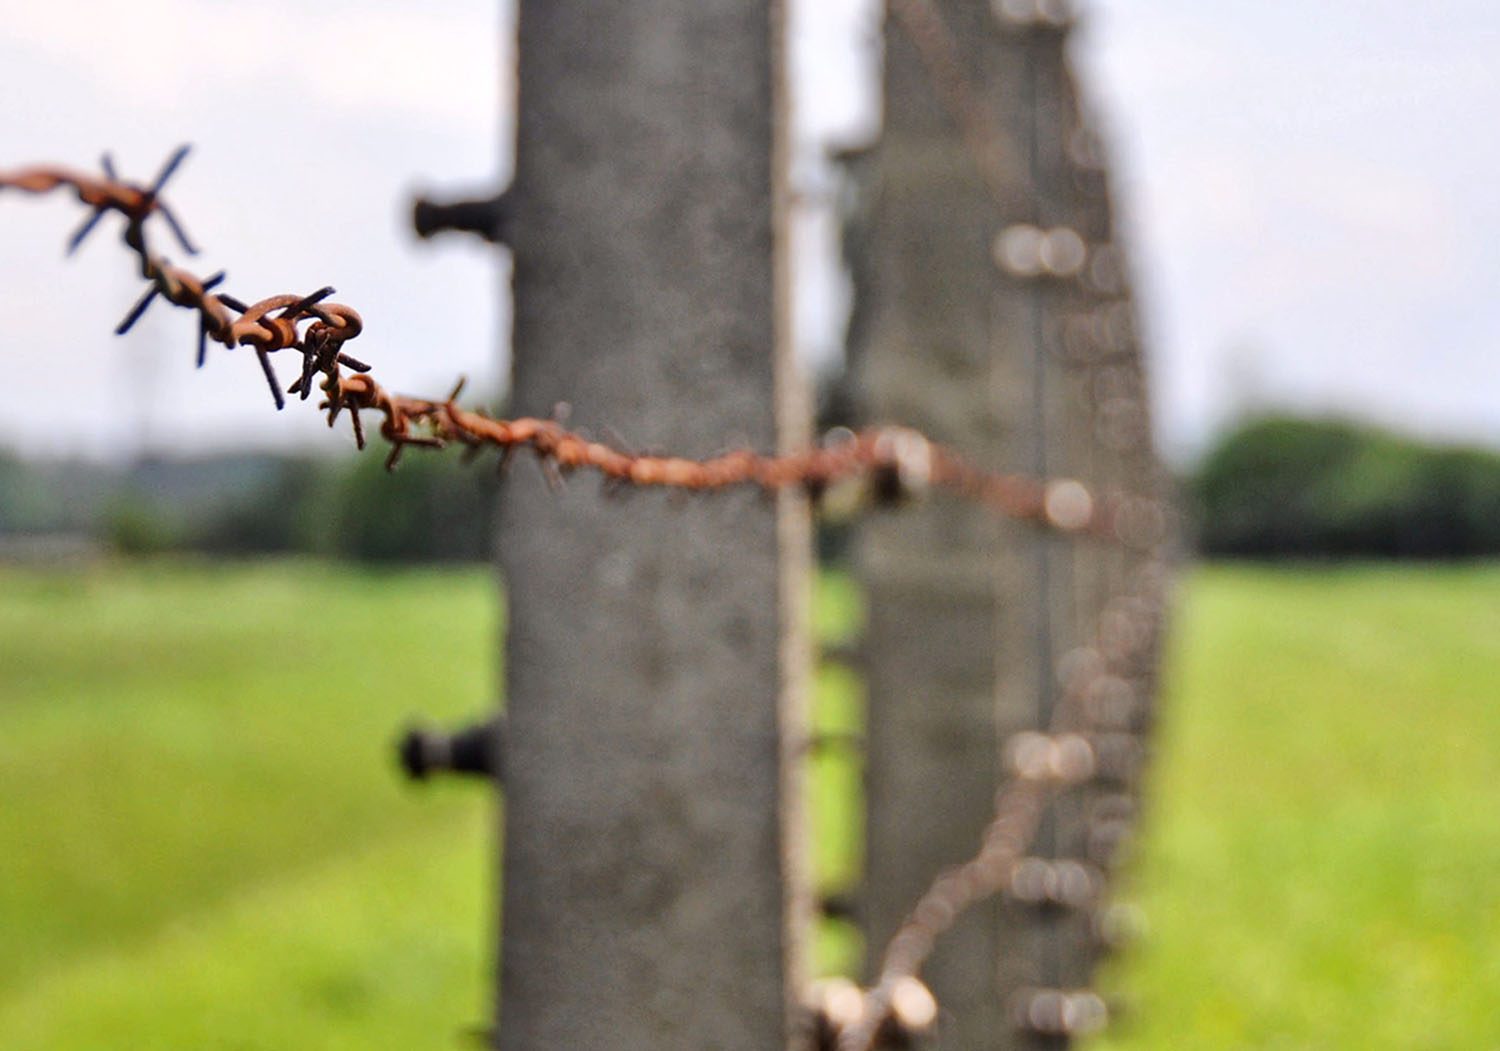
There is beauty all around you, whether it’s flashy or not. Sometimes it’s easy to see, like on an idyllic white sand beach. But other times, beauty can be in the imperfect. The everyday.
When you start seeking out beauty in everything around you, you notice the reflection in puddles and the pattern in tiles. You notice the texture of tree bark and how a small hole in a fence makes a super unique shape. You’ll start to love graffiti and walls covered in interesting vines.
You’ll start seeing beauty in even unexpected places. Capture it.
28. Don’t overthink it
This might sound contradictory after just piling up a list of tips and things to think about when taking photos. But the thing is, even if you’re a pro, you can’t do all of these things each time you snap a picture.
And sometimes you only have a moment or two to capture a shot. Go for it. Spontaneity is beautiful. If you have time, look at your picture and think about how you could make it better and snap another.
Don’t get in your head too much. This list of tips is more or less meant to inspire you and help you think more creatively about photography.
29. Bring your camera everywhere (within reason)
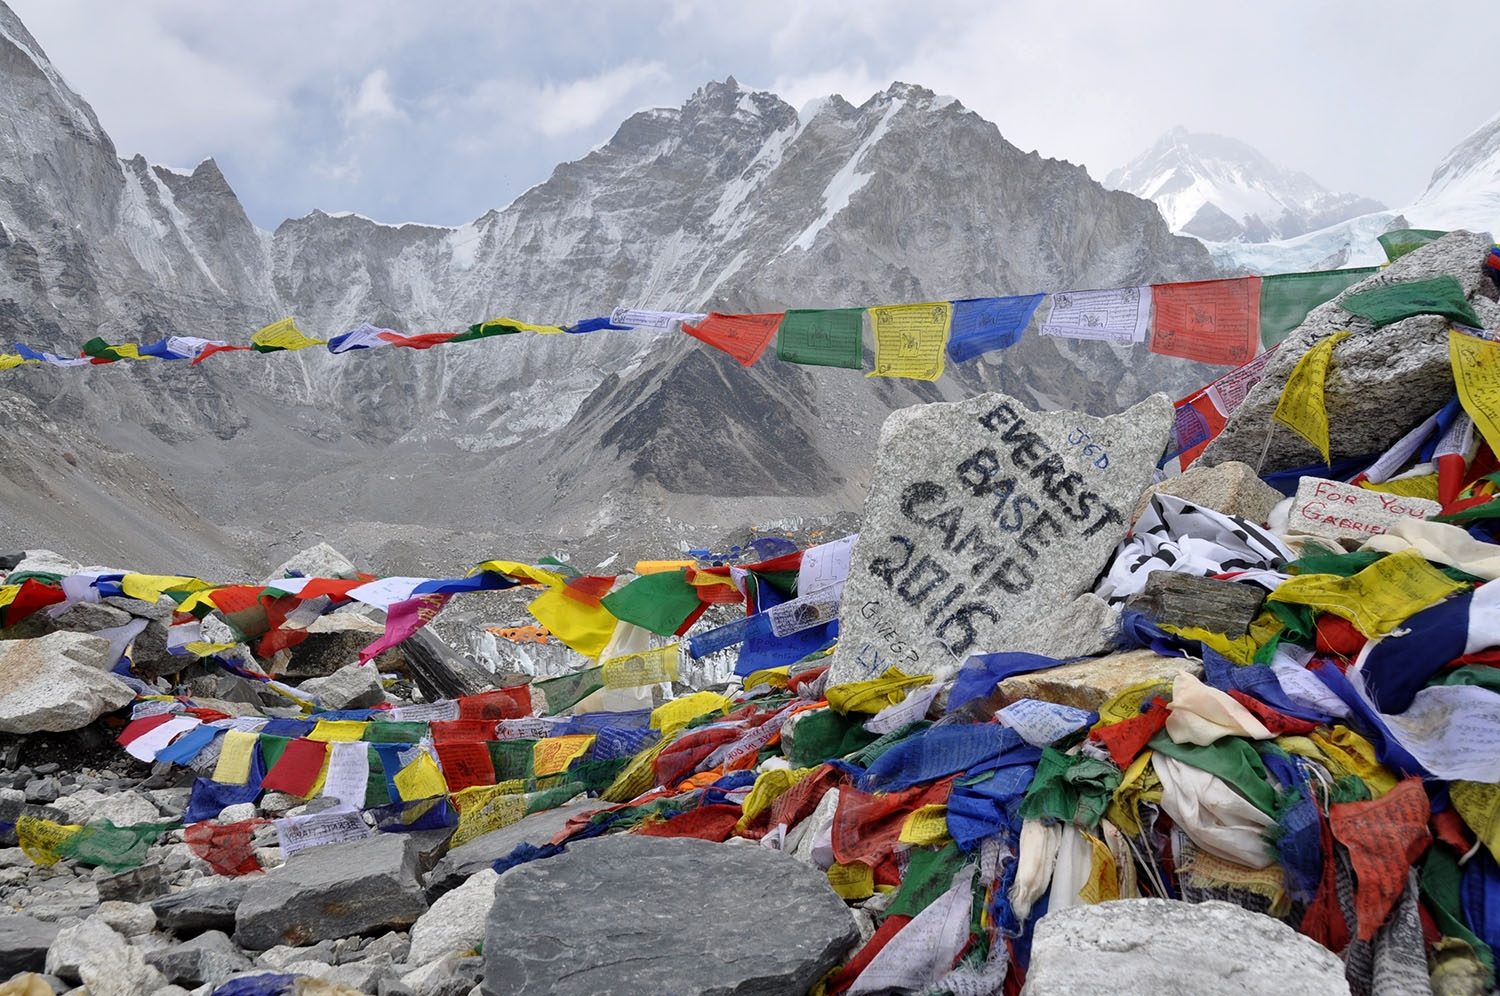
This may sound obvious, but you won’t get pictures if you leave your camera in your hotel room. I used to be so nervous about ruining my camera or getting it stolen, that I often left it behind when I went hiking or anywhere that made me even a bit nervous. I wound up with crappy pictures from my phone and my DSLR sat mostly unused.
I finally realized that it didn’t make sense for me to own a camera if I wasn’t going to bring it with me. I decided I would take it off the pedestal I had once placed it on and I have since brought it EVERYWHERE. I even trekked it to Everest Base Camp. And I am so glad I didn’t leave it behind.
My advice would be to get a camera that you feel comfortable bringing with everywhere. This means that if you don’t want to carry extra weight, get a smaller camera. If you’d be devastated if an expensive camera got stolen or damaged, choose one that you could manage parting with.
It doesn’t matter what camera experts recommend if you’re not going to feel comfortable bringing it along on your travels. Get a camera that makes sense for you.
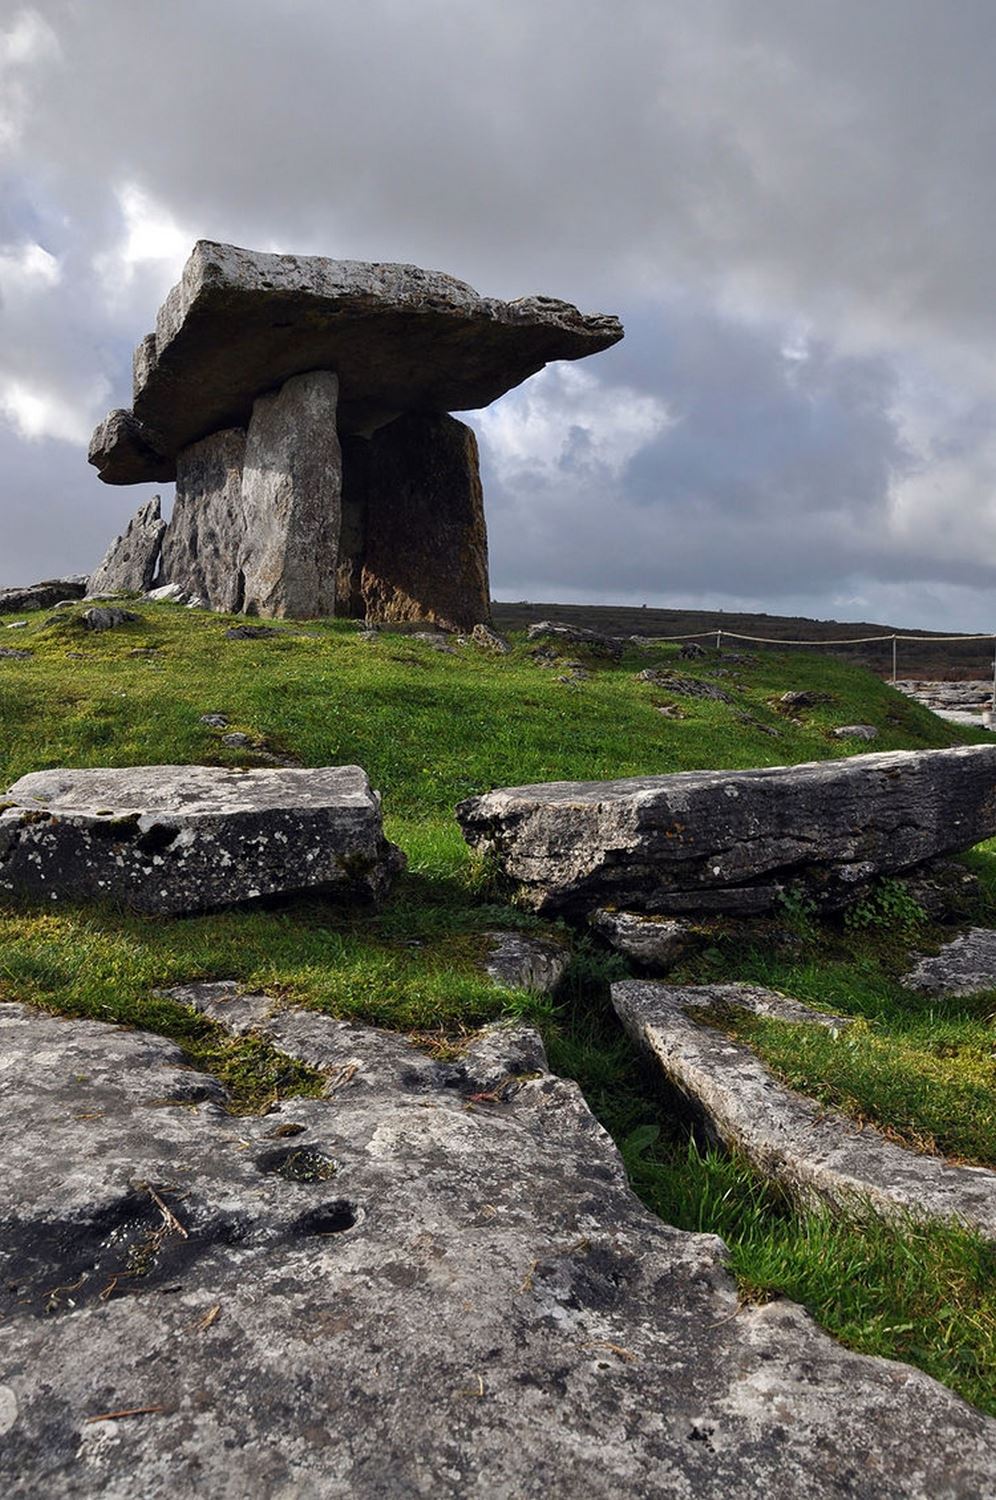
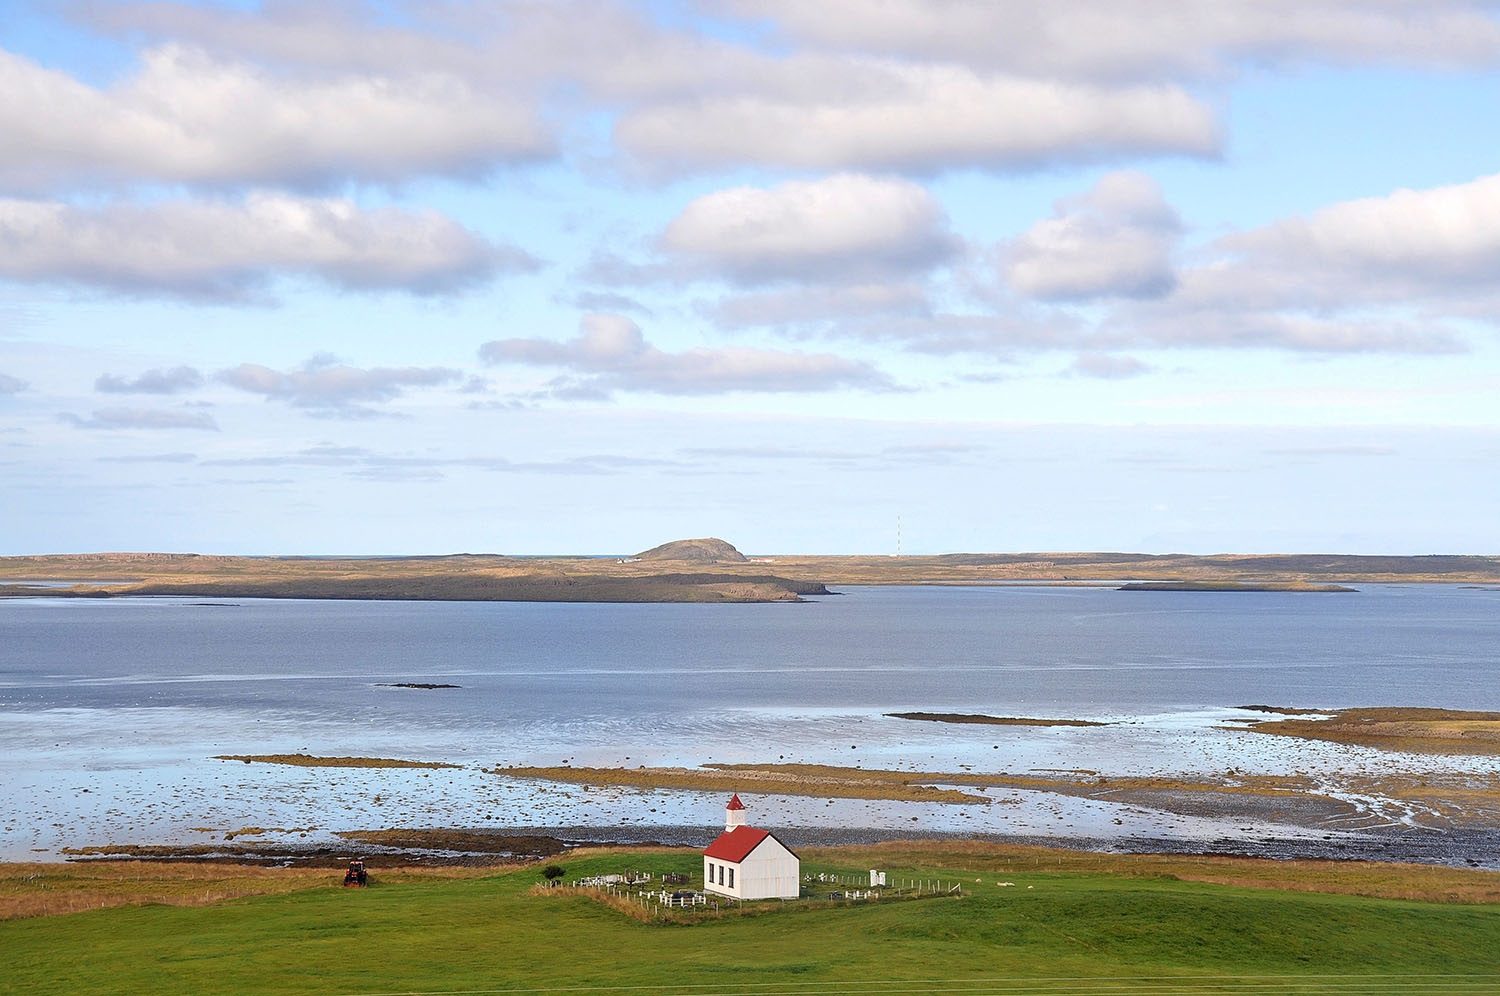
30. Have your photography equipment ready in a “go-bag”

Being prepared is essential to getting the perfect shot on your travels. (For those times that you stumble upon an epic church like this one!)
I’m notoriously bad at leaving equipment behind. There have been many times that I have forgotten a back-up battery and my camera has died right as I reach an epic spot. And I have left behind my tripod or lenses that would have made an alright shot absolutely epic. I’m really trying to get in the habit of carrying it all with me.
You don’t need to have a massive camera bag with all equipment that you own. But make sure you have extra memory cards, back-up batteries, cleaning cloths and a tripod in one easy-to-grab bag so you’re not caught in an epic moment without them. Check out The Broke Backpacker’s article on his picks for the best camera bags for travelers.
31. Play around with editing software
Hey, you photo pro! If you’re looking to really up the ante and create a portfolio from your travels, it’s a good idea to familiarize yourself with editing software. You can make colors pop and really give all your travel photos a bit of your signature style.
I prefer to use editing software to slightly enhance colors and to lighten up dark photos, but I don’t like doing very heavy, noticeable edits. That’s my style, you’ll find your own.
We use Photoshop and Lightroom, which you can rent for $13 per month. If you’re super serious, there’s really no competition. These products are the best.
But if you’re just starting out or simply want to edit your travel photos for fun, there are free versions of editing software that should have all the capabilities you need. Try using Canva or Gimp.
32. Back it up, baby!
There’s not much that would ruin a trip faster than losing all your photos.
I used to think, “I’ll just back my pictures up when I’m at home”. But I can tell you from experience that you may not have that luxury. Your memory card could get damaged, or your camera could be stolen. You might even accidentally delete your SD card and find yourself having to figure out how to recover your deleted photos (been there and trust me, it’s not fun!).
I’m not trying to scare you, but I do want you to be prepared. Backing your photos up virtually while on your trip is the smartest way to ensure they stay safe. That way no matter what happens, your memories are safe in the cloud! That peace of mind is invaluable. Or I guess it technically costs about $99 per year for unlimited photo storage if you subscribe on Amazon, like we do. (Google and Apple have their own versions too.)
On a similar note, we always make sure we have travel insurance so that we’re covered in case our camera is stolen. Read up on what to look for in travel insurance here.

Travel Photography FAQs
What is my photography background?
Photography has always been a huge part of my life. My dad was in the photography business, so I grew up with cameras. I took photography classes in high school and college (I miss darkrooms tremendously!) and have toted my beloved camera with me on my travels all around the world.
I’ve done some portrait photography and even worked in product photography, but my favorite type of photos to take are while traveling. All that said, I’m still constantly learning and trying to improve.
Documenting what I see on my travels is like a journal to me. My photographs are my most precious travel souvenirs, and I get so much joy when I look back on them and share these memories with others.
What’s the best camera for travel photography?
Some photographers out there will swear by one brand and say that’s the only way to go. But to be honest, I think the most important thing when choosing a camera is that it’s the right fit for you.
Choose a camera that is:
- the right price point for your budget (a good camera does not need to be expensive)
- has the capabilities you want to grow, but not more than you need
- is a size you are comfortable carrying with you (see tip #29)
Check out this list of the best cameras for bloggers to get some more specific ideas on which models to look at.
Which is better: Nikon or Canon?
Ahh, the great debate… Both Nikon and Canon are great brands, and have similar capabilities and quality.
I think it’s best to be loyal to one brand so you can continue using the same lenses even when you get a new camera body. Plus, Nikons and Canons are set up differently, so when you get used to one it’s best to continue with that brand because you know how it works.
I personally shoot with a Nikon DSLR and I love it, and I have a Canon Powershot G7X and love that one too!
Note: Nikon and Canon aren’t the only good brands out there, but those are the brands I am going to focus on for camera recommendations.
For the novice photographer
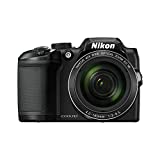
If you are new to photography and don’t want to worry about changing lenses, the Nikon COOLPIX B500 Digital Camera ($257) is a great choice! The lens is not interchangeable, but it is lightweight, has an easy learning curve and takes great photos. Perfect for the beginner.
For the intermediate photographer
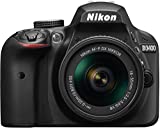
If you are an intermediate photographer and want to develop your skills, you’ll want to get a model that allows you experiment with different lenses. The Nikon D3400 camera ($497) is a good place to start and has enough capabilities to allow you to grow your skills. The Canon EOS REBEL T7i ($749) is the comparable Canon version.
For the serious travel photographer
The Nikon D7500 is on the more expensive end, at $1,547 for the camera body only (lens is not included). But the reviews of this model are fantastic. It takes high quality pictures and has many capabilities for a more serious photographer.
For the professional photographer
These are some of the higher end cameras on the market. If you are a professional photographer or aspiring to become one, you may want to get something along the lines of these two models: Nikon D850 FX-format Digital SLR ($3,297) or a Canon EOS 5D Mark IV ($3,299). These are not for the novice.
If you want more information, this is a great comparison of the best DSLR cameras on the market right now.
Budget Tip: Consider buying a used camera if you are on a tight budget, then get a new lens if needed. Sometime people really want to upgrade even though their camera is in great condition.
What is the best camera lens for travel?
A good lens will really take your camera game to the next level. Even the best photographer won’t get great shots with a low-quality lens.
Tip: If you were to choose to invest your money in a high-end lens OR a top-notch body, the lens should be where you budget more.
It is fun playing around with different lenses, and you can get really interesting effects with wide angle lenses and macro lenses. But when you’re traveling, you likely don’t want to carrying around a whole bag of different lenses. (If you do, good for you! I just don’t love the extra weight and bulk.)
My go-to lens for traveling is an 18-200 mm lens. It is super versatile and allows me to get really close up as well as some great landscape shots. If you were to choose just one lens to bring on a trip, I would say this is the best one!
More Tips from Travel Photography Experts
Don’t just take it from us. We reached out to some of our favorite travel photography enthusiasts and asked them to share their #1 tip to give you better travel photos. Here’s what they had to say…
Jeven & Rachel, travel vloggers and filmmakers
Tip #1: Enjoy the moment. Sometimes we forget to put down the camera. When you get somewhere amazing take it all in, grab some awesome photos then set aside the camera. We’ve traveled with other couples and have see their entire trips ruined because they are too focused on getting “the shot”.
Tip #2: Learn every inch of your camera. The internet is exploding with information. As a photographer you need to get past using the AUTO setting. Go through your cameras manual and learn what every button and every function does on your camera. Once you’ve mastered this then when you’re out shooting you won’t be fumbling around and miss a moment.
Check out their website Wanderworx & follow them on Instagram @wanderworx
Dave Anderson, globe-trotting photographer
“Invest in a quality travel tripod and set of ND Filters (Neutral Density). I’m a big fan of long exposure photography, and you’ll need to keep the camera as still as possible.
The ND Filter is essential to capture these shots during the day, because what they do is cut out how much light hits your sensor. If you’re near water, it flattens it out and really makes photos pop! It takes a bit of getting used to, but once you learn the basics it’s really addicting, Trust me!”
Check out Dave’s site, Jones Around the World, & on Instagram @jonesaroundtheworld
Mark & Mimm, travel bloggers & photographers

“Aside from the usual suspects of mastering composition, light, and the technical stuff our biggest tip would be to have patience with your photography.
Sometimes you’re so worried about ‘getting the shot’ that you start snapping away without really stopping to check your settings or think about the scene in front of you. When you do that, you tend to miss out on so many great photo opportunities because you haven’t taken the time to really absorb what’s around you.
There’s nothing worse than looking at your photos later and thinking, “if only I’d shot from this angle instead”! When you slow down, you’ll start to see all these small details and totally new ways of composing your shots.”
Check out their site, The Common Wanderer, & find their Instagram @thecommonwanderer
Amanda Pointer, travel blogger & photography enthusiast
“You don’t need expensive professional gear to take great photographs, but you do need to understand your camera. While I think it’s important to invest in a decent DSLR camera, you don’t need the top of the line model, especially not if you are a beginner.
Shop within your budget and take the time to learn and understand your camera and basic photography principals before you travel. You can find good cameras for under $500 if you shop older models or consider buying used.
“Enroll in a community ed. photography course or spend time watching YouTube videos to learn how to adjust the settings on your camera (don’t just rely on auto!) and then practice, practice, practice before you leave for your travels.”
Follow Amanda’s travel adventures on Instagram.
Val & Nick Wheatley, travel writers & photographers
“Learn a Little Color Theory: When considering the composition of a photo it helps to think about what colors will be present.
Certain colors combinations are more visually pleasing than others. The colors that are opposite each other on the color wheel are considered ‘complimentary colors’. A few examples would be red and green, blue and orange, or purple and yellow.
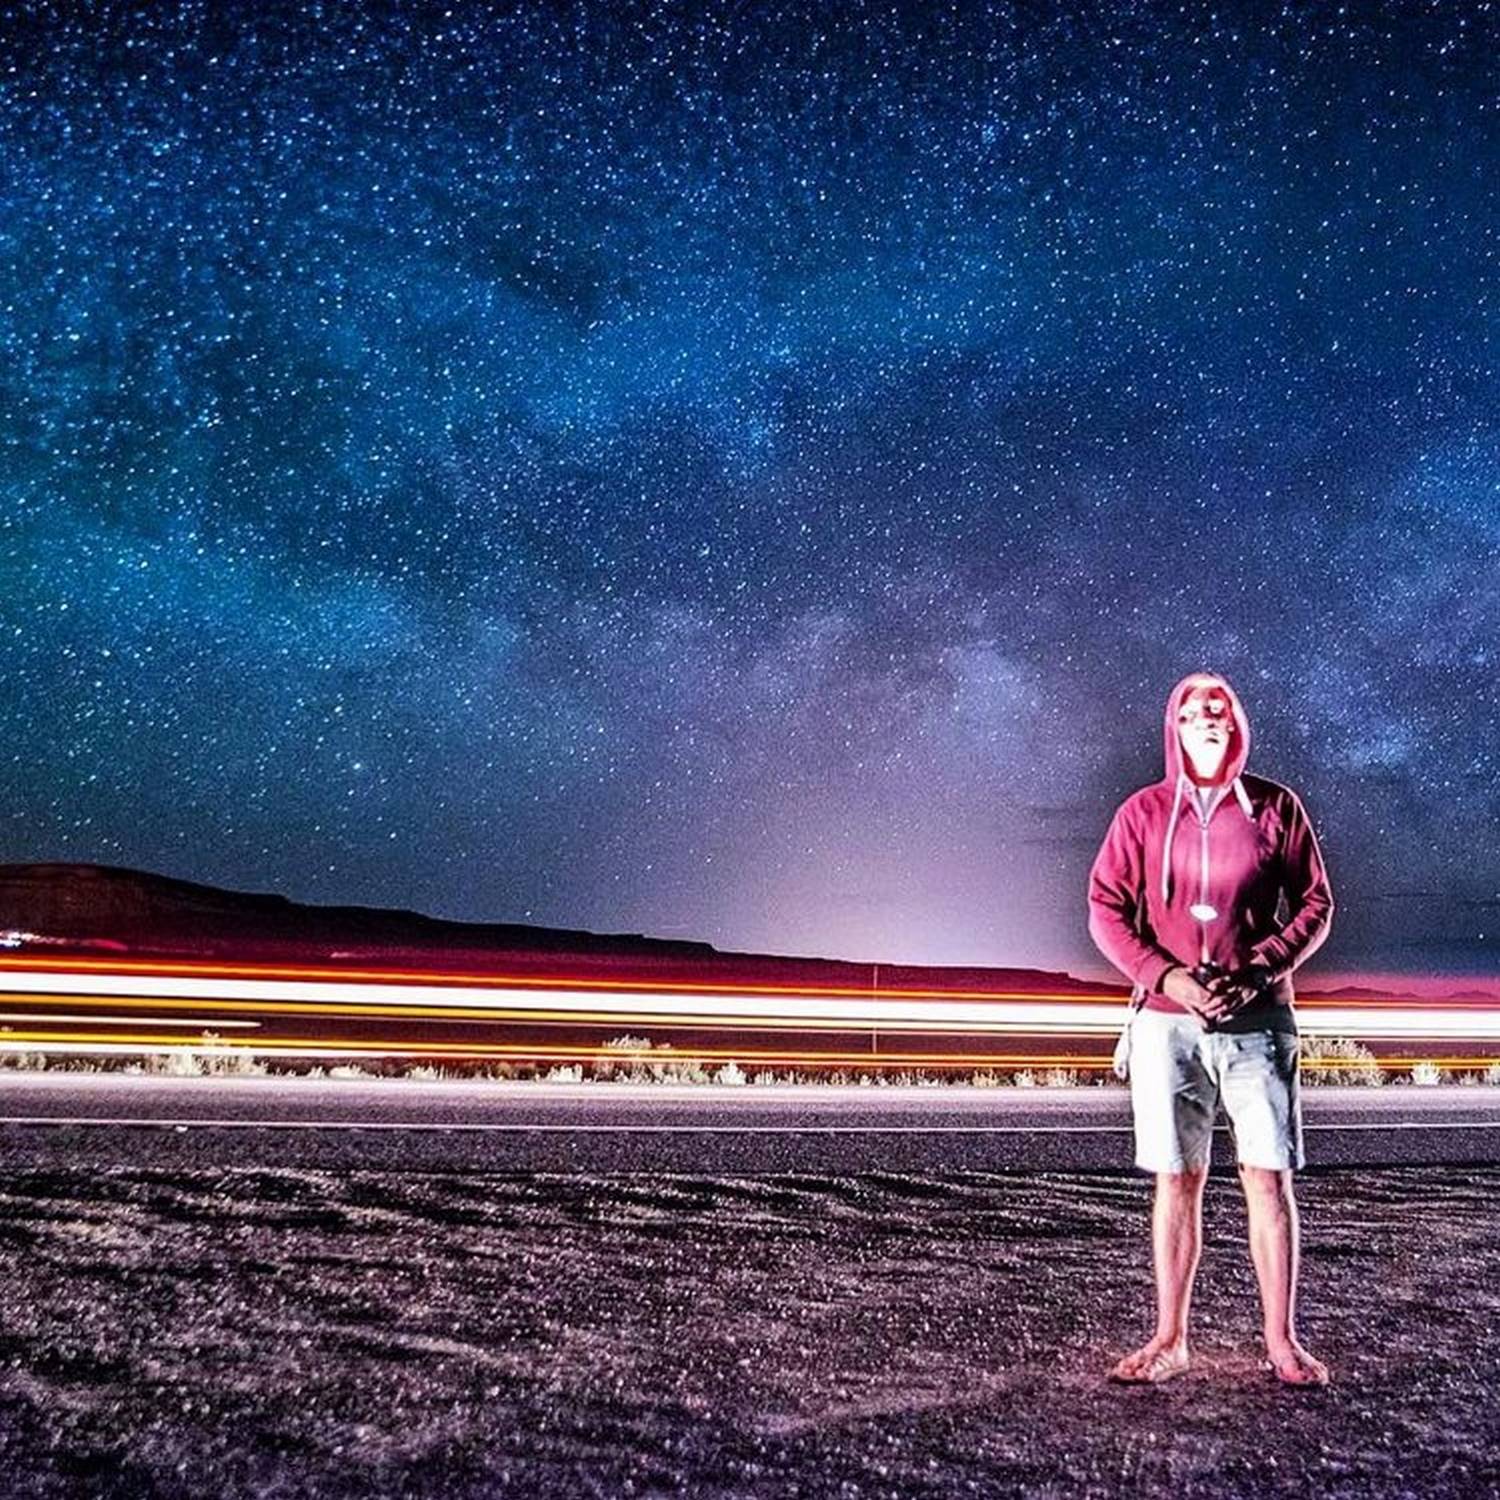
So if you are going to shoot a photo of yourself in the woods perhaps consider wearing something red as it will compliment the green of the leaves, moss, grass, etc.”
Check out their site, Wandering Wheatleys, & follow their Instagram @WanderingWheatleys
Simon Hird, photography & hiking enthusiast
“I think the most important thing is trying to tell a story with your photography. What is it you are trying to say with your photography and why? I think if you consider the aims of your travels or your photography you start to move and shoot with more purpose and direction.
Your work will have more substance behind it and people will really be able to feel and engage with what you are doing. I can guarantee if you find this purpose, you for one will feel way more excited and motivated by your work and at the end of the day that is what matters the most.“
Check him out on Instagram @simonhird
Lia & Jeremy, travel bloggers
“Challenge your perspective. If there is a famous landmark you want to shoot, I guarantee everyone and their mother has taken a picture of it at eye level straight on. Even Google Street View probably has the same photo. Yikes.
Find a new vantage point. Climb a tree. Get on your butt. Sneak into the rooftop bar across the street (yes, we’ve done this). Whatever it takes to make it fresh.”
Check out their website, Practical Wanderlust, and on Instagram @practicalwanderlust
Let us help you travel better…
Be sure to check out our Travel Planning Homepage for resources on everything you need to know about how to plan a trip, from packing to budgeting and more! Or you can read some of our favorite articles about planning your next trip below.
- How to Plan a Trip in 10 Simple Steps
- Expert Tips for Finding Cheap Flights
- Genius System for Booking the Best Accommodation
- Carry-On Packing List: What You Actually Need on a Flight
- Our Favorite Travel Essentials
- This is the one thing we NEVER travel without!
- Packing Hacks to Help You Pack Light Every Time
- Tips to Fight Jet Lag (that actually work!)
- How to Get Cell Service Abroad (without spending a fortune!)
→ Traveling as a family? Don’t miss our family travel articles!
What if the hard part was already done for you?
All you have to do is pack your bags!

Save this article on Pinterest for later!
We want to hear from you!
Which tip is your favorite? Do you have any other travel photography tips you think belong on this list? Leave your comment below and we’ll do our best to get back to you!
Katie Diederichs is the lead writer and co-founder of Two Wandering Soles, where she creates in-depth travel guides, itineraries, and tips designed to help readers plan better trips with confidence. With a background in journalism, photography, and design, she combines thorough research with firsthand experience to deliver clear, practical, and visually driven travel content. As the primary trip planner, Katie turns complex logistics into easy-to-follow advice travelers can actually use.
777pub
I can relate so much to what you’re saying! I’ve gone through a similar experience with [insert situation], and reading this just gave me the encouragement to keep pushing forward. You’re not alone!”
RAW mode should have been mentioned especially with respect to Everest base camp
Good tip! Whenever shooting epic landscapes we do tend to use RAW mode so that we can do a great edit when processing the photo.
GOOD INFORMATION. IT CAME IN HANDEY