Home » Blog » U.S.A. » Hawaii » Kalalau Trail: My Favorite Hawaii Hike (planning guide + tips)
This page may contain affiliate links. More info in our Privacy Policy.
The Kalalau Trail is one of the best hikes in the world, but it’s not without difficulties. In this guide we are walking you through literally everything you need to know before attempting this trek as well as sharing a hiking route you can copy!
Hugging Kauai’s Na Pali Coast, the Kalalau Trail is one of the best hikes in North America, if not the world.
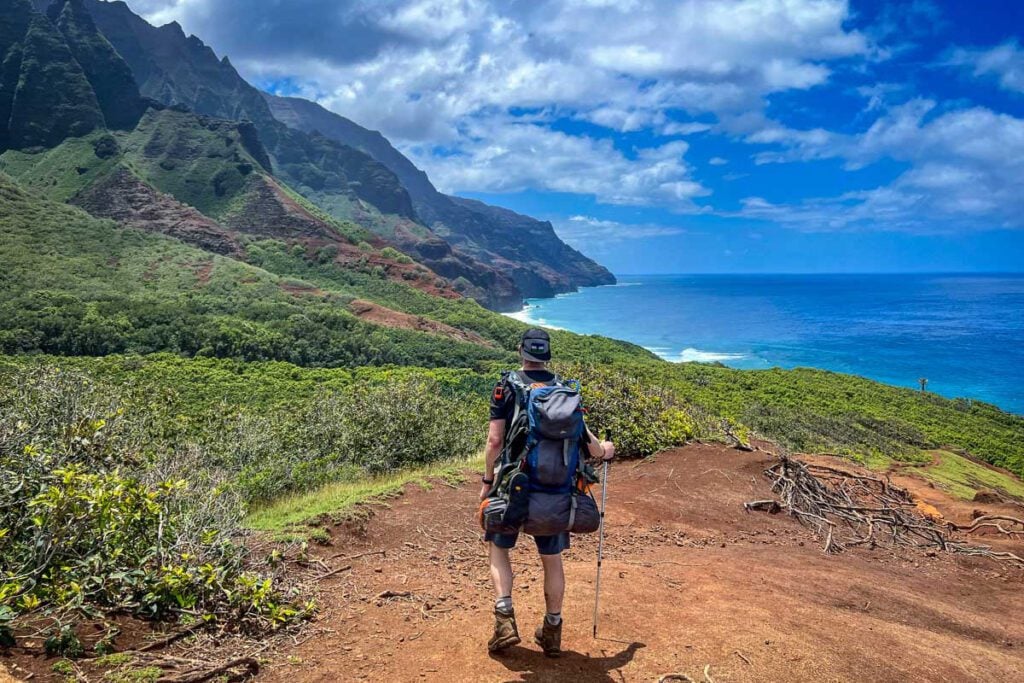
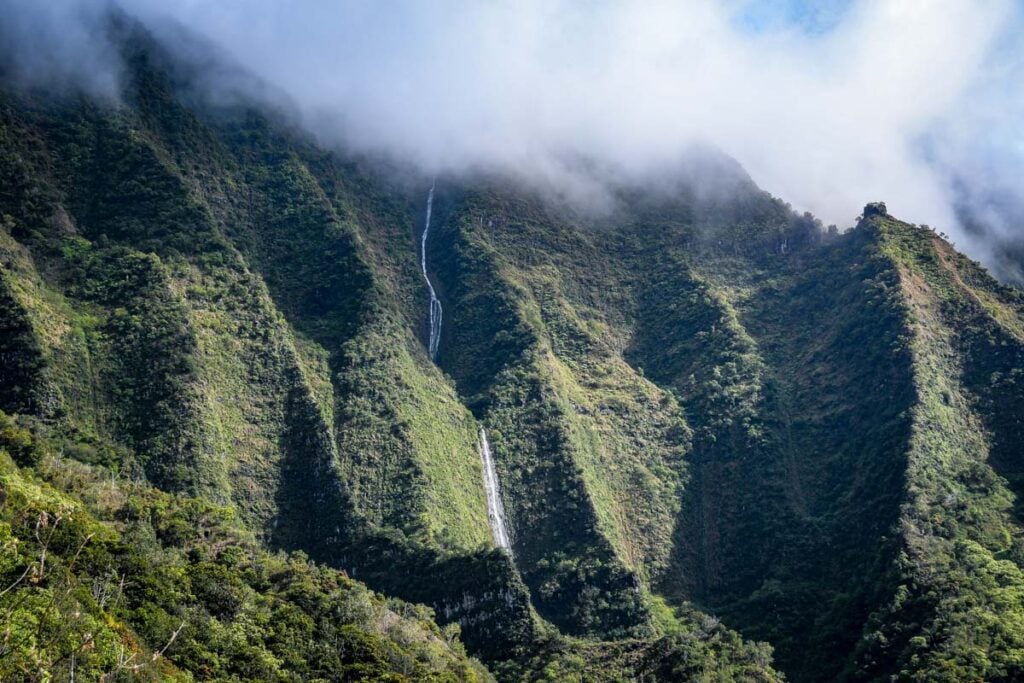
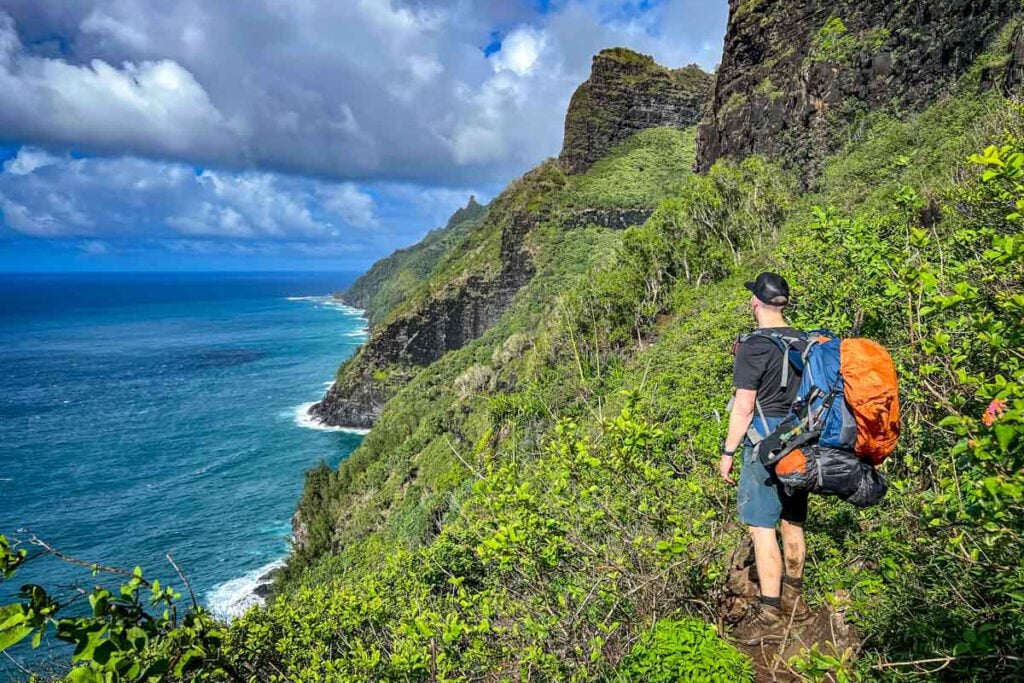
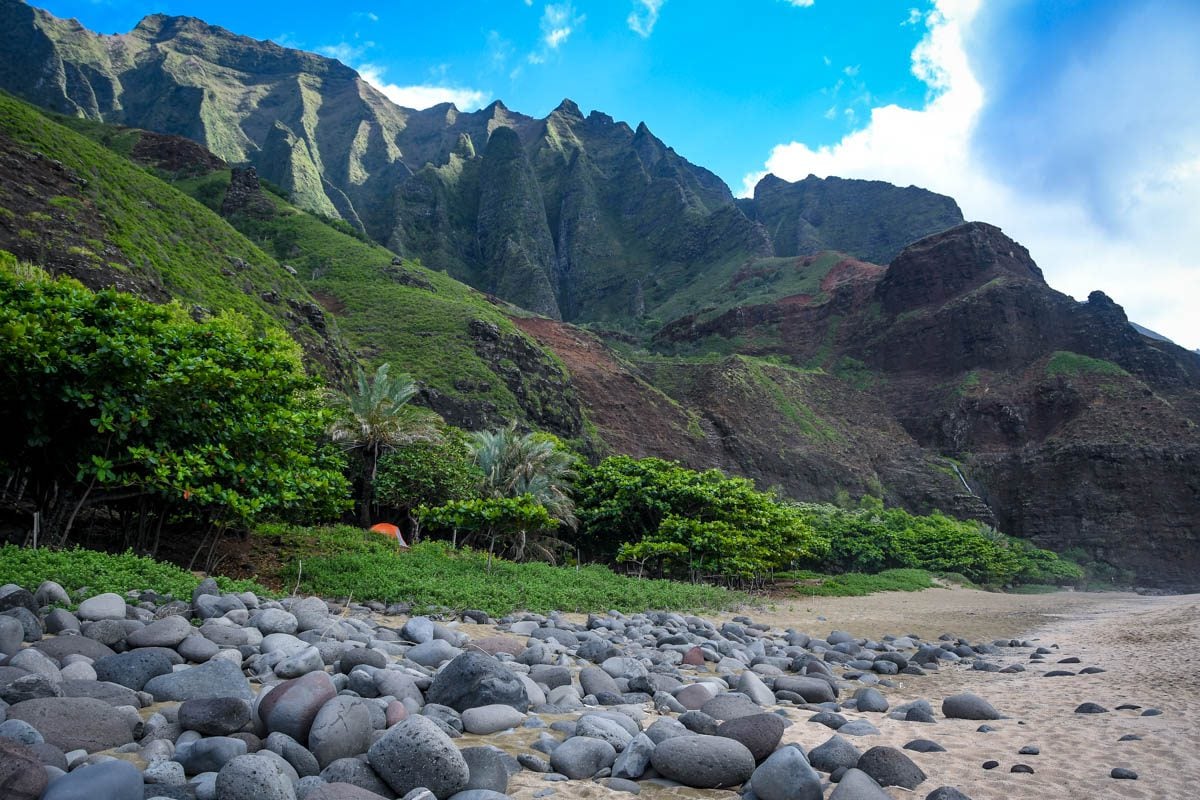
The Kalalau Trail is an iconic oceanside trek that brings hikers on a wild path along exposed sea cliffs, through humid jungles, past towering waterfalls, and to a white sand beach that is unparalleled in beauty.
Undoubtedly one of Hawaii’s top hikes, the 22-mile Kalalau Trail is not for the faint of heart.
But those that make the effort will be able to spend a night (or several!) on the idyllic Kalalau Beach, soaking up the sunshine, playing in the surf, drinking from the seaside waterfall, and sleeping beneath the stars.
It truly is as magical as it sounds. But before you start lacing up your hiking boots, there are some very important things you need to know…
First, hiking the Kalalau is no easy feat. Often named one of the “most dangerous hikes in the world”, there are many factors (river crossings, likely downpours, extreme heat and humidity, muddy paths, and sheer cliff drops) that make the Kalalau Trail one that requires advanced planning and preparation.
In fact, the logistics of planning your Kalalau Trail trek are enough to make even the most seasoned hiker’s head spin.
But fear not, we are here to share everything you need to know about hiking the Kalalau Trail so you know exactly what to expect, what to pack (and what to leave at home), and exactly how to plan your hiking itinerary.
Let’s get this adventure started!
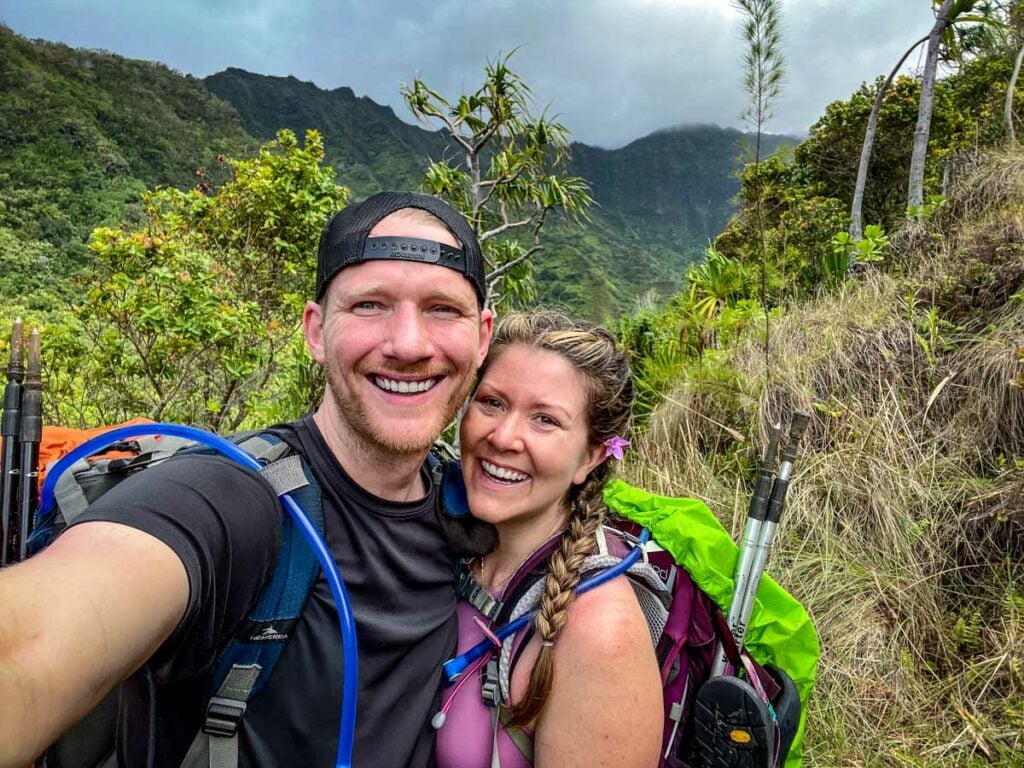
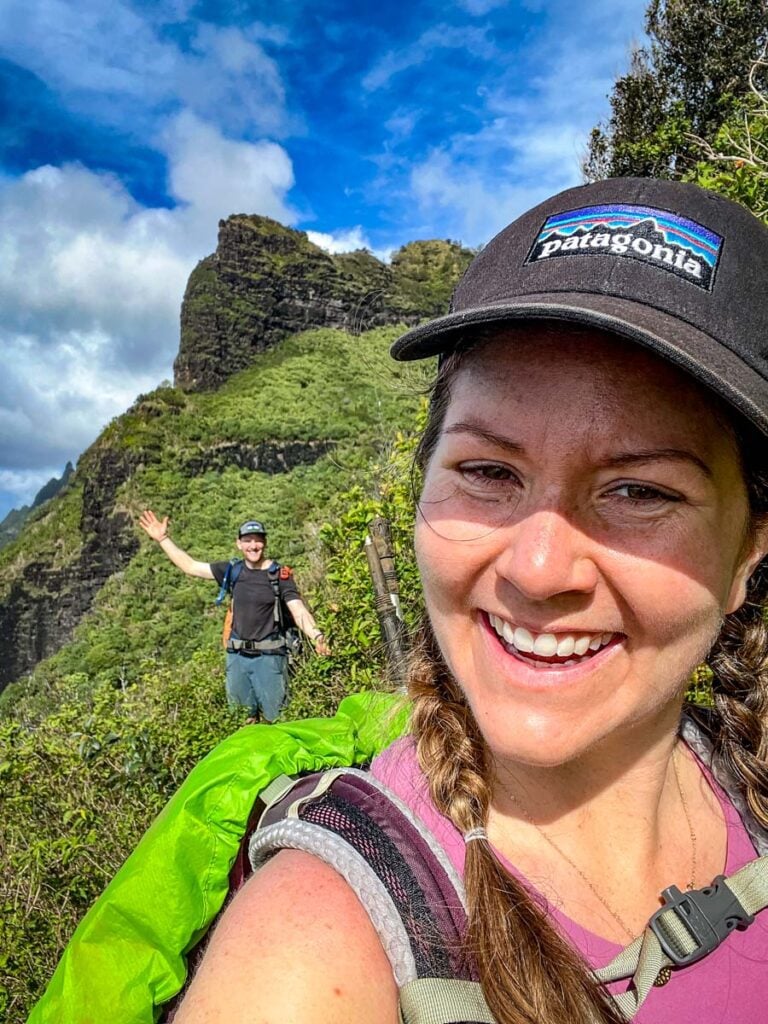
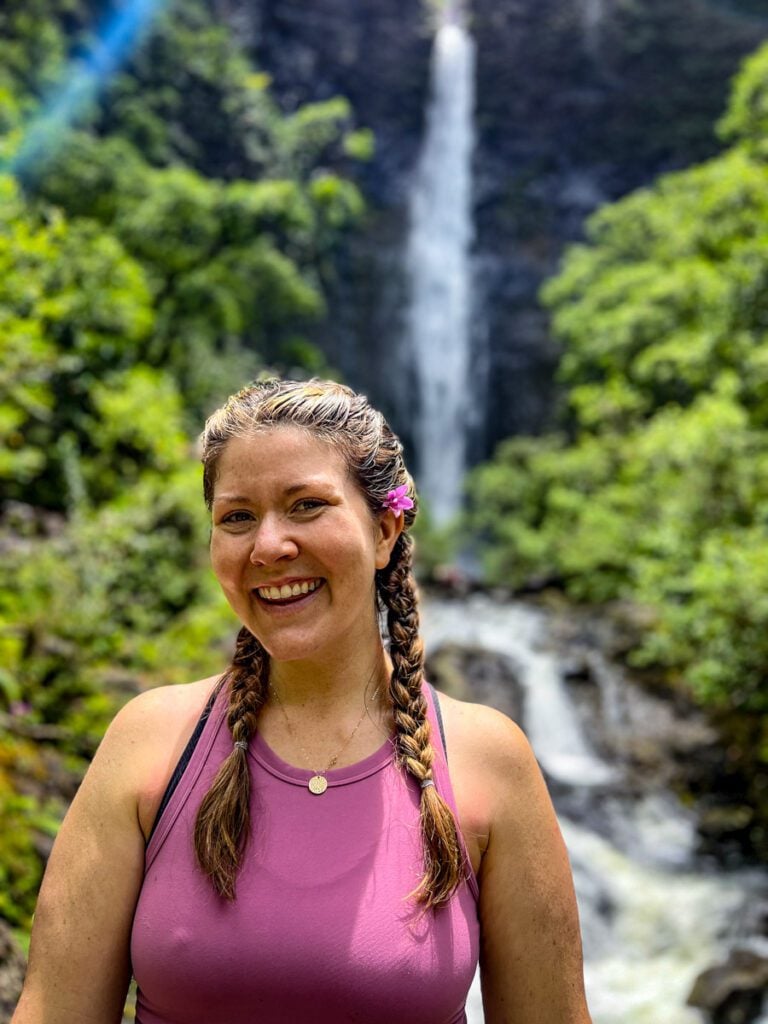
My personal experience hiking the Kalalau Trail
When I first saw photos of the Kalalau Trail that a friend of mine posted (many, many years ago), I couldn’t get it out of my head. It immediately took a spot on our lifetime bucket list of hikes around the world.
Insider Tip: Create an AllTrails account and make a “bucket list hikes” list. Then, anytime you hear about an epic hike, save it here!
On top of planning our trip to Hawaii, the Kalalau Trail added a whole new layer of logistics, from securing permits to flying with our backpacking gear to arranging childcare for our 15-month-old, who was traveling with us.
But it was 100% worth it.
Even as experienced hikers, this trail felt completely unique. Some sections, like the infamous “Crawler’s Ledge”, were easier (and less scary!) than we expected. Other moments, like slugging our way through ankle-deep mud, were more challenging than we were prepared for.
Then there were moments of pure magic, like watching whales breach offshore as we ate lunch on Kalalau Beach.
Overall, backpacking the Kalalau Trail exceeded our expectations, and will hold a place in our hearts as one of the most epic multi-day hikes we’ve ever done.
This isn’t a hike you can wing, but for those who plan ahead, it’s unforgettable. And we’ve got everything you need to prepare.
The Kalalau Trail is known for both epic beauty as well as being a humbling (and at times dangerous!) hike.
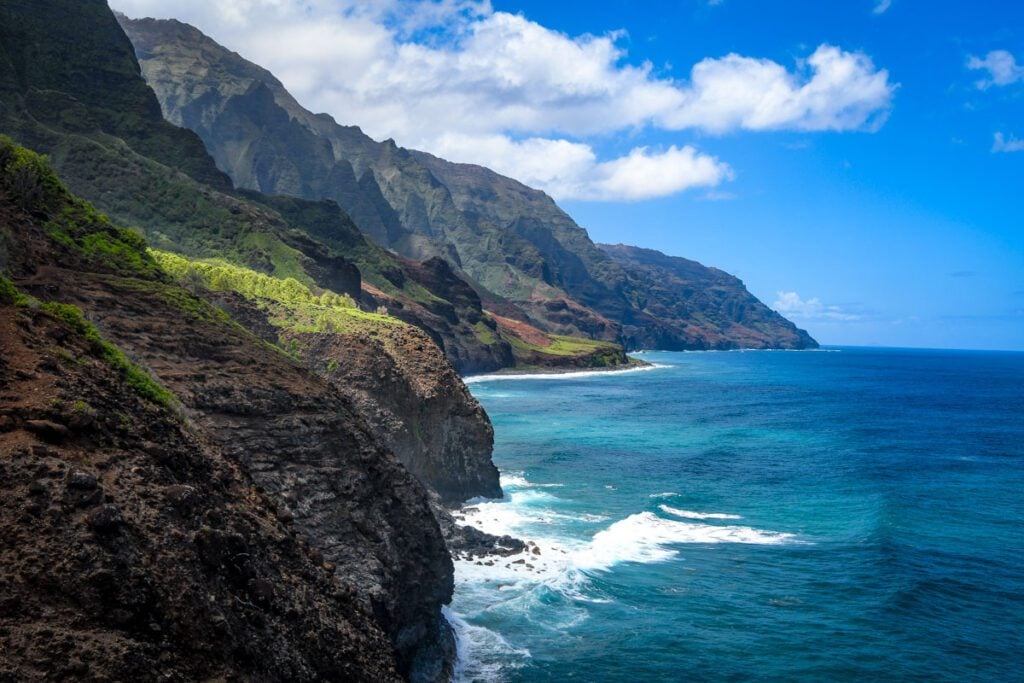
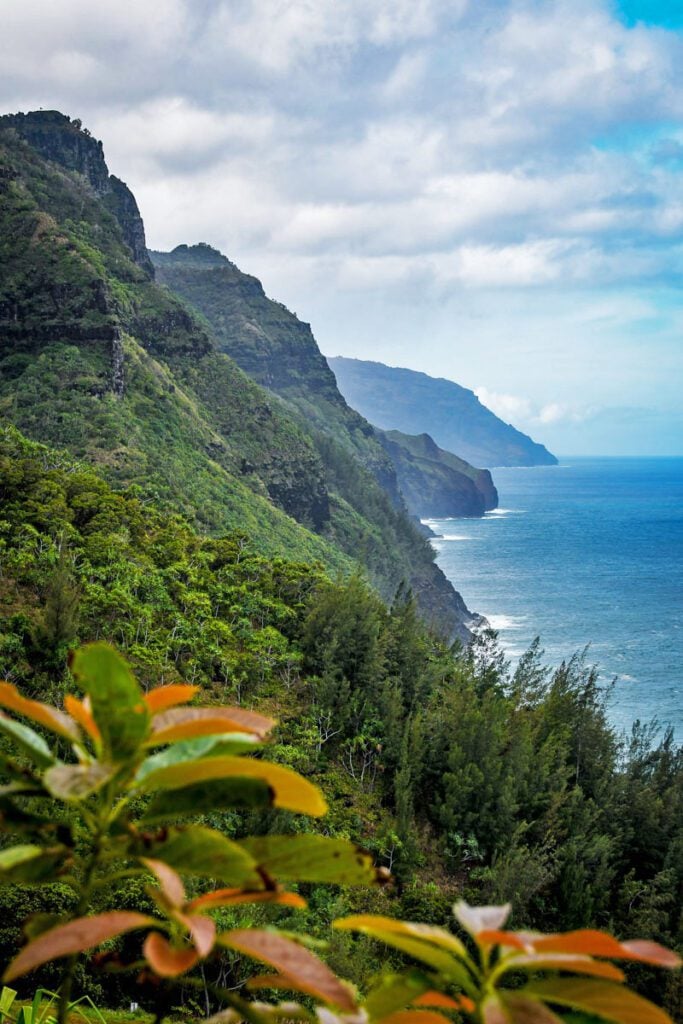
The juxtaposition of shocking turquoise waters of the Pacific Ocean paired with rugged and jungle-covered mountains of the Na Pali Coast is truly breathtaking. And if the sight doesn’t take your breath away, the hike sure will!
In total, the trail is 22 miles through rivers, mud, and along some very steep sea cliffs.
Fun Fact: If the jaw-dropping landscape of Kauai’s north shore looks familiar, it’s because it was the backdrop of Jurassic Park.
Things to know about the Kalalau Trail
Before we dive in, there are a few things you should know about this trail.
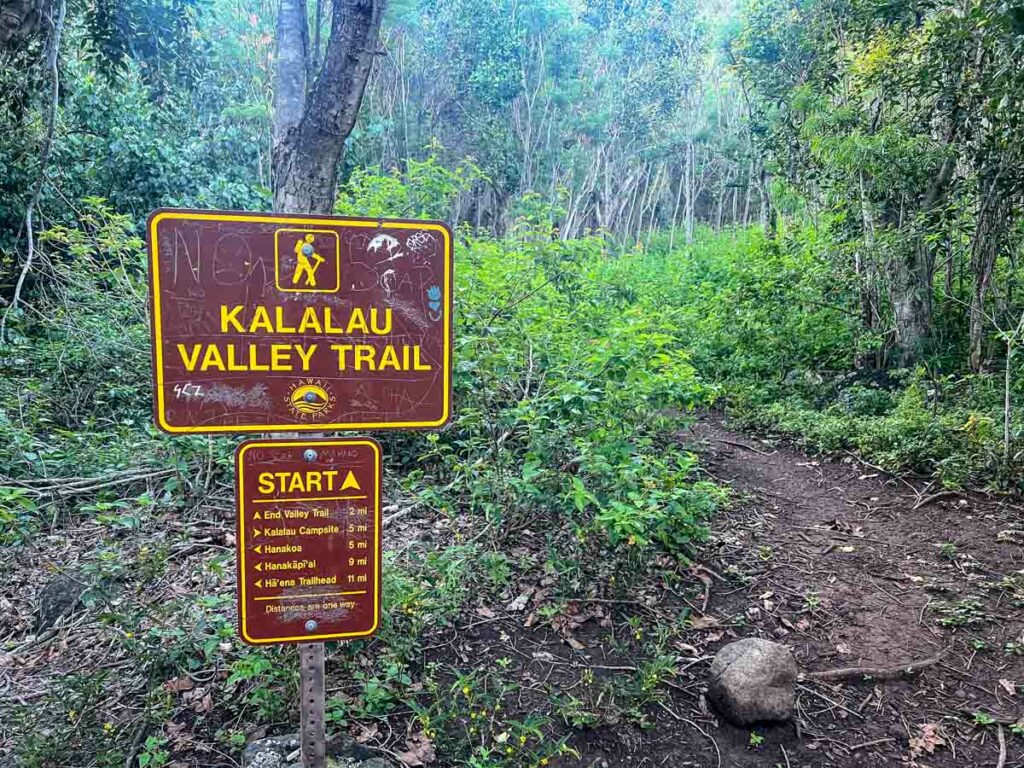
1. Permits are required to hike past the 2-mile mark
You must have a permit in order to hike past the 2-mile mark.
For information on how to score one of these competitive permits, jump down here!
2. Transportation to and from the trailhead requires planning
There is a small parking lot at the Kalalau trailhead, but overnight parking is not allowed. This means hikers will have to arrange transportation to and from the trailhead. Jump down here to see your options.
3. There is no cell service on this trail
You will not be able to get cell reception at the trailhead or anywhere along the hike. This means you must arrange transportation in advance and have a plan for emergencies.
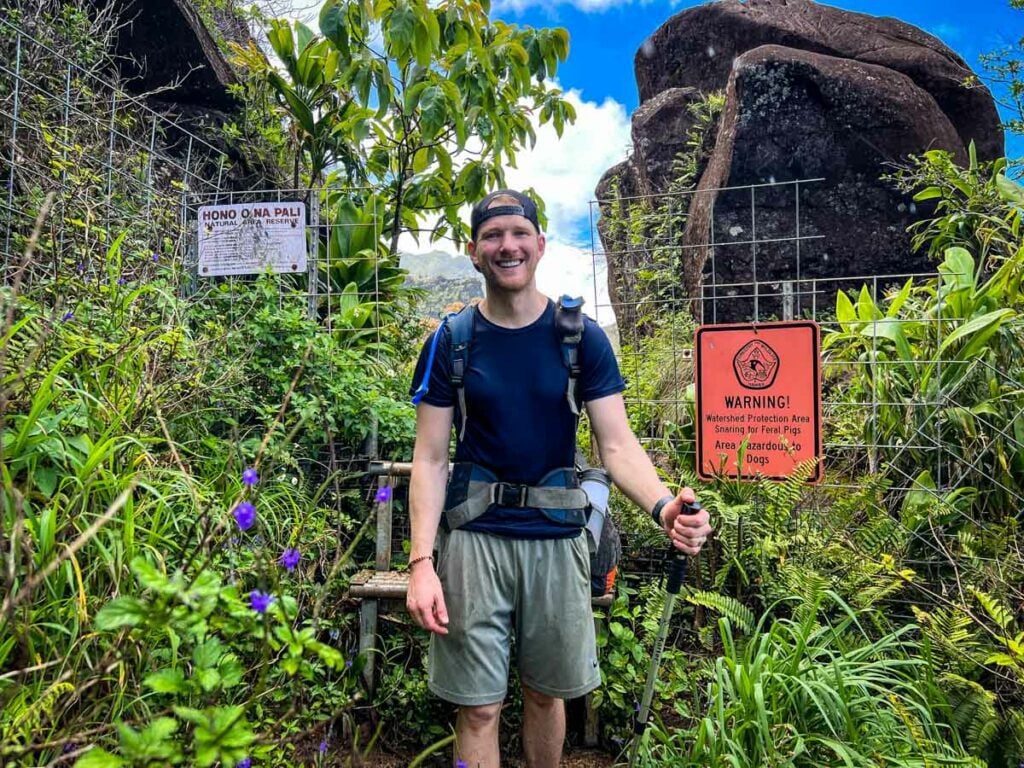
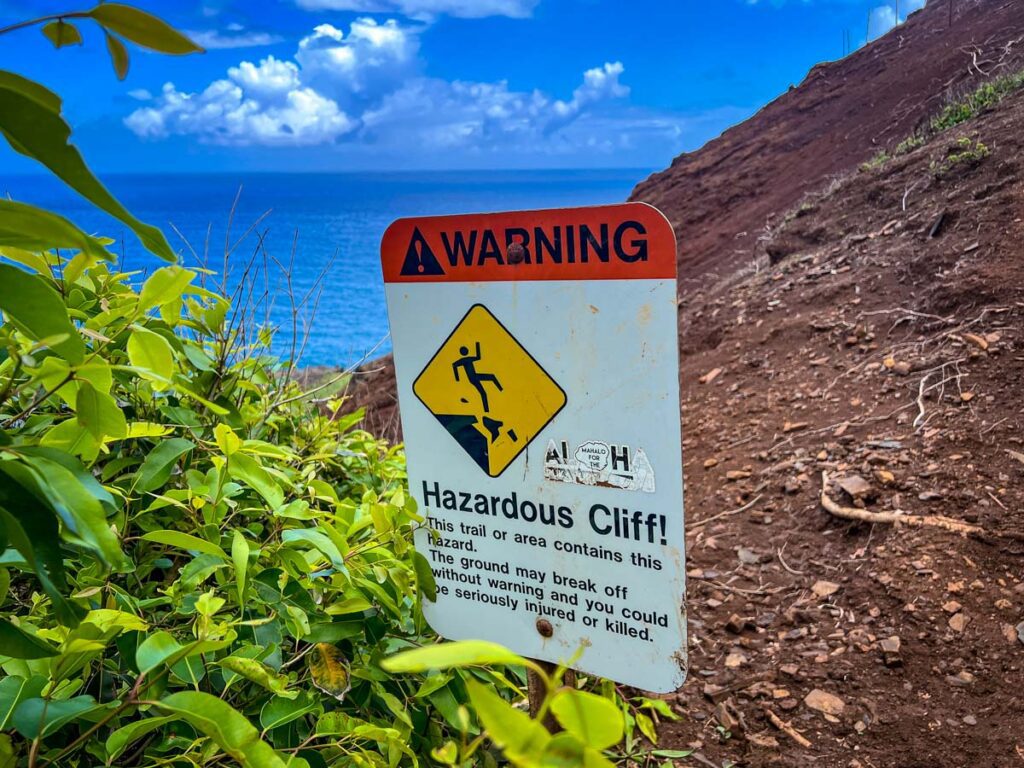
4. Drones are prohibited
Respect the rules of this land and the people.
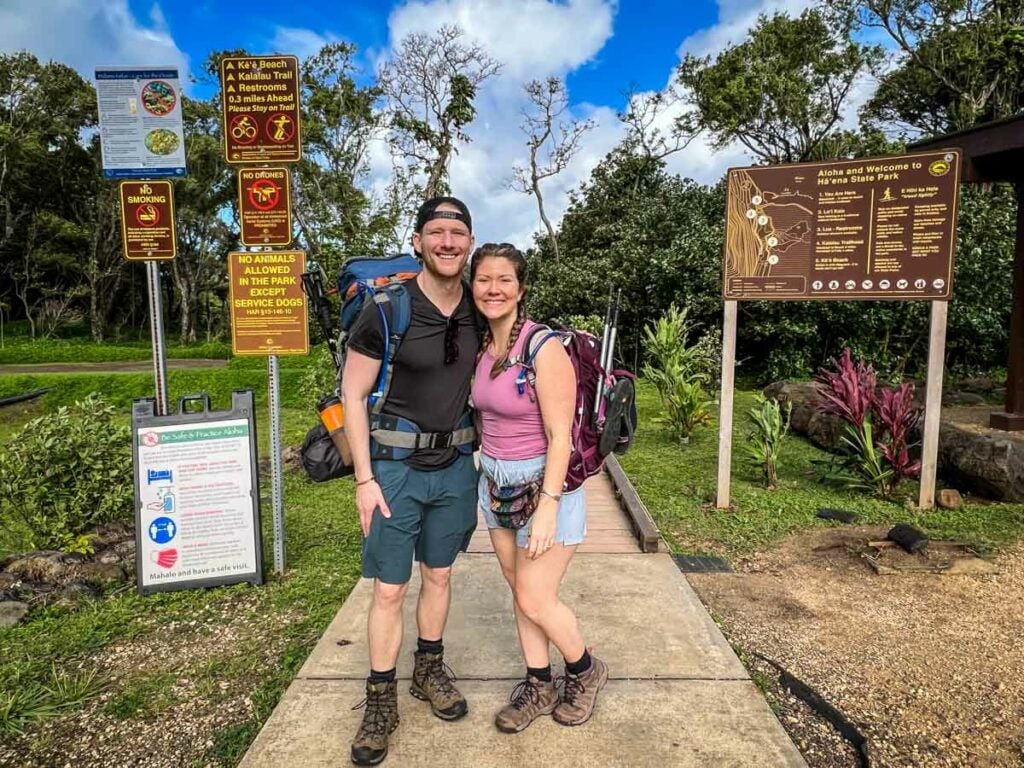
Our experience: We didn’t realize this before our trek and assumed they were okay to bring since we’ve seen lots of other people who post drone photos of this area. However, when we got to the trailhead, we saw the sign that warned they are not allowed. So even though we carried our drone the whole 22+ miles, we did not use it out of respect for the rules in this area.
5. There are lots of ups and downs
The trail starts at 20 feet above sea level and climbs to nearly 800 feet at its highest point.
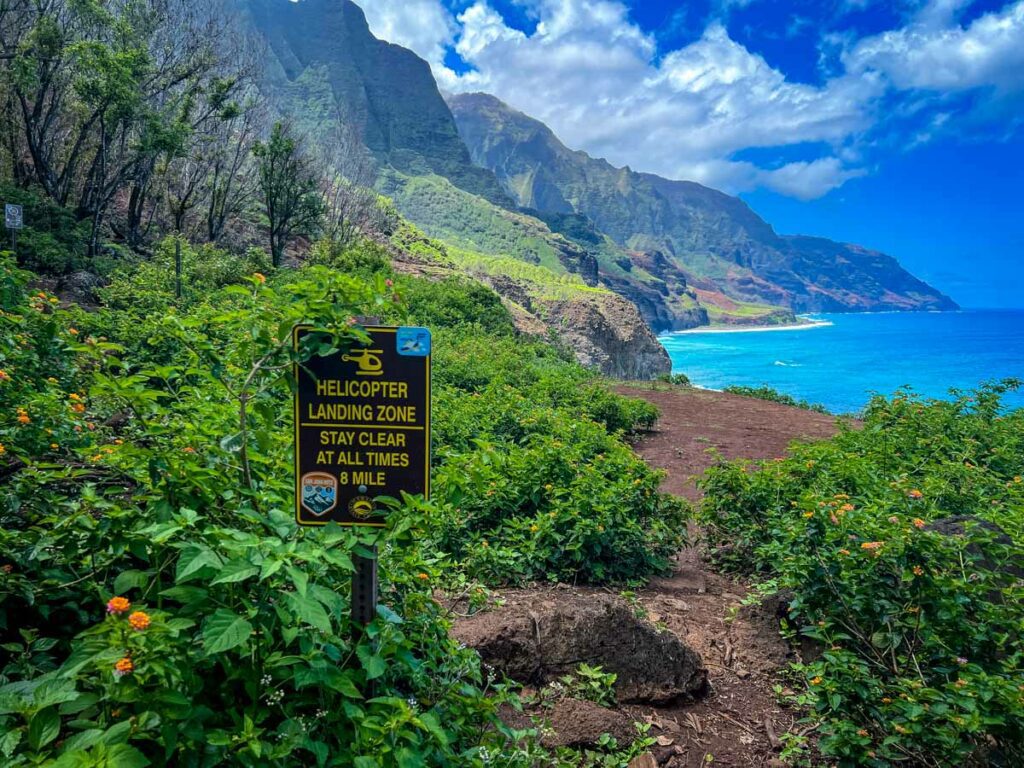
6. You will see (& hear!) lots of helicopters
The Na Pali Coast is a popular spot for scenic helicopter rides (which I highly recommend doing after your hike if you have the time and budget).
There are certain sections of the trail where you will see more helicopters than others, and weather conditions can change up their route, but I was truly surprised by just how many helicopters we saw while hiking. And not just from a distance. Some got very close and they were extremely loud at times.
When we expected to have lots of peace and solitude, the sound of the choppers above us was pretty obnoxious.
On that note, you’ll also see helicopter landing pads around the trial. These are for emergency landings and there are signs to keep clear at all times.
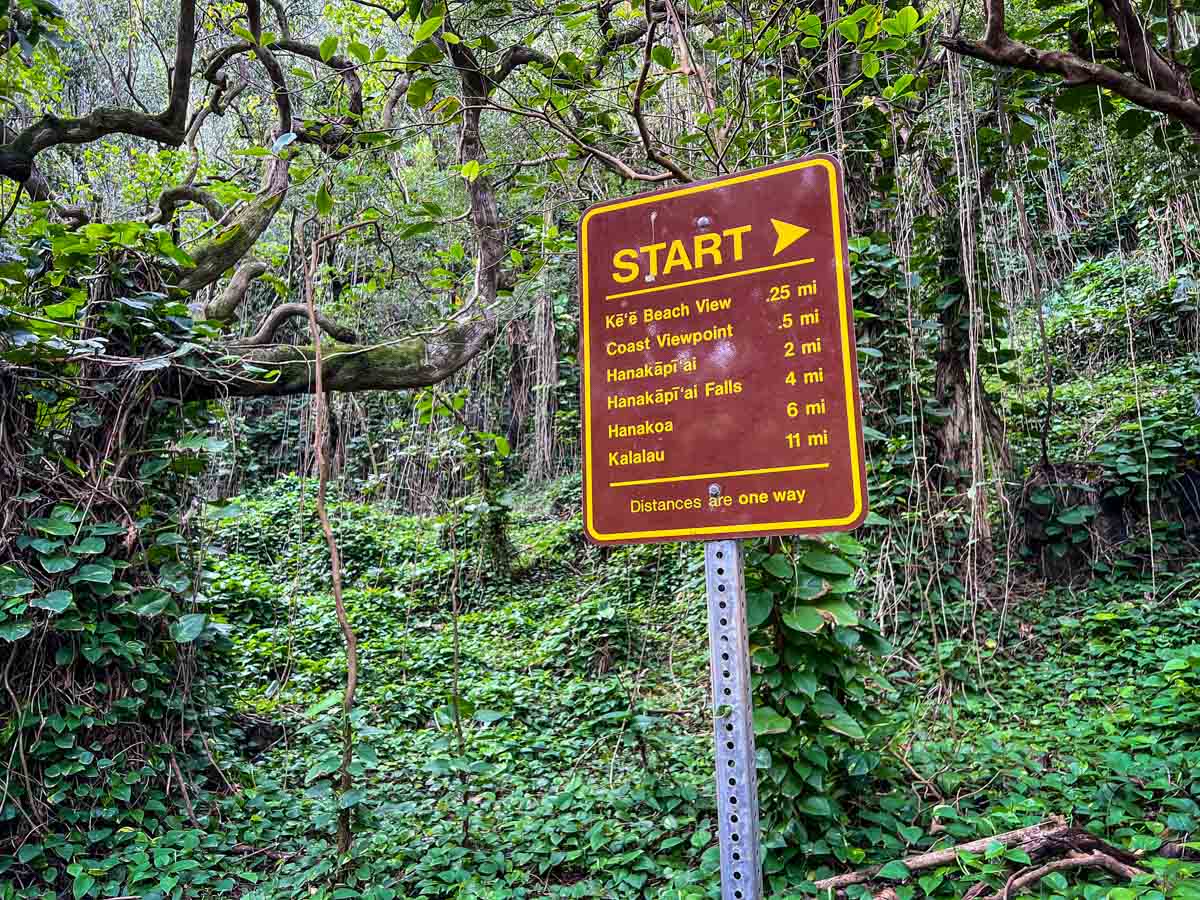
Kalalau Trail map
Kalalau Trail hike stats
Distance: 22 miles total*
Elevation gain: more than 5,000 feet in total
Type of hike: Out and back
Difficulty: Challenging
Permit: required past the 2-mile mark
Location: Kauai’s North Shore, along the Na Pali Coast
A note on total distance
*22 miles is the “official” distance. However, the trailhead is now only accessed by a .5-mile boardwalk path from the Ha’ena State Park parking lot. This adds an additional 1 mile to your total hiking distance.
But you may want to expect even a bit more than that. With detours to 2 waterfalls and walking up and down the beach a few times, we clocked 32.72 miles total.
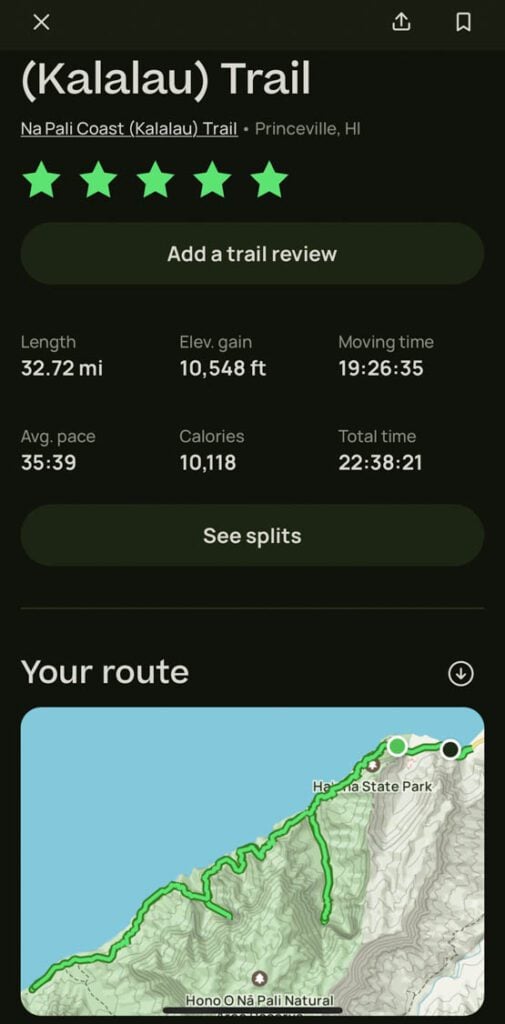
Our personal trail map
Below you’ll see our personal recording of our hike on the Kalalau Trail using the AllTrails+ app.
Psst! Take a look at the elevation gain in the graph above – you’ll notice lots of ups and downs!
Kalalau Trail sections
There are 3 distinct sections of the Kalalau Trail.
As you’re hiking, you can track your distance by using an app, like AllTrails, or by looking for the mile markers, which are painted on large rocks.
Here’s what you can expect from each section:
Section 1: Kalalau Trailhead to Hanakapiai Beach (2 miles)
Miles 0-2
Points of interest:
Ke’e Beach
First views of the Na Pali Coast
Hanakapiai Beach
Since this portion of the trail is open to day-use hikers, expect to see many more people than you will later on. We encountered people of all ages on this section, and it was quite crowded in some places.
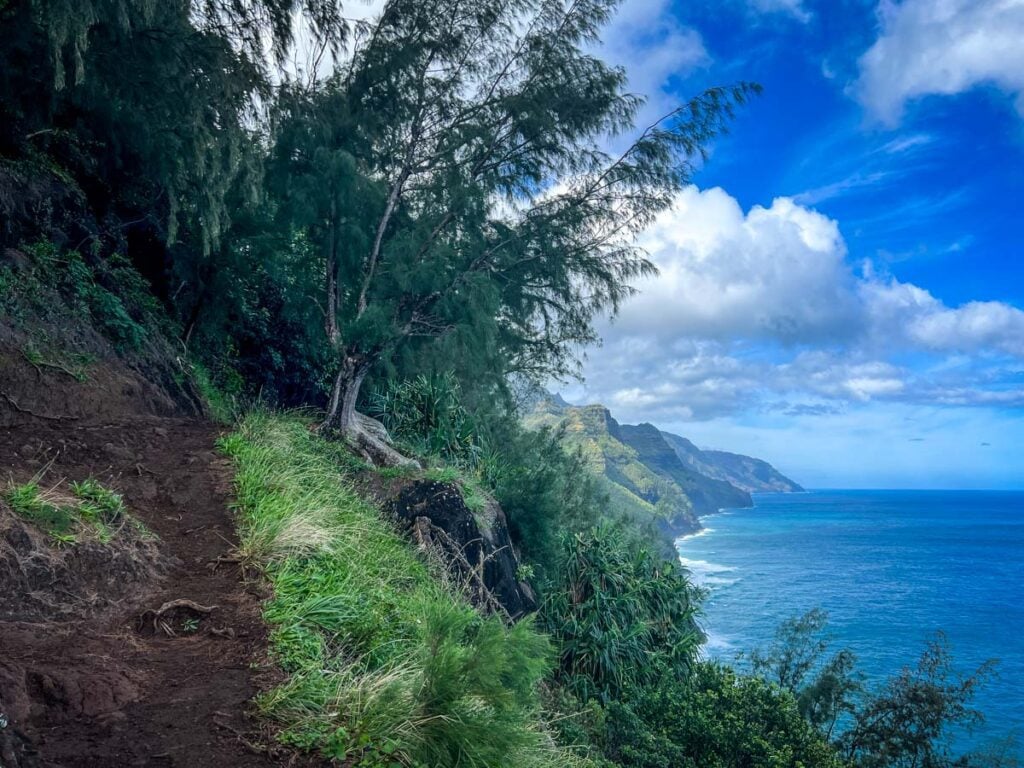
There are several viewpoints as the Na Pali Coast begins to reveal itself. But just know the views get even better later on!
This portion of the trail was also one of the muddiest during our hike.
Just before reaching Hanakapiai Beach, there is a river crossing. This was one of the stronger ones, so take your time.
Hanakapiai Beach is a nice place to have a snack and rest, but you’ve still got lots ahead of you. Near the beach, there is a composting toilet (which happened to be the grossest toilet on the trail during our visit!).
From here, you can decide if you keep on going on the Kalalau Trail, or if you do a 4-mile detour to Hanakapiai Falls.
Section 2: Hanakapiai Beach to Hanakoa Camp (4 miles)
Miles 2-6
Points of interest:
“The Gate”: step over a gateway
Jungle paths and small streams
Now you will start to see fewer people, as this portion of the trail is only open to permit-holders.
There are quite a few switchbacks right away and several portions of the path that are very narrow with steep drops. If the trail is muddy (like it was when we hiked!), take extra caution here.
Hanakoa Camp is a perfect spot to spend a night in order to break up your days. Or, if you are hiking the whole 11 miles in one day, the covered shelter at camp makes a good lunch spot.
Section 3: Hanakoa Camp to Kalalau Beach (5 miles)
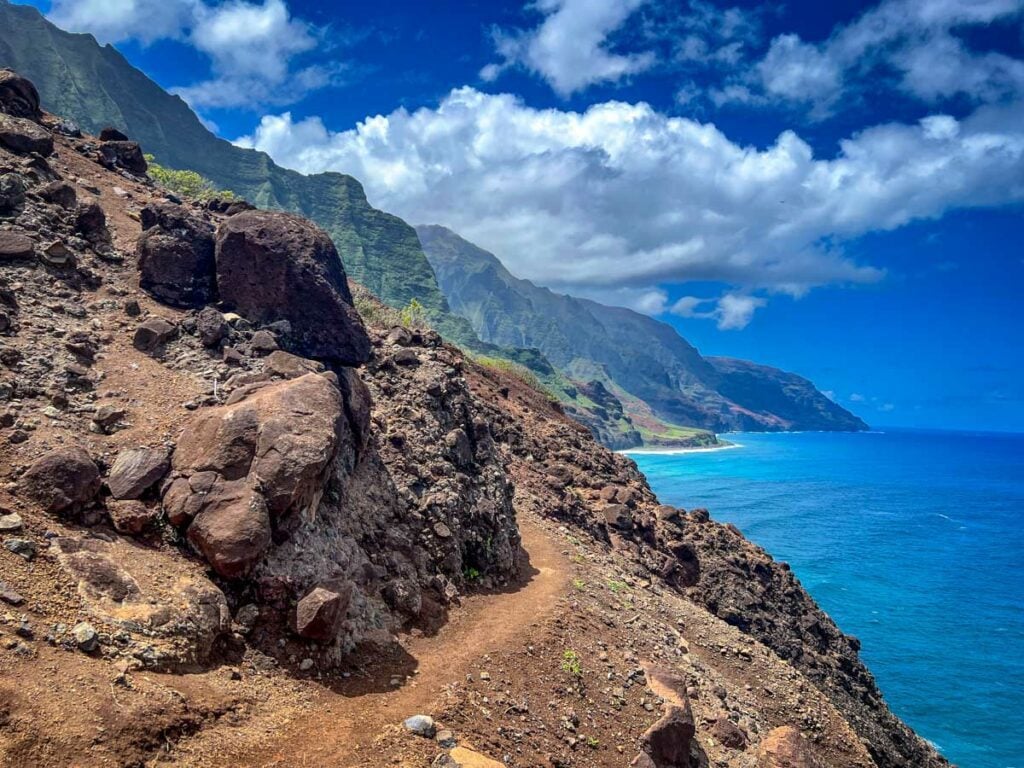
From mile 7 onwards, there is very little tree cover, so you will be exposed to the sun. Be sure you are wearing layers or sunscreen and have a protective hat.
This portion of the trail includes the infamous Crawler’s Ledge as well as some sections of the path that are very dusty and can get slippery. Don’t rush this portion.
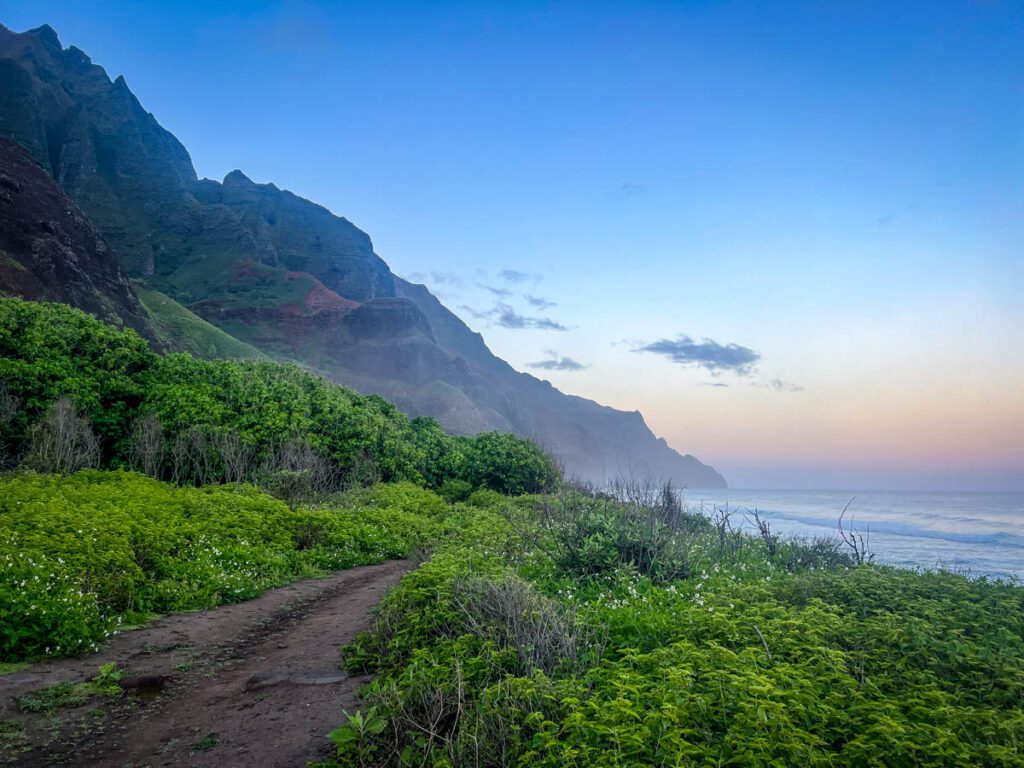
Just before getting to the beach, you will cross your final river and bush-wack your way through flower bushes and fruit trees. (Breathe in to smell the goodness!)
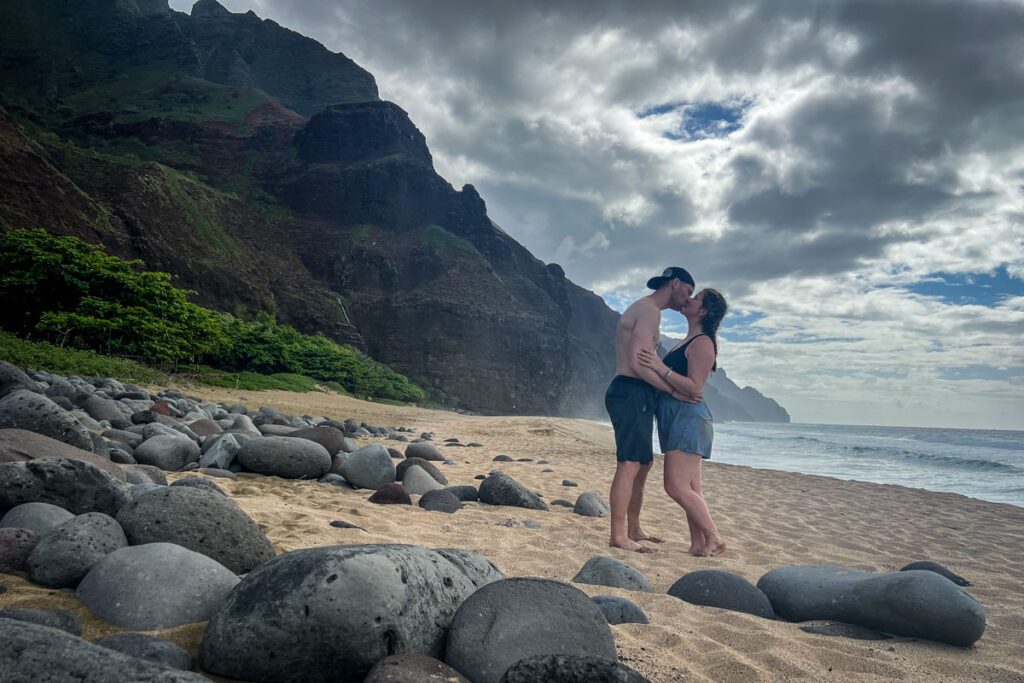
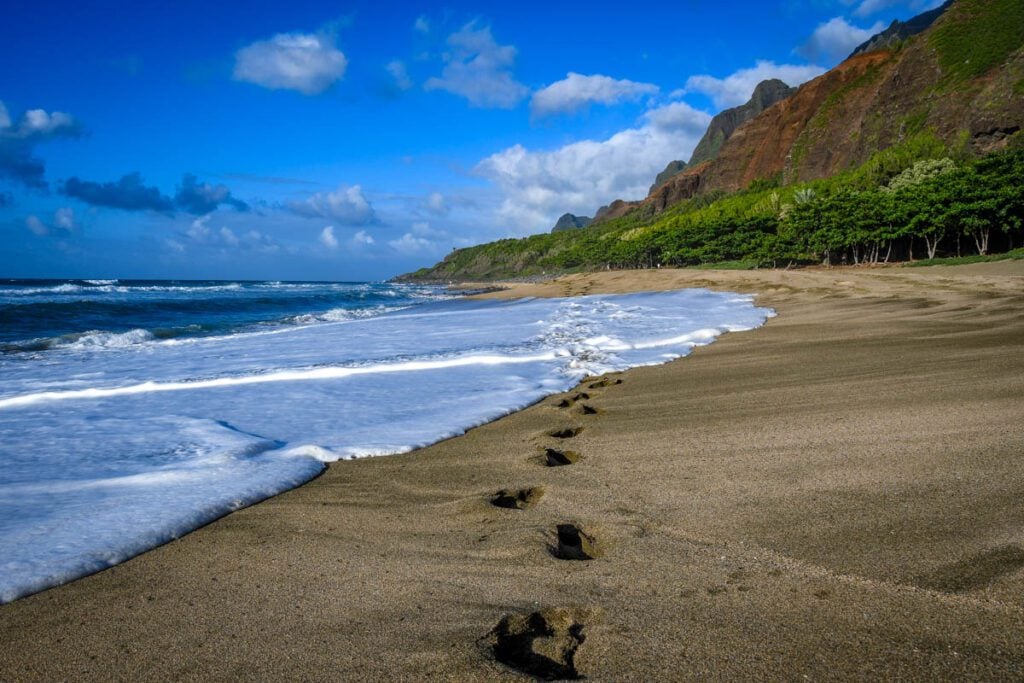
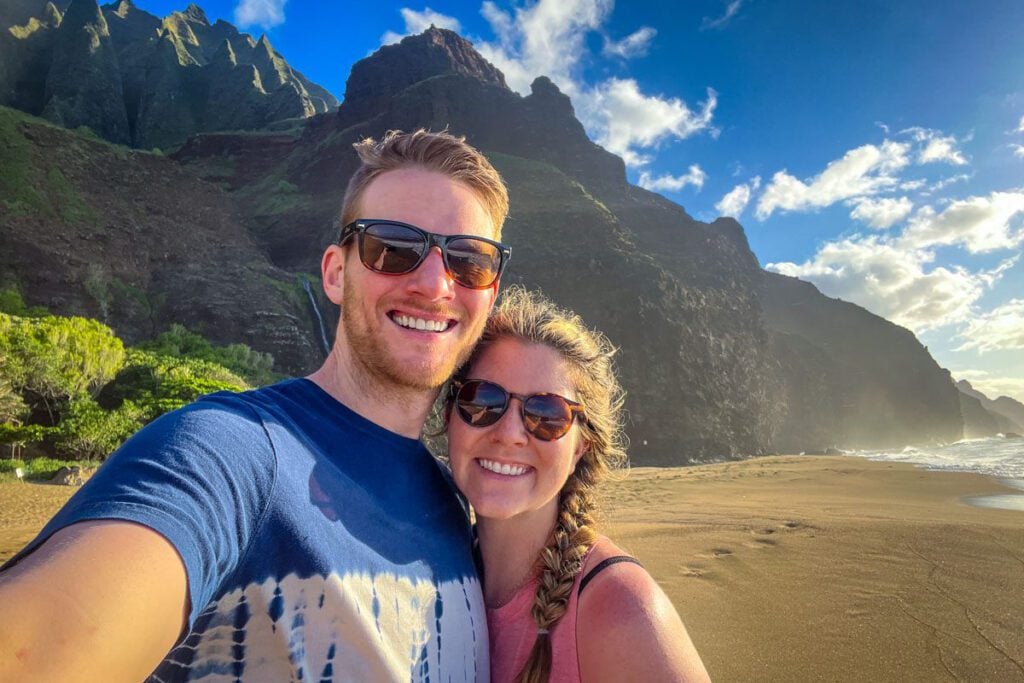
Arriving at the beach is pretty magical. White sand flanked by those lush Jurassic Park mountains is a stunning juxtaposition that you will never forget.
And with people hanging out in hammocks or posted up in the sand, it’s a scene reminiscent of Alex Garland’s The Beach (in a good way).
Find a spot to set up camp and spend the rest of the day relaxing and soaking it all in!
Optional detours on the Kalalau Trail
If you have the time, we’d recommend adding at least one of these detours to your hike.
Hanakapi’ai Waterfall
Location: at the 2-mile marker
Additional distance: 4 miles
This is a popular day hike for many people, so if you choose to add this on, expect to see many other people on the trail.
Getting to Hanakapiai is no easy feat. There are 4 river crossings on the way to the falls, all of which you will need to cross a second time as you return.
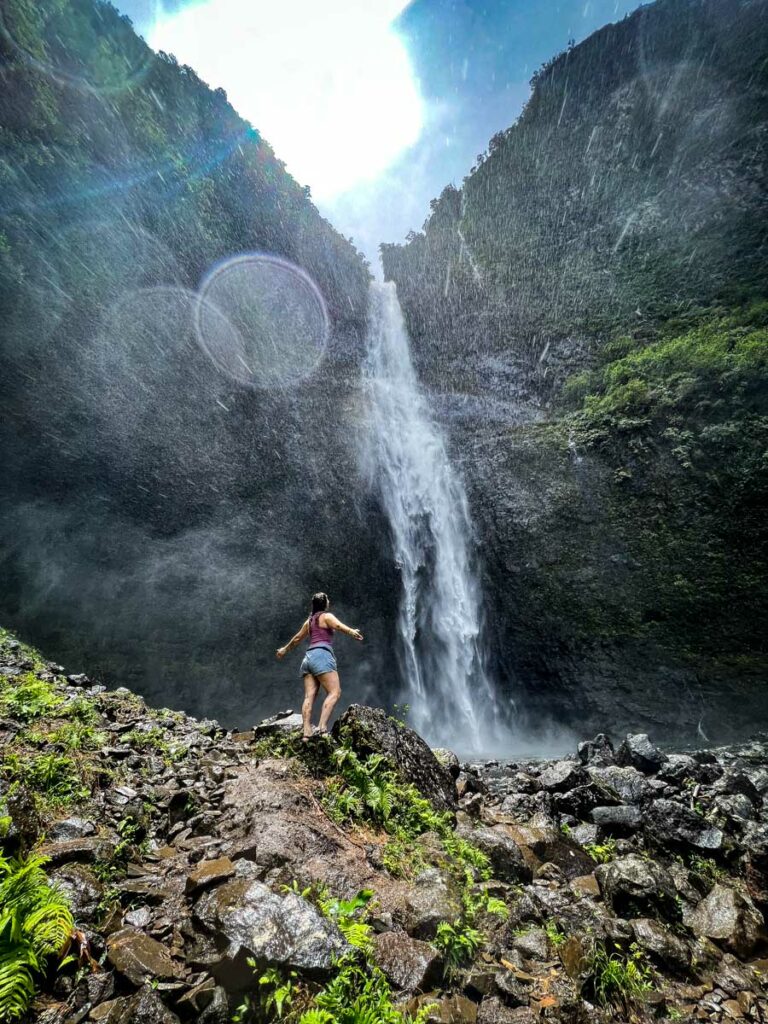
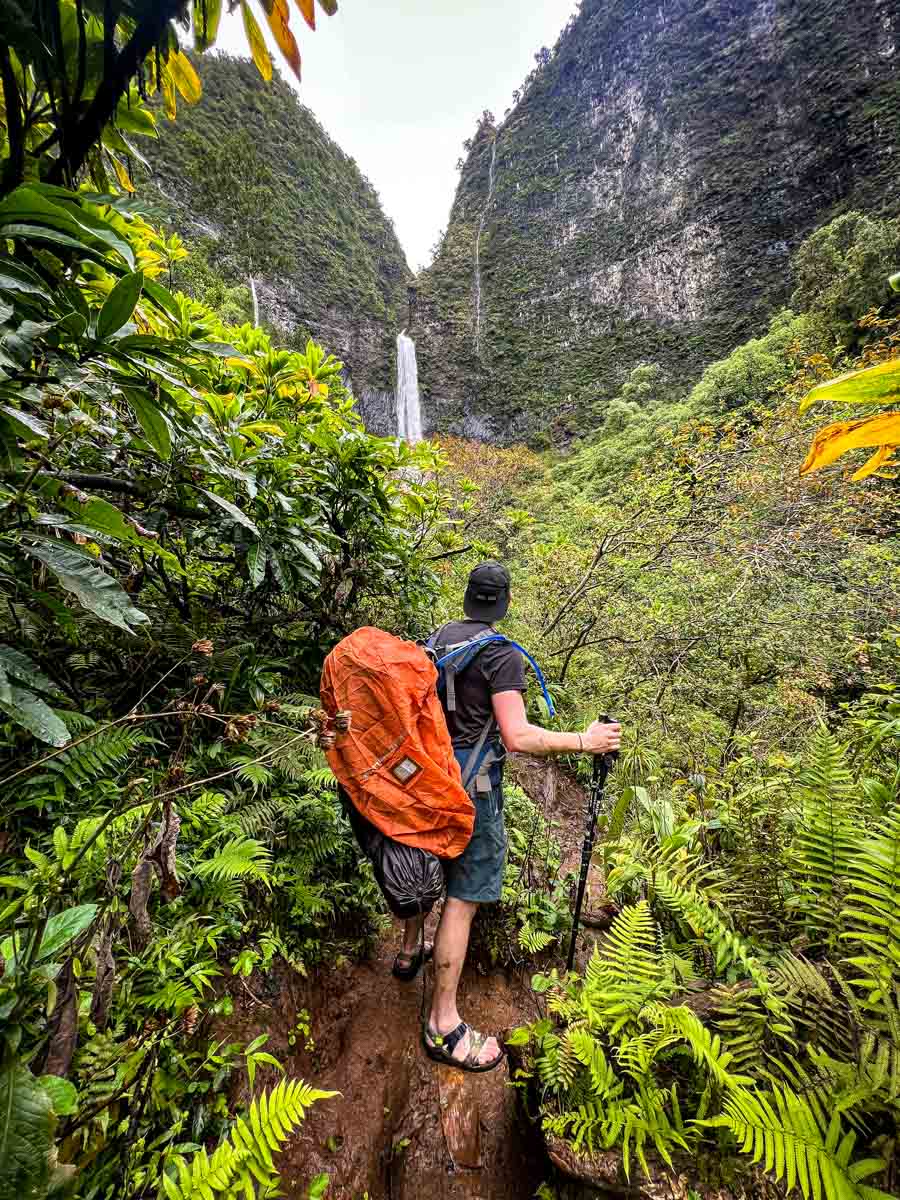
The falls itself is towering and powerful and quite a sight to behold. Even though there were lots of other people on the trail, we had a few minutes to ourselves at this waterfall.
As you get close, it is quite powerful and you will get wet from the mist. We found a flat area just off the trail nearby (away from the mist) with a perfect view of the waterfall, and took 30 minutes to enjoy our lunch.
Insider Tip: Leave your packs in a safe space at the start of the trail to lighten your load.
Hanakoa Waterfall
Location: at the 6-mile marker
Additional distance: 1 mile
The trail to this falls starts just after the Hanakoa Campsite. If you’ve spent the night here, we’d recommend tearing down camp, filling your water, then leaving your packs in the shelter at the trailhead to lighten your load.
The path is very overgrown and a bit difficult to find in places, so we’d recommend having AllTrails loaded on your phone so you can see your current GPS location.
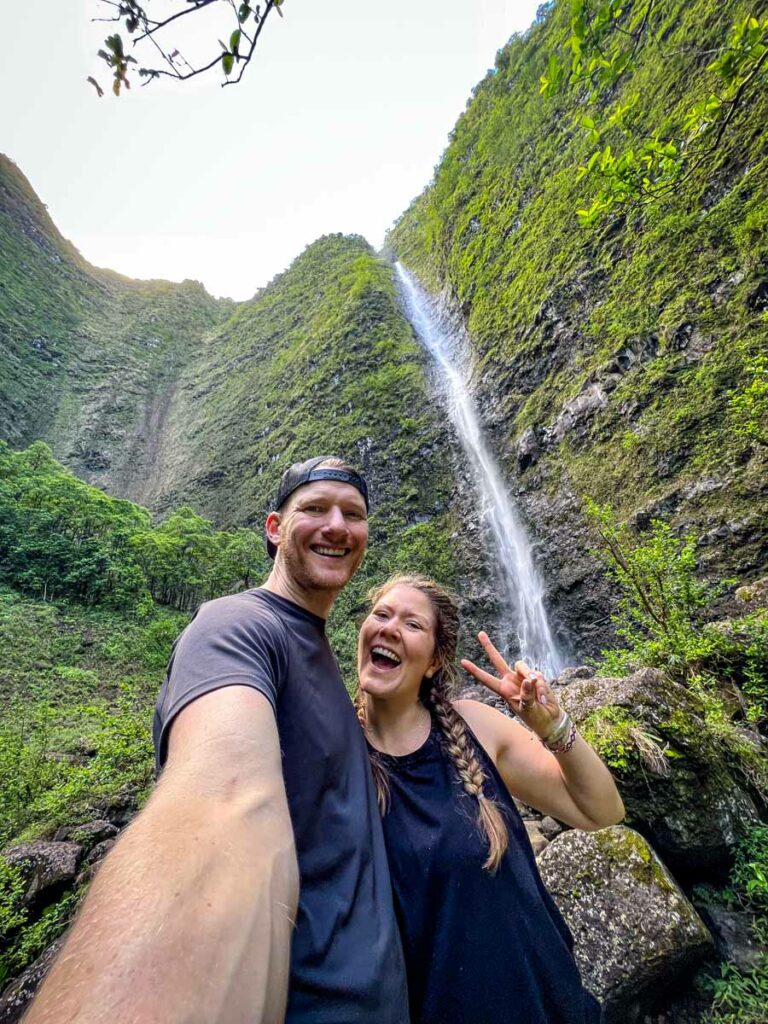
We had this waterfall entirely to ourselves, and were really happy we made the extra 1-mile detour!
Kalalau Valley
Location: at Kalalau Beach
Additional distance: 4-5 miles
Not far from camp, you can follow the End of the Valley Trail into the Kalalau Valley. This leads to some small waterfalls and nice swimming holes. We’ve even heard there is a rope swing at one!
We personally didn’t have time to do this as we only had 2 nights, but if we had an additional night on the beach, we would have definitely tacked this on!
It seems this trail is very overgrown and can be tricky to navigate. Do some research prior to your trek and carry your phone so you can see your current GPS location on the map.
Insider Tip: You can leave most of your belongings behind at camp. Bring a small daypack with essentials (like water, sunscreen, first aid, and snacks).
Best time of year to hike the Kalalau Trail
The view over Tunnels Beach from the beginning of the Kalalau Trail
Summer (May – October) is known as the best time to hike the Kalalau Trail, as you will have less chance of rain.
That said, summer is also the most highly sought-after and permits can be very difficult to snag. (We’ve heard that they can often sell out in seconds after going on sale at midnight!)
Another thing to consider is that during the drier times of the year, the landscape won’t look nearly as lush as during rainier times. That said, less mud and rain will definitely make the hike easier and more enjoyable.
Personal experience: We personally hiked in early April, and while we encountered quite a bit of mud on our first day and rain on our last day, we still had an incredible time. Even if you’re not able to hike during the “best” time of year, you should still have a wonderful experience as long as you are prepared.
Want more info on weather in Hawaii? We created a guide that goes over the best times to visit Hawaii and what to expect during each season.
Weather on the Kalalau Trail
While weather on the trail varies drastically, two things are very likely: heat and rain.
Be prepared for both, and keep reading for more weather-related information.
1. Weather on the trail is notoriously unpredictable
Take a look at the weather forecast before your hike, but don’t put too much weight into it. The forecast tools aren’t super accurate with this region, and while it can give you an idea of what to expect, it likely won’t be completely correct.
We found that the weather on the first half of the trail was much rainier (and the path was therefore muddier) than on the latter half of the trail. This may not always be the case, but my point is that it can be totally beautiful on one section and downpouring a few miles further.
Expect to encounter it all, and come prepared.
2. Check to see if there are any warnings or closures
Check the Kalalau Trail website prior to your hike to ensure there are no warnings or closures in place.
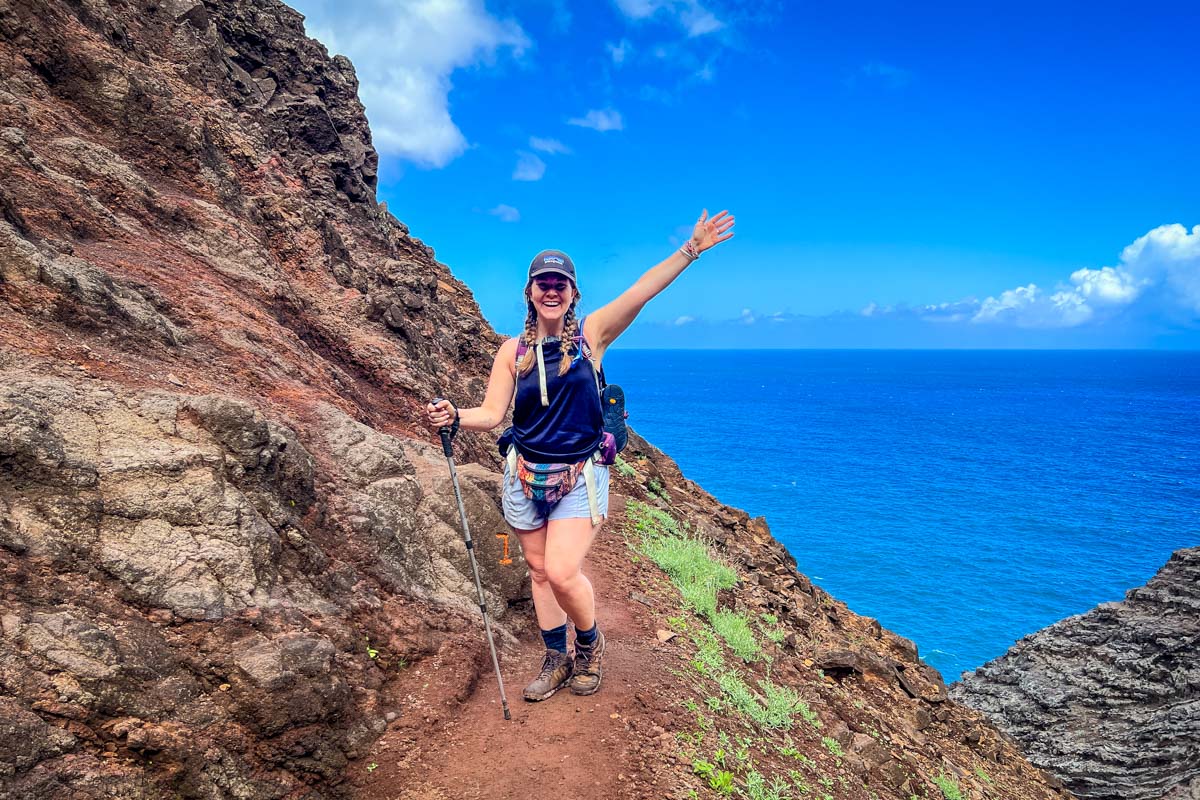
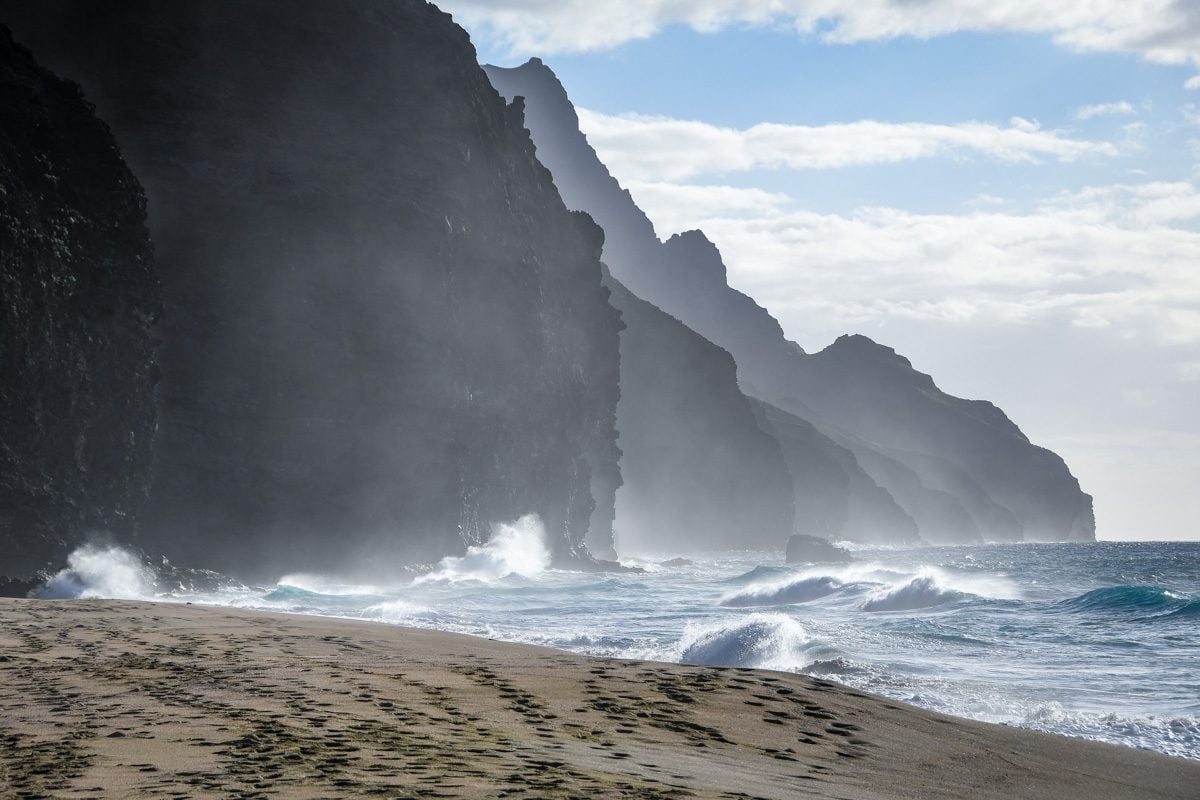
3. Be prepared for heat, humidity & sections with zero shade
It gets hot. Like, really hot. There are sections of the trail that snake through wild jungles and the air is thick and heavy. And there are other parts where there is no shade for miles (like the photo above), as you make your way along the exposed, sun-baked trail.
We’d recommend getting an early start each day to lessen the amount of time you spend hiking in the peak heat of the day. You likely won’t avoid it completely, but it’s nice if you can clock some miles before the sun is beating down directly above you.
Good to know: Between 9:30 a.m. and 10 a.m. is when things really start to heat up.
4. Pack a lightweight sleeping bag
Before our trek, we kept reading that a full-blown sleeping bag was overkill in the Hawaiian heat, so at the last minute, we ditched our 20º sleeping bags and ordered these super lightweight ones. They zip together to make a double sleeping bag (which we liked), and it was plenty warm for us.
I can confirm that it stays warm throughout the night and your regular sleeping bag will be too hot (and unnecessarily bulky).
Good to know: We’ve read that some people just bring a sheet or a sleeping bag liner, but we were happy we had a little something more than that.
5. You will be wet
We were pretty much damp the entire 3 days on the Kalalau Trail, either from sweat, humidity, rain, waterfall mist, river crossings, or all of the above.
Here are some tips for keeping yourself and your gear dry:
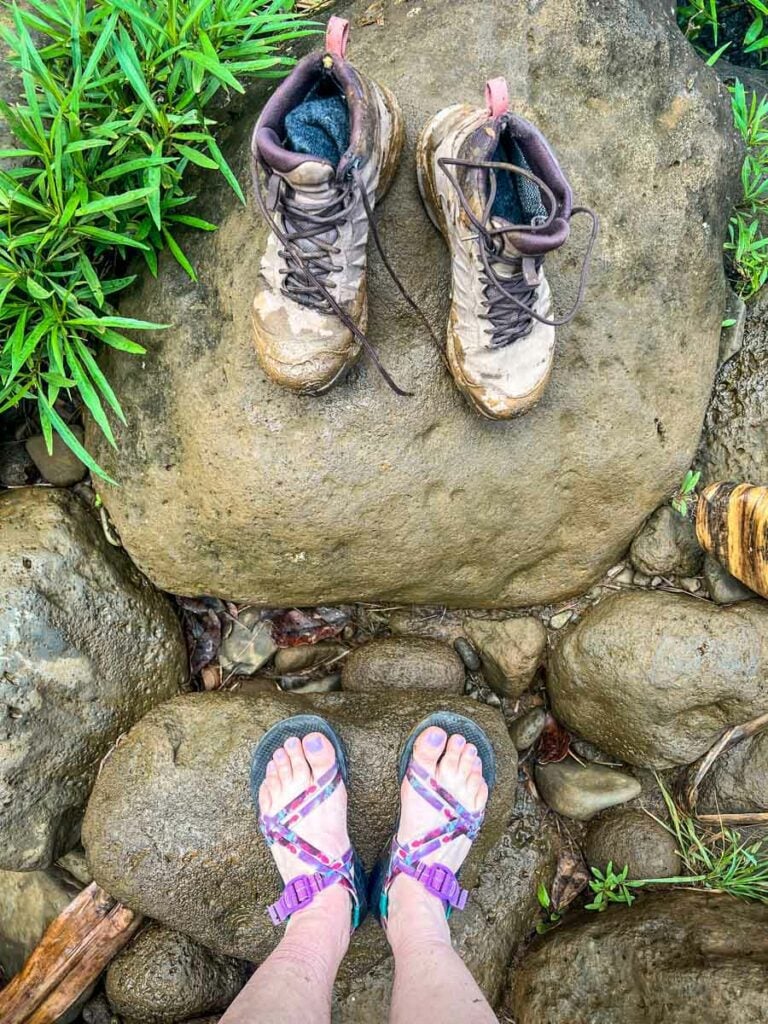
wear waterproof hiking boots
switch to water-friendly hiking sandals (like Chacos) for deep river crossings so you keep your boots and socks dry
bring a lightweight rain jacket or poncho
carry a dry bag for your valuables (like camera equipment)
at the very least, put your wallet and trail permit in a ziplock baggie
use a waterproof phone carrying case
choose a backpack that has a rain fly
6. You’ll likely encounter some rain
Kauai is the rainiest Hawaiian island and is even home to the wettest place on earth (Mount Wai’ale’ale), so during most times of the year, it’s almost guaranteed that you will experience some rain during your hike.
You may experience a light sprinkle while it’s still sunny (my grandma, who lived in Hawaii, called this “pineapple juice”). Or, you may encounter a straight up downpour where the skies show no mercy for you and your backpacking gear.
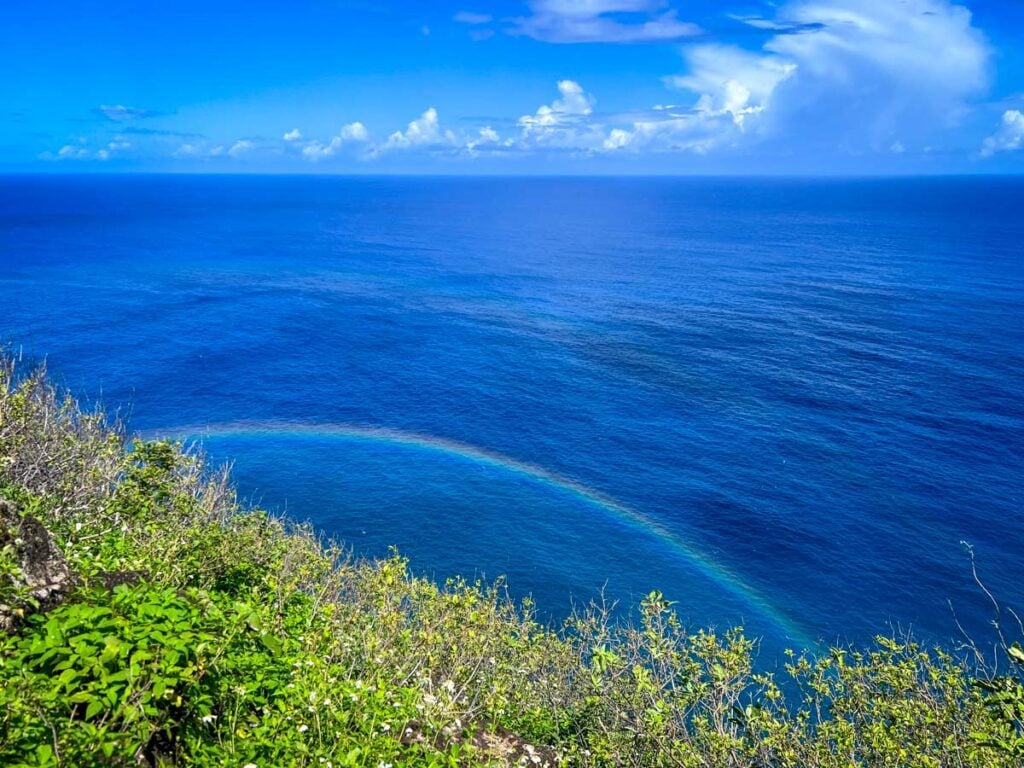
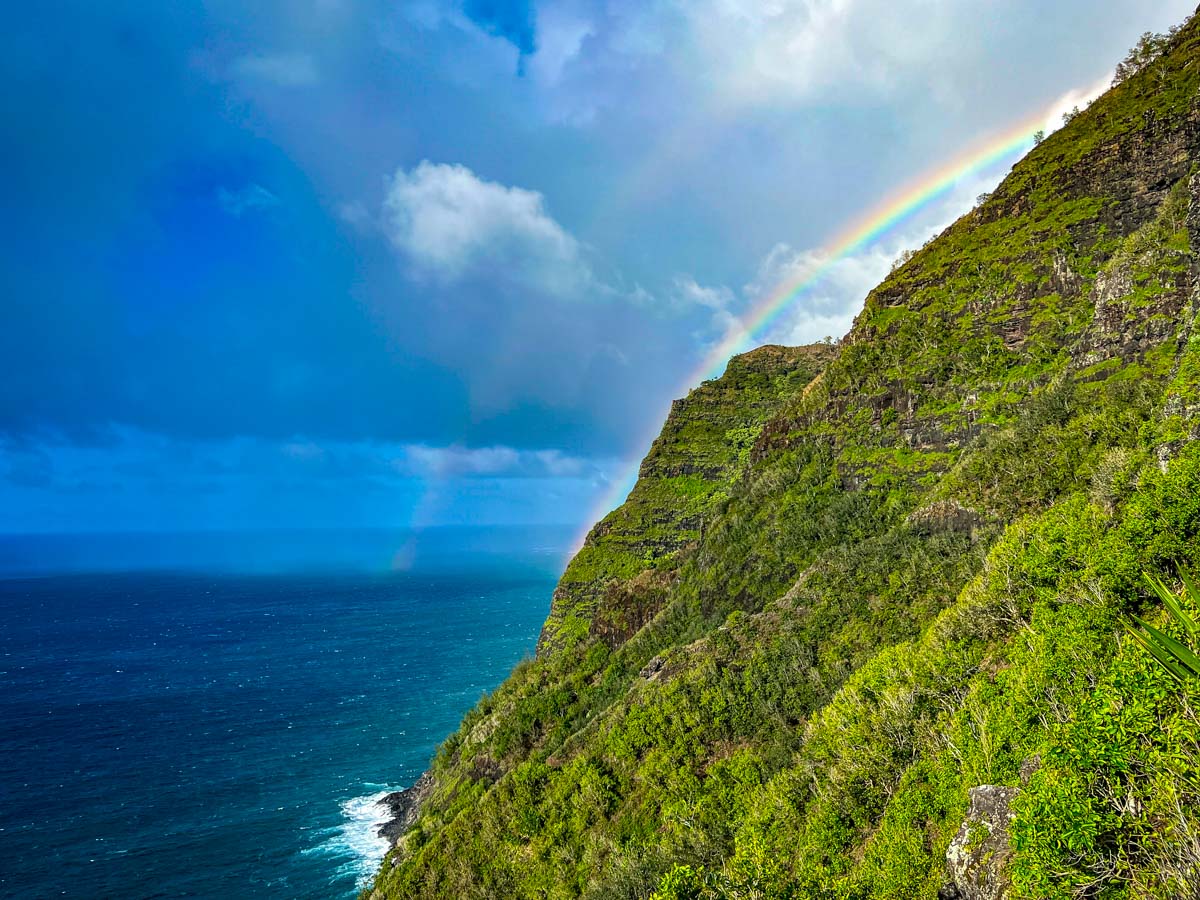
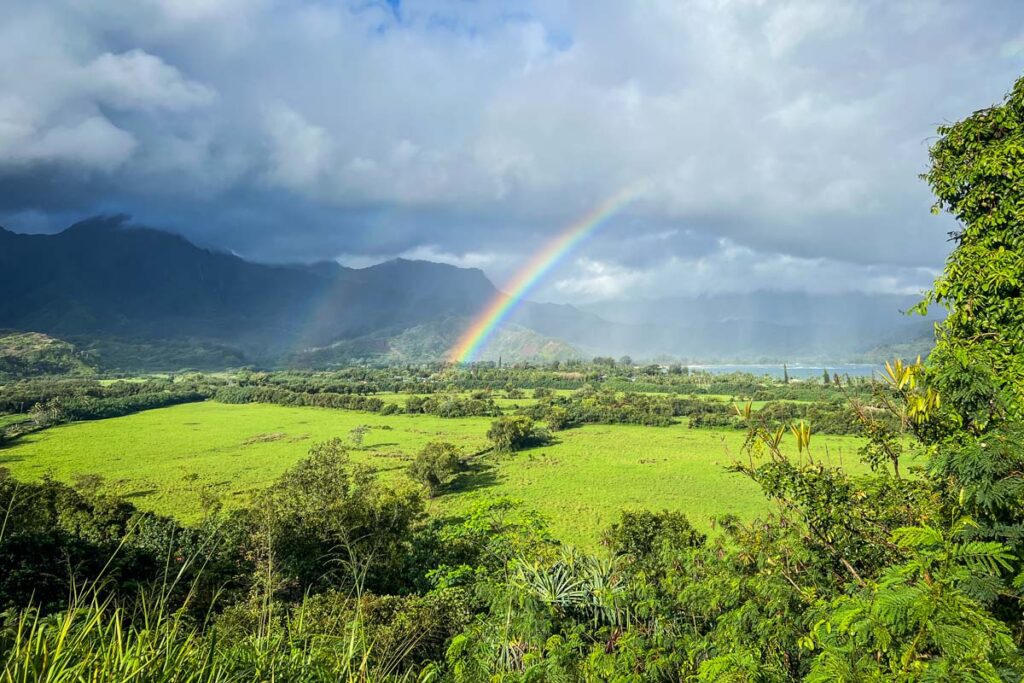
You might get both, like we did! After a rain, keep your eyes peeled for a rainbow – there’s nothing quite like seeing one on the Na Pali Coast. Trust me.
And if you experience no rain at all, consider yourself one of the lucky ones!
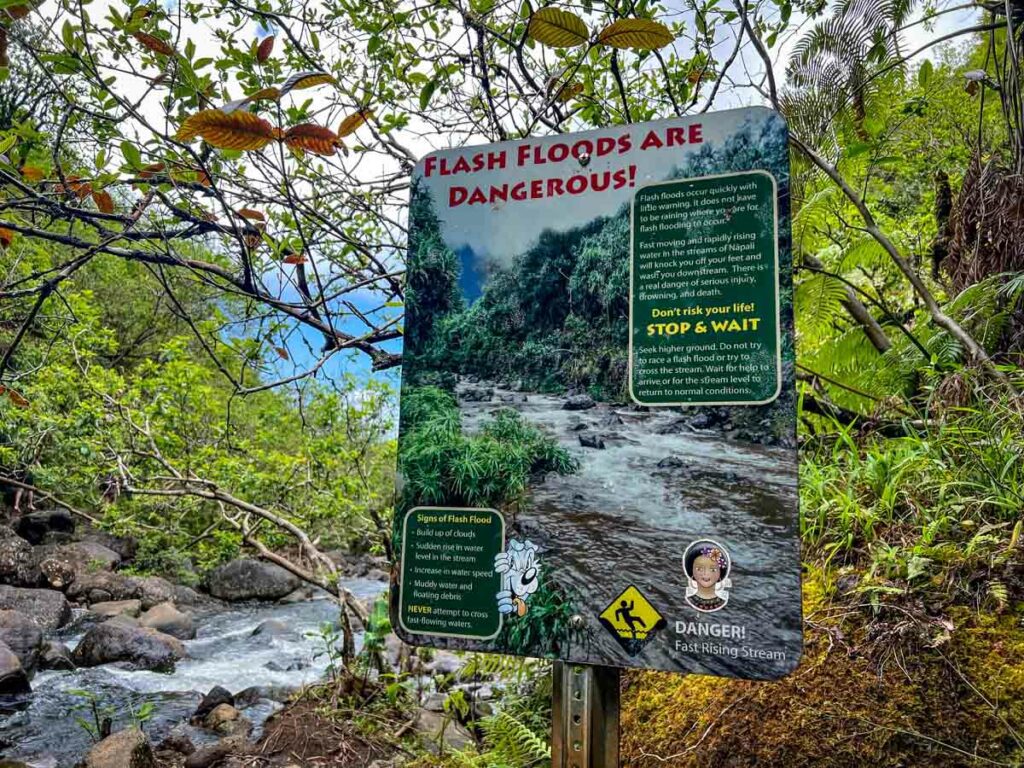
7. Don’t hike in flash flood conditions
One of the most important things to know is that you should not cross rivers in flash flood conditions. There are signs warning about this at each river crossing, and it can be a real danger.
If you find yourself in this situation, wait a while, as the river can sometimes go down as quickly as it rose.
How to get a Kalalau Permit
Permits are required on the Kalalau Trail past the 2-mile point.
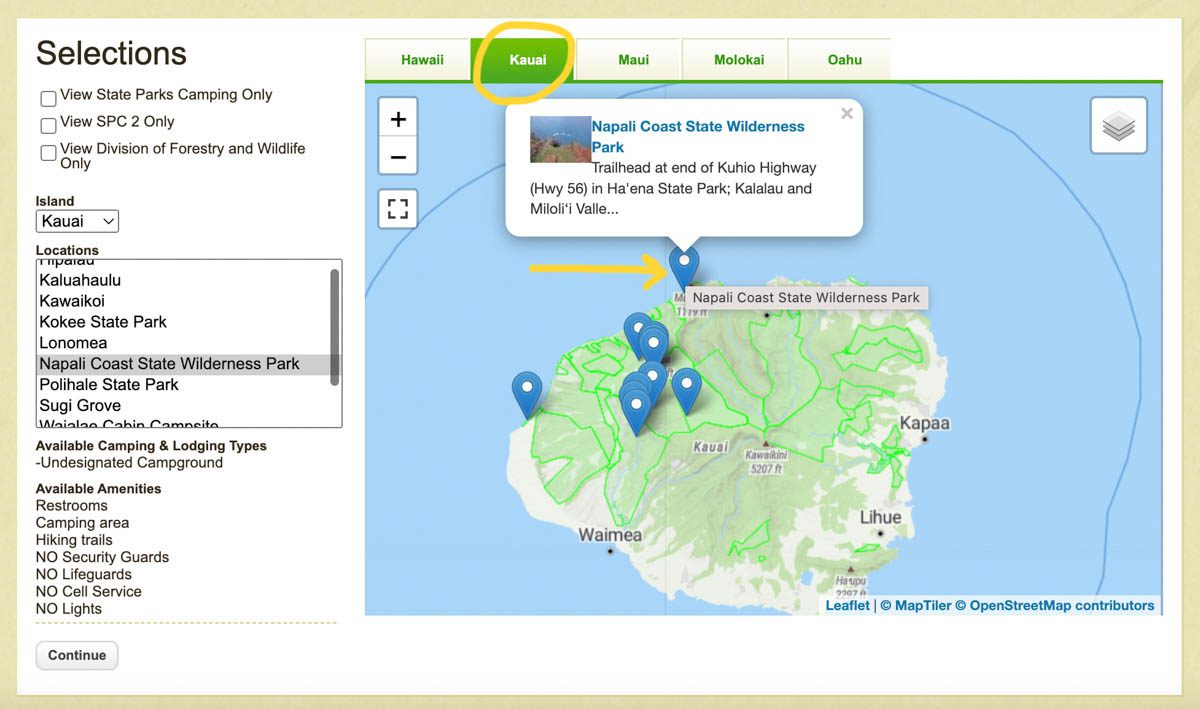
You can apply for a permit on this website. This is the only way to get a permit.
Things to know about getting a permit:
Permits open up 90 days before your hiking date at midnight Hawaii time.
Insider Tip: Set an alarm on your phone so you remember to get online just before they open up. Clear your cache and wait to see the spots populate.
Dates during the most popular season (summer) sell out in minutes – sometimes seconds! – from going live.
You need a profile set up on the permit website in order to complete your transaction. Expedite the process by setting up your profile in advance so purchasing them is quick and easy.
For the best chance of securing a permit, go in a smaller group as it can be difficult to get many permits during much of the year.
If possible, be flexible with your dates. You may have to try several days in a row before securing permits.
If you don’t get your dates, check for cancellations. Several people have secured permits this way, but it is not guaranteed.
Important: Be sure to print out your permit and carry it with you.
When attempting to get your permit, make sure you are in the “Kauai” tab at the top (yellow circle), and select “Napali Coast State Wilderness Park” (yellow arrow).
Permit cost
Non-residents: $35 per person, per night
Hawaii resident: $25 per person, per night
Cancellations
If you cancel your permit at least 15 days prior to your dates, you will be granted a refund minus a $5 cancellation charge.
I didn’t get a permit; can I still do this hike?
Yes and no.
You can hike the first 2 miles of the Kalalau Trail without a permit. After this point, there is a sign past which you cannot hike unless you have a permit.
This means you cannot hike to Kalalau Beach without a permit (even if you don’t plan on camping).
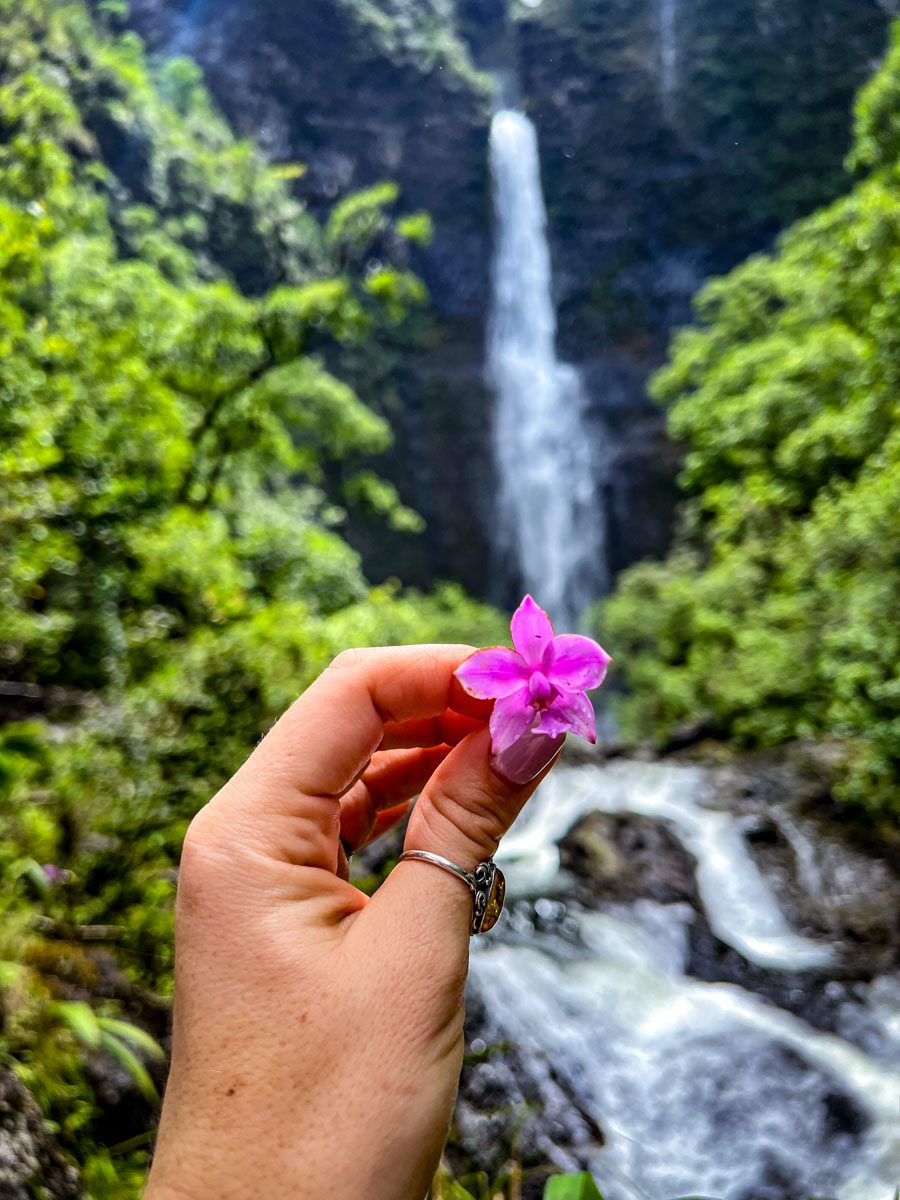
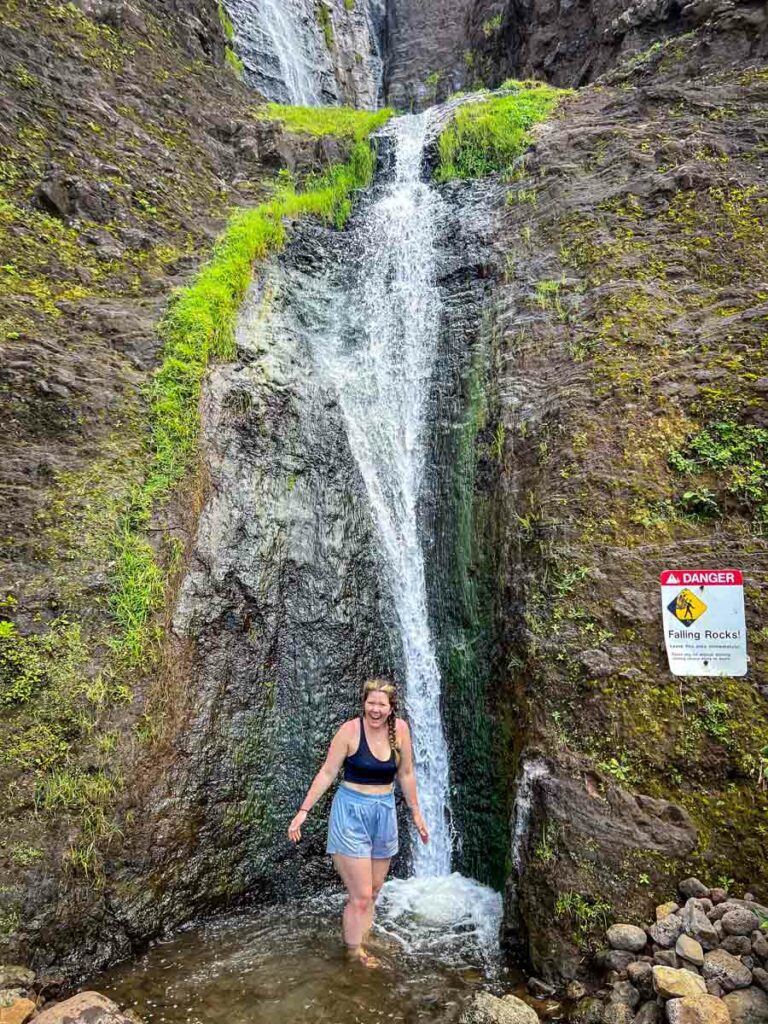
Can I hike the first portion of the trek without a permit?
Even if you don’t get a permit, you can hike to Hanakapiai Falls (pictured), as it is in an area open to day hikers.
Yes, the first 2 miles of the trail are open to day hikers.
While the trail can be muddy and there are river crossings, we personally saw people of all ages (young children through seniors) on the first 2 miles of the Kalalau trail.
Options for day hikers:
Viewpoints: There are a handful of viewpoints along the way, like ¼-mile viewpoint (which is actually . You can hike to these viewpoints, then turn around and spend time on Ke’e Beach.
Hanakapi’ai Beach: Located at the 2-mile mark, and many day hikers make it to this beach, then turn around. This means, it will be a 4-mile hike in total.
Hanakapi’ai Falls: Day hikers can trek to Hanakapi’ai Falls, which is located in the Hanakapi’ai Valley, 2 miles from the beach. In total, it is an 8-mile hike if you plan to see Hanakapi’ai Falls (with several river crossings).
Psst! Don’t leave without discovering all the best things to do in Hawaii, including the quintessential activities and some off the beaten path experiences you won’t want to miss!
How many days do I need?
Below you’ll find the bare minimum along with our personal recommendation.
Minimum: 2 days, 1 night
We wouldn’t even consider this trail if you don’t have 2 full days and one night.
Our recommendation: 3 days, 2 nights
We went back and forth between 1 night and 2 nights, and we were so happy we chose the latter. With 3 days, you can add on a couple of detours and break up your days so you don’t have 2 long hikes back-to-back.
See our Kalalau itinerary suggestions in the section below.
Even better: 4 days, 3 nights
If you have the time, an additional night can be nice to really relax at Kalalau Beach and even hike into the Kalalau Valley where there is a swimming hole and rope swing.
What about more days?
This would purely be up to you, but personally, I think any more than 4 days would be a little long for this trail.
FYI 5 nights is the maximum you are allowed to stay.
Kalalau Trail Itinerary
Wondering how to plan your days?
I get it – it can be kind of confusing.
Below you’ll find the route we personally took and highly recommend as well as routes if you have more or less time.
This is the route we personally followed and we were very happy with it. We think it is the best itinerary for this hike.
This route gives you a bit of wiggle room on your start time on day 1 and allows you to add on detours to two waterfalls.
By following this itinerary, you’ll also have plenty of time for relaxing at Kalalau Beach, instead of showing up at sunset and leaving the next morning (as we saw many people doing).
If you’re curious about our route, trail conditions and timing, here is our personal trail report:
Day 1
We began at the trailhead at 9 a.m. and arrived at the Hanakoa Campsite at 5:45 p.m. This included a detour to Hanakapiai Waterfall, a leisurely lunch and lots of photo stops.
If we were to do it again, we would start just a bit earlier as we didn’t have much time at camp before the sun set.
Day 2
This was a very leisurely day for us. We didn’t even set alarms. After breaking down camp and filling water, it was about 9 a.m. We did a 1-mile detour to Hanakoa Falls, then hiked the 5 miles to Kalalau Beach. We arrived to our campsite at 2 p.m. so we had the rest of the afternoon and evening to relax and enjoy ourselves.
Day 3
Woke up while it was still dark (5:30 a.m.), and broke down camp as the sun was rising. Left camp at 6:30 a.m. and hiked to the river crossing .5 miles from camp where we filled up our water (we filled here instead of the waterfall since it would be out of our way). We left the river shortly after 7 a.m. and were the first people on the trail leaving from the beach (though there were 2 groups not far behind us).
We stopped for a quick snack at Hanakoa Camp and were making really good time until about 3 miles from the trailhead. It began to downpour and the trail became a muddy mess, so this section took much longer than normal.
We arrived back at the parking lot at 2:10 p.m., meaning it took us about 7.5 hours for the hike, a couple short snack breaks and one water fill-up. (FYI This was a quick pace, other than the last few miles.)
2 days, 1 night itinerary
This is the route you can take with the bare minimum amount of time.
Day 1: hike the entire 11-mile trail and camp at Kalalau Beach
Day 2: hike 11 miles back to the trailhead
Be sure to start as early as possible on day 1 so you can have time to enjoy the beach. On day 2, you’ll also want to get an early start so you’re able to get back to the trailhead in time to catch a shuttle or other mode of transportation.
Pro:
This allows you to experience the Kalalau Trail even if you don’t have much time to spare from your Kauai itinerary
Cons:
You likely won’t have time for detours to the waterfalls
You will have 2 very long hiking days back-to-back
Depending on your start time and pace, you may not get to Kalalau Beach until just before sunset. We saw many people arriving at dusk then leaving first thing in the morning, meaning they didn’t really get to enjoy the beach (aka the pinnacle of the hike and reason to do this trail).
4 days, 3 nights itinerary
If you have more time, we think an extra night at the beach would be really nice. This will give you time to truly soak it all up and even hike into the Kalalau Valley if you desire.
Follow our 3 day/2 night itinerary, but instead of hiking out on day 3, spend the day and night at Kalalau Beach. If you want to go into the Kalalau Valley, this is around a 5-mile day hike. Here, you will find a swimming hole with a rope swing as well as many fruit trees.
Have more time? Spend another night at the beach, or add a stay at the Hanakoa Campsite on your return trek to lessen your time hiking.
Campgrounds on the Kalalau Trail
There are two campgrounds on the Kalalau Trail, and we’ll share what you can expect at each.
Both campgrounds have the following:
A shelter of some sort
Flat(ish) spots to pitch your tent
Composting toilet
Water source
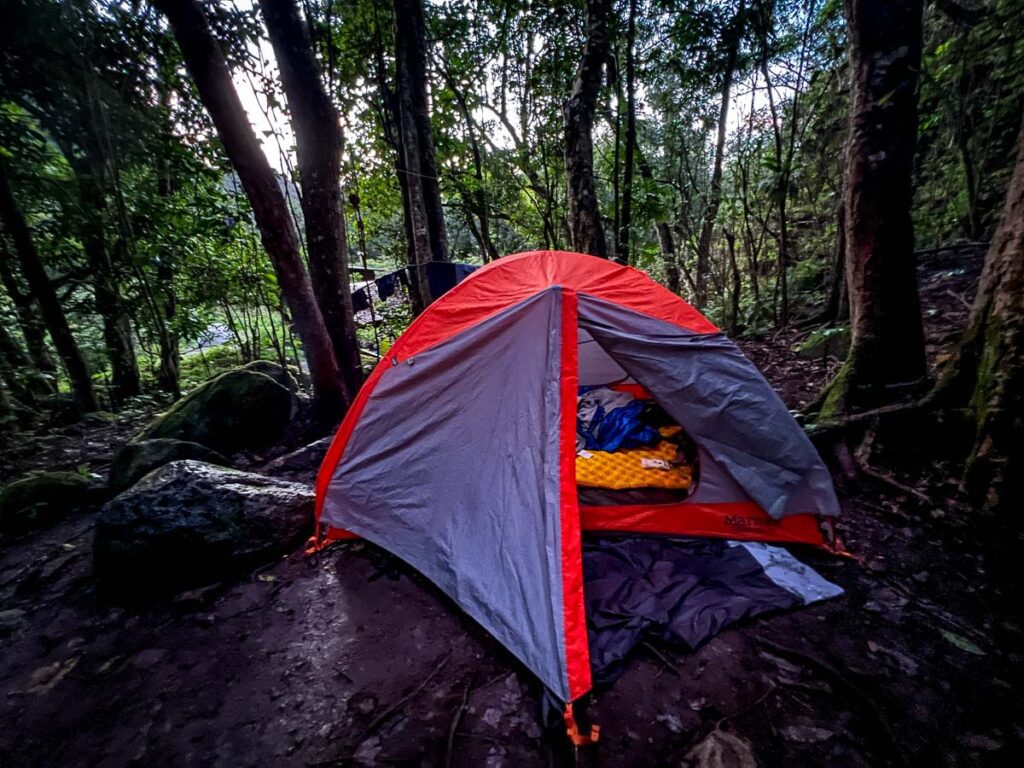
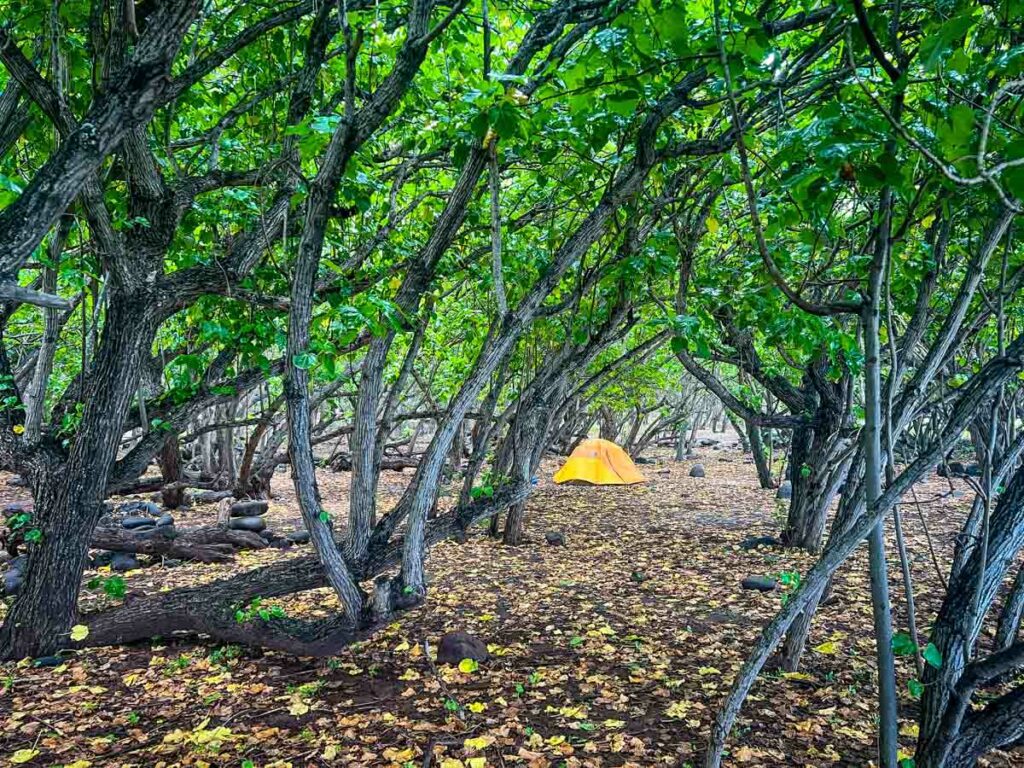
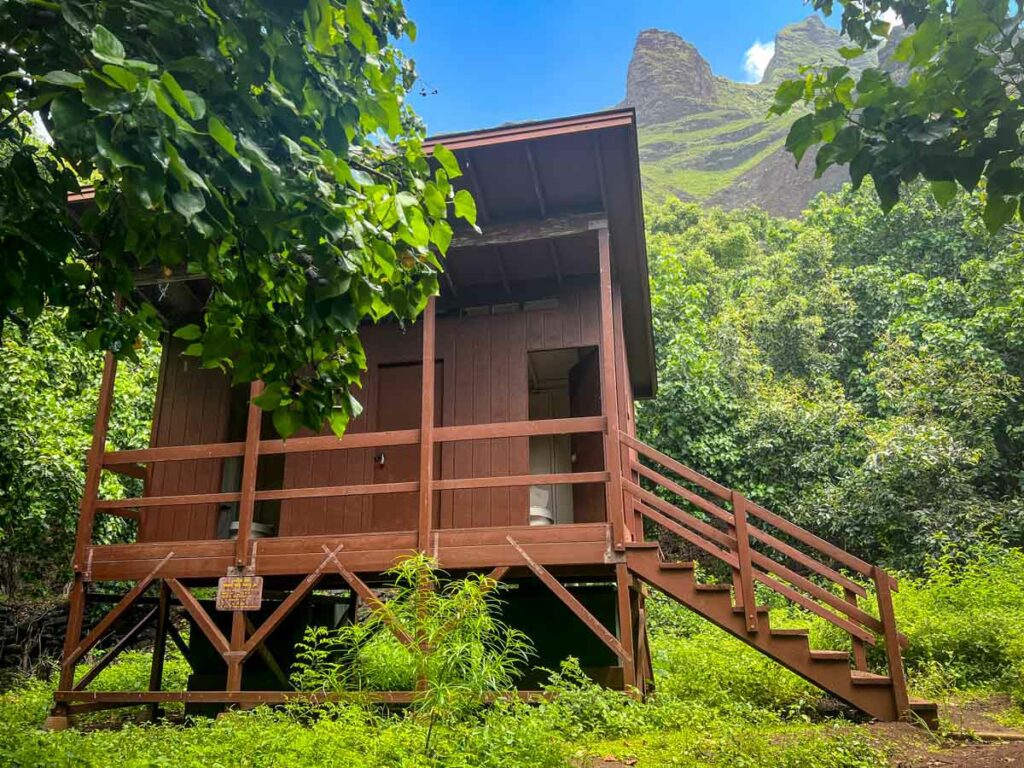
Hanakoa Campground
The first of the two campgrounds is by far the smallest, but we highly recommend spending a night here to break up your hike.
There are a handful of “tent pads”, aka flat(ish) spots to set up your tent. We found ours to have lots of roots, so we’d recommend packing a sleeping pad. This site is forested, so you may notice some bugs here.
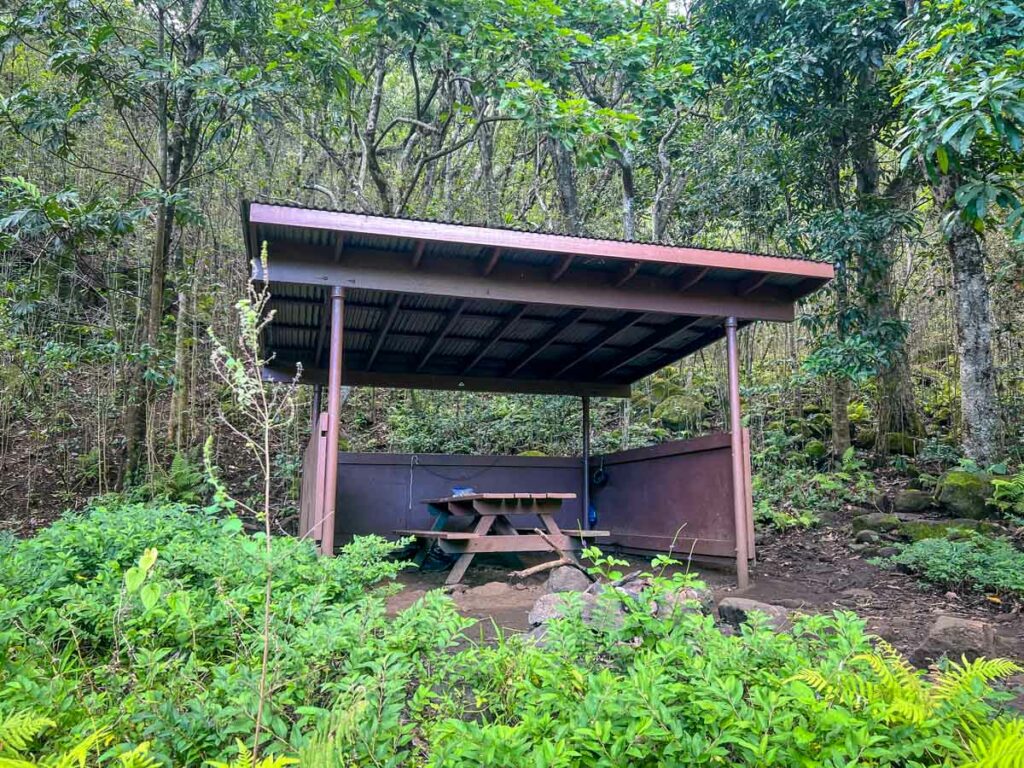
There is also a shelter with a picnic table, which is nice for cooking and hanging out with other hikers. You’ll also find a composting toilet.
Just a bit further on the trail is a river (which you will need to cross after leaving camp). This is where you can fill up water. It is also a nice place to take a dip!
If you plan on bathing here, please do not use any soap (even biodegradable stuff). Getting into the water feels refreshing enough, trust me!
Good to know: You are only allowed to spend one consecutive night at the Hanakoa Campground. This means you can spend one night here on the way to the beach and 1 night on your return trek. But you cannot spend two nights in a row here.
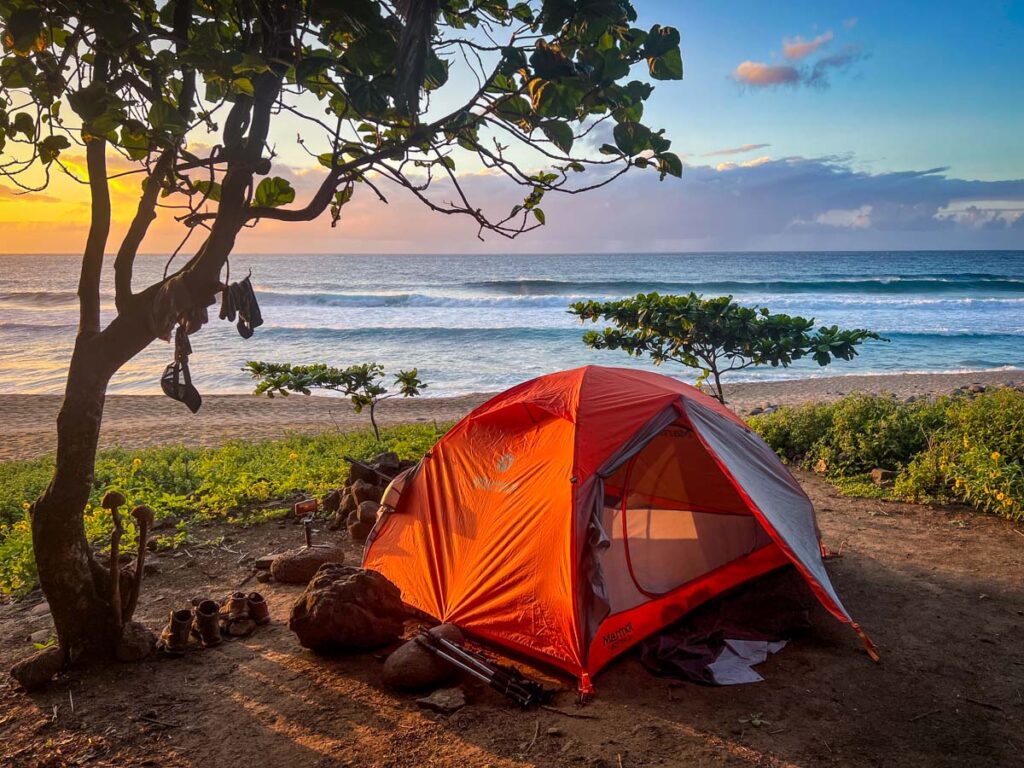
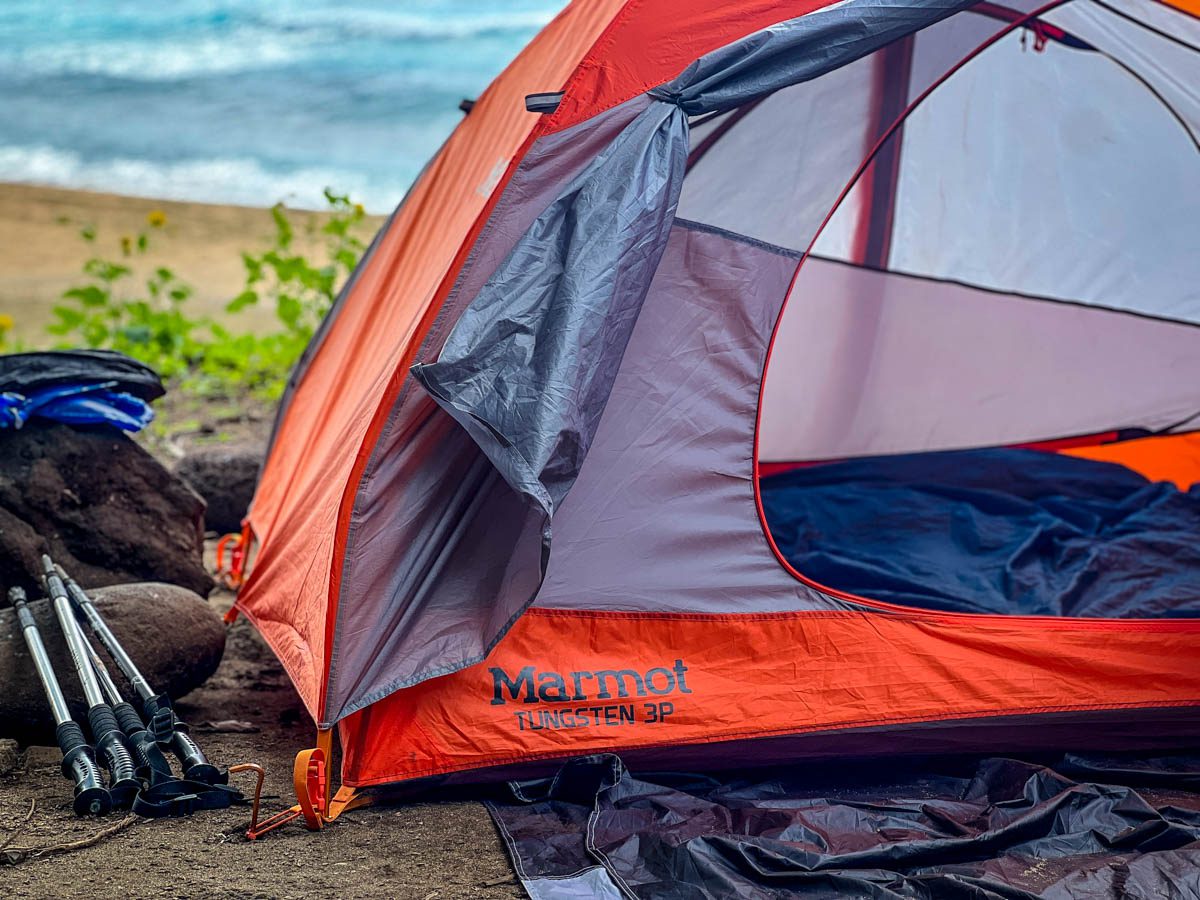
Kalalau Campground
Staying here is the reason people make the trek!
This white sand beach flanked with jungle-covered mountains will likely be one of the most epic places you’ve ever spent the night.
Unlike Hanakoa Campground, which is pretty compact, the camping at Kalalau Beach is much more spread out.
As soon as you reach the beach, you may be tempted to pitch your tent in the shaded and flat area amongst the trees, but we’d encourage you to keep walking a bit further.
As you near the waterfall at the end of the beach (the water source for this campground), the sites become larger, more private, and have breathtaking ocean views.
The waterfall at Kalalau Beach is a great spot to rinse off and fill your water.
Speaking of the waterfall at the end of the beach,it is a great place to rinse off and fill up your water. There is a sign that says you can use biodegradable soap here, but we personally chose not to, as just rinsing off felt amazing by itself.
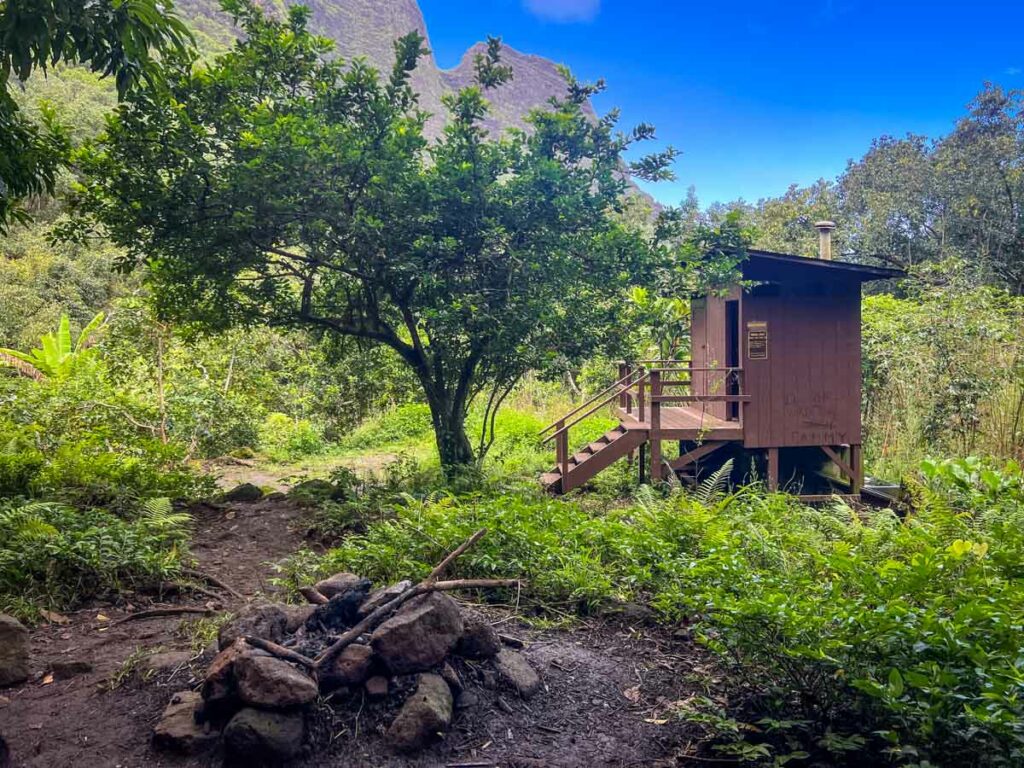
Also at camp are some boarded up buildings with overhangs for shelter if it is raining, and two toilet areas.
Even though there will be many others camped here (roughly 40 people when we were there in April), it doesn’t feels crowded. There is plenty of space to spread out.
Toilets on the Kalalau Trail
There are a handful of toilets on the trail. Here are the locations as well as what you can expect at each:
Ke’e Beach: clean with flush toilets and running water; there are outdoor showers here which are great for rinsing off mud when you complete the trail
Hanakapi’ai Beach: these were very smelly/dirty when we were there (worst on the trail during our trek)
Hanakoa Camp: very dirty/smelly
Kalalau Beach: there are two toilets here; the “unisex poop room” (haha, I know!) near the waterfall at the end of the beach was clean and surprisingly did not smell at all when we were there
Good to know: The toilets should have toilet paper, but I would also bring your own. It can be damp or dirty, and if it runs out you’ll be outta luck!
What if I need to go where there is no toilet?
Good question! It happens. Ya gotta go when ya gotta go, right?
Well, listen up because there are some very important things to keep in mind if you plan to do your business in the wild and it does require some advance planning…
Get off the trail. Nobody wants to walk where you went to the bathroom.
Make sure you are at least 200 feet from a water source. Aka don’t go right next to rivers or streams.
If you need to go number 2, dig a hole that is at least 6 inches deep. Cover it up once you’re done so nobody steps in it. *cue me vomiting* For this reason, we never hike without a poo shovel. They are very lightweight and inexpensive and should definitely be on your packing list.
Pack out your TP. Toilet paper takes much longer than you think to disintegrate, and it is recommended that you pack it out with you. Carry a plastic baggie for this purpose.
Insider tip for ladies: When you go number 1 in the wild, instead of using TP (and having to pack it out), drip dry or carry a Kula cloth which makes it easy to feel dry and fresh without using toilet paper.
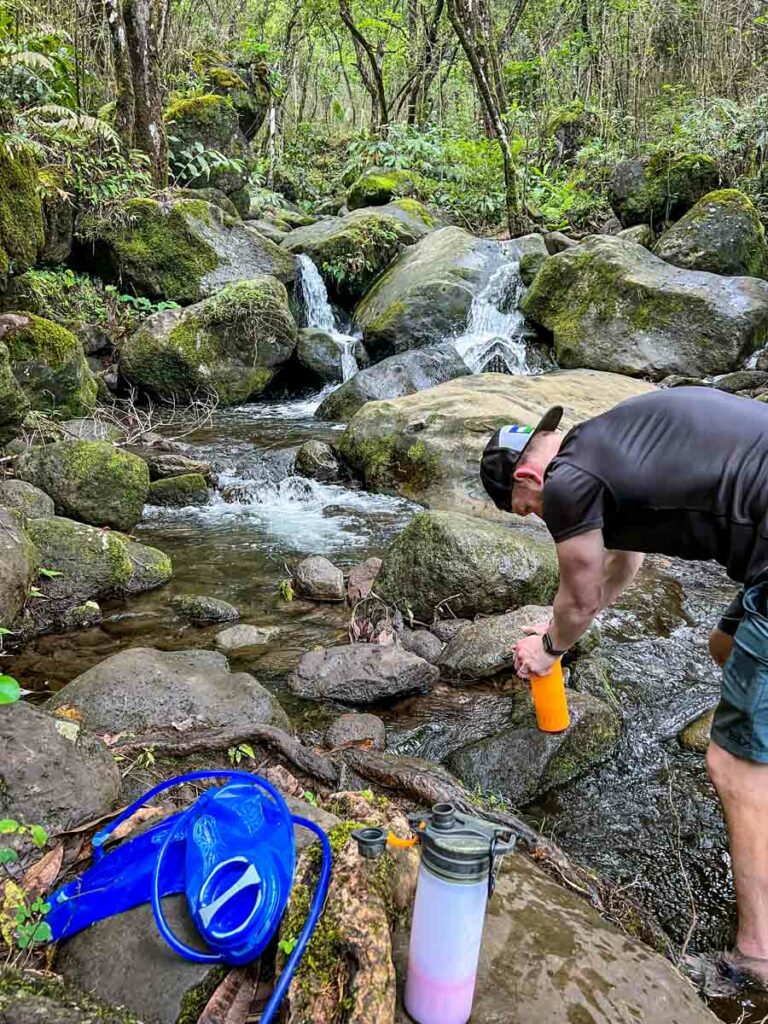
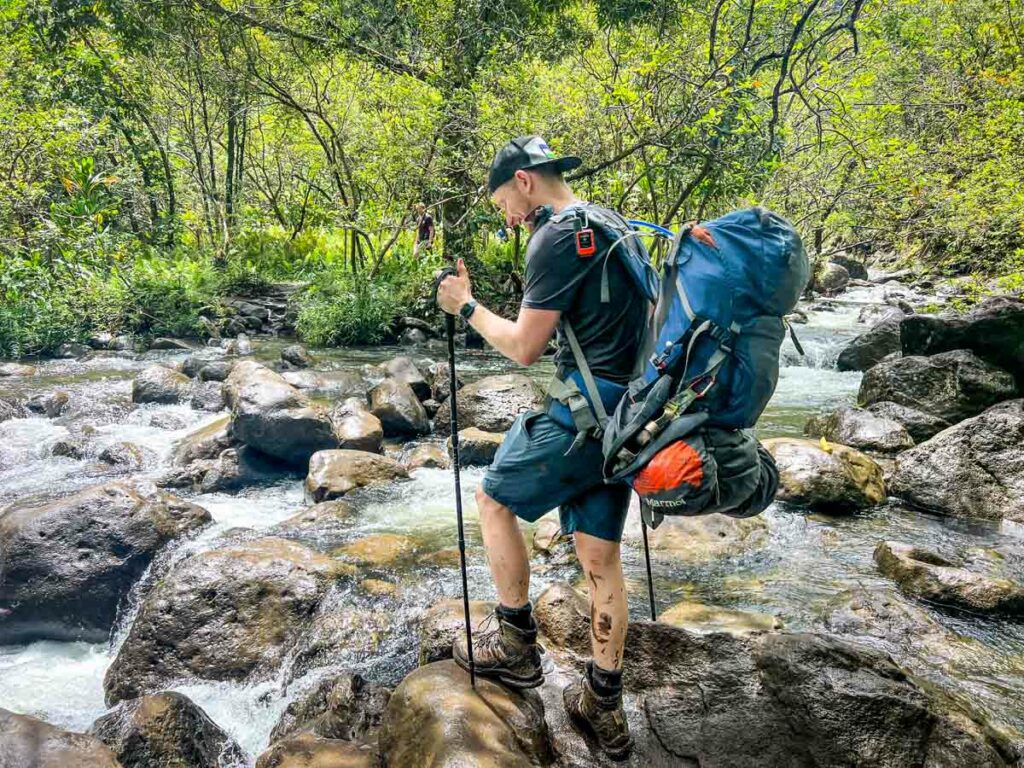
Water fill ups on the trail
Ben is using our Grayl bottle to filter the water, which we then pour into our hydration bladders.
There are plenty of places to fill water along this trail, which is amazing (the same can’t be said about all trails!).
This means you won’t have to worry about running out, so drink up! You’ll definitely want to stay hydrated on this demanding (and very hot!) trail.
There are lots of small streams, but the best places to fill are at the 3 major river crossings (as well as the waterfall at the end of Kalalau Beach).
Main river crossings on the Kalalau Trail:
Hanakapi’ai Beach (mile 2)
Hanakoa Valley (mile 6)
.5 miles before Kalalau beach (mile 11)
Good to know: Conveniently, there is a river crossing by both campsites so you can fill at night and in the morning.
Filtering water on the trail
Water that you fill from the streams and rivers on the Kalalau Trail must be treated. The water on Kauai can potentially have bacteria that causes leptospirosis, which sounds like a pretty nasty thing to contract.
I mean, listen to what the CDC has to say about it:
“Without treatment, Leptospirosis can lead to kidney damage, meningitis (inflammation of the membrane around the brain and spinal cord), liver failure, respiratory distress, and even death.” –CDC
Don’t worry – there are a variety of treatment methods that’ll kill all the bad stuff! The best water treatment method really comes down to personal preference.
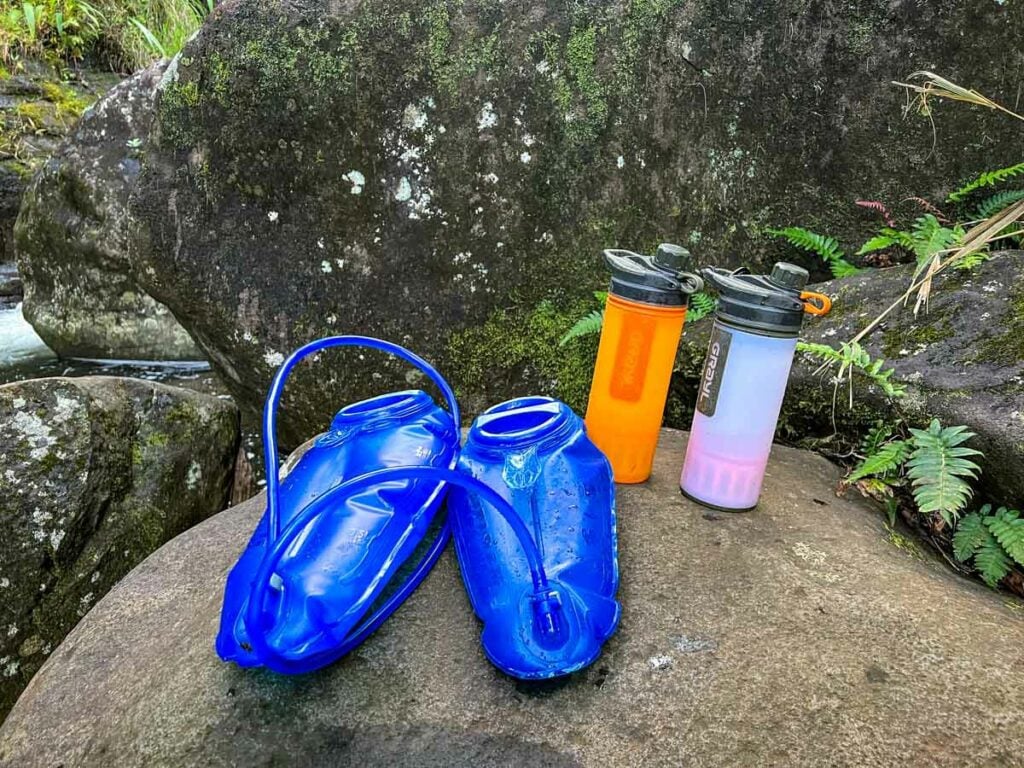
Filtration bottle (our personal favorite!)
Grayl water bottles have a plunger system, similar to how you use a French press. Push down and a carbon filter purifies water and removes debris This is personally what we did on the Kalalau Trail.
Pro: It is quick and you can drink the water immediately.
Con: You’ll have to plunge several bottles worth of water to fill your hydration bladder.
Good to know: I reached out to the Grayl team to ensure this bottle filters out the leptospirosis-causing bacteria, and here was their response…
“Katie, it sure does! Our purifier technology removes over 99.99% of ALL waterborne pathogens. Cheers to the many adventures ahead!” -Travis Barczak, Grayl
Hang up this filtration system (for example, on a tree) and it will use gravity to drip water through the filter. This is probably the most popular method of sterilization.
Pro: Set it and forget it system.
Con: You need to be at camp or a place where you can hang your system and wait for it to sterilize your water.
A UV light sterilize water in 90 seconds. This used to be our favorite system, and we still use it when we travel internationally to places where the water is untreated. But for backpacking, we like our Grayl bottles since they filter out impurities.
Pro: Lightweight and fast.
Con: It doesn’t filter out debris, and it has to be charged in order to work.
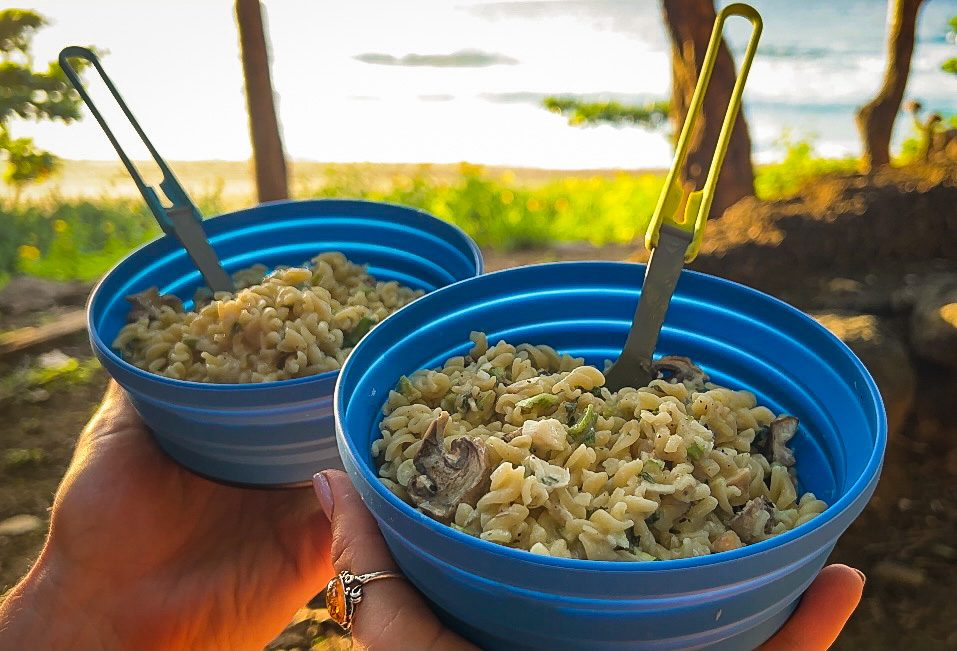
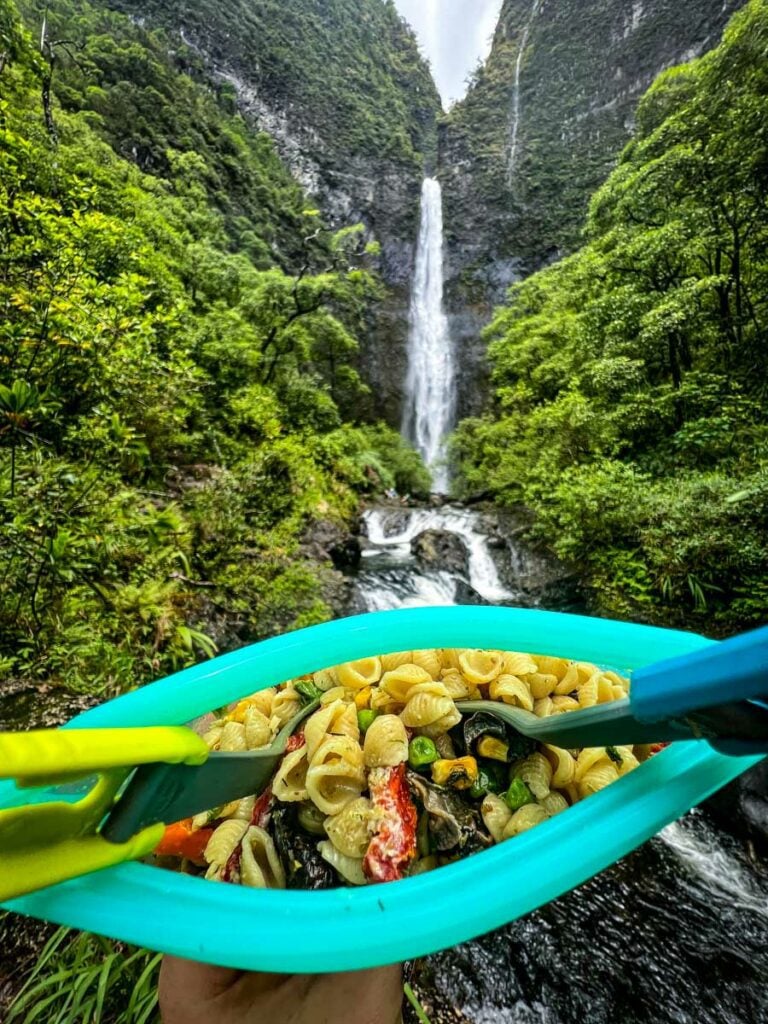
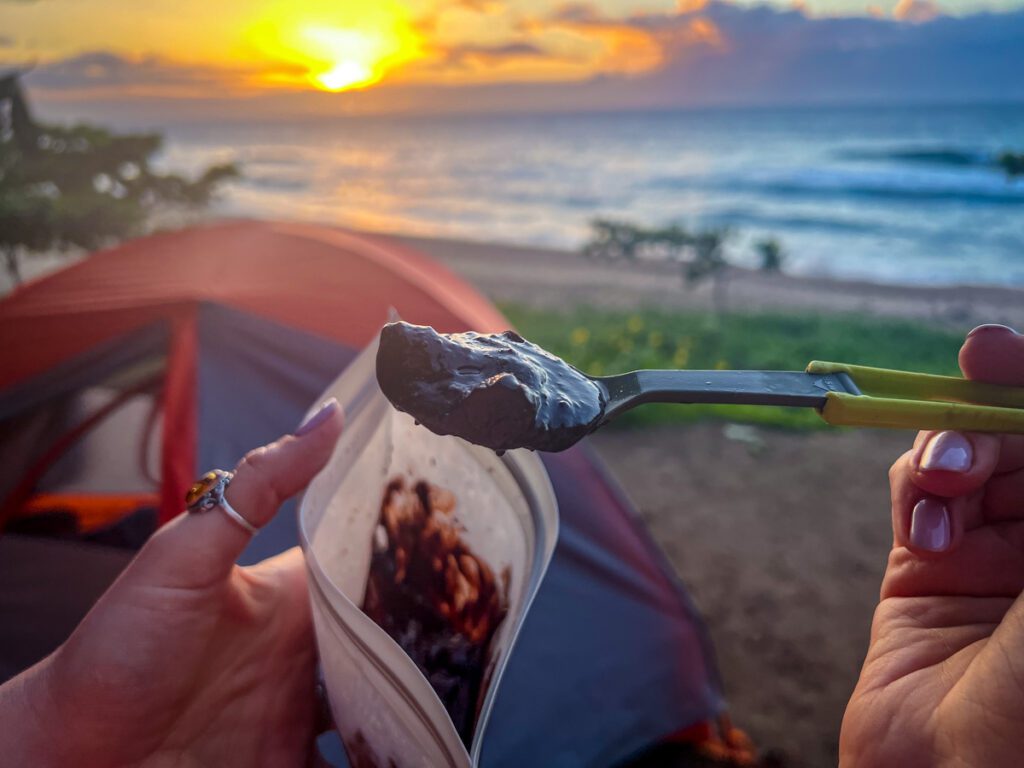
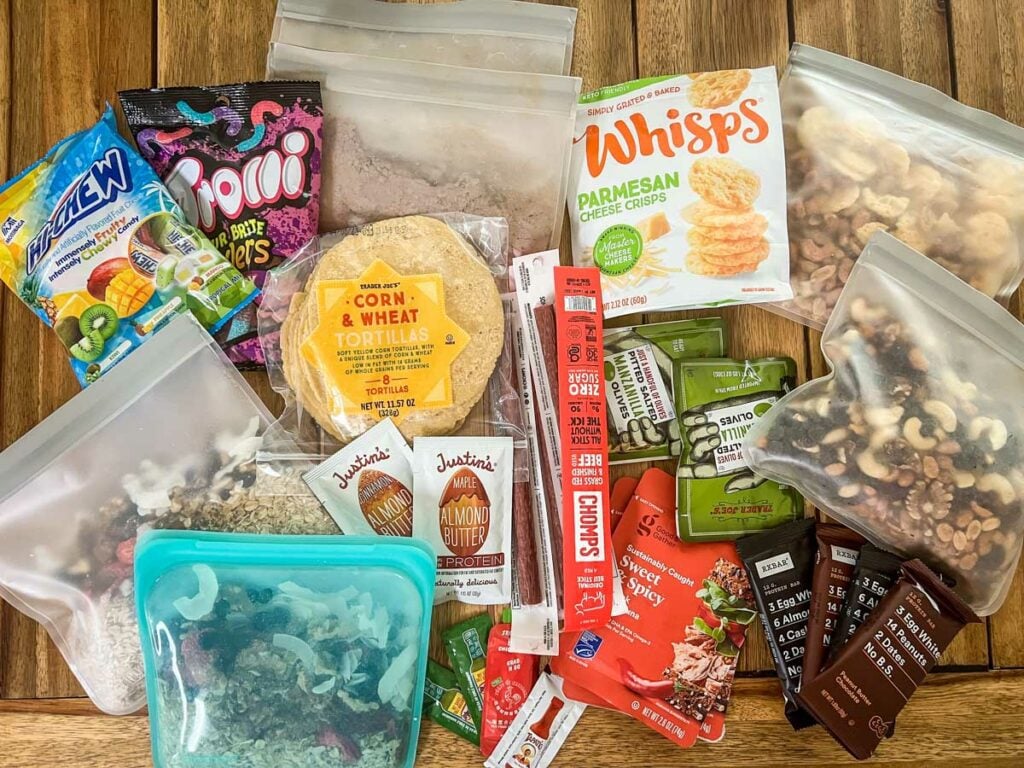
We always opt for meals that simply require boiling water rather than those that must be cooked in a pot over a flame. Not only do they cook much faster, but this means you won’t have to pack a pot and you’ll have fewer dishes to do.
Like to cook? While there are all sorts of brands out there, we started dehydrating our own backpacking meals in recent years and will never go back! It’s easy, saves lots of money, and you can make meals that are way more delicious (and nutritious) than what you’ll find in the stores.
We love bringing a little bit of brownie mix on trails (Ghirardelli is the best!). You add a few teeny, tiny drops of water and boom, you’ve got brownie batter for dessert! Thank me later!
Our advice: We’d recommend purchasing your food for this trek at home before you land in Hawaii. We found groceries to be more expensive on the islands (understandably), and we’re glad we didn’t have to search around to find backpacking meals.
Food storage on the trail
On many trails in the PNW where we live, it is required that you put your food in a bear-proof canister and store it outside of your tent. Since there are no bears in Hawaii, this is not necessary (and packing a canister would be bulky and overkill).
You should keep your food in a bag separate from your other items. On most trails, we hang food bags from a tree and we were planning to do this. However, it was raining pretty hard the first night, so we kept our food bag inside our tent.
There is always a chance that a critter will be drawn to the scent of food and will try to get to it (whether on a tree or inside your tent).
Food sack: Whether you keep your bag inside your tent or hang it from a tree, we’d recommend putting it inside a bag that is “critter proof”. We personally have this bag which is tear and puncture-proof.
Hanging from a tree: If you are hanging your bag, make sure it is at least 6 feet off the ground and 6 feet away from the trunk. It should also hang down from the branch. This will prevent most animals from being able to reach it. Don’t forget to pack rope for this purpose.
These tips will come in handy during your hike – trust us!
1. Download the offline version of AllTrails before this hike
Since you won’t have cell reception during this hike, we’d highly recommend downloading the offline AllTrails map onto your phone.
Paper maps are great (and a very reliable backup), but we find it really helpful to see our current GPS location as well as upcoming elevation gain at any point along the trail.
Also, it’s worth mentioning that if you plan to use your phone for navigation, you should set it in airplane mode to save battery and travel with a battery pack so you can keep it charged. (This is our favorite battery bank – it holds 7 full charges).
Psst! In order to get access to offline trails, join AllTrails Plus. We’ve been Plus members for a few years and it’s the only app we pay for that we can confidently say we will never quit!
2. Wear reef safe sunscreen
No matter where you are in Hawaii, you should be wearing reef safe sunscreen. Regular sunscreen is harmful to marine life and has actually been banned since 2018 (yes, even for tourists).
Some mineral sunscreens leave a white layer, but this is the brand we personally use and love. We think it absorbs really well, just like regular sunscreen.
3. Bring one hiking pole
We’re not huge hiking pole people, but we think they are so incredibly helpful for this trail. We’d highly recommend packing yours from home or renting one.
Our advice: Personally, we each brought two poles and found that to be overkill on the narrow path. We both went down to one pole for the entire trail and wished we hadn’t brought all four!
4. Carry all your trash out
Please, please take everything out with you.
It is a privilege to be able to hike this trail and the least we can all do is leave it as good as we found it for the next people. And if possible, carry out one piece of rubbish you see with you to leave it even better.
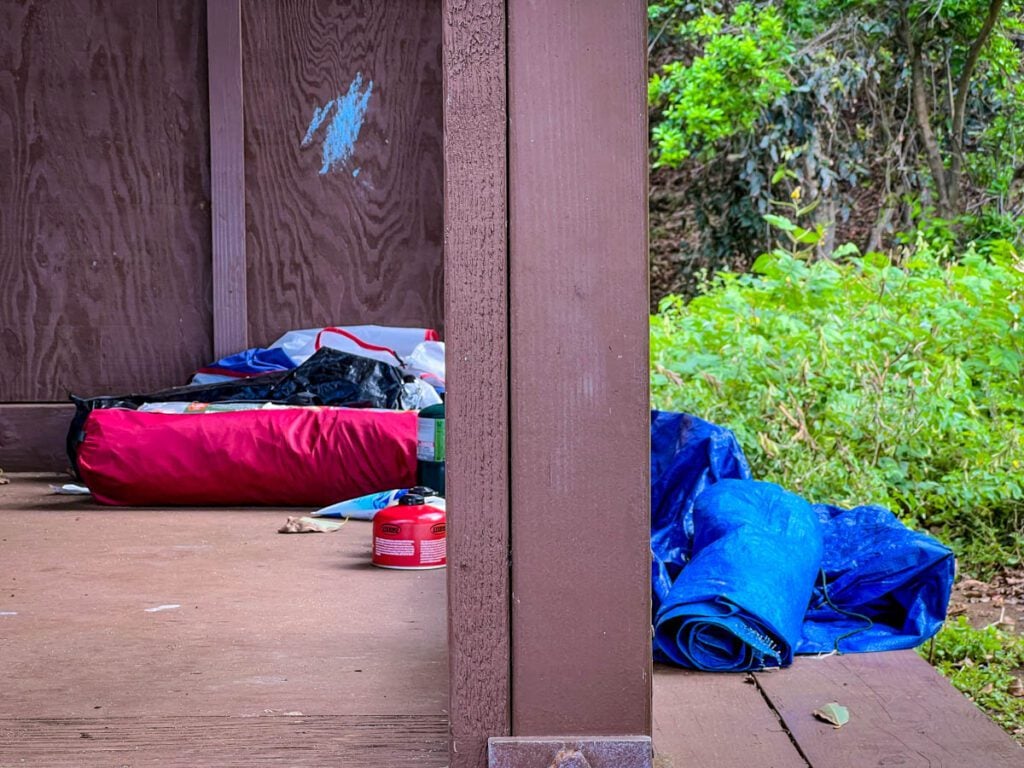
A note on this: We didn’t see much litter, but rather items people left behind probably thinking others can use them, like bags of half-eaten trail mix and propane canisters. Please do not do this.
Rangers periodically clean these out (which is probably very annoying to them), and hikers should not rely on items being left behind. Carry everything you need with you, and pack it out.
Insider Tip: If you have lots of propane left (like we did), donate it to the Ace Hardware in Princeville. They gladly took our canister that we got there for free from someone else’s donation.
5. Join this Facebook group before your hike
This Kalalau Facebook group is a great place to ask questions and see other hikers’ recent trail reports. We also like checking trail reports on AllTrails before attempting major hikes so we know what to expect with recent conditions.
6. Don’t forget to print out your permit
It is required that you carry your printed permit. We forgot to do this until the last minute and had to get it printed at the airport lounge. Oops!
7. Start your days early
It gets hot on the trail, so the more miles you can clock while it’s still (relatively) cool, the better!
8. Glimpse history
Along certain parts of this trail, you can see ruins of ancient terraces built for farming taro. We saw some on the path to Hanakoa Falls as well as near Kalalau Beach.
Wildlife on the Kalalau Trail
What kinds of animals will you see on the Kalalau Trail? All sorts, as it turns out!
We really didn’t expect to see anything, so we were surprised to see all the the following:
Birds
This should come as no surprise while hiking on a tropical island!
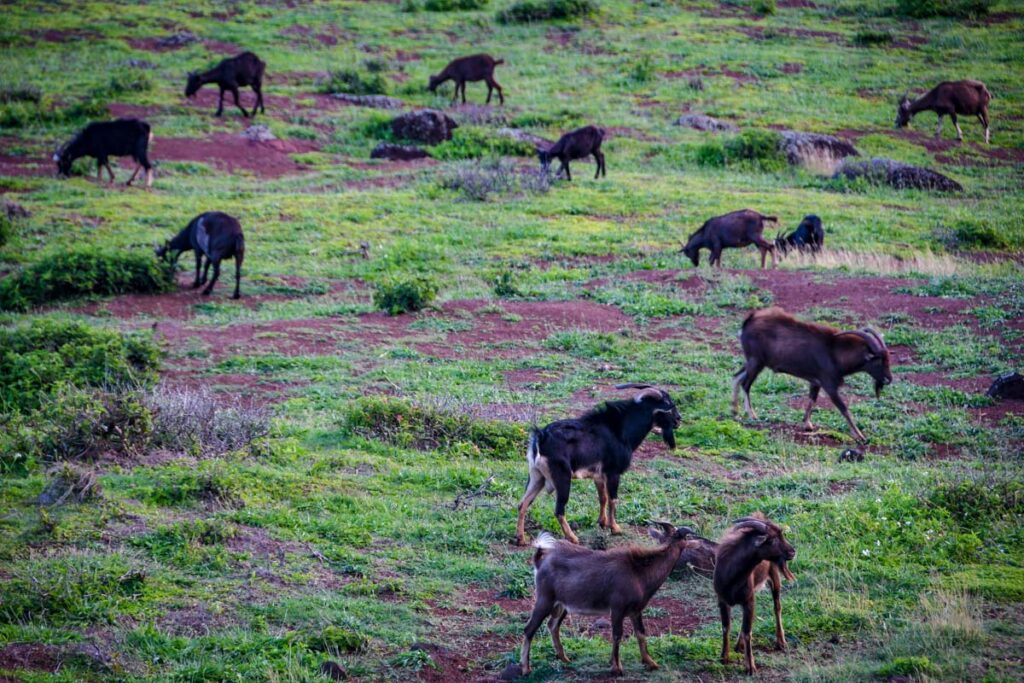
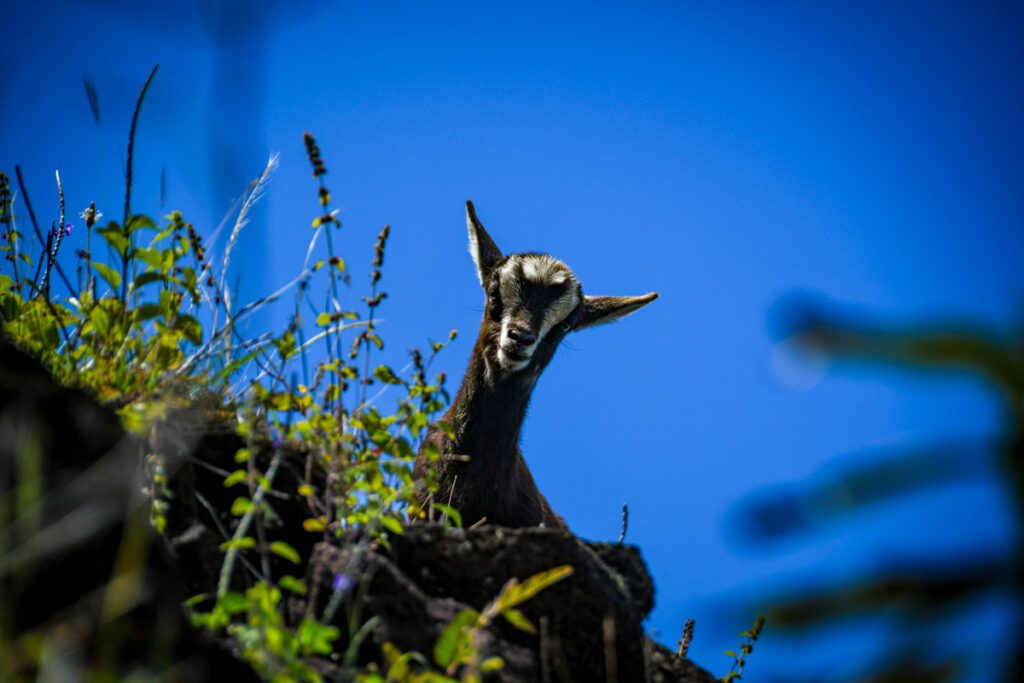
Goats (lots of them!)
This is the animal you’ll likely see the most of besides birds. There are random spots along the trail where we saw goats hanging out or crossing the path in front of us, but you’ll see the most goats in a grassy area just before you reach the beach. There are tons of them!
Wild boar
While elusive (they don’t do well in high heat, so they aren’t very active during the day), it is possible to see wild boar on the trail. We saw one!
Interesting fact: Did you know that on Kauai, there are 25 times as many wild pigs as there are humans?! They are invasive and detrimental to the native bird population as well as forest regeneration, so there is an open season on hunting boar all year long. You’ll see signs about this along the trail.
Whales
If you are hiking during whale migration season (December – May), take a look at the ocean and see if you can spot any whales breaching. We watched a pod of whales breach for about 20 minutes while eating lunch at our camp on Kalalau Beach. It was magical.
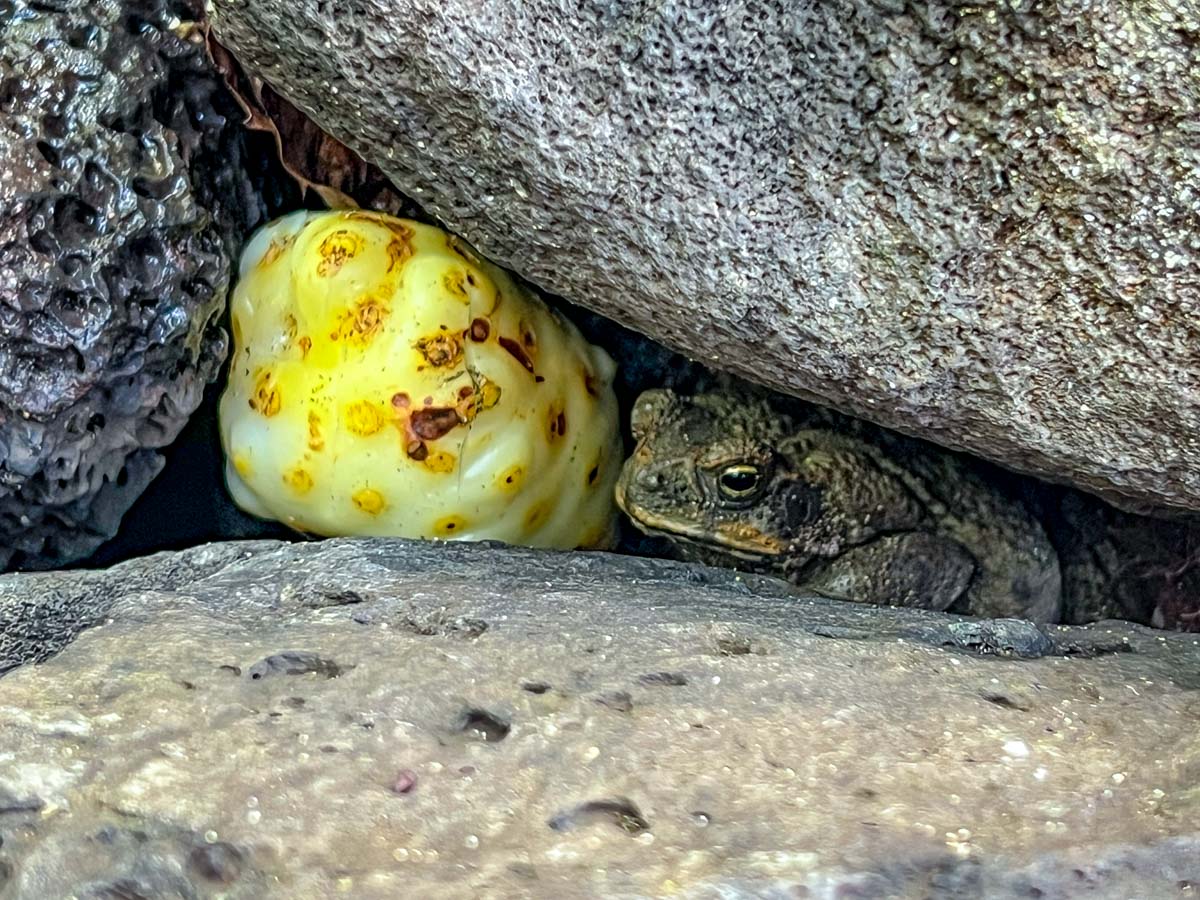
Toads
We heard (and spotted!) a few of these guys at our campsite on Kalalau Beach. They were huge!
Feral cats
There are signs warning about feral cats, and I wondered if it was for real until I saw one with my own eyes! Apparently there are lots of them living in this jungle, but they are often spotted near the campsites.
Rats
We didn’t see any rats, but we’ve heard of other hikers who have.
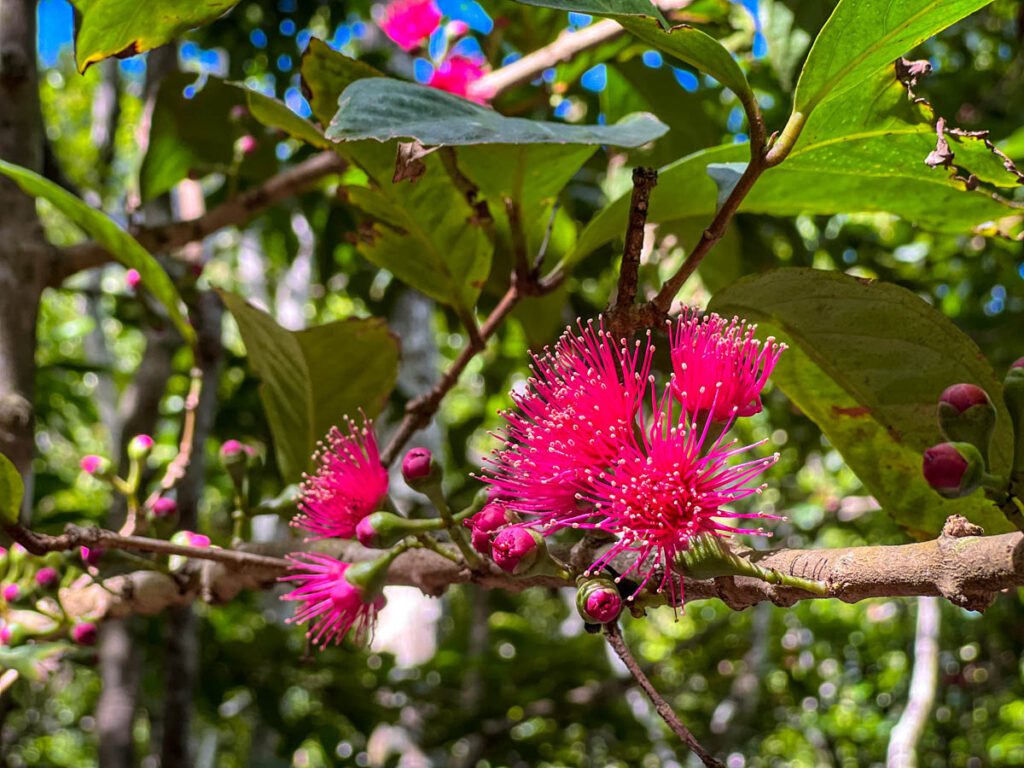
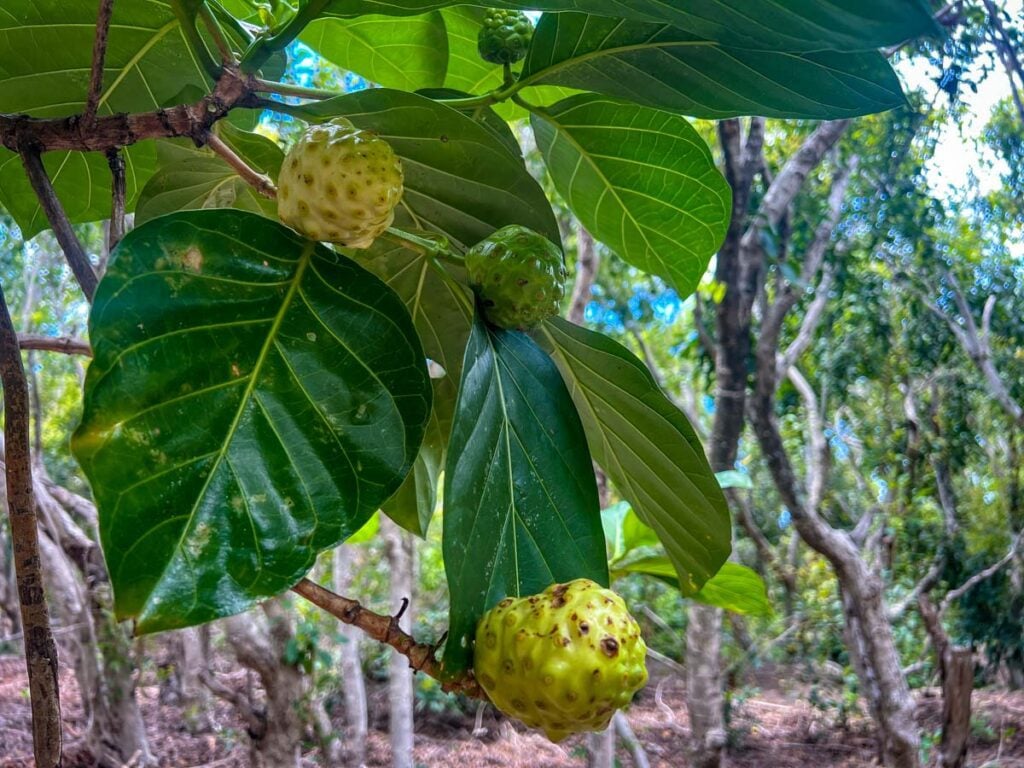
Flora & fauna
In addition to wildlife, pay attention to the flora and fauna you encounter. You’ll see all sorts of native Hawaiian plants as well as fruit trees, like strawberry guava and even mango.
Safety on the Kalalau Trail
The Kalalau Trail is not technical – no climbing or mountaineering of any kind – but there are some factors that have earned it the title of one of the most dangerous hikes in the world.
Let’s go over some important things to keep in mind during your hike so that you stay safe.
Wait, why is it called one of the “most dangerous hikes in the world”?
There are many factors that make the Kalalau Trail dangerous: narrow sections of the trail, steep drops, unpredictable weather, river crossings all factor in.
Another danger to consider is that the ocean current can be very strong and unpredictable. According to Outside Magazine, there have been more than 100 drownings documented on the trail’s remote beaches.
All that said, we didn’t feel unsafe. Continue reading our safety tips so you know what to expect.
Safety tips for the Kalalau Trail
Be sure you have travel insurance, and read the fine print so you fully understand your coverage.
Carry a first aid kit. Before your hike, be sure it is well-stocked.
Bring an SOS device for emergency use.This is the one we have and it worked really well on this trail.
Bonus: We used it to communicate with family to let them know when to pick us up.
Hike with a partner. Being that there is no cell service and it’s a very long hike out if you are injured, this is not a trail we’d personally recommend as a solo adventure. That said, we did see backpackers on their own, so it’s not unheard of.
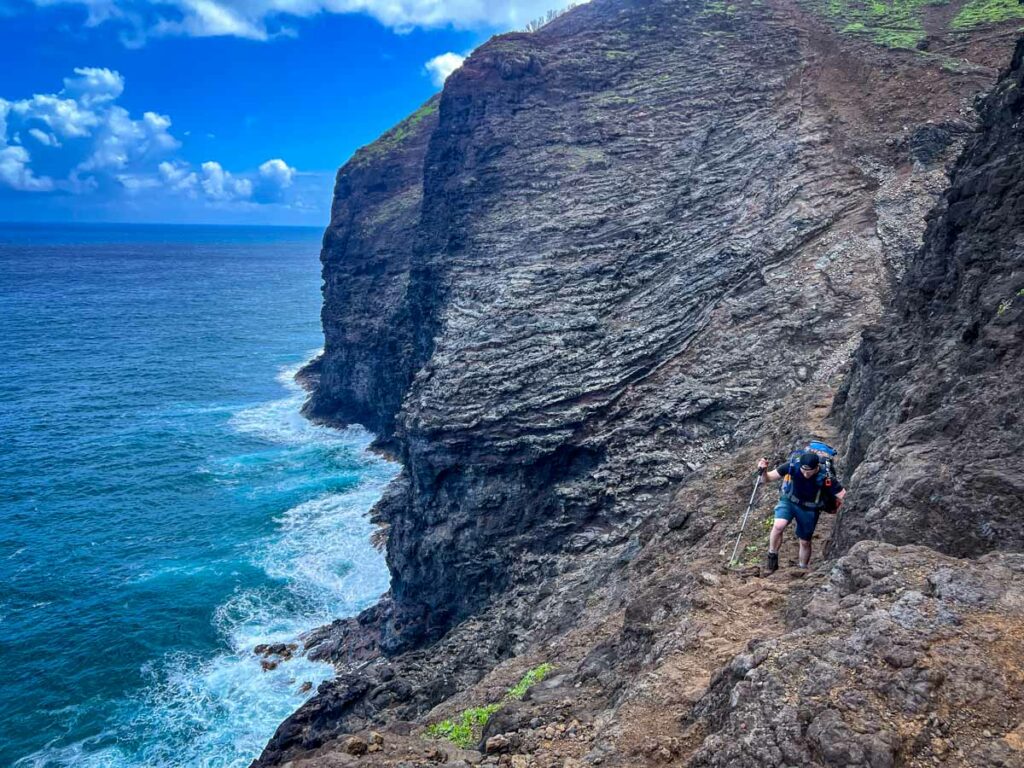
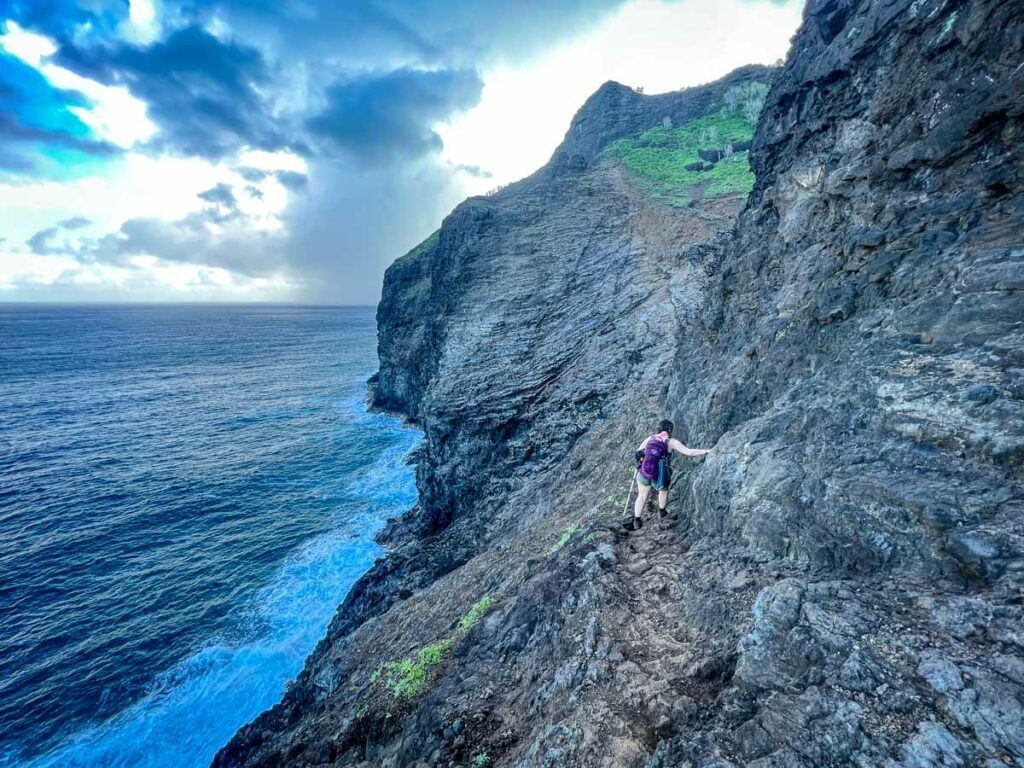
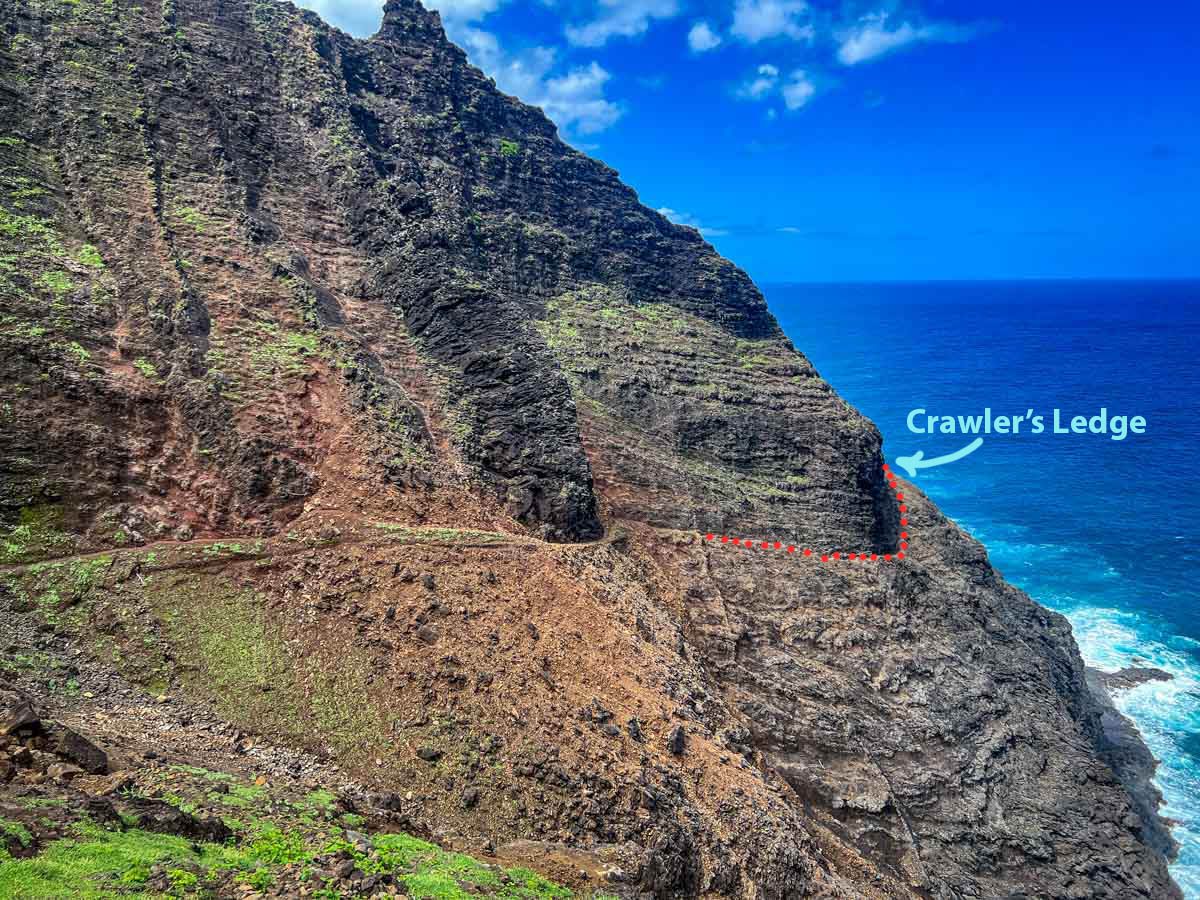
How scary is Crawler’s Ledge, really?
This is definitely the most notorious part of the trail, and there are all sorts of opinions about it flying around the Internet. This section is yet another opinion, but hopefully it’ll help you know what to expect and calm your nerves a bit…
I had low-key nightmares about Crawler’s Ledge in the weeks leading up to our flight. I’m a very experienced hiker and am not afraid of heights, but I didn’t know quite what to expect.
I don’t want to downplay this section of the trail because it can be dangerous, and some people find it very scary. However, in both mine and Ben’s opinions it was nowhere near as scary as we were expecting.
For starters, it is a very short section of a very long trail, maybe 100 meters or so. In total, we spent just a few minutes here. Compared to the hours of trekking, this is a tiny fraction of the trail.
As long as you take it slowly and watch your footing, you should be fine. There are lots of spots to place your hands for added security.
All that said, if you are afraid of heights, you might have a different take on it.
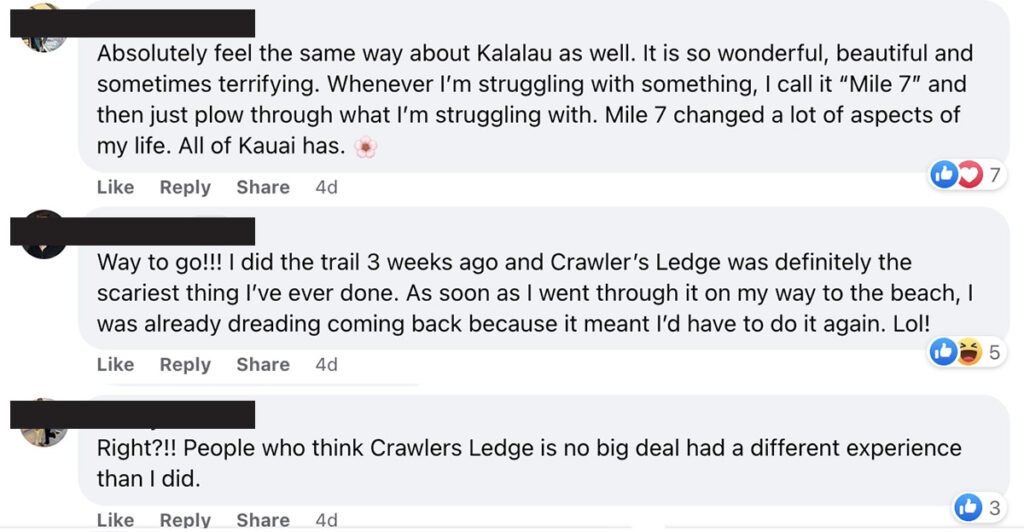
I kind of love how the first poster uses it as a milestone to help them get through hard things in life! #mile7
Insider Tip: We’d recommend holding onto the rock wall with one hand and using your hiking pole in the outside hand to help with stability.
Want to see what Crawler’s Ledge looks like in real life? Check out our Kalalau Trail vlog where we have video footage of us tackling this section of the trail. Plus, we have all sorts of other tips and footage in the video that we weren’t able to fit into this article
What is the hardest part about this trail?
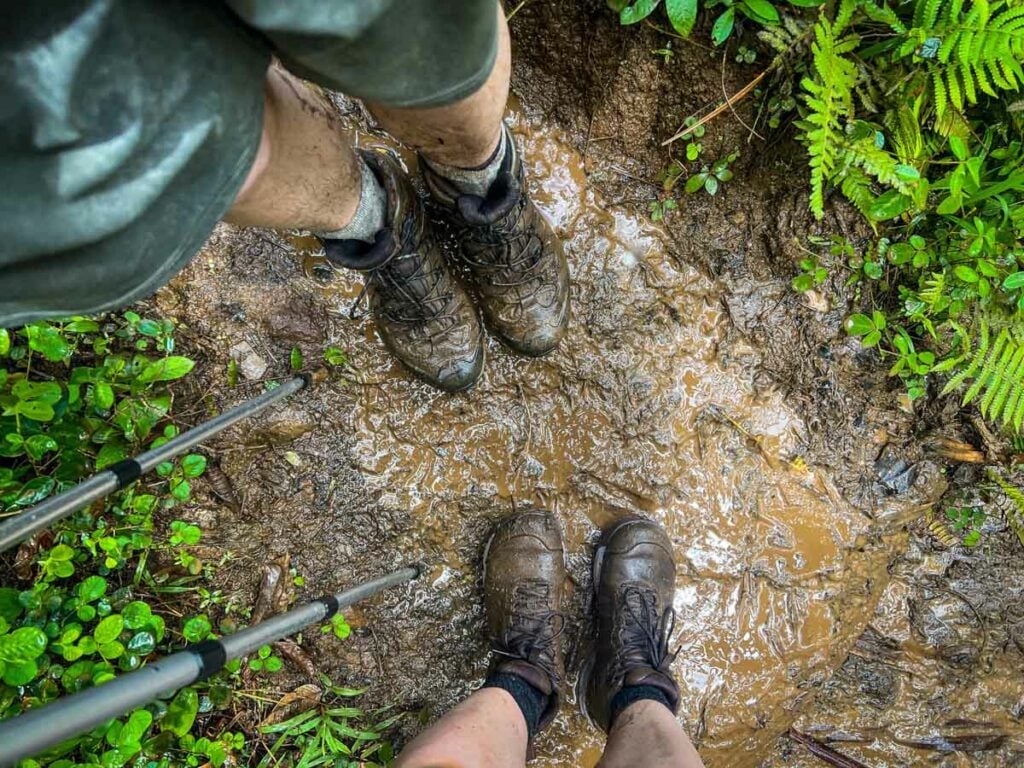
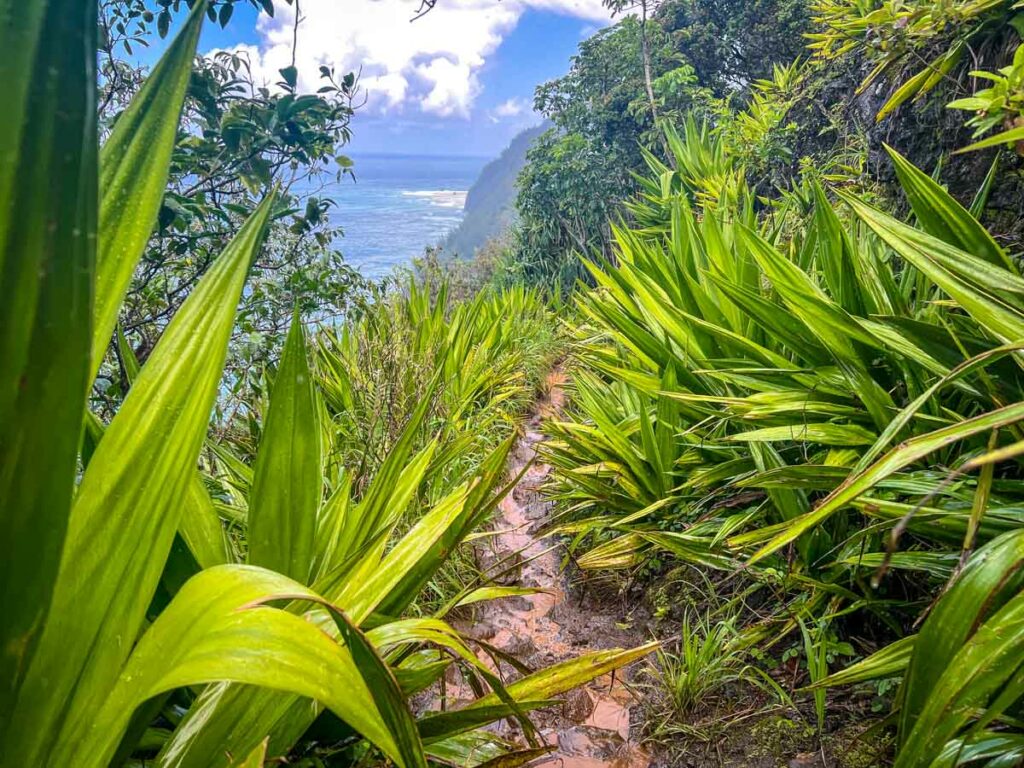
Photos don’t exactly do justice to just how difficult the mud can be after a heavy rain. One misstep in some places on this narrow trail can lead to slipping down a cliff, so you really have to take certain sections slow if there is mud.
The answer to this question comes down to each specific person, but here are some of the most challenging parts:
Mud
For us, the mud was the hardest part. It had rained in the days before our hike, making parts of the trail a slip and slide. Coupled with a very narrow trail that was wearing away in places and sheer drops down a cliff face, we had to go much more slowly than anticipated.
The portions of the trail where the mud is worst will vary based on recent weather patterns, but when we hiked, the 4 miles between Hanakapiai Beach and Hanakoa Campsite were the muddiest and most treacherous.
We’re used to mud (we live in the PNW!), but not like this thick, soupy mess! If it has been rainy in the days leading up to your hike, be prepared to take it (much) slower than you’re used to.
Not sure if this is the official name, but personally, I found this section (near mile 8) to be scarier than Crawler’s Ledge.
The ground here is dusty and slippery. Had it been raining, this would have been especially treacherous.
River crossings
The red dotted line indicates the start of Crawler’s Ledge.
There are 3 main river crossings on this trail, and each one is different. You may find one pretty easy while navigating others means getting knee deep in fast-flowing water.
It’s important to remember that you must cross each river twice – on the way there and on the way back – and the conditions can change quickly after a rain. What was an easy river to cross on day 1 might be much more challenging on your way out, so give each crossing patience.
Elevation gain
There are certainly some steep portions of this trail that can be daunting. We’re personally used to high altitude alpine hiking, so none of the sections stand out as being crazy hard.
However, the Kalalau Trail has a lot of ups and downs, so while one climb on its own isn’t all that difficult, the 10th climb in a few hours gets to be quite challenging. In total, there’s more than 5,000 feet of elevation gain in total, so it does add up.
Distance
After hiking for many hours with energy stores running low, the sheer distance can be a challenge.
11 miles each way is no short distance. Plus, if you choose to do some detours (highly recommend you do!), that’ll tack on some additional mileage.
If there are other factors – like rain or inclement weather – slowing you down, this trail can take much longer than you might expect.
A Kalalau mile just hits different. Almost every hiker we met said their pace on this hike was much slower than average, and we agree.
Weather
The heat, sun exposure, humidity and rain can all be factors that make the hike more challenging. Be prepared to experience it all because you probably will.
Transportation to and from Kalalau Trail
Transportation to and from the trail is one of the tricky parts of planning your hike.
Here’s why:
There is no service at the trailhead. This means you won’t be able to request an Uber or call a taxi. For this reason, you must have transportation arranged in advance.
There is only a small parking lot in the state park. Overnight spots are very limited so most hikers will need to make alternative arrangements.
Have a friend or family member pick you up
This is what we personally did, but it won’t work for most people. If you’re from Kauai or are traveling with someone who is not doing the trail with you – yay, you got yourself a driver!
We used our Garmin InReach Mini to send my parents a message that said “2 miles from trailhead”. We discussed with them that this would give them roughly 1 hour to get to the parking lot.
Overnight parking permit in Hā’ena State Park
There are limited overnight parking spots in Hā’ena State Park (where you will complete your trek). You must reserve a parking permit online, and these go pretty quickly.
In order to reserve a spot, you must already have your Kalalau Permit. Parking spots are listed 30 days prior to your hiking date, so while you may secure your hiking permit up to 90 days in advance, you must wait until 1 month before your hike to get a parking permit.
Overnight parking permits go incredibly quickly. According to the website, they can sell out as fast as 1 minute after being listed (at midnight 30 days prior to your start date).
If the parking lot is full during your dates, there is more overnight parking at Aliʻi Kai Resort in Princeville. For more information, call them at (808) 826-9988.
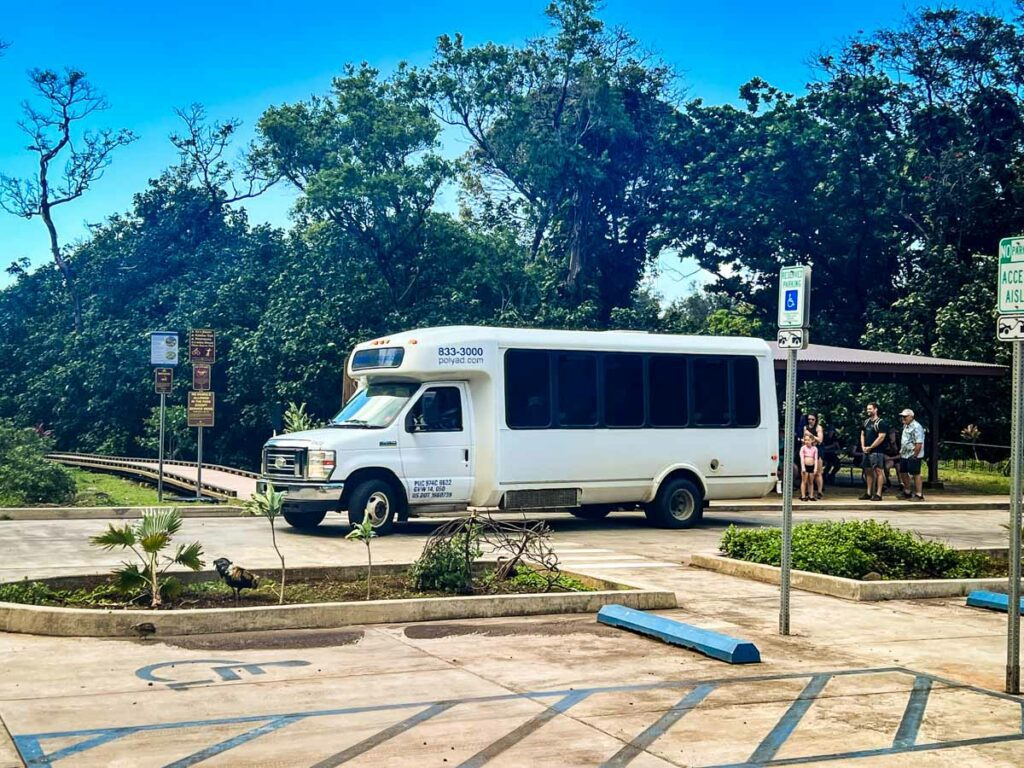
Shuttle service to and from Hanalei
There is a shuttle service that goes from Hanalei town to Hā’ena State Park. It can be booked through GoHaena.com. However, there is no overnight parking at the Waipa Park and Ride, so have to arrive on foot or get dropped off.
The shuttles start at 6:20 a.m. and run every 20 minutes until 6:40 p.m. which is the last pick-up from Hā’ena State Park.
The cost for the round-trip shuttle:
$35 for ages 16+
$25 for ages 4-15
Ages 0-3 are free on lap
Tip: the booking system for the shuttle opens up only 1 month in advance and the best times get taken quickly. If you know the dates and times you want, be sure to book well in advance.
If you miss your reserved time, you can wait standby, but you might be waiting awhile as the shuttles seemed to be pretty full.
For more information about the shuttle service, check out their FAQs page.
Arrange a private driver
In forums online, there are several individuals who live in Kauai and offer their services as a personal driver.
A few names that pop up in just about every forum are:
Join this Facebook group and search for their names to message them directly. If they don’t have availability for your dates, try making a post in the group to see if there is anyone else available.
Pre-arranged taxi
If you’d prefer to go with a taxi company, these two offer trailhead drop-offs and pre-arranged pick-ups.
Aloha Kauai Northside Taxi
808-212-7581
Environmentally-Friendly Rides
808-652-059
They also offer luggage storage.
What to pack for the Kalalau Trail
Below we’ve curated a comprehensive packing list that is specific to hiking the Kalalau Trail.
Before you dive in, I think it’s worth mentioning that these are all the things to think about, but you may not personally need every single item on this list.
We’d recommend trying to pack as light as possible while also bringing the items that will bring you comfort on the trail. If you are coming from outside of Hawaii, you’ll also need to put some thought into flying with your gear.
Tip: Ask to see if anyone has donated a canister – they gave us one for free. Then, we donated it after our trek for someone else to use as it was still very full.
Lighter and/or matches
pick up at the Ace Hardware in Princeville when you get your propane
Utensils
Multitool (remember to put this in checked luggage, not your carry on)
We’d recommend just boiling water in a Jetboil or something similar instead of cooking in a pot. You can simply add boiling water to your dehydrated meal pouch, eliminating the need to do lots of dishes.
Trash bag
Small bottle of Dr. Bronner’s for washing bowls & utensils
Small microfiber towel for drying dishes and other gear
Food bag (we use this one that is designed to keep critters out)
Rope (if you plan to hang your bag)
What to wear
Hiking boots (I personally love Oboz and Ben loves Salomon)
Water shoes (like Chacos): these are great for river crossings and wearing at camp
We hiked for many years without this, but now that we have it, we think it’s an essential – especially when we’re in an area with zero cell service and potentially very hazardous conditions.
This was very helpful for us to communicate to our transportation (my parents!) when we’d be at the trailhead.
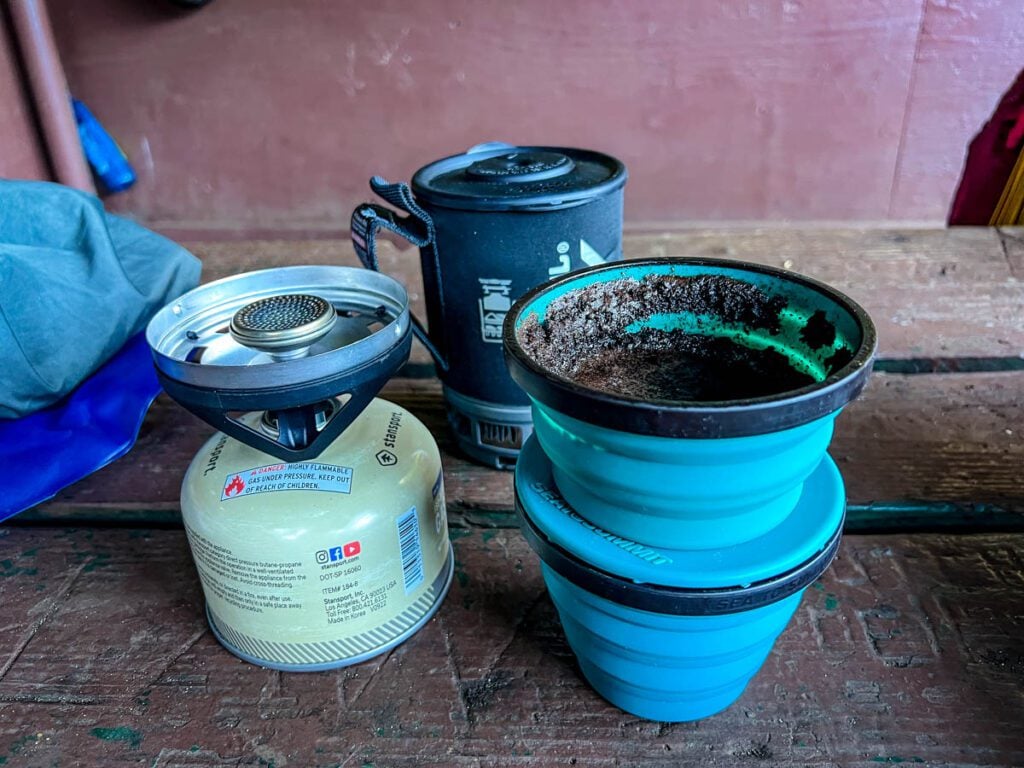
Optional (fun) items
If you’re coffee lovers like us, you might want to consider bringing a collapsible filter to get your morning caffeine kick!
If you plan to do a 4 day, 3 night trip (with an extra day to hang out at the beach), a hammock would be great! Otherwise, it might not be worth the extra bulk.
Be sure to download our complete packing list for Hawaii! It’s packed with good suggestions and insider tips to help plan your trip. And it’s completely FREE, so why not!?
Camping gear rentals
Since many people hiking this trail will be flying into Kauai, it is common to wonder if it makes more sense to rent the gear.
There are a few companies that offer gear that you can rent a la carte or as a package.
We looked into this a bit, however, there were a few factors that ultimately led to us bringing our personal backpacking gear from home.
Comfort
We prefer using our own gear that we have carefully purchased over the years to be exactly what we want. If we didn’t have our own backpacking gear that we really like, renting would have been a much more appealing option.
Cost
When you rent gear, it adds up! The package we were looking at was $85 per day for two people. Multiply that by 3 days on the trail, and it would have cost $255. (We may have even needed to rent it an extra day or two so that we could pack and have time to return it.)
That amount of money could go a long way in buying us some new gear that we actually get to keep! Plus, we get 2 free checked bags each when we fly Delta, so it didn’t cost us anything extra to pack our gear from home.
Logistics
Some of the rental companies are a bit of a drive from the trail, so picking it up and dropping it off may require a bit of planning depending on where you plan to stay before and after the hike.
All that said, it can be very annoying to have to lug around your own backpacking gear for the remainder of your trip. We just left it in our rental car so it wasn’t a big deal, but renting can certainly be a good option…
Companies that rent backpacking gear:
Pitch a Tent Kauai: In addition to gear rental, they also have luggage storage, and sell dehydrated meals. (Located in Wailua)
Kayak Kauai: They offer gear rentals, luggage storage and guided tours. (Located in Wailua)
Peddle N Paddle: Located in Hanalei, this is the closest rental company to the actual trail.
Be sure to contact the company you’re considering, as some have more gear options than others.
Luggage storage
What do you do with everything you’re not bringing on the trail, like your cute sandals and flowy dresses?
Don’t worry, you won’t have to trek with any unnecessary items.There are a few options when it comes to storing the other luggage you have for your time in Kauai.
We had a unique situation because my parents were also with us on Kauai. They took care of our daughter while we did the trek, so we left everything we weren’t bringing on the trail at our Airbnb.
Since accommodation is so expensive on the islands, most people won’t want to leave their hotel or Airbnb sitting unoccupied while they’re hiking, so this isn’t an option for most hikers.
Luggage storage options:
a) Store in your rental car at your own risk: Some hikers leave their luggage inside their rental car which they leave parked at the shuttle lot. That said, this isn’t recommended as car break-ins aren’t uncommon. It is widely known that this parking lot is where people park for this multi-day trek and unattended vehicles are a target. You could risk it but I would personally be paranoid during the hike, and stolen luggage would put a damper on the rest of the trip.
b) Ask your hotel or Airbnb about storage options: Reach out to your hotel or Airbnb host that you will be staying at after your trek.You never know, they may accommodate you for free or for a small fee. This would be super convenient.
c) Pay for luggage storage: This is the best option for most hikers.
Here are some luggage storage ideas:
If you are renting gear, chances are they also do luggage storage, which would be very convenient.
Use the app Bounce to arrange luggage storage at the UPS store in either Kapa’a or Lihue
Some individuals who offer transportation services also can store your luggage, so ask them if you are arranging transport with an individual
Kalalau Trail FAQs
Still have questions about the Kalalau Trail? We’ve got answers!
How long does it take to hike the Kalalau Trail?
Most hikers complete the Kalalau Trail in 2 to 3 full days.
We would highly recommend taking 3 days for this epic hike.
The 11-mile stretch from the parking lot to the beach takes hikers different amounts of time to complete based on experience, number of stops, and weather conditions.
If the trail is dry, 7-9 hours is a reasonable amount of time to complete this distance. However, if it has been raining and the trail is muddy, budget 8-10 hours.
Is the Kalalau Hike worth it?
Worth it? I say, “HELL YES!”
While this is certainly a subjective question, our personal answer is a big, resounding HELL YES!
It requires a lot of preparation and planning, and is challenging. But those that put in the effort will be rewarded with some of the most incredible views in Kauai.
We’ve done a lot of hiking around the globe, and the Kalalau Trail is definitely in our top 10 best hikes in the world and our top 5 hikes in North America.
Is the Kalalau Trail crowded?
While this is a popular trail and peak season permits often sell out in sheer minutes from being listed, we personally didn’t find it to be too crowded.
During the first 2 miles of the trail, you’ll see many people, as this portion is accessible to day hikers and doesn’t require a permit. However, once you cross the 2-mile mark, you will find solitude along the trail.
Sure, you’ll cross paths with people returning from the beach (say hello and ask about current conditions!), but we didn’t come across any lines or waiting or crowds of any sort. The places you’re most likely to run into others that are going the same direction as you is at river crossings as they take a bit of time to complete.
One fun part about the trail is befriending others along the way. You’ll likely be staying at the same spot, so why not strike up a conversation?!
How many nights is the maximum you can stay?
You are allowed a maximum of 5 nights on your permit.
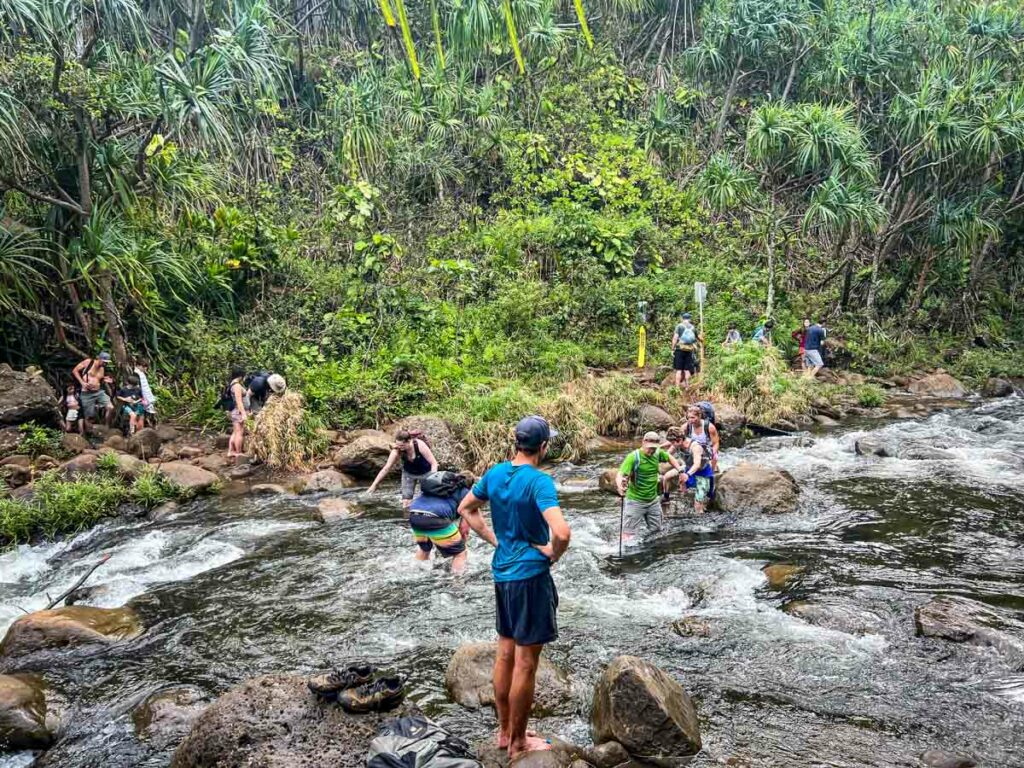
How many river crossings are there?
This is the busiest river crossing, as it is in the section of the trail that is open to day use hikers.
While you will cross several small streams along the path (likely without even getting your shoes wet!), there are 3 major crossings that require you to slow down and plan a route. They are also ideal places for filling your water.
Main river crossings on the Kalalau Trail:
Hanakapi’ai Beach (mile 2)
Hanakoa Valley (mile 6)
.5 miles before Kalalau beach (mile 11)
Good to know: If you hike to Hanakapi’ai Falls, you will cross the river 4 times on the way to the falls and 4 times on the way back. This will add 8 river crossings to your hike.
River crossing tips:
Personally, we found it helpful to switch from our hiking boots into our Chacos so we could step in the water without worrying about getting our boots wet. We stepped where it was most sturdy and knew we’d have dry socks and boots to change into on the other side.
We also found a hiking pole to be helpful in river crossings.
How much does it cost to hike the Kalalau Trail?
Seeing a double rainbow on the Na Pali coast?! Priceless!
The total cost will vary depending on your specific situation, but here are some expenses to consider.
Permit: $35 per person, per night ($25 for Hawaii residents)
Gear
Buying new gear
Gear rental
Paying to check a bag on the flight
Luggage storage
Shuttle: $35 per person round trip
Food for on the trail
Can I do this hike in one day without camping overnight?
Technically, yes. Should you? No.
We’ve done a 24-mile through hike in a single day (The Enchantments), and many around the 20-mile mark, so we’re not opposed to big days. However, there are many factors (like unpredictable weather, sheer cliff drops, and river crossings, to name a few!) that make the Kalalau Trail a bad candidate for a single-day thru-hike in our opinions.
In order to do the entire 22-mile trek (not including any offshoots), you’d need to be an extremely confident trail runner and get a very early start.
While this is technically possible, we would highly, highly advise against this for a few reasons:
There are several dangerous sections of this hike that require you to pay careful attention to the trail and take your time (Crawler’s Ledge, cough, cough!). It’s just not very conducive to trail running. Honestly, trying to tackle it in a single day feels pretty irresponsible in our opinions.
Even if you do decide to go ahead and tackle it in one day (despite our cautions otherwise), you still need a permit. (Yes, even though you’re not planning on camping.) According to the official laws, all hikers need a permit past the 2-mile mark. That means you still need to go through the process of getting a camping permit, so why not just camp?
Attempting this hike in one day means you will have to rush everything. You will not be able to tack on any of the offshoots and you will hardly have time to take in the views, which kind of defeats the purpose.
Still convinced you want to do it in a day?This quick video gives you a decent look into trail running the Kalalau Trail.
Can I build a campfire at night?
Nope. Building fires is strictly prohibited. Cooking should only be done on camping stoves.
You will see some fire rings that others have made, but please don’t be that person. Respect this land and the rules while you’re here.
Can you swim at Kalalau Beach?
Yes, it is possible to swim at Kalalau Beach; however, you should take precautions.
There is no protective reef barrier near the beach so surf can be high, especially during the winter months. Also, there are strong rip currents even when conditions are calm.
There are several documented drownings here, so be very careful if you choose to swim.
Are there a lot of bugs on the trail?
The answer to this will depend on the time of year you hike as well as conditions on the particular day. For this reason, we’d recommend being prepared for bugs and packing insect repellant.
Personally, we didn’t encounter many bugs at all during our hike in early April. We didn’t even put on the bug repellant we packed but we were happy we were prepared in case. The biggest annoyance was ants near our campsite at Kalalau Beach, but it really wasn’t a huge deal.
Is this trail child-friendly?
No, the Kalalau Trail is not child friendly.
The first 2 miles and even the hike to Hanakapi’ai Waterfall is possible (though challenging) with children. But we wouldn’t recommend bringing young kids on the rest of the hike.
We often hike with our daughter and go backcountry camping with her, but we did not bring her on this trail. We were very happy we left her behind with Grandma and Grandpa who were staying at an Airbnb in Princeville.
There are too many dangerous sections where the trail is slippery with sheer drops, as well as many places where there is little to no shade, that we feel it’s only suitable for teenagers (who have lots of hiking and camping experience) and adults.
Are dogs allowed on this trail?
No, dogs are not allowed.
Is there lots of trash on the trail?
There are areas where previous hikers have left supplies they no longer want. Please don’t do this.
We didn’t see much trash on the trail itself, and it wasn’t like we saw litter exactly. But at the camps, people have left behind things they no longer want, like food, propane canisters, and camping equipment.
I hope I don’t have to explain why, but you should never leave anything on any trail. Someone will eventually have to pack it out. If you brought it in, it is your responsibility to bring it out.
Do people still live on Kalalau Beach?
On forums we’d heard rumors that there were hippies living on Kalalau Beach off the grid, outlaw style.
Well, it seems that in recent years there has been crackdowns on this and while we can’t say for certain, we personally did not see any permanent residents. The only remnant of this we personally saw was a 1 gallon jug of soy sauce sitting near the beach.
This article about the “outlaw hippies” is pretty fascinating.
What kind of shoes should I wear?
We recommend wearing hiking boots and also packing hiking sandals.
Hiking boots
We’d strongly recommend wearing a good pair of waterproof hiking boots (that have been worn in!).
There are many portions of this trail that are muddy, and other shoe options like sneakers or hiking sandals wouldn’t be ideal. There are also sections that are slippery and good traction is important.
Water shoes / hiking sandals
In addition to hiking boots, we’d recommend bringing a pair of hiking sandals that do well in the water. (Our personal favorite are Chacos!) There are many river crossings on this trail, and some can be crossed by stepping on rocks and using hiking poles. However, we found many of the crossings were easier (and less dangerous) when we didn’t try to avoid the water.
Wearing shoes that are meant to get wet and have good traction (like Chacos) will prevent you from slipping and make river crossings a breeze.
Additionally, you can wear these at camp at night so you get a much needed break from your boots.
Insider tip: Instead of packing these inside your bag, clip them on the outside of your pack for easy access.
Do I need trekking poles?
Personally, we rarely hike with poles, but this hike was an exception and we think a pole is very helpful, and dare I sayessential.
We each had two poles and felt like it was a little too much on most portions of this narrow path so we ended up only using one pole each.
Kauai’s North Shore Travel Guide
Looking for more things to do in the area before or after your hike? Wondering where to stay?
Personally, we stayed on the north shore before and after our hike and I’d recommend this to others as well. Not only are you close to the trailhead, making it easier logistically, but there’s lots to see and do in this area.
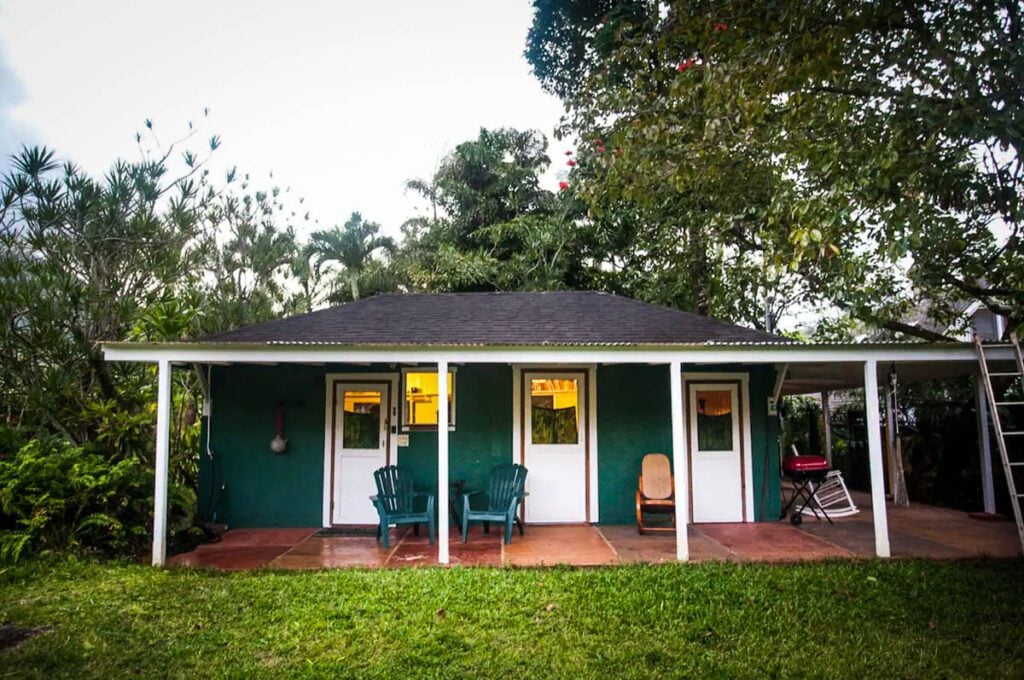
We loved the cute little town of Hanalei, but there are fewer places to stay here (unless you have a huge budget!), so we ended up basing ourselves in Princeville, which has a more residential feel and more budget-friendly accommodations.
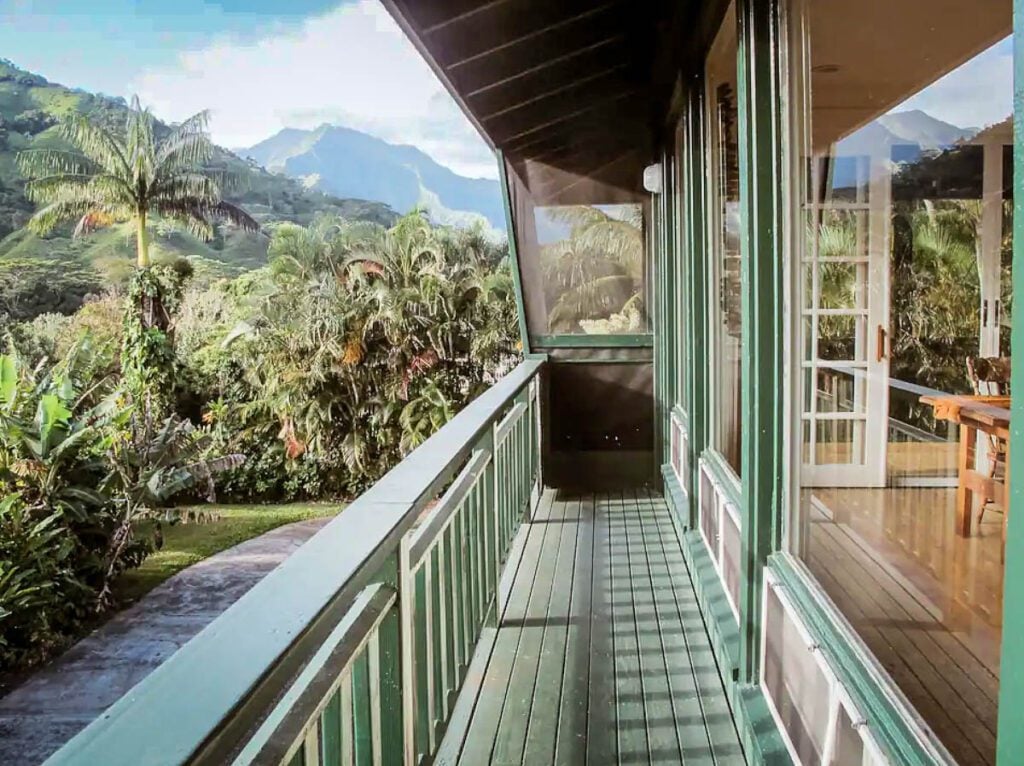
This secluded cottage just outside of Hanalei was voted as one of the best Airbnbs in Hawaii by Conde Nast Traveler, and is actually reasonably priced compared to just about everything else in Hanalei. If you see an opening, snag it because they go fast!
This unit in Princeville is where we personally stayed and we’d recommend it! The main bedroom has been updated and looks even better than the photos on their Airbnb listing. The lanai (balcony) is spacious and the perfect spot to enjoy a morning coffee (weirdly, the host has a coffee maker but doesn’t provide actual coffee). Other than that, we had a lovely stay here.
This condo is one of the more affordable (relative to Hawaii!) places in the North Shore, but still earns rave reviews. This makes a great home base for exploring Kauai.
Hang out on underrated Moloa’a Beach, where Gilligan’s Island was filmed
Other ways to experience the Na Pali Coast
Not totally convinced this trail is for you? Maybe you don’t have the time in your itinerary to devote to it, or perhaps it just doesn’t sound like your cup of tea…
If you still want to see the Na Pali Coast, there are several options. Or you can add these experiences in addition to the Kalalau Trail to see this special place from a variety of perspectives.
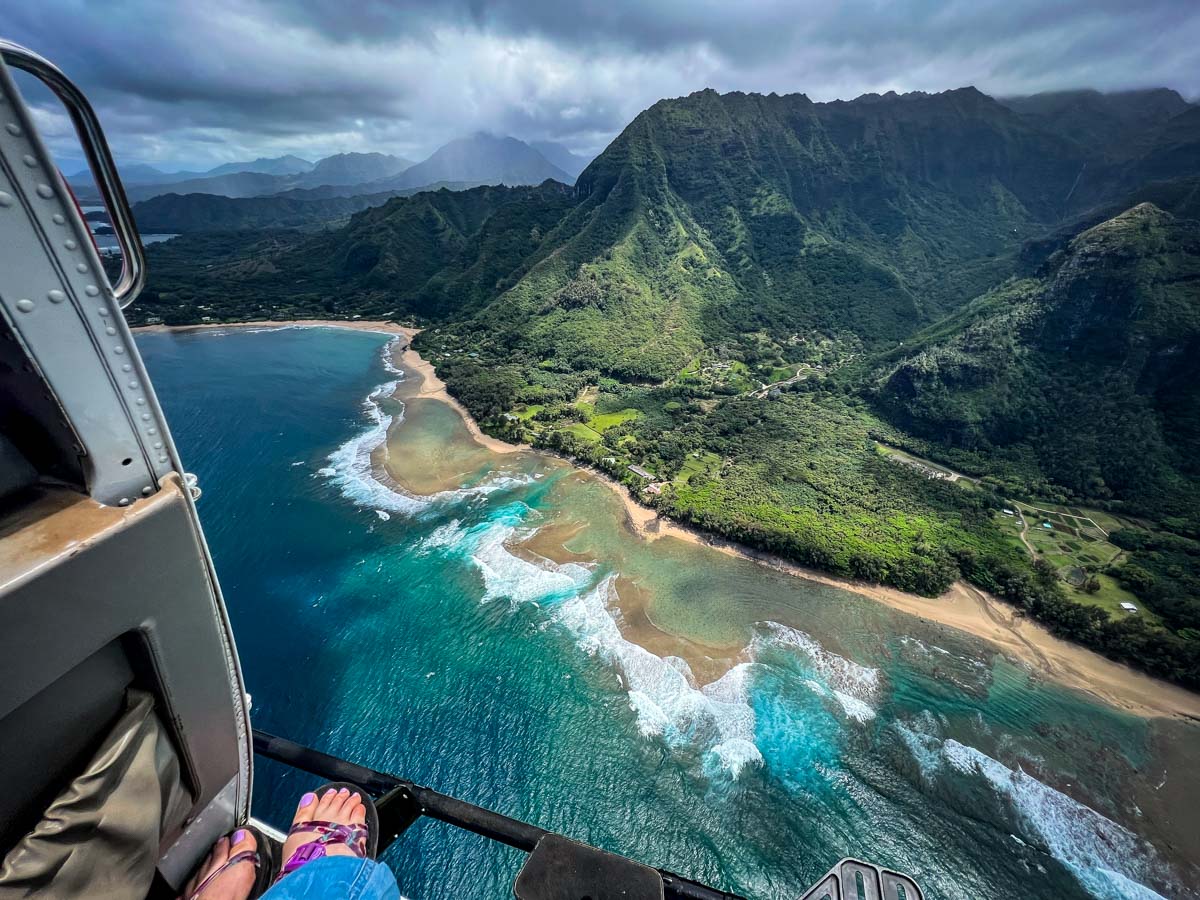
Scenic helicopter flight
This is a splurge, but in our opinion, it’s totally worth it.
We did a doors-off helicopter tour and it was incredible. 100% recommend this experience!
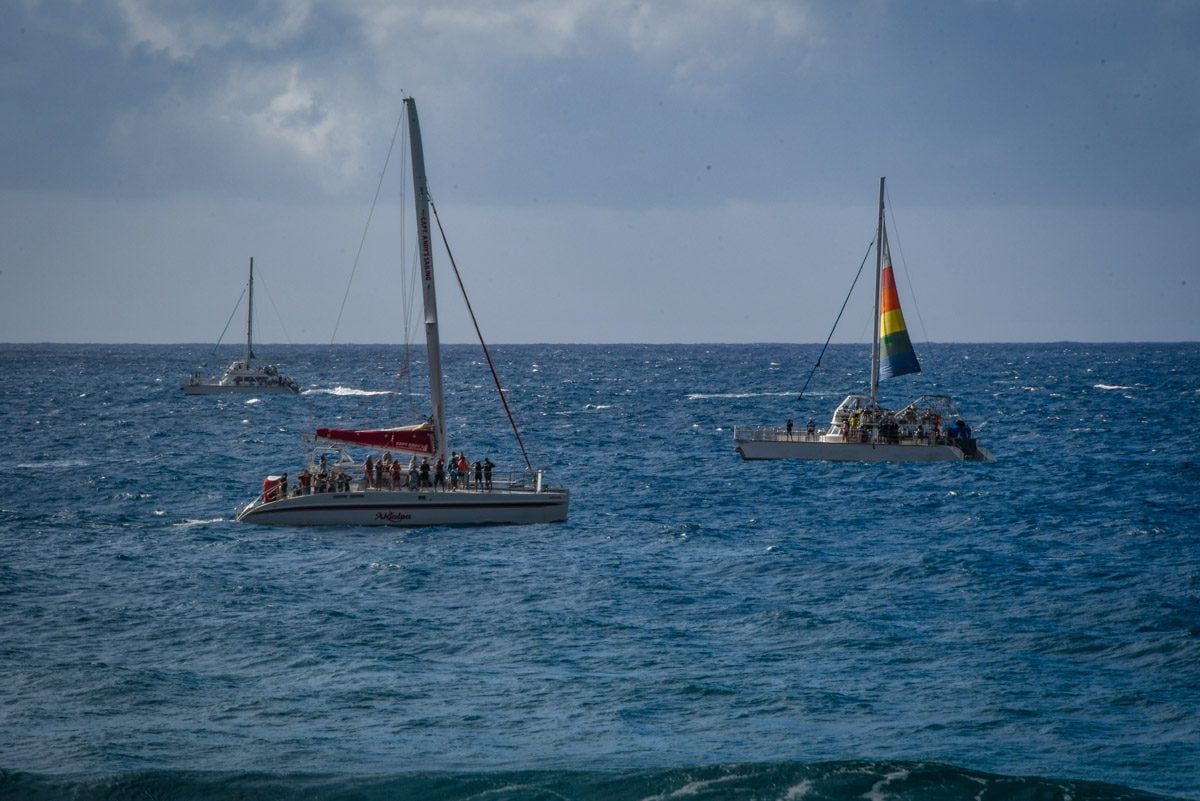
Na Pali Coast boat cruise
Spend half a day on a boat as you sail along the Na Pali Coast. See dolphins, sea caves and Kalalau Beach from a distance.
Good to know: If you get motion sick, definitely take some dramamine before this experience, as it can get choppy on the water.
Hike the first 2 miles of the trail
If you don’t want to attempt the whole thing, why not do the first 2 miles of the trail and get a tiny taste?! You can go as far as Hanakapi’ai Beach. If you want more of an adventure, continue on into the valley toHanakapi’ai Waterfall.
After multiple trips to the islands (and already dreaming of our next one!), we’ve put together tons of helpful resources to make planning your dream Hawaii vacation a breeze. Start with our Hawaii Travel Homepage, and be sure to check out these helpful articles:
First time? Our Hawaii Trip Planner walks you through everything you need to know.
Curious about vanlife in paradise? These are the best Hawaii campervan rentals (and expert tips for living vanlife in Hawaii!).
Don’t forget to grab your Hawaii Packing list!
Be sure to download our complete packing list for Hawaii! It’s packed with good suggestions and insider tips to help plan your Hawaiian vacation. And it’s completely FREE, so why not!?
Save this guide on Pinterest for later!
Be sure to pin this article so you don’t lose it! It’s packed full of things that will be handy on your hike, so you don’t want to waste time searching.
We want to hear from you!
Still have questions about the Kalalau Trail? Comment below and we’ll do our best to get back to you!
Katie Diederichs is the lead writer and co-founder of Two Wandering Soles, where she creates in-depth travel guides, itineraries, and tips designed to help readers plan better trips with confidence. With a background in journalism, photography, and design, she combines thorough research with firsthand experience to deliver clear, practical, and visually driven travel content. As the primary trip planner, Katie turns complex logistics into easy-to-follow advice travelers can actually use.