
We’ve called on a fellow travel blogger and hiking enthusiast to go over everything you need to know to hike the Laugavegur trail, one of Iceland’s most difficult, yet rewarding, multi-day treks. From planning your route to budgeting for your trip and a day-to-day trail breakdown, this article has you covered.
Written by Guest Author: Natasha Karcz
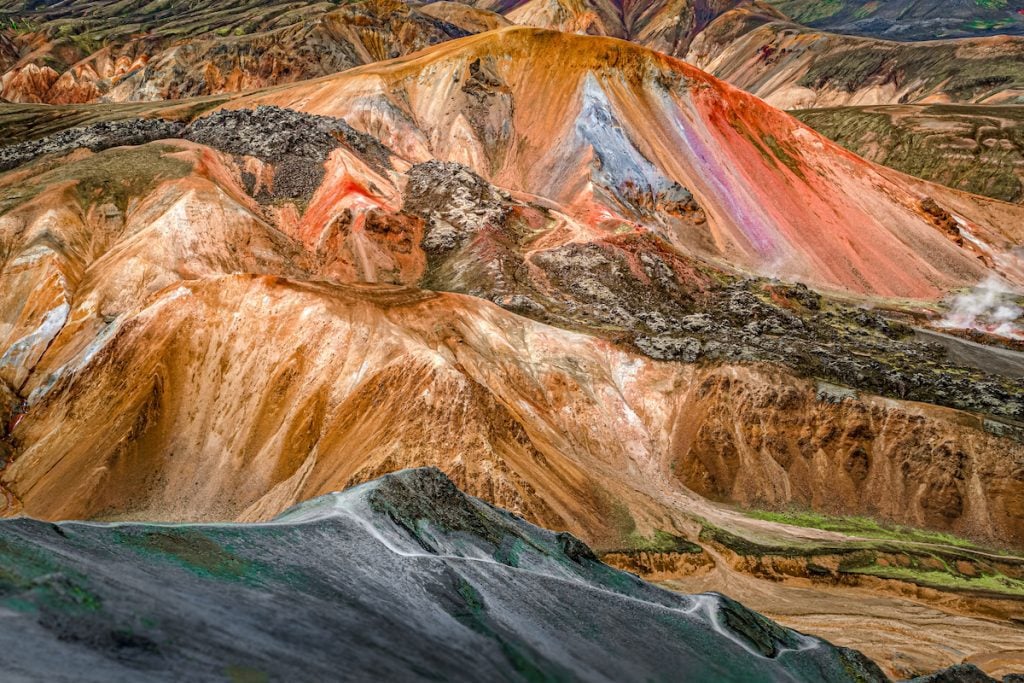
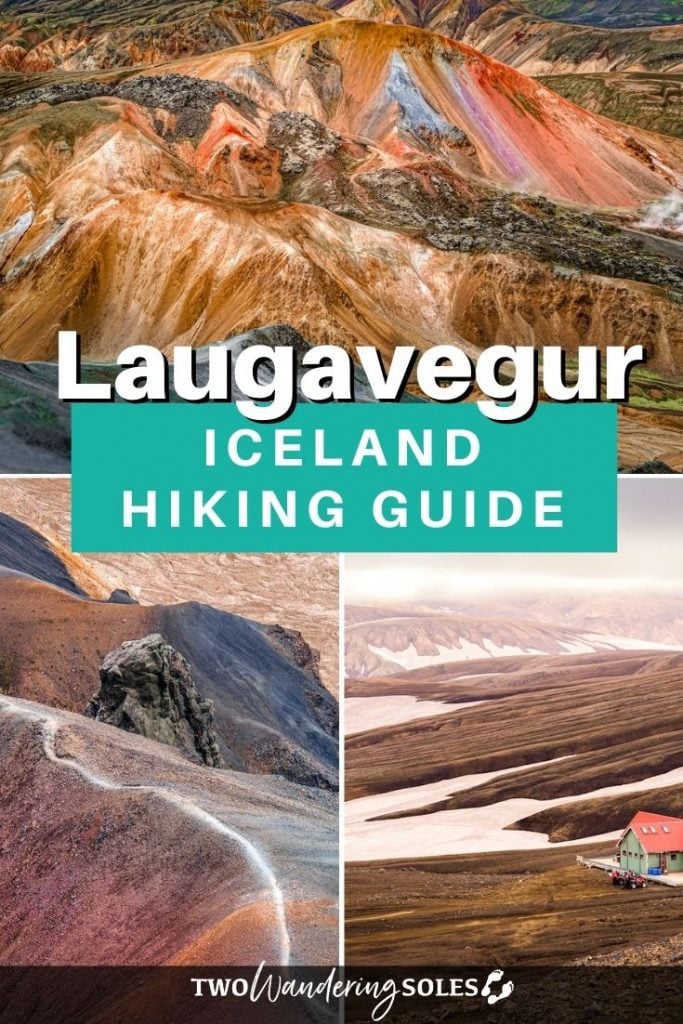
Amidst the vast, unspoiled terrain of the Icelandic Highlands sits the renowned Laugavegur trail; a notoriously difficult-yet-rewarding trek famed for its unparalleled rugged landscapes.
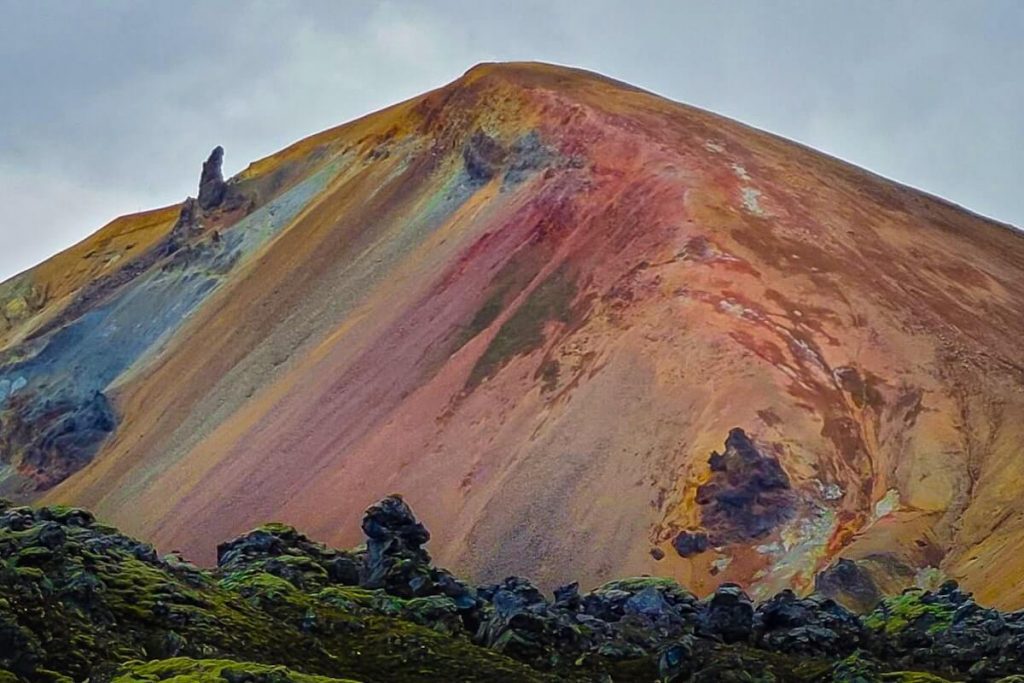
It’s here, surrounded by Iceland’s acclaimed “rainbow mountains”, black sand deserts, and moss covered volcanic peaks that you’ll come to know the true definition of otherworldly.
While hiking Laugavegur certainly isn’t for the faint of heart, the trail does boast some of Iceland’s most idyllic and untouched scenery, ultimately attracting backpackers and thru-hikers from all corners of the world as one of the most incredible Iceland hikes.
If it sounds like I’m describing you, then you’ve come to the right place!
Laugavegur is a multi-day trek that should only be attempted if you’re confident in your hiking abilities and fully understand what you’re getting into.
In this guide, I’ll walk you through everything you need to know—from getting to the trailhead and what to pack, to what the hike is really like—so you can tackle the Laugavegur trail prepared and confident.
And this isn’t just a trail I’ve researched, I’ve actually hiked the Laugavegur myself. Every tip and recommendation in this guide comes from firsthand experience on the trail, from the weather surprises to the moments that made every tough mile worth it.
Laugavegur Trail Guide
- Laugavegur trail overview
- Duration and accessibility
- Routes
- Reservations and facilities
- Planning your hike
- Budget for hiking Laugavegur
- What to pack
- Day-by-day breakdown
Laugavegur trail overview
- Distance: 52.1 km (32.4 miles)
- Elevation gain: 1,701 meters (5,583 ft)
- Type of trail: Point-to-point
- Difficulty: Hard
- Hiking time: 4 days and 3 nights
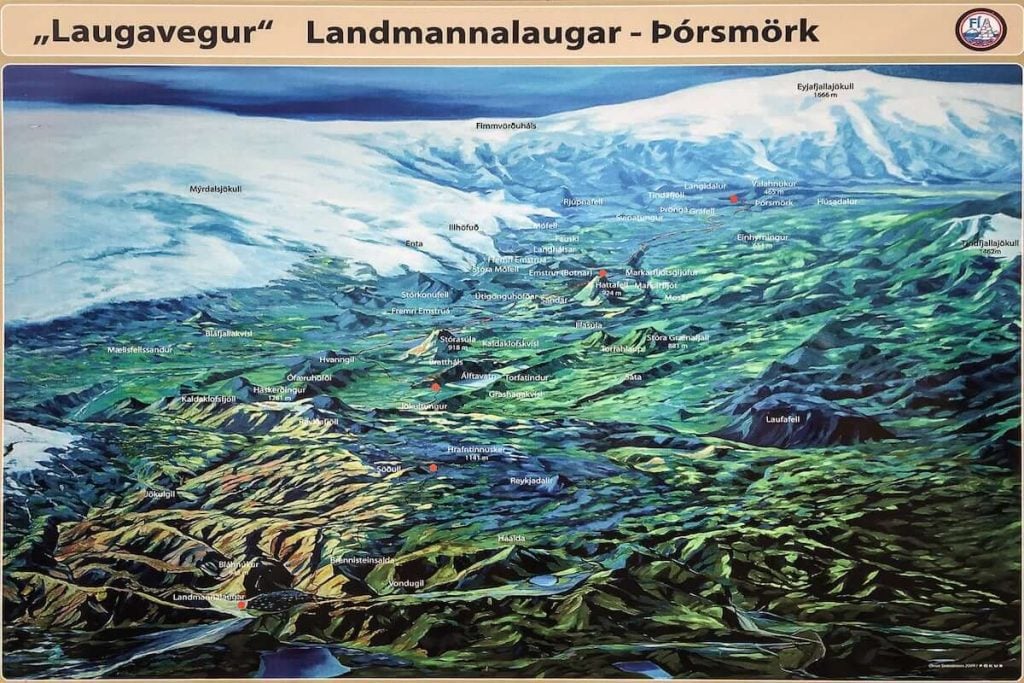
- Starting point: Landmannalaugar
- Ending point: þórsmörk (Básar Hut)
The Laugavegur trail is a point-to-point trail, meaning where you start your trek and where you finish it are two different locations that do not create a circuit.
Given that there is significant ground to cover between the two points, it’s imperative that you prepare in advance your transportation method both to and from the trail (which we’ll touch on more later!).
There is also an option to connect this hike with the famous Fimmvörðuháls trail, Iceland’s best day hike. Since both hikes are point-to-point and start and/or end in the Thorsmark Valley, you can combine the two if you should choose to add an extra day.
In addition to the distance covered, the Laugavegur trail has nearly 2,000 meters of elevation gain, ranking it “difficult” in terms of fitness level required. Fortunately, with that being said, Laugavegur is considered “moderate” in terms of its technical ability as the trail is well-worn, signed, and moderately trafficked.
Duration and trail accessibility
The recommended duration of the Laugavegur trail is 4 days and 3 nights. However, it’s worth mentioning that there’s no medal for adhering to or exceeding this timeframe.
Don’t rush your way through this scenic region of Iceland just for the sake of it. Take the trail at your own pace, and enjoy the plentiful sights to be seen along the way.
Given the reputation that the Icelandic Highlands has for being so unforgiving by nature–think freak rain or snow storms in what’s supposed to be the heat of summer—and the region’s overt inaccessibility, you never can be too cautious.
Laugavegur trail is open between the months of June through September, with optimal hiking conditions most commonly found in July and August.
During this time of year, not only will you be hiking in some of Iceland’s most temperate climates but you’ll also find no shortage of daylight given that you’ll have the distinct advantage of hiking under the “midnight sun”.
→ Psst! Wondering when to go? Find out the best time to visit Iceland based on your travel preferences and planned activities.
Laugavegur trail routes
The next step is determining the route you intend on hiking for the Laugavegur trail.
You could opt to take the ever-popular SoBo (southbound) route, and hike from the Landmannalaugar to Þórsmörk (or “Thorsmark” when translated to English spelling), or hike the reverse NoBo (northbound) route from Þórsmörk to Landmannalaugar.
Of course, each route offers its own variety of benefits and challenges.
SoBo: Landmannalaugar to Þórsmörk
If you’re a view-driven hiker or are someone who enjoys meeting fellow travelers on your adventures, it may be worth following the conventional Landmannalaugar to Þórsmörk route.
PROS:
- Most hikers opt to tackle the Laugavegur trail SoBo route, due to its (comparatively) forgiving elevation gain/loss ratio.
- When hiking SoBo, you descend into the valley that Laugavegur trail is so widely known for amongst photographers and other view-seekers. If you were headed NoBo, you’d be climbing out of the valley, and therefore the view would be behind you.
CONS:
- Greater potential to have trouble getting a campsite if the trail is otherwise heavily trafficked, as most hikers tend to arrive at the overnight accommodations within the same few-hour period.
NoBo: Þórsmörk to Landmannalaugar
If you’re instead drawn to the physical challenges of a hike of this caliber and prefer to find connection to your surroundings through solitude, a NoBo trek might make the most sense despite being the path less traveled – literally!
PROS:
- Sharing the trail or battling crowds is a virtually non-existent issue when traveling the NoBo route from Þórsmörk to Landmannalaugar. For the most part, most hikers will be headed in the opposite direction as is typically seen on the Laugavegur trail.
- Ending the trail in Landmannalaugar means that you’ll be ending the trail in a geothermal hotspot, meaning lots of natural hot springs and ample opportunity to rest up and soak in the warm waters after a few demanding days on trail.
CONS:
- Most transportation providers offer pick-up from Þórsmörk given that it’s Laugavegur’s more popular end-destination, which may result in a pricier return trip to Reykjavik given the 50km/30mi+ additional distance.
Needless to say, hike your own hike and opt for whichever route sounds the most appealing based on your hiking ability and preferences.
Note: If you are planning to combine this hike with the Fimmvörðuháls Trail, your direction will determine whether you start with Laugavegur trail or Fimmvörðuháls Trail first.
Planning your Laugavegur hike
There are a few things to consider before you hit the trail on your Laugavegur hike.
Reservations and facilities on the trail
Laugavegur is Iceland’s most popular thru-hike so naturally, its annual visitor numbers reflect that. It’s estimated that up to 10,000 hikers trek the route each season.
Therefore it’s highly recommended to book your Laugavegur huts well in advance. Especially so considering that, on average, each of the huts hold up to an average of 60-75 persons per night.
→ Inquire and book your Laugavegur Huts here.
All huts are equipped with bathrooms and showers (with the exception of Hrafntinnusker Hut, which does not include a shower). If you have to relieve yourself on the trail, please be sure to follow Leave No Trace principles and pack out any waste.
However, if you wish to camp in the allocated sites next to each of the huts, no reservation is required as this operates on a first-come, first-serve basis and payment can be made upon arrival.
Note: Wild camping is illegal on the Laugavegur trail. Despite any misinformation that may advise contradictory to this, park wardens regularly patrol the area and will fine you for camping anywhere other than the designated sites found at the trail huts.
Trail conditions, weather warnings and more
Icelandic weather is unpredictable at best. Keep up to date on weather warnings and trail conditions by using safetravel.is. It’s a free service to receive updates and alerts in real time that may impact your trip.
This resource even includes up-to-date river crossing advisories (of which there are at least three on the Laugavegur trail).
→ Psst! Check out our other recommended Iceland travel apps.
So while it’s understandable to want to unplug for the majority of your thru-hike, it’s worth tuning in every once in a while to ensure the safety of you and those around you; which lends well into my next point…
Cell service and contacting emergency services
Surprisingly, cell service is pretty readily available on the Laugavegur trail (with the exception of Hrafntinnusker or Emstrur), especially in places of high elevation such as mountaintops or ridgelines.
Even so, it is good to be prudent and plan for emergencies. Bring an off-grid GPS—even a downloadable/offline AllTrails map is better than nothing!—and a portable battery pack, just in case, as it is not always possible to recharge your devices en route.
The emergency services number in Iceland is 112 and should be contacted if you are in need of the police, fire department or rescue services.
Fitness level and advanced training
Given that the Laugavegur trail is ranked “difficult” in terms of skill and fitness level, it is not recommended to attempt this trail as your first multi-day trek.
However, if you’re someone who is competent in the backcountry, including having experience with carrying your own overnight gear and supplies, then you’ll likely find this trail to be a pleasant and totally rewarding experience.
Like any hike, the more prepared you are, the more enjoyable the experience will be.
Be mindful of the distances between overnight stops and ensure that that’s well within your wheelhouse before attempting the Laugavegur trail, and you’ll be fine!
Note: This trail is not accessible to those with limited mobility due to its often uneven, challenging terrain and significant elevation gain/loss.
Budget for hiking the Laugavegur trail
Local currency is the Icelandic Krona (ISK), and it is largely the preferred payment method nationwide (though major credit cards are widely accepted as well).
Given the isolated nature of some of Laugavegur trail’s overnight huts, it’s strongly recommended you carry cash with you in the event of power outages or simple lack of debit/credit machines.
Accommodation costs
In 2025, the average cost of a dorm bed in one of Laugavegur’s huts is 15,000 – 16,000 ISK (approx. $118 – $126 USD) per person. The fee is typically paid in advance to reserve your spot.
So assuming you’re staying the recommended minimum of 4 days and 3 nights, expect to spend at least 45,000 ISK (~$357 USD) in total on lodging if utilizing the huts.
Camping is a much more affordable option along the Laugavegur trail. Campsites cost roughly 3,200 ISK ($25 USD) per person in 2025. Though, if planning to camp, be mindful that you’ll then have to carry your overnight equipment with you on trail.
Keep in mind, whether you’re paying to transport your own equipment, or rent camping gear in Iceland, sometimes it works out to actually be cheaper to opt for a hut. And remember, whether you opt to stay in a hut or at the campsite, five minutes in a hot shower will cost you 1,000 ISK (~$8 USD).
→ You can find the most up-to-date hut prices listed here.
Food on the trail
If there’s one thing that’s common knowledge when it comes to budgeting for Iceland, it’s that food is outrageously expensive. So much of your costs will be dictated by personal preferences, dietary requirements, and how much food you intend to bring and where you shop.
However, it’s worth mentioning that planning for four days worth of food–especially considering the intensive physical activity you’ll be enduring–could very well be the most expensive portion of your Laugavegur trail hike.
→ Use our guide to supermarkets in Iceland to find money-saving tips so you can budget accordingly and stock up on groceries for your hike!
Transportation costs
The final consideration when budgeting for your Laugavegur trek is transportation costs.
Since there are no public transportation services available at either end of the Laugavegur trail, you’ll need to arrange private transportation in advance.
The overwhelming recommendation on this one (passed on from hiker to hiker as the most inexpensive option by far) is to purchase a Highland Bus transfer for round-trip transportation to each end of the trail.
The cost is based on the route and time of year, but you should expect to pay around $155 USD if you need a two-way transfer.

Psst! The Laugavegur is one of Iceland’s great multi-day hikes — and if you’re heading to Iceland for adventure, our 2-week Ring Road itinerary is packed with incredible day hikes too, including the famous Fimmvörðuháls trail. Lots of adventure options! Get the Ring Road Itinerary →
What to pack for hiking the Laugavegur trail
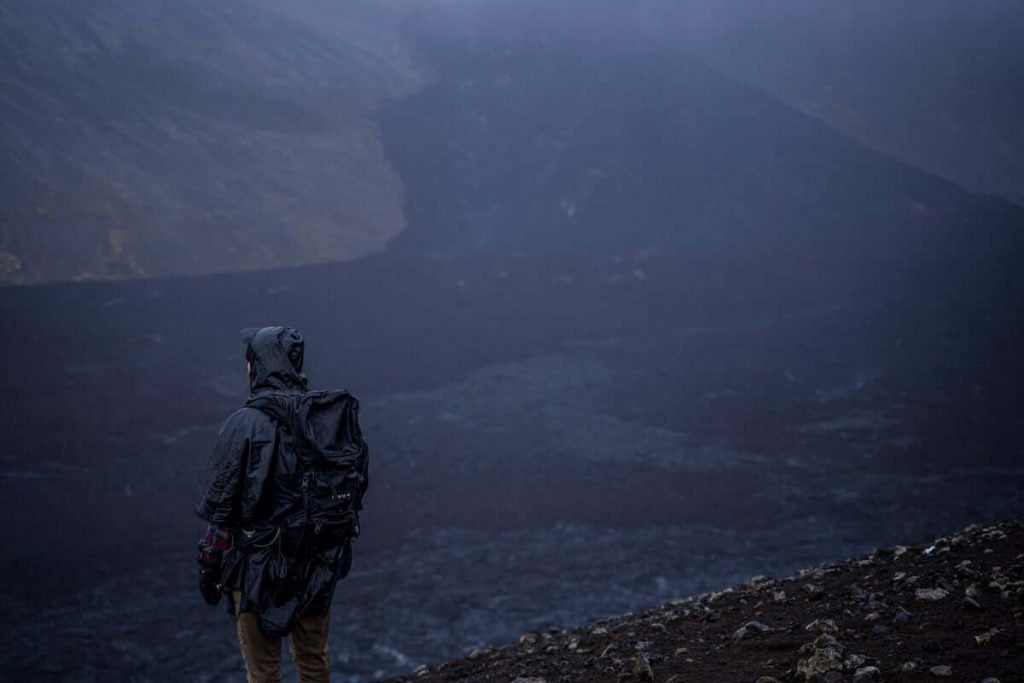
While everyone’s gear setup is bound to look a little different based on their hiking competency, experience and skill level, one thing is never contested: you’ll want to keep your backpacking base weight as low as possible.
Given Laugavegur’s remote nature, there’s no opportunity to unload excess weight off your pack like you might on a day trip. That, in combination with the fact that you’ll have to pack out your own waste, means needing to keep space in your pack available for such eventualities.
Now, with that being said, there are some staples that every hiker should bring with them before attempting to hike the Laugavegur trail.
Bring-from-home gear:
- Hiking clothes: opt for water resistant/lightweight materials and layers wherever possible to accommodate Iceland’s fickle weather.
- Find out what to wear hiking in every season.
- Hiking boots: ensure your footwear is properly broken in and have ample tread for those rockier sections of trail.
- Hydration pack: a hydration pack (aka Camelbak-style bladder) is by far the most convenient method for staying hydrated while on trail.
- Iceland’s water is notoriously pure and potable. You can fill up at any water source found along the trail (of which there are many).
- First aid kit: always ensure you’re prepared for worst case scenarios!
- Electronics: be it a cellphone, GPS, camera or drone, you’ll likely want some method for contacting the authorities in the event of an emergency, as well as a method to document this once in a lifetime trek!
- Bring extra batteries as there will likely be little to no opportunity for you to charge your electronics along the way.
- Drone note: Overnight huts/campsites are posted no-fly zones, but the remainder of the Laugavegur trail is free game and no drone permits are required.
- Food: while a cook kit can largely be disregarded given that overnight huts are equipped with virtually everything you’ll need (pots, pans, utensils, etc), you are on your own in terms of food and snacks brought to keep you energized along the Laugavegur.
- We found it hard to find things like decent protein bars in Iceland, so we’d actually recommend packing your hiking snacks and backpacking meals from home.
Gear you could rent if you need to:
- Trekking poles: help take the pressure off your joints while traversing over the Laugavegur’s many elevation gain/loss points. Trust me—you’ll thank yourself for having brought them!
- Microspikes: be sure to check conditions in advance and decide if microspikes are right for you. Worst case scenario, they add an extra pound to your pack and you don’t use them; but at least you were prepared to!
- These are the best microspikes for hiking
- Headlamp: helpful in the event that you get a late start to your day and/or the sun starts dipping beneath the horizon before you’ve reached your stay.
- While this is less of a concern during the summer months given Iceland’s remarkable midnight sun phenomenon, you may find it useful during periods of cloudiness outside, or if you’re getting an early start to the day in a hut and don’t want to turn on lights to disturb any other hikers.
- Camping equipment: We have a whole article on where to rent camping gear in Iceland, including tents, sleeping bags, mattresses, and even clothing!
Be sure to download our complete packing list for Iceland! It’s packed with good suggestions and insider tips to help plan your Italy trip. And it’s completely FREE, so why not!?

Day-by-day breakdown of the Laugavegur trail
In this section, we’ll go over what to expect along the trail on each day of your hike.
The days here are listed in order of hiking the more popular SoBo route, Landmannalaugar to Þórsmörk. However, they can be reversed to represent the NoBo route as well (keeping in mind the elevation gain/loss is reserved as well and the timing may differ).
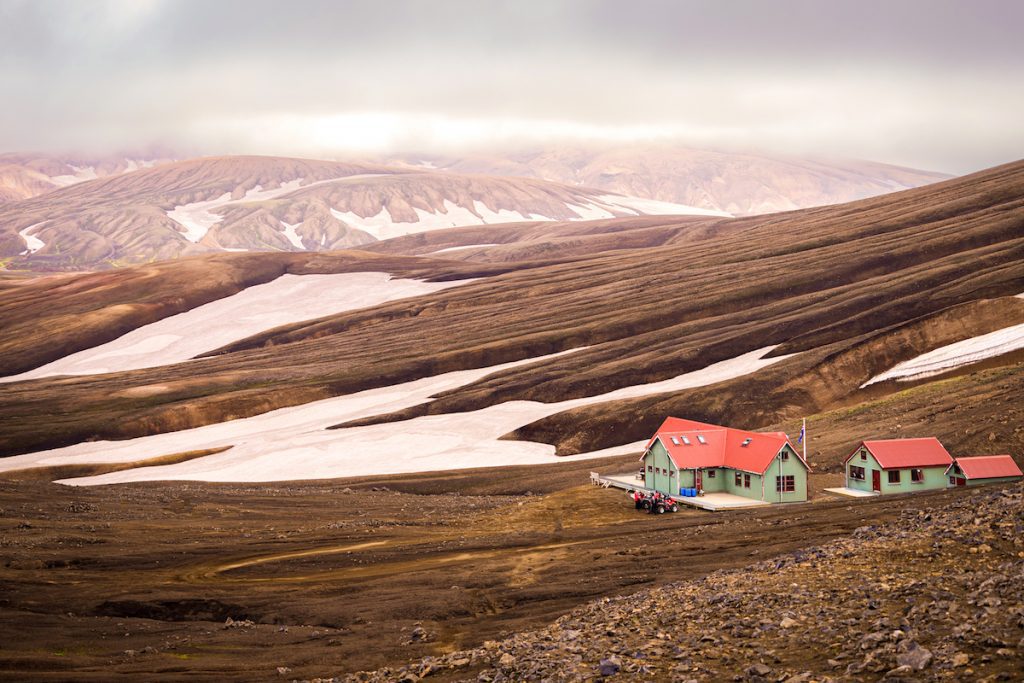
Day 1: Landmannalaugar to Hrafntinnusker
- Distance: 10.3 km (6.4 miles)
- Elevation gain: 664 m (2,178 ft)
- Difficulty: challenging
- Hiking time: 4 hours
- Alltrails notes
As soon as you depart from Reykjavík, you can already expect to be met with stunning views of south Iceland as you make the 3-4 hour drive to Landmannalaugar.
Upon arrival, the trailhead is obvious. Follow it and you’ll be immediately met—and rewarded with—bubbling pools of hot, geothermal water, Landmannalaugar’s signature rhyolite mountains (which give them their distinct “rainbow striped” appearance), and the stark black Laugahraun lava fields.
With consistent elevation gain, the first day on the Laugavegur trail is the most challenging one. Today you’ll cover more elevation gain than any other day.
The Hrafntinnusker hut is the highest elevation point on the Laugavegur trail, meaning a lot of climbing (read: switchbacks).
Expect to spend a modest 4 hours making the trek up ever-changing terrain. When completed, you’ll take a well-earned rest amidst your first stop along the revered Icelandic Highlands!
Day 2: Hrafntinnusker to Álftavatn

- Distance: 11.3 km (7 miles)
- Elevation gain: 257 m (843 ft)
- Difficulty: moderate
- Hiking time: 4-5 hours
- Alltrails notes
On day two of the Laugavegur trail you leave the high plateau around Hrafntinnusker and begin a scenic descent down into the picturesque valley of Lake Álftavatn.
Fortunately, you’ll have even better views of the rhyolite mountains during this section of trail (and without the Landmannalaugar day hike crowds!).
The route takes about 4–5 hours and starts with a walk across a broad valley and small ravines, followed by a short climb to panoramic views of colorful mountains and valleys.
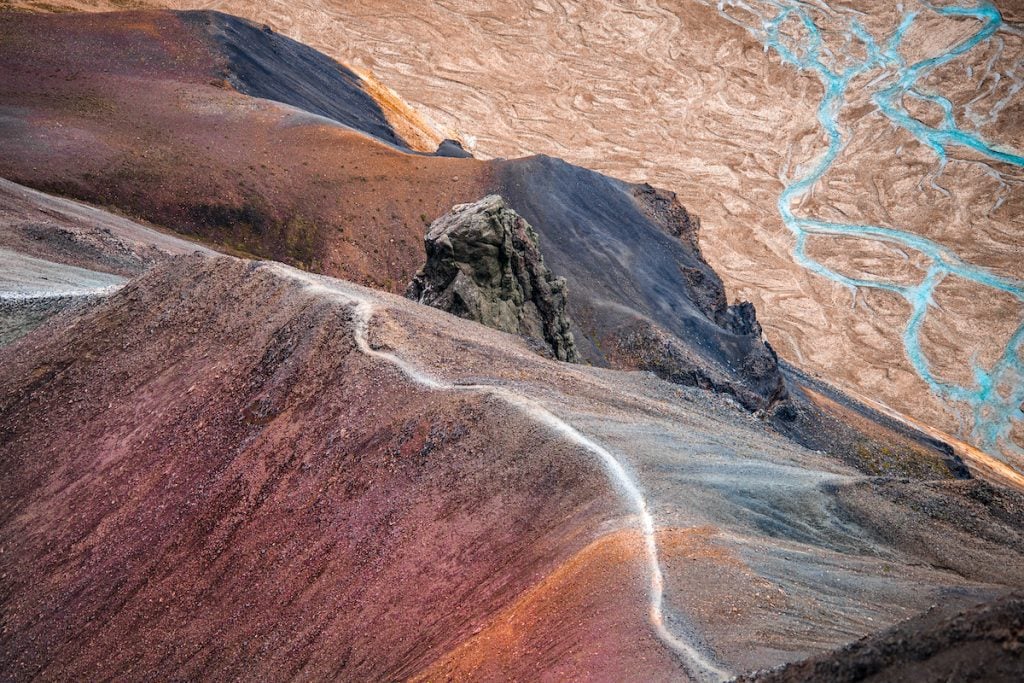
You will also encounter the rather eerie, yet enchanting, black obsidian desert in the Jökultungur area before descending into the lush valley towards the lakeside Álftavatn hut. But first, a notable river crossing on the final stretch.
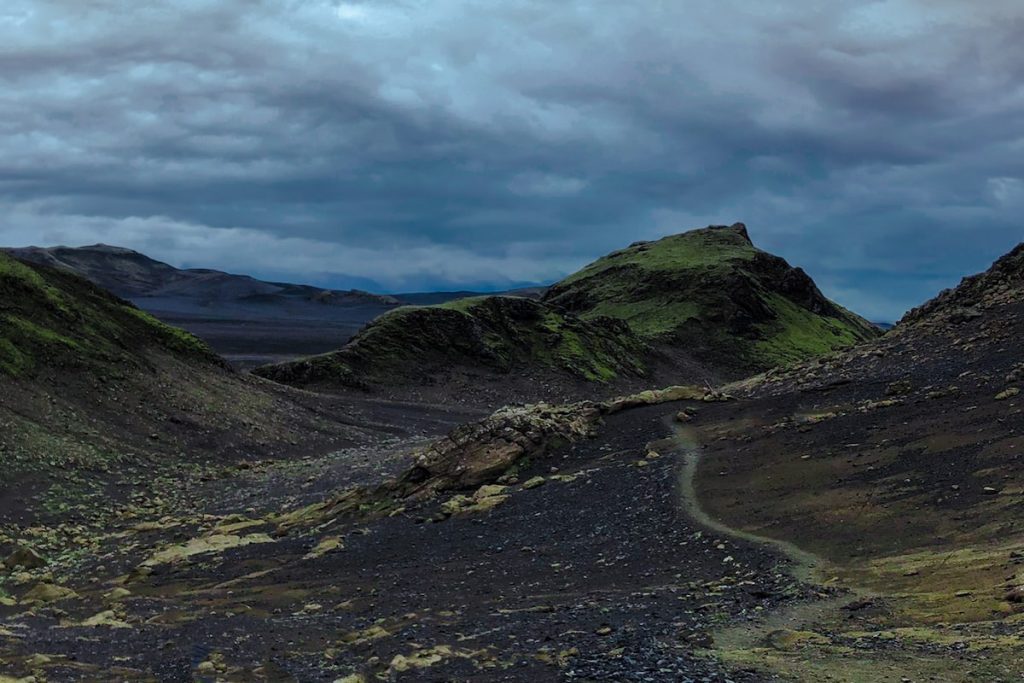
Day 3: Álftavatn to Emstrur

- Distance: 15.8 km (9.8 miles)
- Elevation gain: 443 m (1,453 ft)
- Difficulty: moderate
- Hiking time: 6-7 hours
- Alltrails notes
On day three of the Laugavegur trail, you’ll hike the longest distance, from Álftavatn to the Emstrur (Botnar) hut and campsite, a section that typically takes 6–7 hours to complete.
You’ll leave the glacial lake behind, cross through the Hvanngil valley area, and traverse mixed terrain of lava fields and black sand before reaching the more vegetated Emstrur region.
Traversing past volcanoes and glaciers in the same stretch of trail really reminds one why Iceland is referred to as “the land of fire and ice”.
The terrain is mostly flat with minimal elevation change, but it includes multiple river crossings—some wide and cold. It’s recommended you bust out those trekking poles and follow proper pack-safety protocol here (unbuckling your pack from your chest and waist in the event that it gets caught in the current, it won’t pull you under or downstream).
Once you’ve made it safely across, it’s easy following the lava rock-riddled trail up to a fork in the road where you’ll follow the path toward Emstrur hut. It’s here that you’ll begin to see yet another dramatic change in landscape, as more of Iceland’s otherwise elusive vegetation begins to make an appearance.
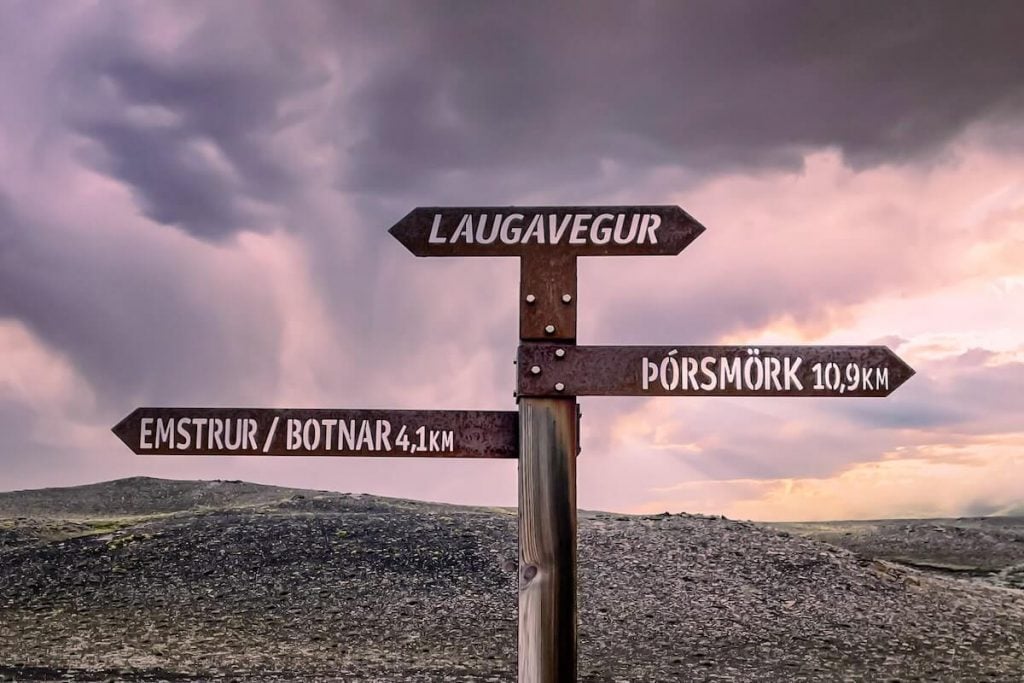
Day 4: Emstrur to Þórsmörk
- Distance: 15 km (9.3 miles)
- Elevation gain: 300 m (984 ft)
- Difficulty: moderate
- Hiking time: 6-7 hours
- Alltrails notes
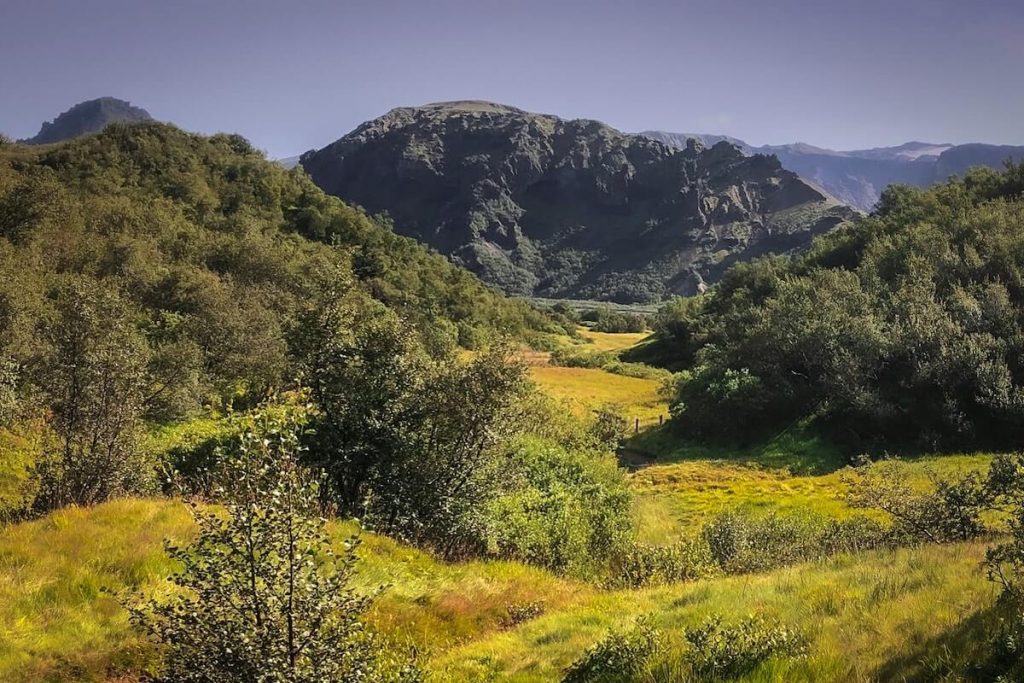
The final day of the Laugavegur trail takes you from the desolate highland plains around Emstrur down into the lush birch-forested valley of Þórsmörk, a journey that generally takes 6–7 hours.
You’ll get to know the phrase “what goes up, must come down” rather intimately as you make the rather steep descent into a canyon. In this canyon will be yet another fast flowing river, though fortunately, this one has a bridge to aid you in your crossing.
As you get closer to Þórsmörk, the landscape shifts dramatically from volcanic sand and rock to greener terrain and forested trails, ending at the huts and campsites nestled in this scenic, glacier-framed valley — a perfect final stop for your multi-day trek.
Optional: Fimmvörðuháls trail: Þórsmörk – Skógar
If time (and potentially aching muscles) permit, consider the 1-2 day addition of Þórsmörk to Skógar. As mentioned above, this section is known as the Fimmvörðuháls trail, Iceland’s most famous day hike.
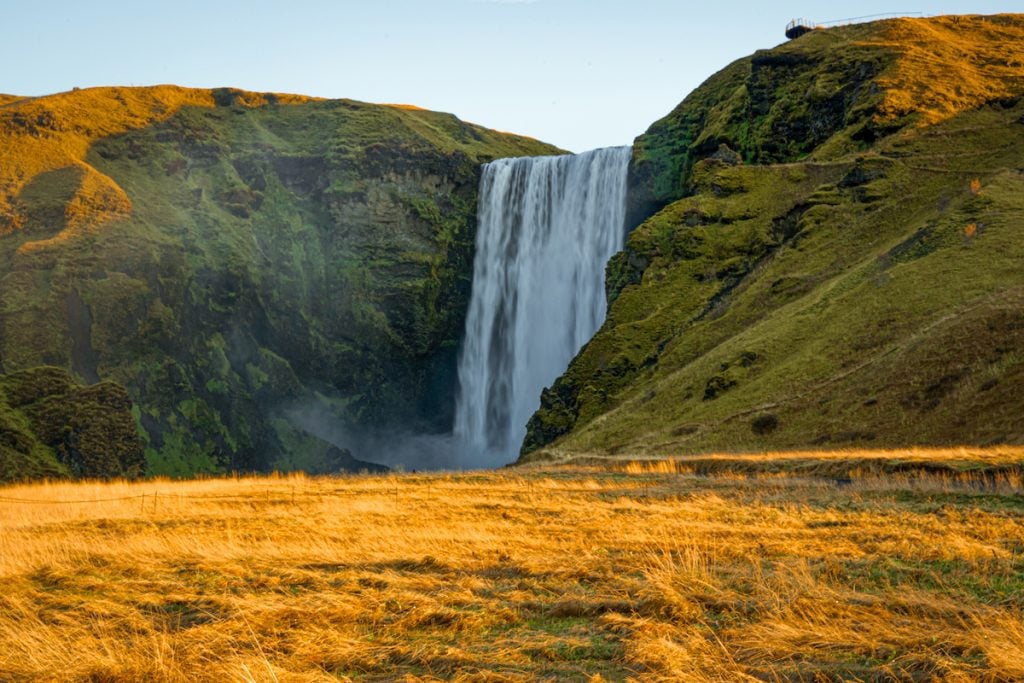
Adding another giant elevation gain and nearly 25 km of distance proves to be challenging, without doubt, but is also a great way to bookend the Laugavegur trail with yet even more remarkable views of lush vegetation and plunging waterfalls.
Read our Fimmvörðuháls hike guide for everything you need to know about this additional stretch.
Final thoughts and the importance of “Leave No Trace”

The Laugavegur trail is one of Iceland’s most popular hikes, and attracts nearly ten thousand backpackers each year to its illustrious, raw landscapes.
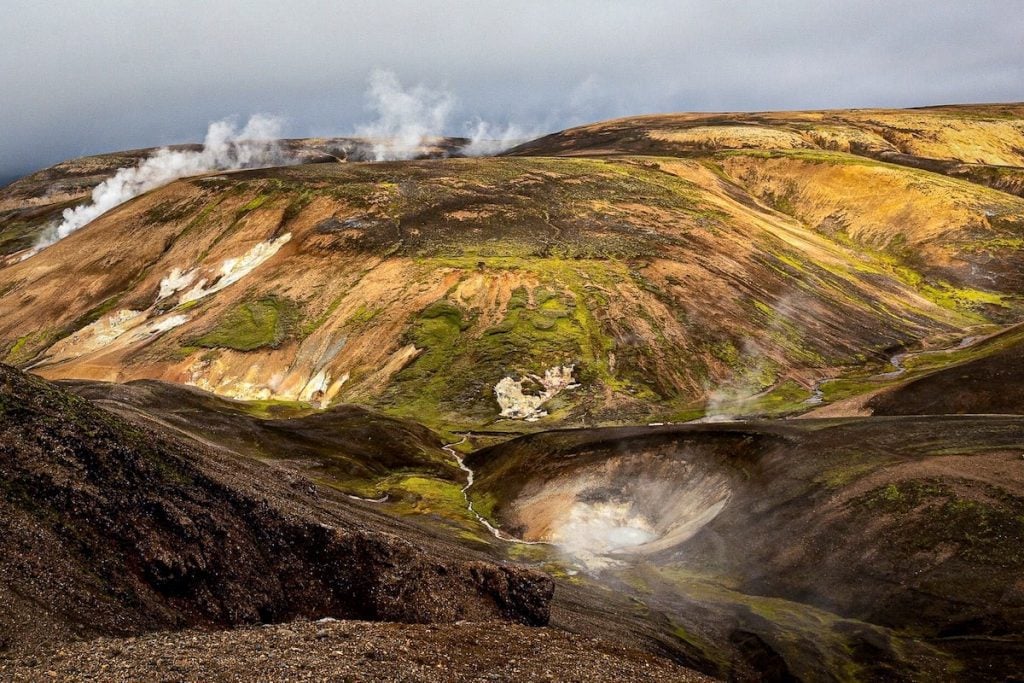
Between the rolling boil of Landmannalaugar’s vast geothermal network and the tree-lined descents into Þórsmörk’s lush canyon, you’ll encounter kaleidoscopic mountain ranges, jet black volcanic peaks and majestic crystal glaciers.
Iceland’s wilderness is, in a word, pristine. And it’s up to those of us who revel in its spoils to keep it that way.
Respect the flora and fauna of Laugavegur by packing waste out with you, and staying on-trail to avoid damaging the surrounding vegetation (specifically Iceland’s signature wild mosses, which can take up to several hundred years to grow back!).
→ Read more about the 7 principles of Leave No Trace.
Now that you’re appropriately equipped to tackle this arduous four-day journey, be sure to carve out the time needed to add the Laugavegur trail to your itinerary. You won’t regret it!

About the author
Natasha is a lover of all things outdoors—hiking, road trips, conservation—you name it. With over a decade of experience (mis)adventuring her way through a few dozen countries, she’s gotten the opportunity to live out some of her wildest dreams, and nowadays chronicles all about them over at her blog, Planes, Trains and Karcz, to inspire you to follow yours!
Perfect Iceland itinerary
Want to skip the stress of trip planning?
Planning a trip to Iceland can feel overwhelming—there’s so much to see, and it’s easy to miss hidden gems if you don’t know where to look. That’s why we created our done-for-you Iceland Ring Road Itinerary—so you can spend less time researching and more time soaking in Iceland’s epic landscapes.
This 14–day itinerary takes you along Iceland’s entire Ring Road, blending adventure with a touch of luxury. You’ll visit iconic sights like Skogafoss and Diamond Beach, plus off-the-beaten-path spots most tourists miss (like a hidden cave you can dine in by candle light!).
With detailed daily plans, insider tips, driving directions, and hand-picked stays, this guide takes the guesswork out of planning so you can experience Iceland stress-free.
Plan your trip to Iceland
We have TONS of resources on travel in Iceland and how to make the most out of your trip. Check out our Iceland Homepage for all the answers to your most burning questions, or read some of our favorite articles below.
- Check out all of our top recommendations for things to do in Iceland.
- Figure out the best time to visit Iceland based on weather, crowds, and activities.
- Start with this 7-day Iceland itinerary if it’s your first time visiting.
- This step-by-step guide will help you plan an unforgettable Iceland road trip.
- You’ll want to keep this guide handy if you plan on driving Iceland’s Golden Circle.
- Bookmark these must-see stops along Iceland’s Ring Road before you hit the road.
- Read up on all the actually cool things to do in Reykjavik.
- Be sure to download these essential Iceland travel apps before your trip!
Don’t miss your chance to grab our Iceland packing list!

Click the banner to download our complete packing list for Iceland! It’s packed with good suggestions and insider tips to help plan your Iceland trip.
And it’s completely FREE, so why not!?
Save this article on Pinterest for later!
We want to hear from you!
Do you have more questions about hiking the Laugavegur Trail? Leave your comments below and we’ll do our best to get you the answers your looking for!
I have a question for those in the know. Is fishing allowed anywhere along the trail? Be it fly fishing, spinning real or hand line?
Thanks for such an amazing tour of Laugavegur. I am even more excited to Hike Laugavegur trail this summer. One question since you have been there. In addition to Laugavegur, what else did you do in Iceland? I am getting so much confused that I’ll be landing in Reykjavik and then will be picked the next morning by the hiking company I signed up with. After I am done, have I seen the best of Iceland or should I add anything else to the trip; there are companies who offer Ring Road Tour, Golden Circle, Blue Lagoon, etc. The addon after the hike definitely becomes expensive. So, I am trying to decide if it is just Laugavegur and come back to the US or add something? Please advise. Thank you!
good
I’m going to visit Iceland with a friend 3 months from now. We’re planning to cover a lot of activities, including the Laugavegur trail. This will be my third multi-day trek ever and I’m very excited for it. One question though, what are the fees and permits you need before going on the trail? Thanks for sharing.