
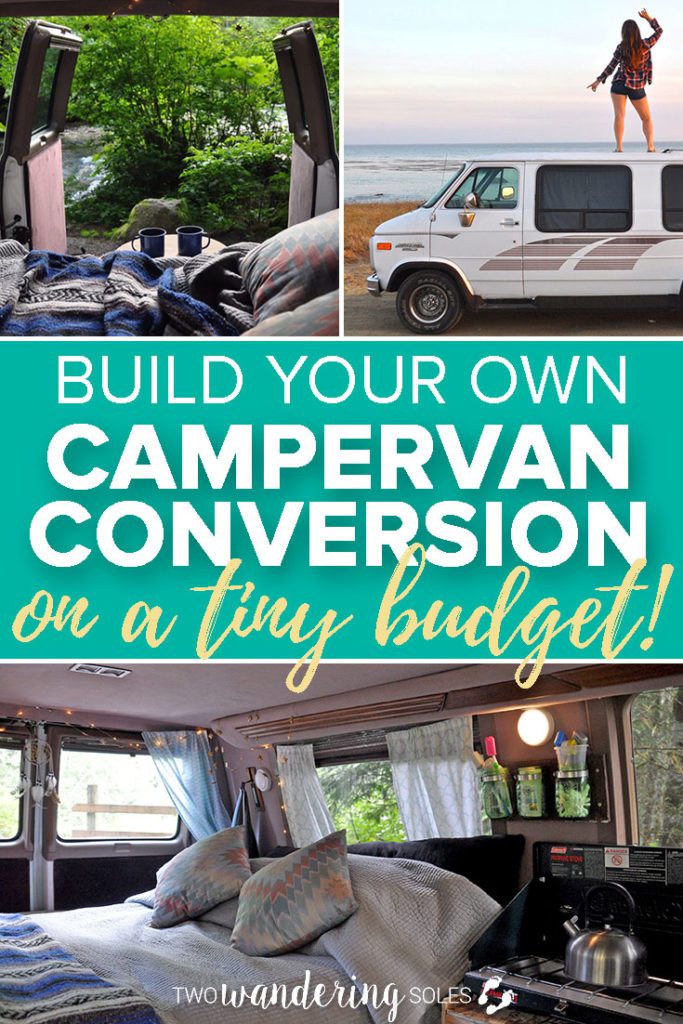
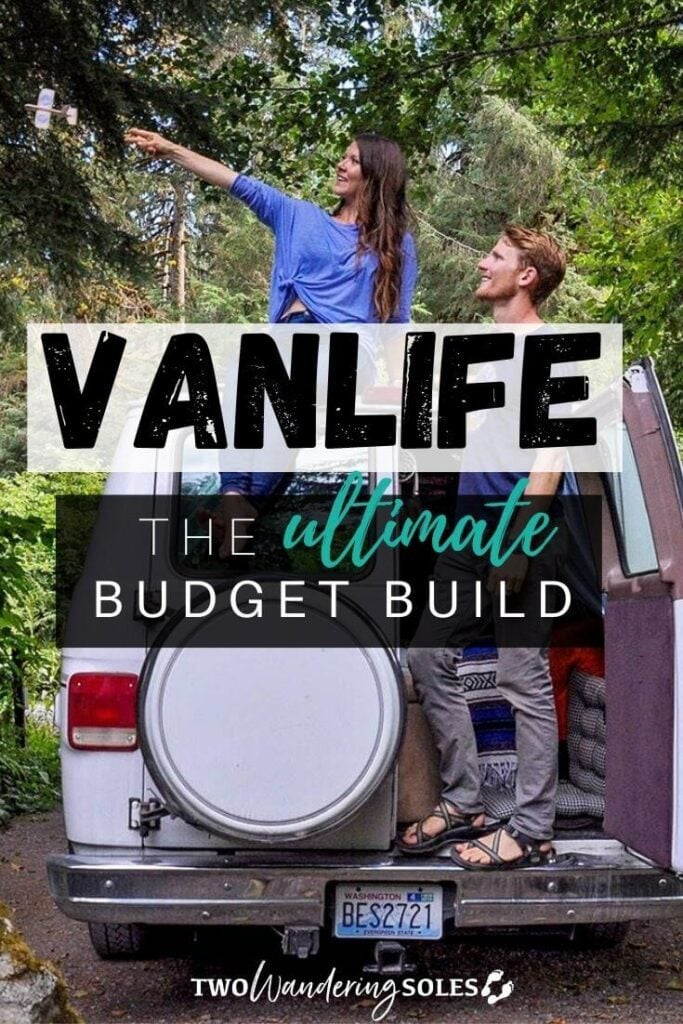
If you want to make your own DIY campervan conversion but don’t have a lot of time or money, we’ve got you covered! This article is chock-full of practical tips and all the steps needed to make your own DIY campervan conversion on a small budget in just one week. Let’s make your vanlife dreams a reality!
So you wanna live the vanlife but you have a super tiny budget and you need a quick turnaround? And on top of that, you don’t have a ton of tools or experience with this type of campervan conversion?
Is this too much to ask?
Not at all!
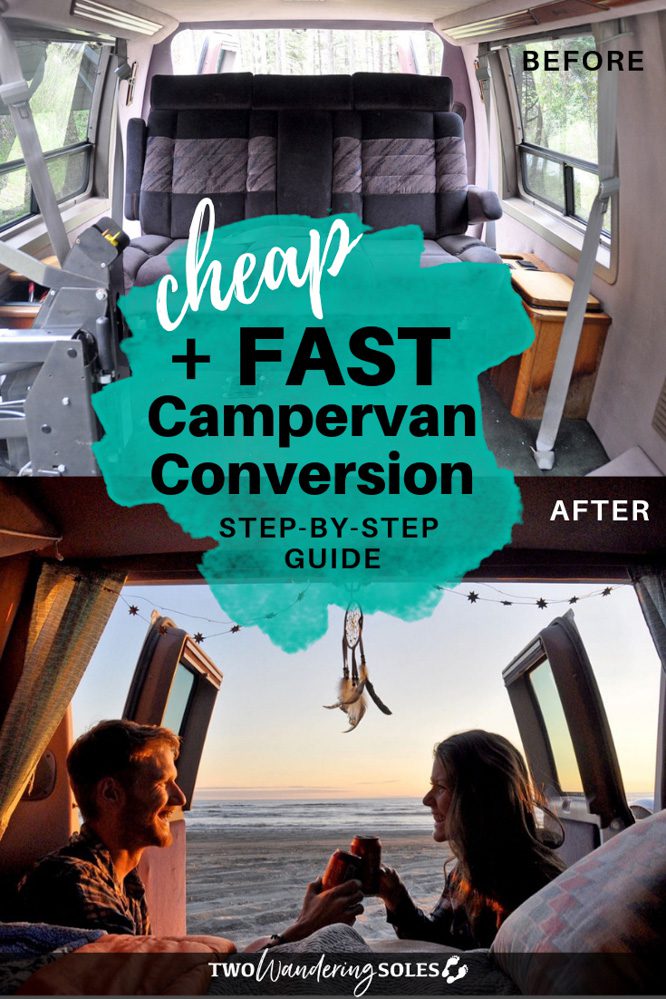
We bought a van (that was in dire need of some TLC) for cheap, and transformed it into a livable home with all the campervan essentials in less than one week of working time. Plus, this was our very first time doing anything like this and we had very few tools to use.
If we can do it, so can you!
In this article, we have laid out exactly how we built our DIY camper van fast and cheap so you can follow in our footsteps and find out for yourself why living in a van is the best.
DIY Budget Campervan Build Table of Contents
If you know what you are looking for, click the link below and jump down the page.
- Campervan conversion inspiration
- Step 1: Buy a van
- Step 2: Gut and clean
- Step 3: Take measurements
- Step 4: Plan the campervan layout
- Step 5: Build the van components
- Step 6: Make privacy curtains or window covers
- Step 7: Make the van liveable and functional
- Step 8: Buy the campervan essentials
- Step 9: Organize the van
- Step 10: Van final touches: Make it feel like “home”
- Budget campervan conversion essentials
- Easy ways to save money on a DIY campervan conversion
- How much does a campervan conversion cost?
- Build steps for a DIY campervan conversion on a budget
- How much does daily van life cost?
I’m interested in vanlife, where do I get started?
We understand just how overwhelming it can be to start this process so we poured all of our personal experience and advice into a mega resource just for you.
Enter your email below to immediately receive our Vanlife Jumpstart Toolkit, your FREE mega guide to jump-starting your #vanlife dreams!
Campervan conversion inspiration
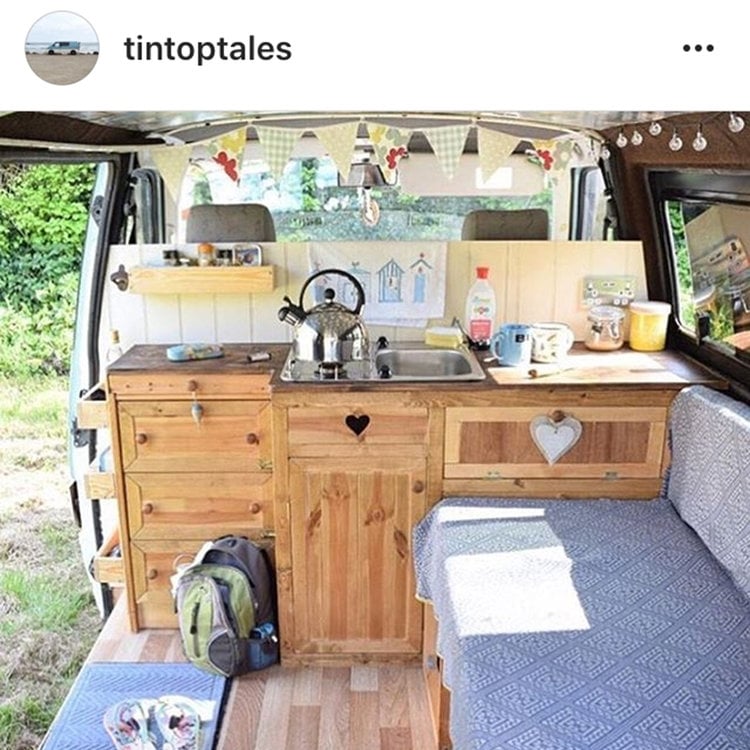
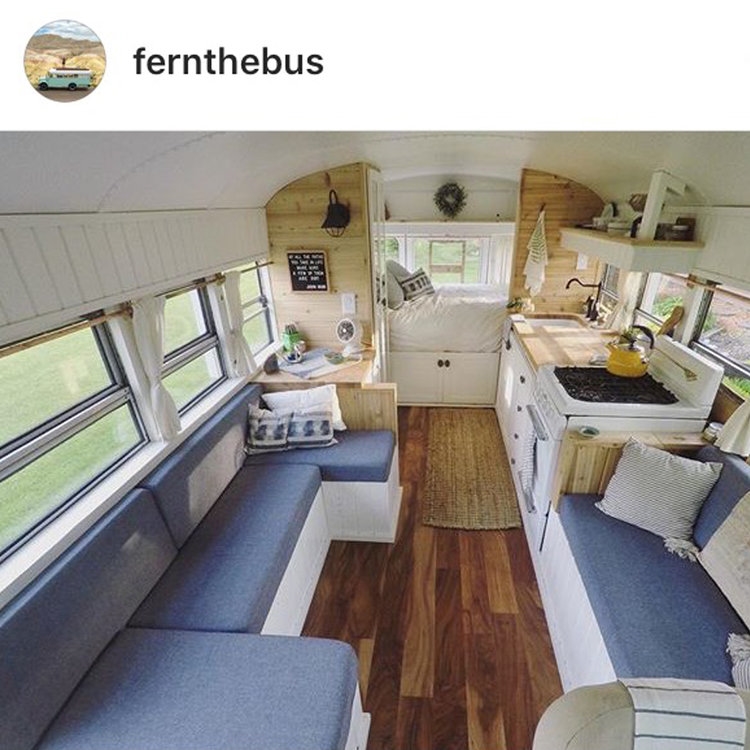
Let me start by saying that our campervan conversion was not super luxurious. No wood floors or raised ceilings or skylights. We didn’t have a bathroom, nor did we have a generator with electricity. (Ben quickly crushed these dreams of mine once he figured out how much they would cost and how much effort it would take.)
You can scroll through Instagram profiles of people who’ve spent years and thousands upon thousands of dollars to create super luxurious camper van conversions. They are frickin’ awesome.
We even put together an entire article of some pretty epic campervan conversions to give you inspiration for your build.
Take a look at some of these, and you’ll be floored by how people can transform a tiny space when given enough time and money.

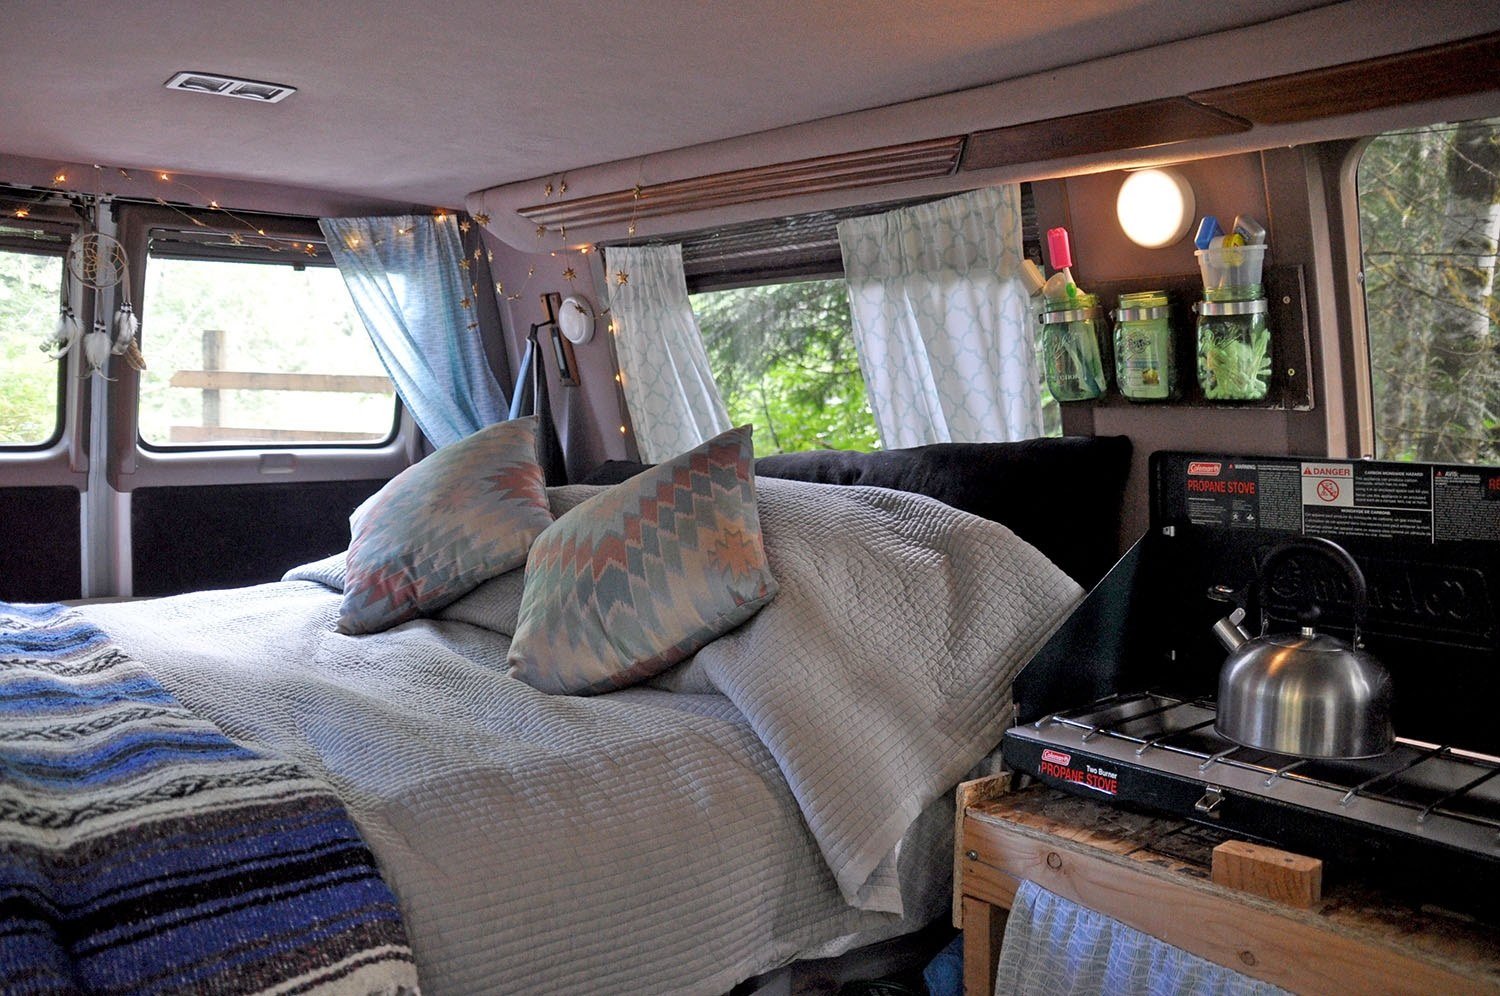
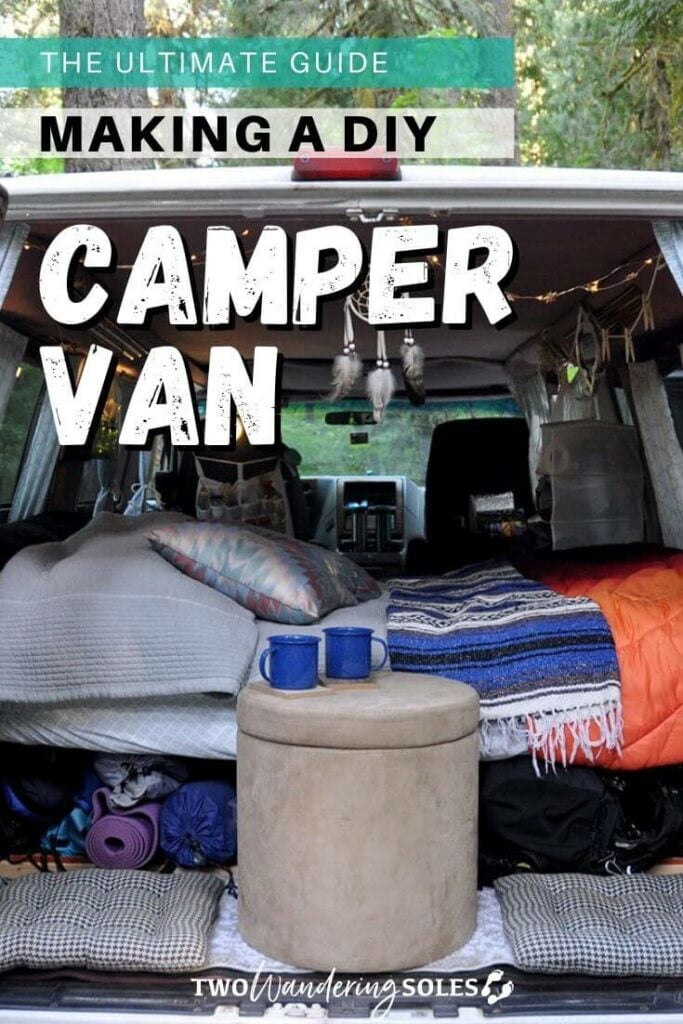
Our camper van conversion was cute, functional, comfortable, and it felt like home. We made it fast and cheap with few tools. But luxurious it was not.
We were incredibly happy with how it turned out and can’t think of much we would change with the time and budget constraints we had.
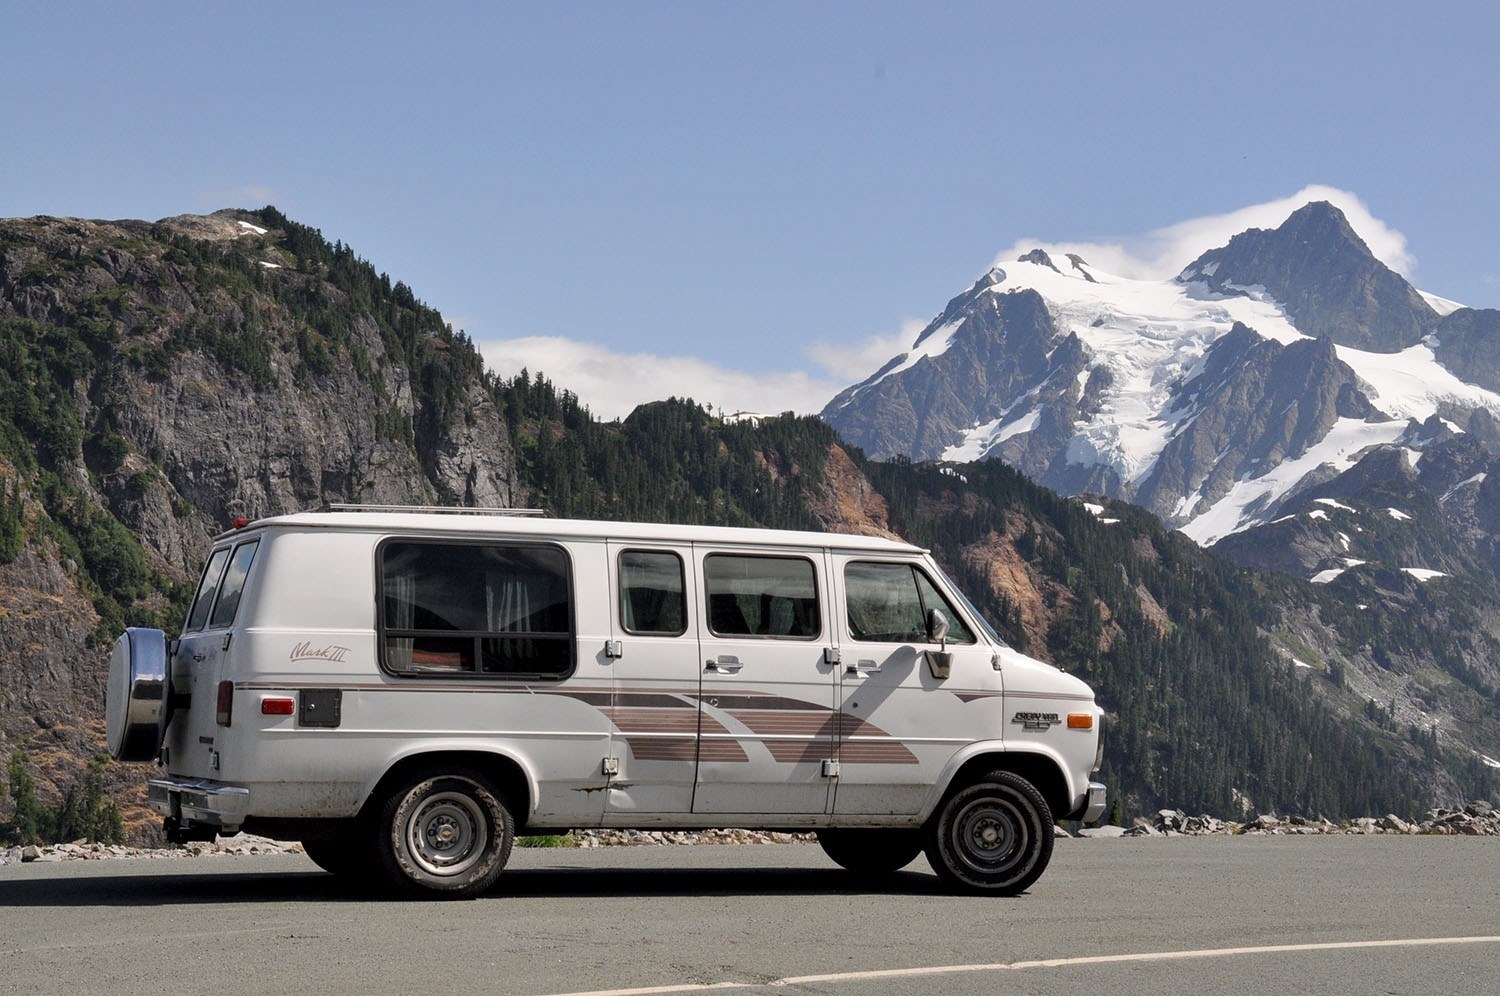
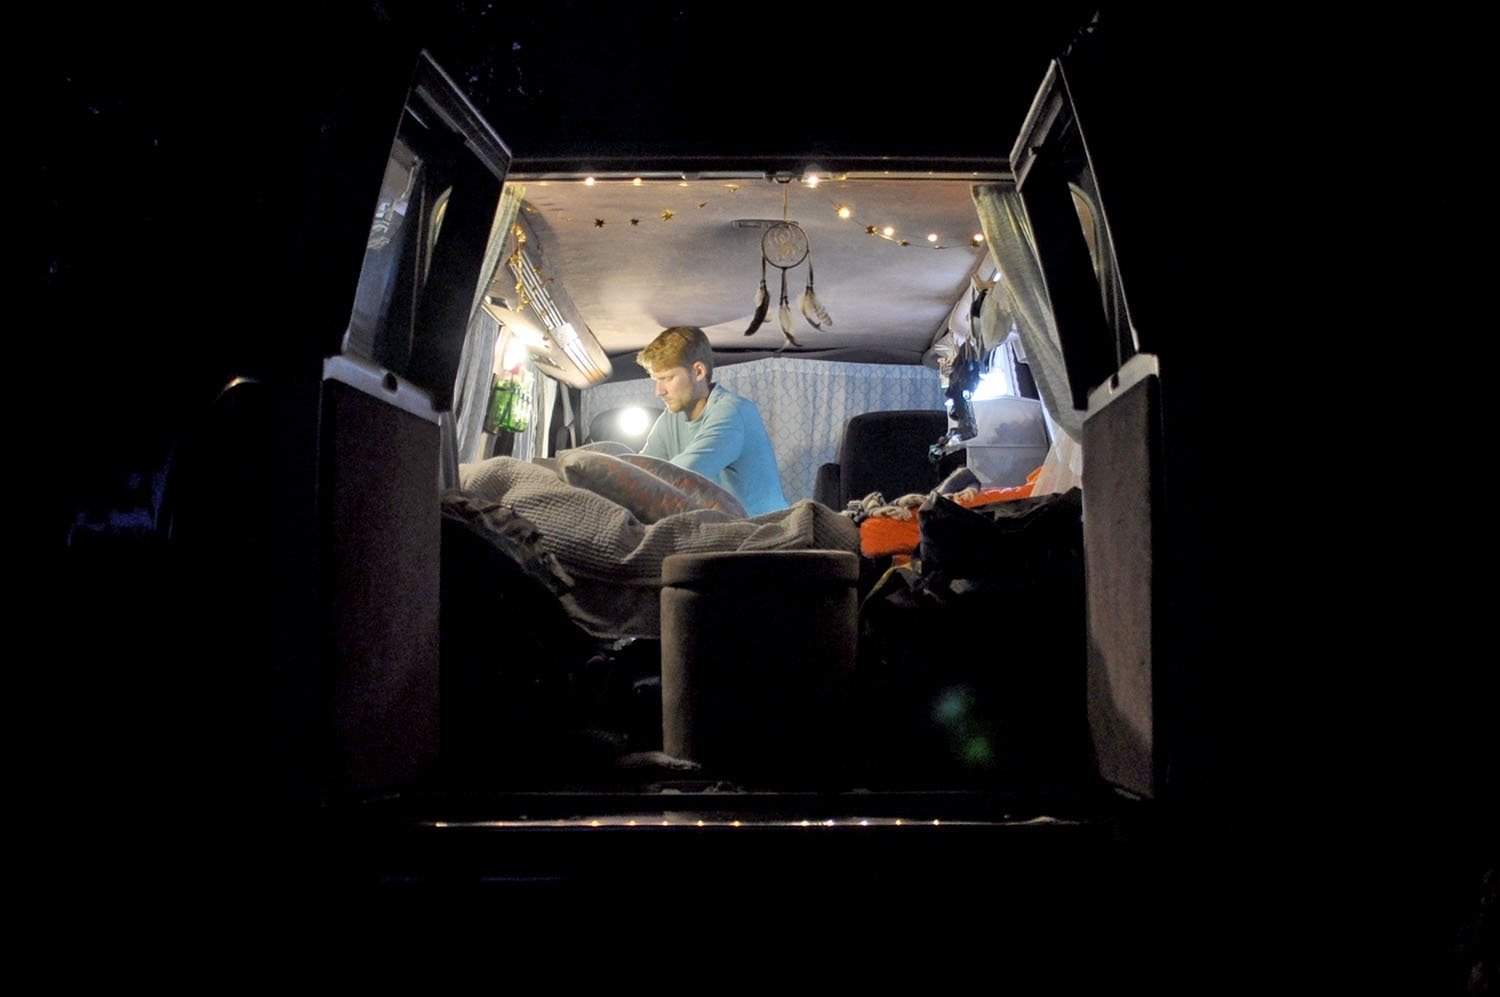
Below is our finished product: Our beloved “Vinny the Van”. Not as fancy as those pictured above, but not too shabby!
We had an incredible summer traveling with Vinny. We made it through 8 western states and even up to Canada. If you want more inspiration to build your own campervan, take a peek at our West Coast Campervan Trip Video below.
Campervan road trip video
For those of you who, like us, don’t have tons of time or money, we are here to share exactly how you can make your own campervan conversion from square one in less than a week and on a tiny budget.
We’re also going to break down exactly how much each of these steps costs us so you have an idea of what to expect. If you have ever thought of doing a campervan conversion (or know of someone who’s thinking of making the plunge), you won’t want to miss this!
If you are looking to do a campervan conversion with a few more of the bells and whistles and have the budget to spare, check out Van Conversion Academy, our comprehensive online course that will walk you through the steps of your van build from zero to on the road!

Don’t have time to DIY your own Campervan?
If you don’t have the time (or interest!) in building your own conversion but you still want to give van life a test drive, we’ve tons of ideas for you! Check out our list of top companies for USA Campervan Rentals, from budget to bougie, we’ve even included some exclusive discounts for our readers!
One company we’d recommend looking into is Escape Campervans. They have 12 different locations across North America and come fully loaded with all the gear you need for an epic road trip. Plus, their rates are fair and affordable.
BONUS: We’ve partnered with them to give you a 10% off discount when you use our link!
Step 1: Buy a van
Well duh, right? Hold up for a minute… there’s a little more to buying a van than just shelling out some cash.
First, decide what your budget is and start searching right away! Even if you’re not able to purchase a van right now, knowing the market and how quickly things sell is helpful.
Check out some of the best vans for camper conversion, get an idea of the makes and models you like, and you’ll also start to understand what is a good price for a van in your area. Each country, region and city is a bit different.
Best vans for a budget van conversion:
You’ve probably seen on YouTube and Instagram these picture-perfect vans with all the bells and whistles as we mentioned before.
What you don’t see is that these vans are most likely a high-roof Mercedes Sprinter Van, Ford Transit, or Ram ProMaster and cost tens of thousands of dollars just for the van body.
There is nothing wrong with these vans (our second and third campervan builds were Ram ProMasters), but if you’re looking for a van for your budget DIY van build, you’ll want to be searching for these types of vans.
- Chevy G20 or G30
- Ford Econoline (2014 and before)
- Chevy Astro Van (Katie’s parents had one of these growing up)
- Dodge Ram Van (the ’90s and 2000’s)
- GMC Savana
- Vauxhall Vivaro
- Chevy Express
Where to find a van for a campervan conversion
We used Craigslist to find our van, but reaching out to friends and family is a good idea, too. You may be surprised at the connections you have. Facebook Marketplace is also worth a shot, but watch out for scam bots that just want to get your info (but that’s a story for another time).
We had better luck searching “cargo van” or “passenger van” than simply just “van” which can be a bit broad.
Don’t be afraid to widen your search a little bit, too. We ended up driving about 3 hours from where we live to pick up our van because the prices are super high in our area.
Important things to think about when purchasing a used van
Mileage and age of the car are both obvious things to consider, but here are a few other things to think about when buying a used van.
- Tires: How are the treads? Will they need to be replaced? If so, use this as a way to negotiate the price.
- Air conditioning and Heat: Do they work well? Living in a space without AC or heat can be very uncomfortable and fixing these systems can be difficult and expensive.
- Clearance: Check out how low the van is to the ground. There are some campsites and “off the beaten path” roads that will be difficult to navigate if your vehicle has low clearance. This is a good thing to keep in mind when purchasing a camper van or RV.
- Noises: Listen to the engine as it’s shifting gears. Any unknown noises can be a sign of a problem that’ll need to be fixed.
- Leaks: If the van has been sitting for a while, look underneath and search for any signs of leaks. Some leaks are easily fixed, but others can be expensive. You’ll want to know what you’re getting into.
- Brakes: Make sure the pads aren’t too worn down and that they don’t squeak when pressure is applied.
- 4WD vs. RWD: This isn’t a make or break, but it’s a good thing to know before buying. RWD will not be the best when wintertime comes (if you’re in places where it will snow). That said, our van was a rear-wheel drive and it made it up many mountain passes in the summertime.
- MPG: I’m going to be blunt and tell you that you’re not going to find a campervan — no matter how new or expensive — that has great gas mileage. When you’re driving your home, the miles per gallon are going to be lower than with a typical car. But it’s good to ask the previous owner what type of mileage they were getting so you have an idea of what to expect. As a benchmark, our 1994 Chevy G20 got between 15 – 18 miles per gallon. Certainly not great, but there are worse out there.

How much does buying a used van cost?
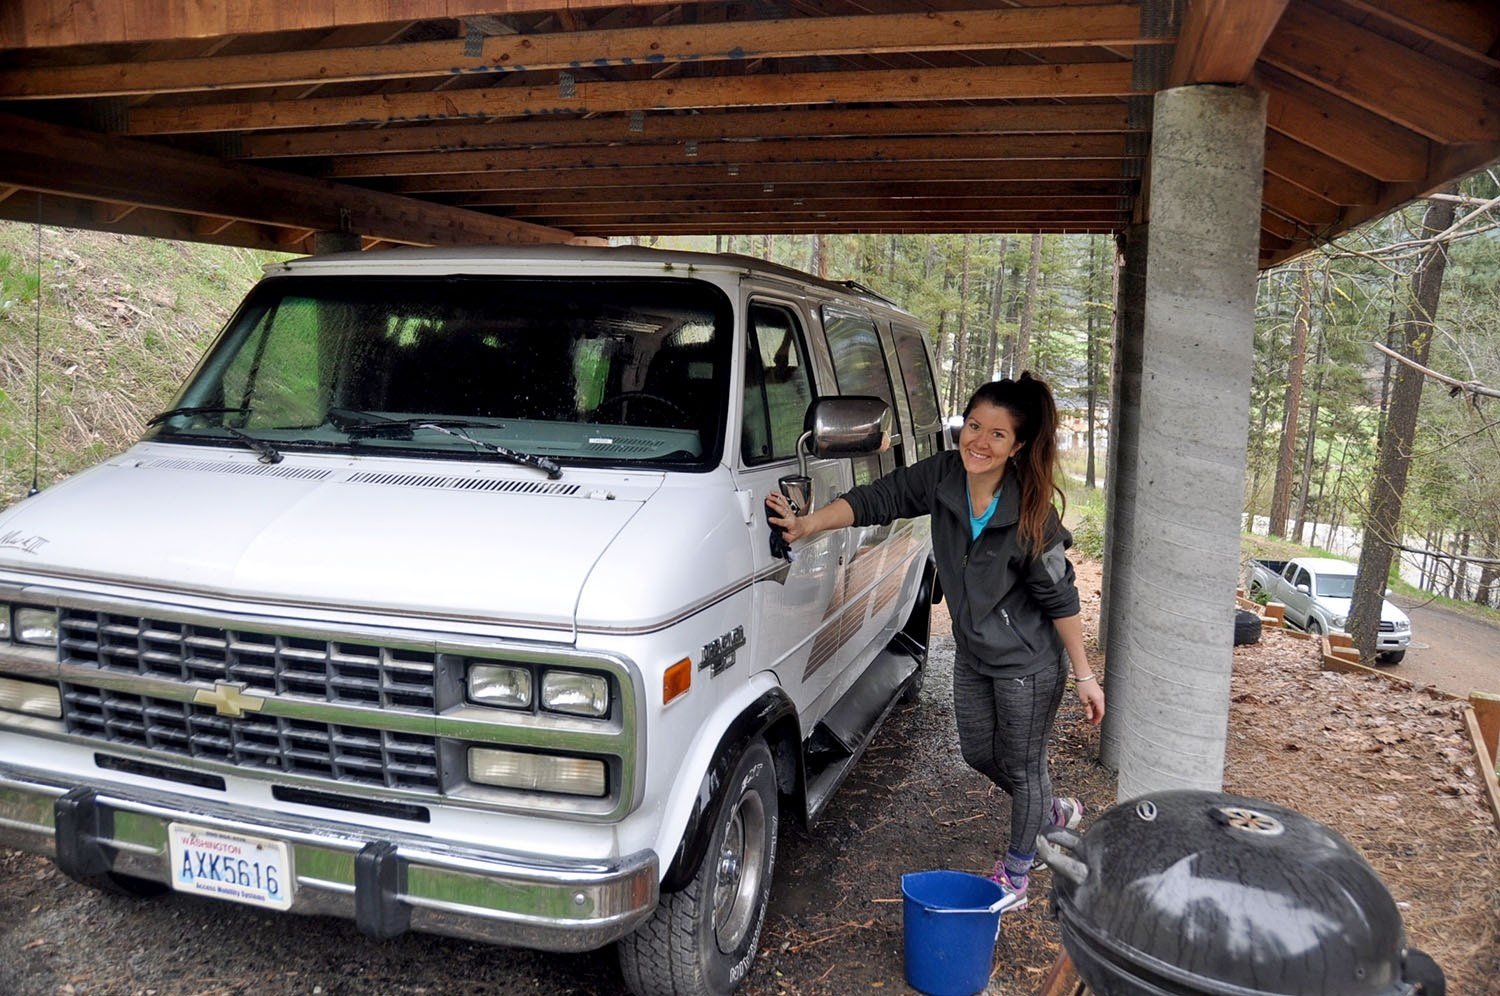
We paid $2,000 for our used van (back in 2017). It is a 1994 Chevy G20 Van with 85,000 miles (super low!). We also had to pay $310 for the title transfer and registration (Washington has notoriously high fees for this service).
As mentioned above, the market for this type of van will vary depending on which area you’re searching. Prices may be a bit higher or lower, but this should give you an idea to start with.
Step 2: Gut and clean the van
Chances are that if you are buying an inexpensive used van, there will be some initial work to do to get it all cleaned out.
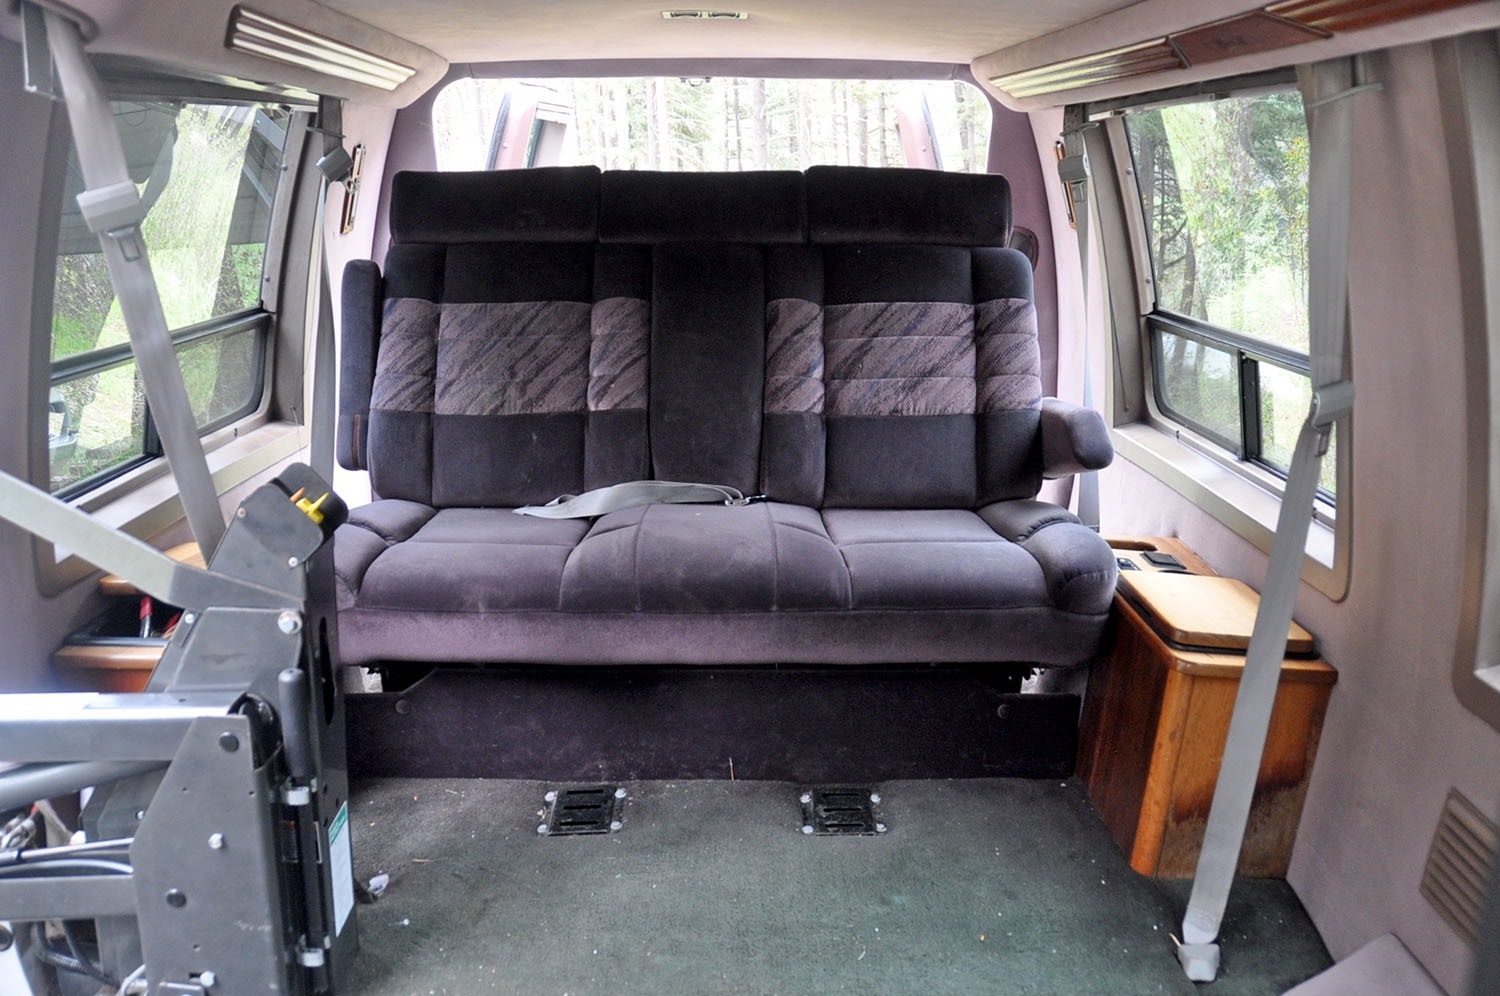
Gutting: We actually took on a pretty big project when we bought our van because it came with a preinstalled wheelchair lift that we had to remove.
Unbolting all the parts took both of us working on it for a full day, and it wasn’t the most glamorous job.
The good part was that we were able to sell the lift and the reclining bench seat for a combined total of $260. If there’s anything to remove from your van, do this first.
Tip: Try selling any valuable items on Craigslist – you never know what people around you may be searching for!
Cleaning: When we bought our van, the interior wasn’t much to look at. The carpet was covered in a layer of dog hair, and mold had started to form in the windows after sitting unused by the coast. And let’s just say the smell wasn’t great…
We used Arm & Hammer carpet cleaner, a vacuum and a hard bristle brush to get the smells and grime out of the carpet.
Then we used Simple Green to deep clean all the van’s hard surfaces. We bought a small air freshener and left the doors open for several hours, and it smelled brand new!

How much did the gutting and cleaning cost?
We bought a couple of cleaning products, totaling $7.83, but since we sold the wheelchair lift and bench seat, we actually made back some money here. This may not be the case for everyone though.
To give you a better estimate, we did not take into account the money we earned on these sales.
Step 3: Take measurements of your van
The next step is to measure everything in your car: length, width and height obviously, but also take measurements of the wheel wells and the windows.
Also, many cars bow out slightly so the width will vary from the floor, to the center, to the ceiling. Getting all the measurements will the next steps as simple as possible.
Step 4: Make a plan for your campervan layout
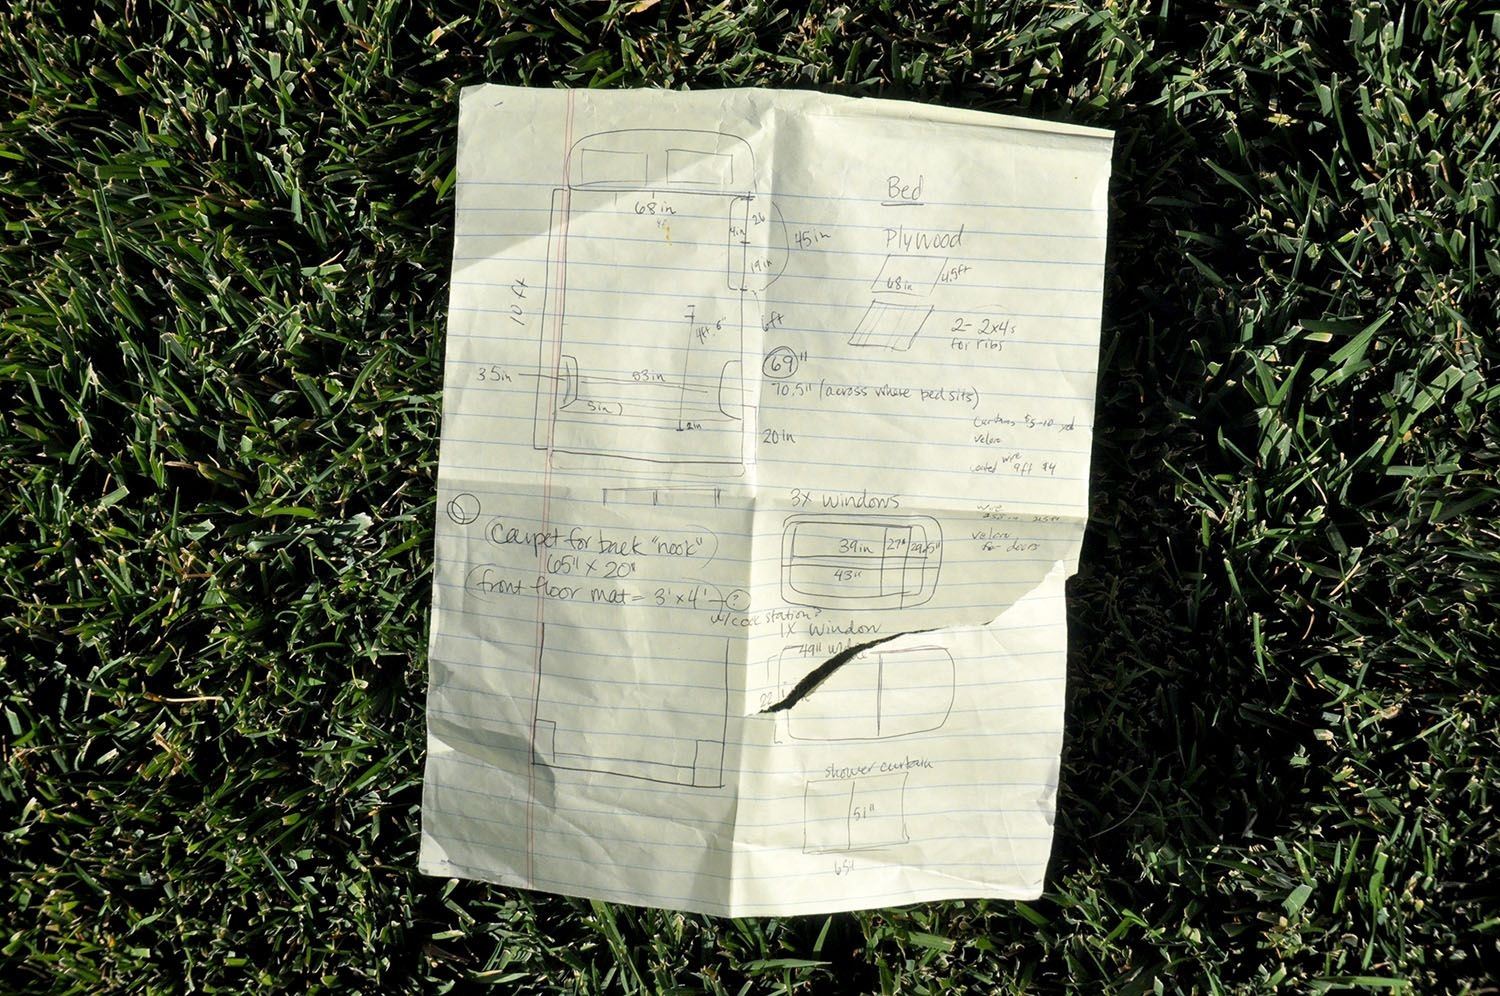
Now it’s time to design your dream campervan layout. Ask yourself what is important to you in a camper van. Our advice when building a budget campervan is to keep things simple as possible and separate your “wants” from your “needs”.
- Bed: Will a fixed bed do or is a convertible bed/bench system better for lounging?
- Kitchen: Should you place the kitchen inside or outside? Do you need a fridge or will a cooler work fine?
- Storage: Do you need storage for adventure gear, like a mountain bike or a snowboard?
- Pets: Do you need an area for a pet?
- Work: Do you need to design a desk to do work on?
- Toilet: Do you need a toilet inside the van or will using public bathrooms be enough?
- Electronics: Do you need to install campervan batteries to power laptops, lights, and a refrigerator? Or will tap lights and a car inverter work for you?
Once you know your top priorities, you can start thinking about the space each element can take up and where it should go.
It is like putting the pieces of a puzzle together when you’re working with a small footprint, so don’t get frustrated if it doesn’t work out right away.
And know that you’ll likely have to make some sacrifices. Play with a few options, and choose the one that works best for your situation.
Start drawing out some basic plans using the measurements you took in Step #3. Download our free van layout template, print it off, and fill in the corresponding measurements. This will be incredibly helpful as you start to plan your build.
For our DIY van build, we decided our layout would include:
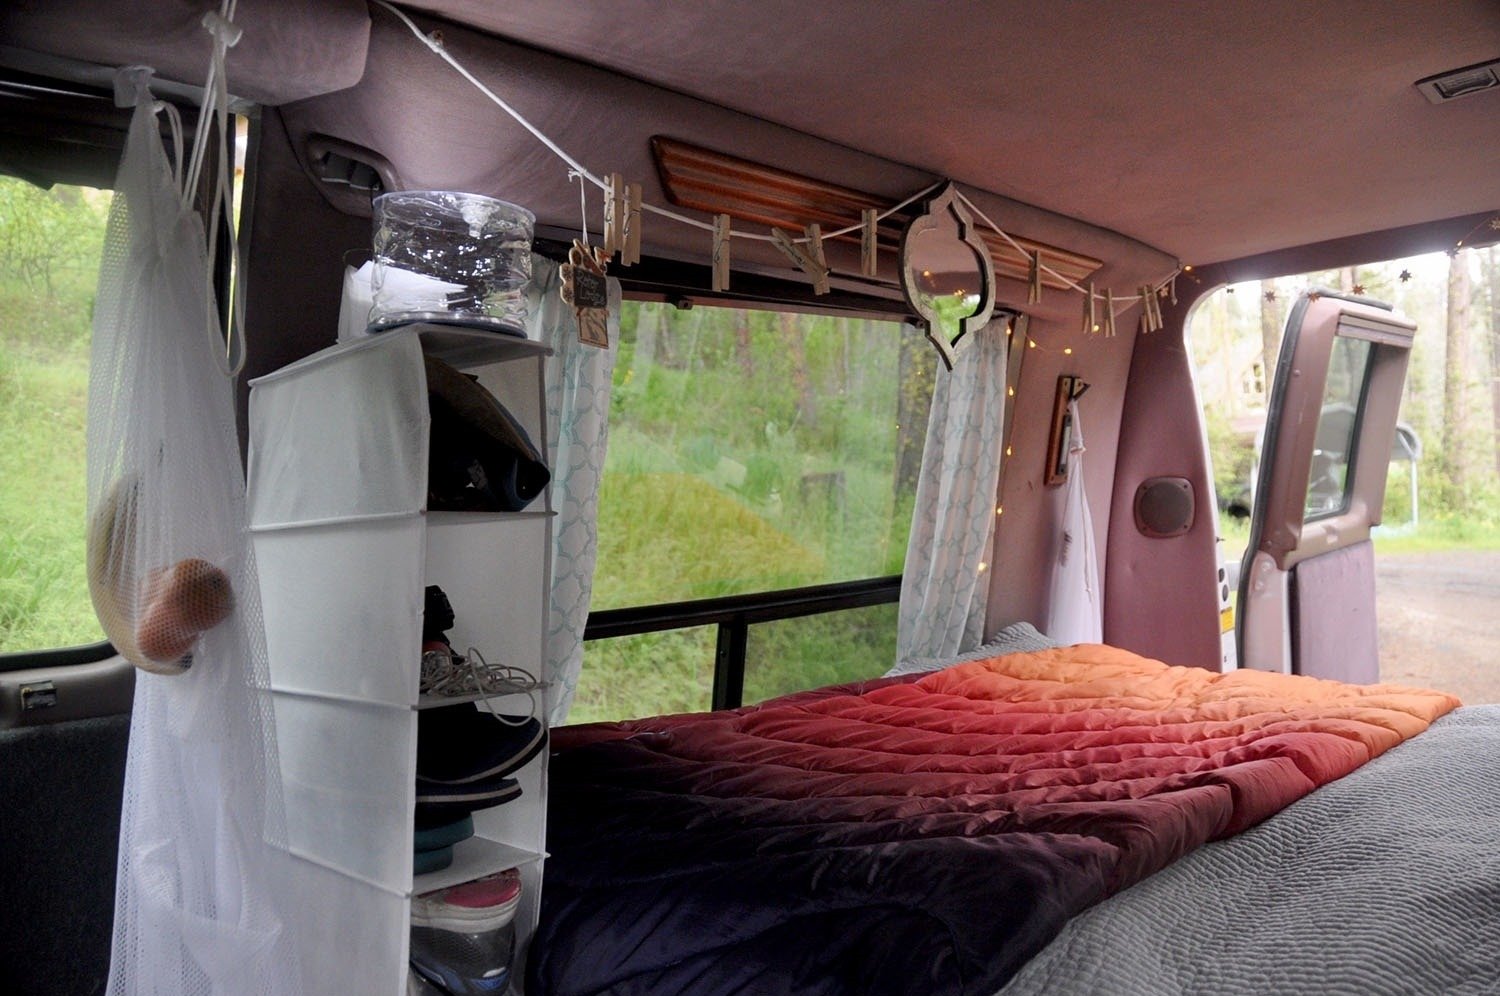
- A fixed bed (with storage)
- A basic kitchen, with a gravity-fed sink, propane stove, and a cooler.
- A car inverter for charging electronics and tap lights and solar lights at night.
- No toilet (we’d use public bathrooms).
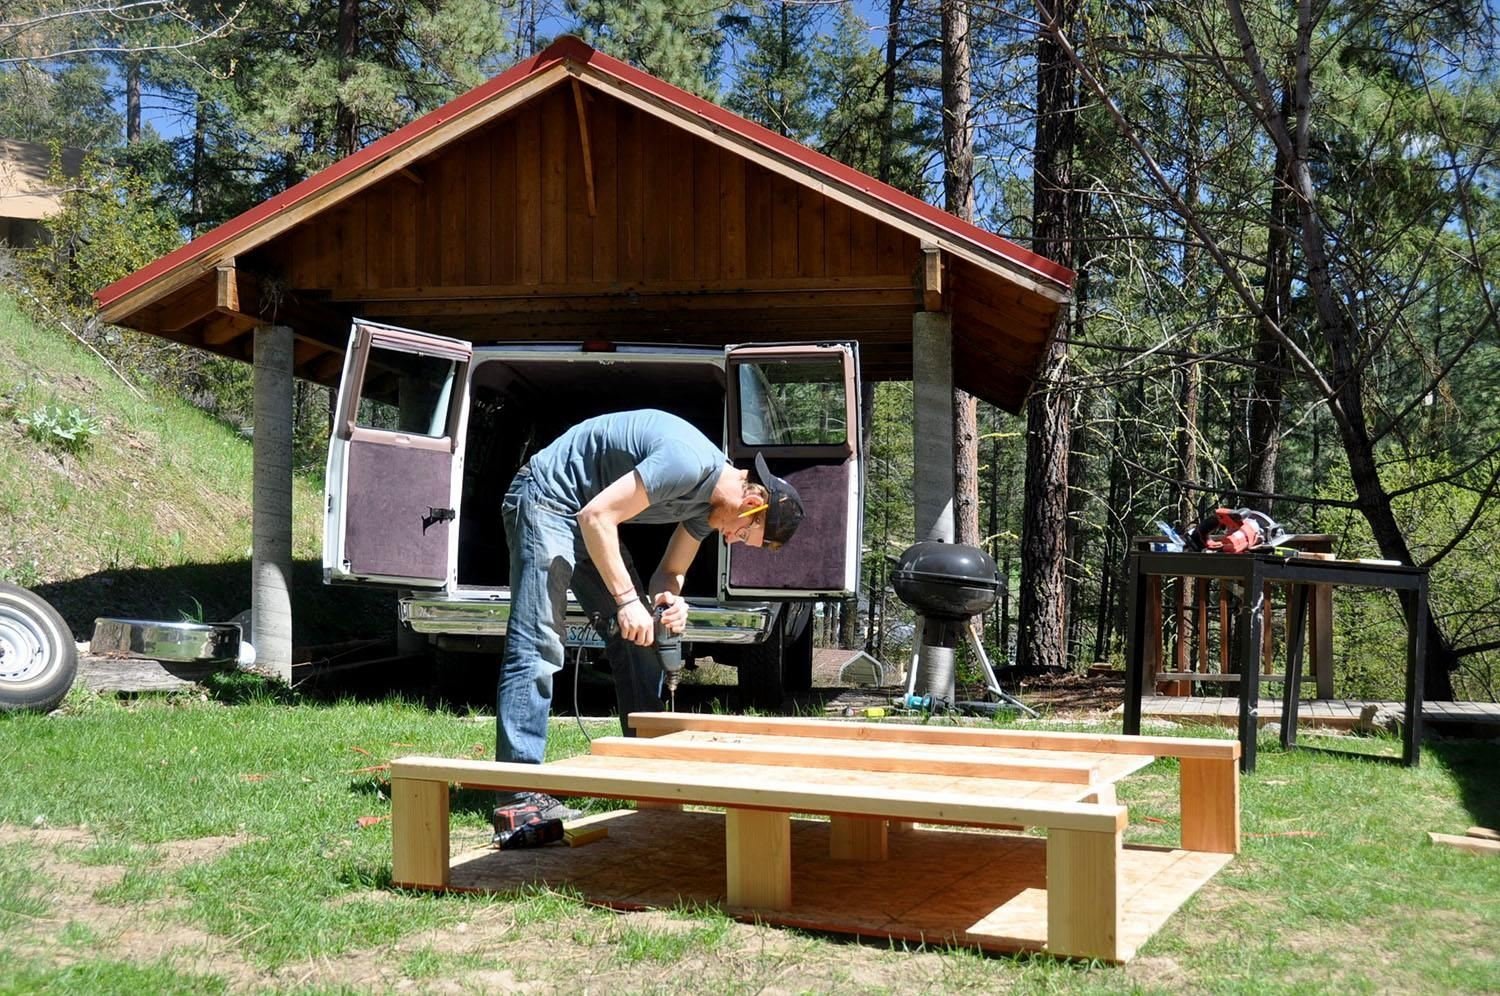
Step 5: Build the components of your van
This is where you’ll get to work with your hands (and get them dirty, if you’re doing it right!).
With the measurements of the van, we created a bed platform using plywood, 2×4’s and 2×6’s. Ben also made a kitchen counter that holds a stove, cutting boards and our functional gravity-fed sink.
Project #1: How to make your own campervan bed platform
We wanted to make a platform that not only supported a full-size bed, but also had tons of storage space underneath for all our gear. We are sharing our step-by-step instructions so you can build your own bed platform.
How much did our campervan bed platform cost?
We had some wood laying around our house, but we paid about $35 for all the plywood and 2×4’s at Home Depot. Also, we were lucky enough that a friend had a full mattress she wanted to get rid of, so that part was free for us.
Tip: If you can’t find a real mattress that’s in your budget, you could always look for futon mattresses or thick foam padding.
How long did it take to make?
We had to come up with a custom plan for the bed frame to fit exactly in our car. Once we had the plans and the lumber, Ben measured, cut and assembled the bed frame in about 4 hours.
Project #2: How to make your own campervan kitchen
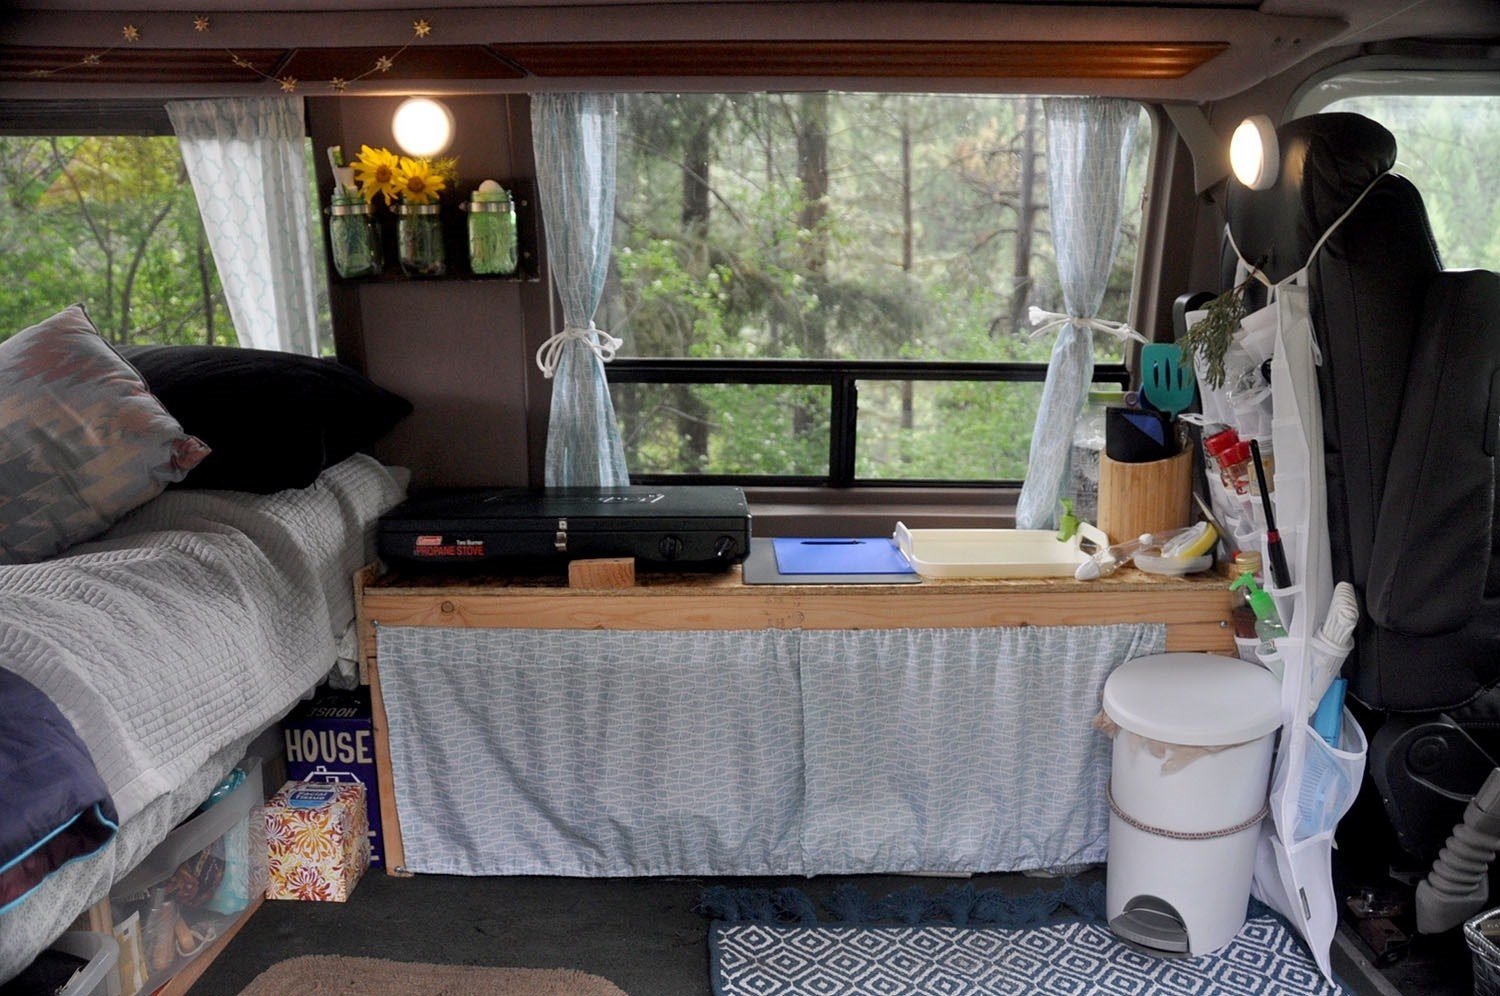
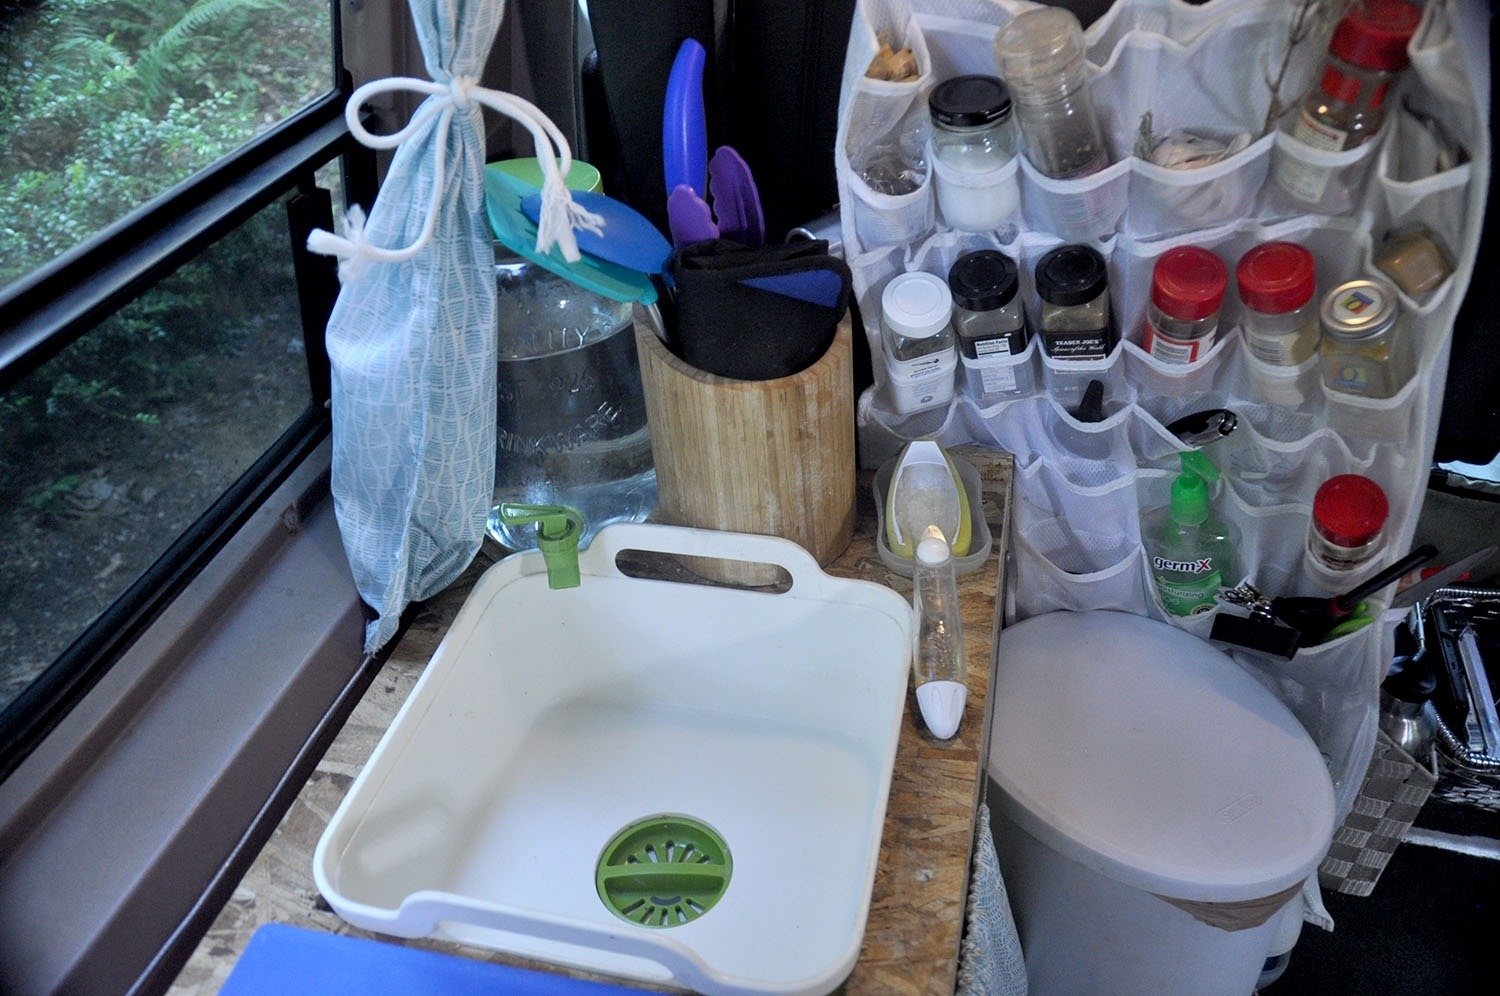
We love to cook, so having a kitchen — however tiny — inside our campervan was a huge plus. We (aka Ben) built a simple countertop that held a Coleman 2-burner stove, a small cutting board, a working sink, and a water container. Plus, there’s plenty of storage below!
How much did our DIY camper van kitchen cost?
The wooden kitchen counter Ben built was made out of plywood and 2×4’s. The lumber cost about $15 from Home Depot. The Coleman stove was about $35 and the kitchen sink was about $23.
How long did it take to make?
We put a lot less thought into the kitchen counter compared to the bed frame, because it basically is a flat table with four legs.
The only tricky part was getting the sink hole to fit the sink nice and snug. In total, it took about 2 hours. Take a look at our step-by-step tutorial on how to make a DIY campervan kitchen.
Step 6: Make your own privacy curtains
We love natural light as much as anyone, and the big windows in our van were something we were super excited about. But when you’re living in a van, you’ll want some privacy. Trust me.
You’ll also need curtains to keep out the lights when you’re trying to sleep. Making your own curtains can seem like a daunting task, but it’s not all that hard. (I speak as someone who had to look up a tutorial to operate a sewing machine!)
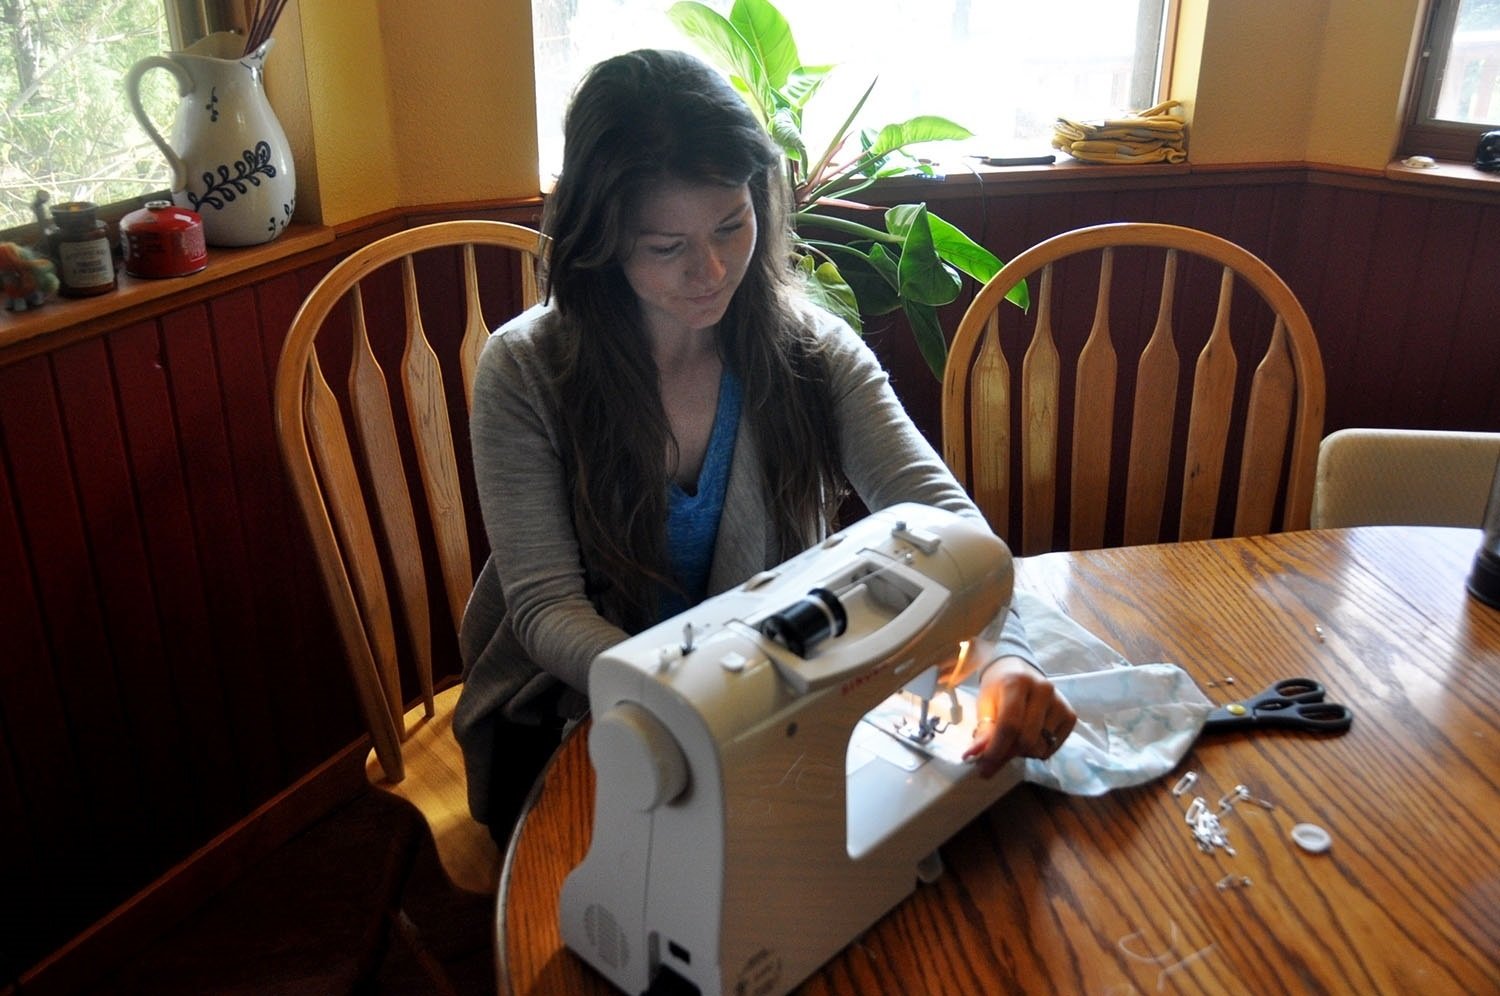
Project #3: How to make your own campervan curtains
After a bit of trial and error, we kind of perfected the process and we have put together a step-by-step DIY tutorial so you can make your own campervan curtains too!

How much did our DIY campervan curtains cost?
With the thrift store sheets, thread, picture wire, screws and velcro, we spent a total of $26 for all our curtains. This cost will be higher if you get your fabric from a craft store.
Step 7: Make the van functional to live in
When you’re living in a camper van, there are some things you’ll want to think about before hitting the road. Here are some things to consider:
- How to charge electronics
- How to light up your camper at night
- How to do laundry on the road
- How to keep cool when it’s hot
1. How did we get power to charge our electronics in the van?
We did a lot of research and landed on the Bestek 300W Power Inverter. We usually had our devices plugged in while we were driving so they’d be charged by the time we parked for the night.
If we were ever really in a pinch, we would plug the inverter in for 10 minutes with the car off, then another 10 minutes with the car running until it was sufficiently charged.
Also, we always travel with our Anker external battery pack to charge items like our phones, GoPro and portable fans. This baby has 7 charges in it!
More time and money?
If you have more time and a higher budget, why not consider adding solar panels to your campervan!
We really like our Renogy solar panels because they were easy to install, the kit had everything we needed, and they are relatively inexpensive.
Don’t want to bother with solar?
Since our first campervan trip back in 2017, so many companies have popped up creating portable power stations, like the Jackery Explorer Series.
It has USB and 120V plugs so it can change pretty much anything. It also can connect to portable and foldable solar panels to charge, making it great to bring out at campsites. Even the tiny Explorer 240 wouldn’t break the bank since it just around a couple hundred dollars, but still pack a punch at 6.6 lbs.
If we were to go back to our very first campervan, this is the power station I would want to charge all our gear and electronics.
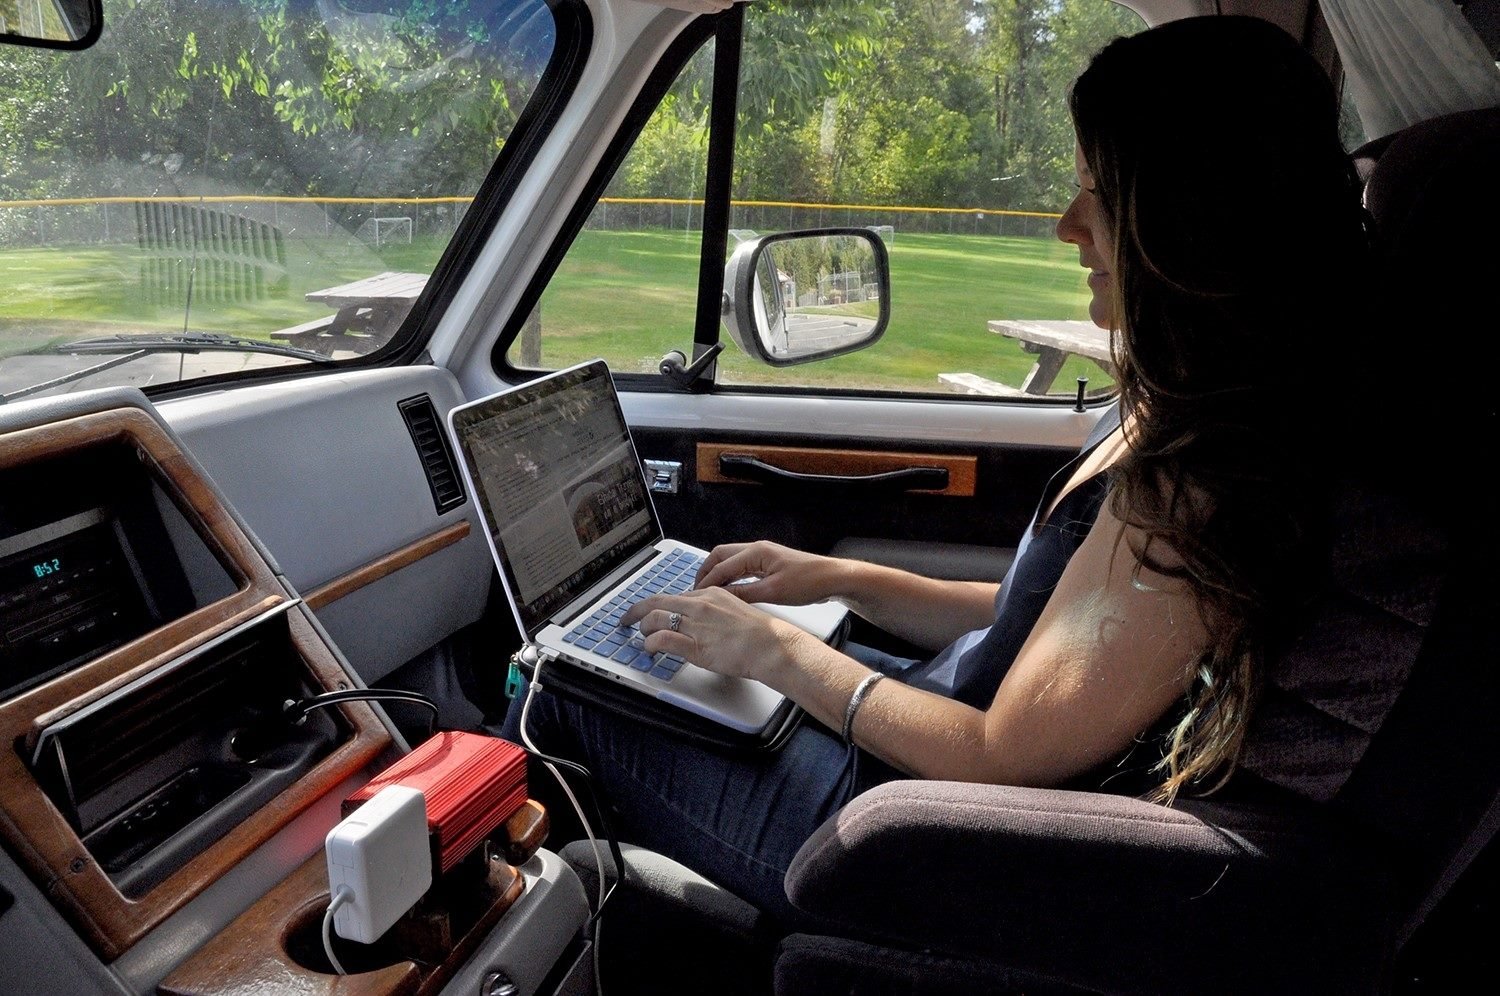
Psst! Wondering how are are able to get work done while on the road? We put together a complete guide on campervan wifi, including multiple options we’ve used during our vanlife adventures.
2. How did you light your campervan at night?
We bought a pack of battery-powered push lights that lasted 3 months and are still going strong.
We also had a solar-powered lantern, Luci, that we left on the dashboard while we were driving. It inflates and gives off tons of light at night. Perfect for the campervan and bringing on any backcountry trips we did along the way.
We also had small, LED-powered fairy lights in the back of our campervan that gave off a nice glow if we wanted to read or watch a movie at night. (And did I mention, they’re super cute?!)
3. How did you wash clothes in your campervan?
Over our 3-month road trip, we went to 1 laundromat and washed clothes at a few friends’ houses.
Most often though, we washed our clothes by hand. We either washed them in our sink, which conveniently has a drain stopper, or we took them into restrooms when we showered and washed them there.
We use Dr. Bronners as laundry detergent and dish soap. It has tons of uses, is biodegradable and lasts a super long time.
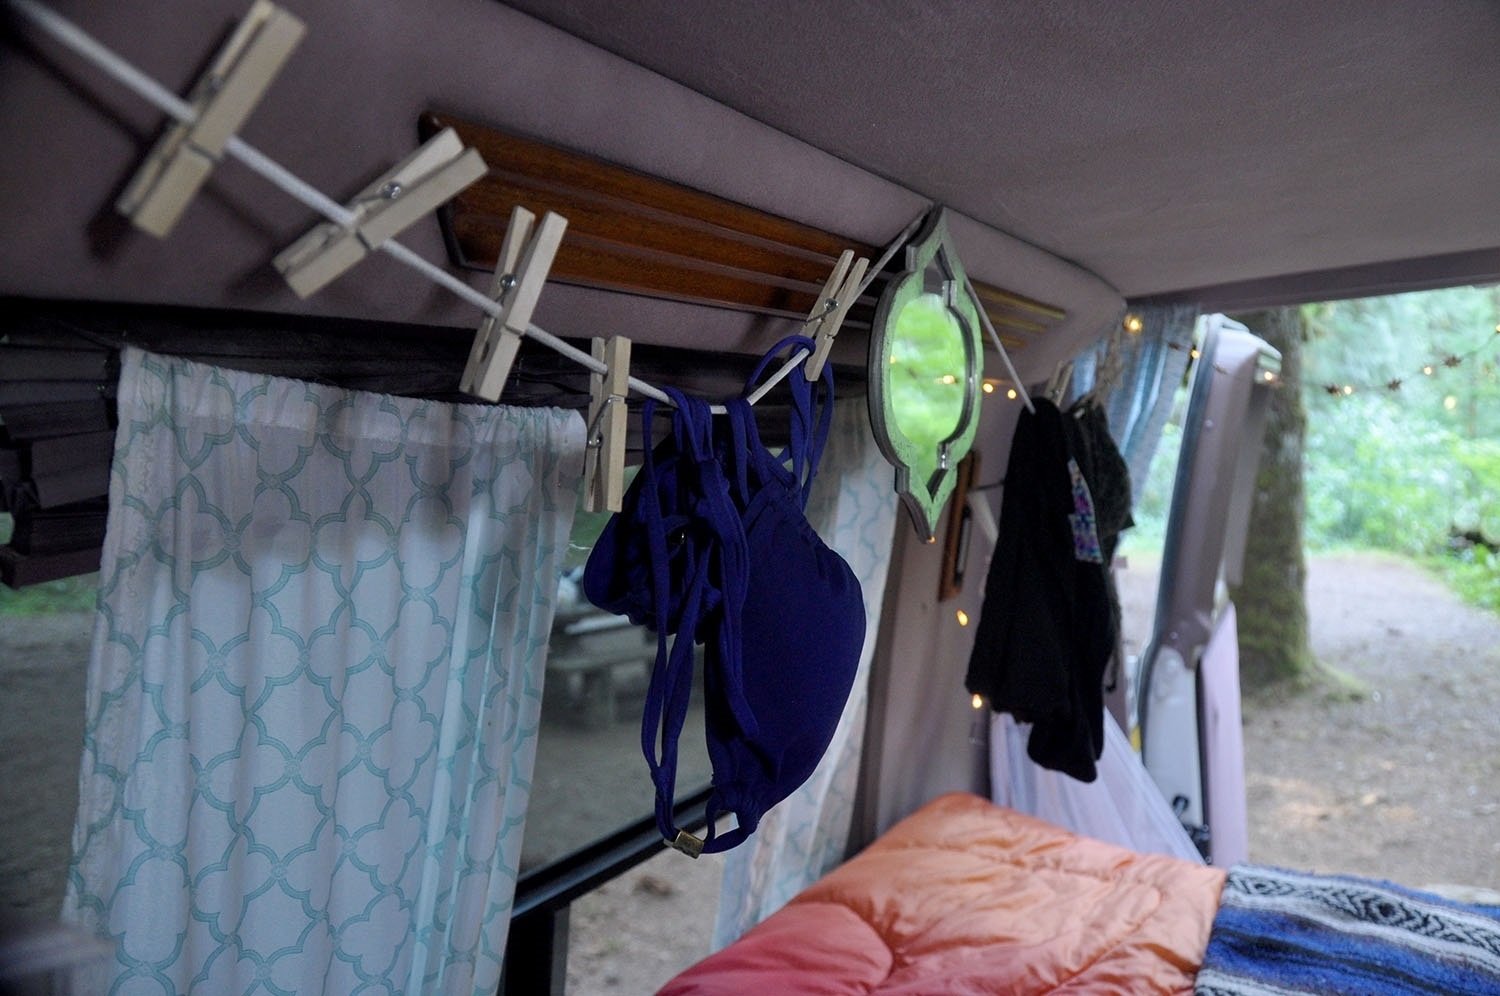
We made a laundry line by stringing up a clothesline and fastening it to the ceiling. We bought clothespins to secure our clothes.
This worked wonderfully because we could wash a few items in the morning and they’d be dry before evening.
4. How did you keep cool on hot days? (Or warm in the wintertime)
We were traveling in the summertime, so we only had to worry about how to keep cool. (Though there were quite a few chilly nights in Washington where we had to bundle up at night!)
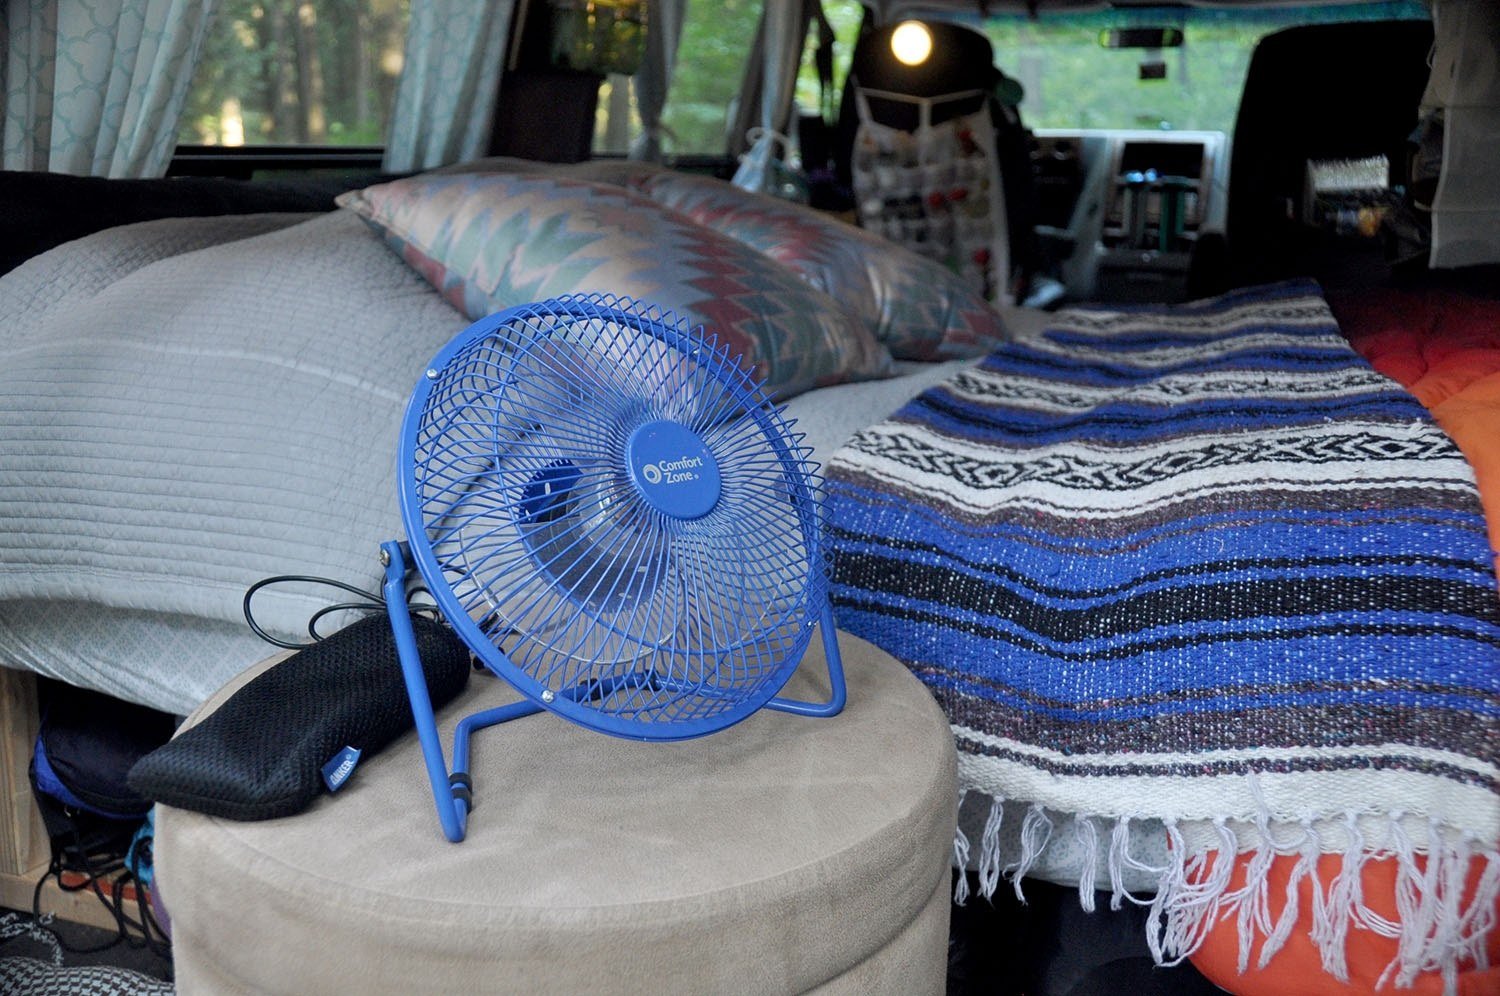
We bought two fans, each with a different purpose:
USB fan: At night, we set this beside us and plugged it into our Anker charger. It would run all night and keep us cool.
Chargeable fan: We had a small handheld fan that is more portable and if charged, doesn’t need to be plugged in. We found that it didn’t last as long though, so it was nice to have both as backups.
Step 8: Buy campervan essentials
Now that most of the hard work is done with the van build, you’re going to need to make a list of all the campervan essentials you’ll need to make your campervan a livable space.
We have a complete list of all the items we packed inside our camper van, but here are some of the basics:
- Enamelware pots
- Cast iron skillet pan
- Durable cutlery
- Camping plates and bowls
- Coleman propane (you can find a 2-pack for a few bucks at Target or Walmart)
- Spatula
- Cutting board for camping
- Camping chairs
- Large cheap cooler or we recommend a Yeti cooler
Check out our ultimate campervan packing list for even more ideas of what to bring in our DIY van shop.
Money-saving tip: Try shopping at thrift stores and you’ll be surprised by how many of these items you’ll find for super cheap.
And if you want to buy them new but are on a budget, try Target or Walmart. (As much as I hate to admit it, Walmart actually does have a pretty decent selection of inexpensive camping gear.)

Step 9: Campervan organization
Without organization, living in a DIY van can feel cluttered and chaotic, so you’ll want to make the most of your space.
This is a good time to make sure you’ve paired down your belongings to a reasonable amount and to make sure everything has a place. (As a former engineer who loves making things as efficient and optimized as possible, this was Ben’s favorite step!)
Here are some of our favorite campervan storage tips:
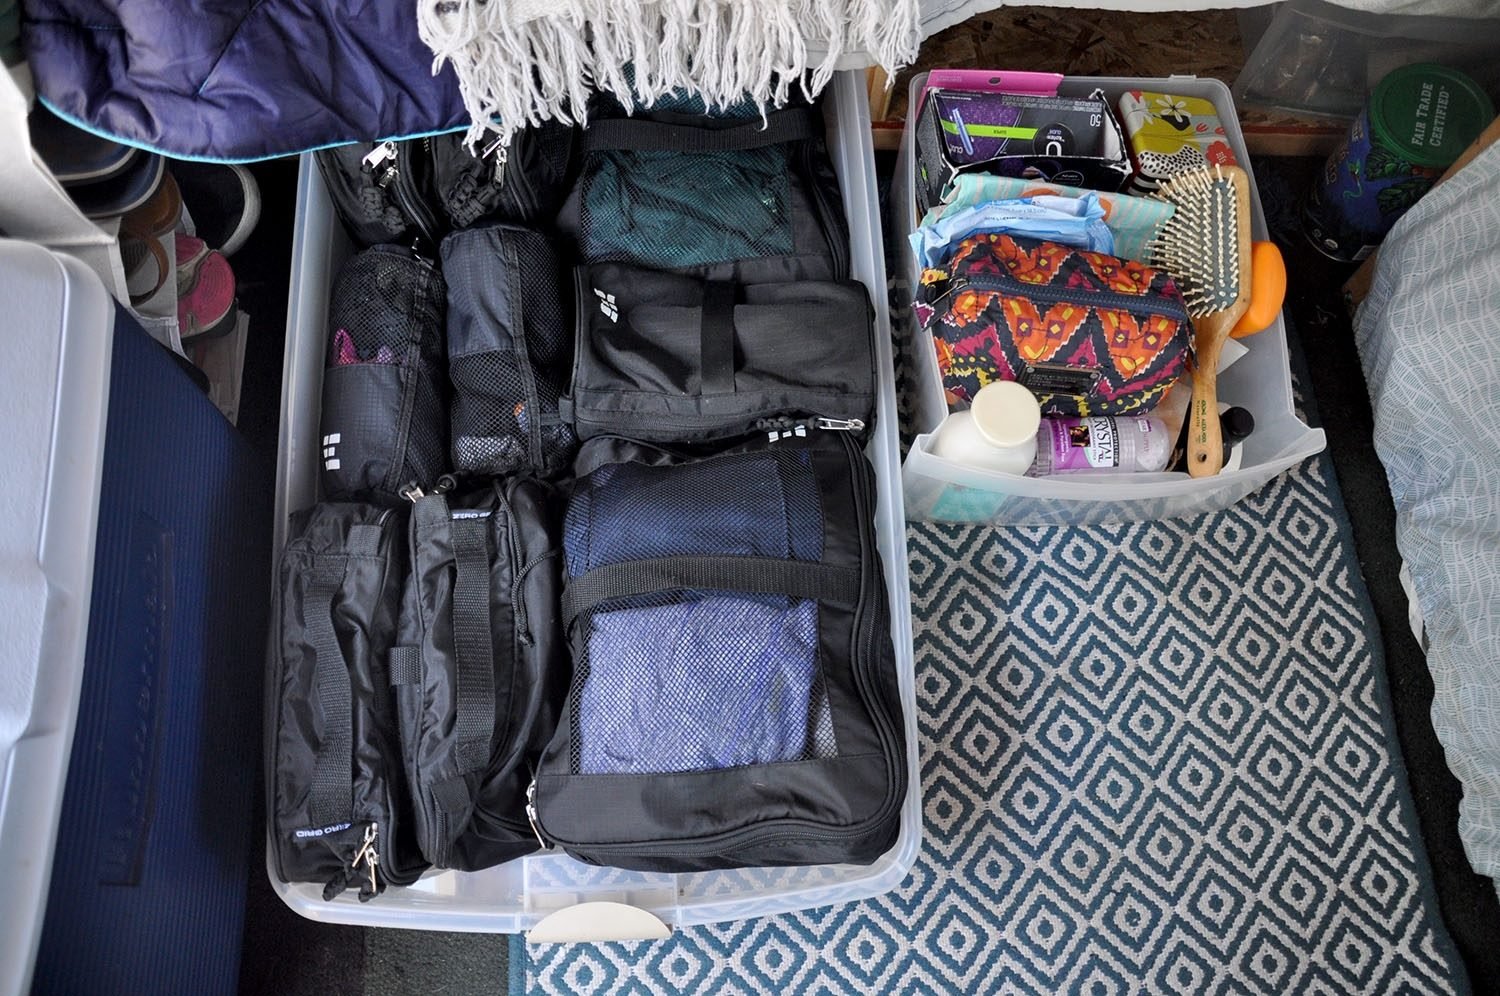
1. Underneath the bed is a great spot for clothes, camp chairs and all other big things.
Make the best use of this area with clear plastic containers:
- We used the containers from a 3-tiered drawer to store toiletries and pantry items.
- We used one large but shallow plastic container (minus the lid) to keep our clothes. We put all of our clothes into packing cubes first to keep them better organized and compressed, then placed them into the container for easy access.
Psst! We put together an entire article on our favorite campervan storage tips in which we’re sharing all of the creative storage solutions we’ve seen in campervans.
2. Use a behind-the-door-organizer to hold kitchen supplies, like spices and oil. Hanging this on the back of the driver’s seat will maximize your space.
3. Make the most of your vertical space. We hung a laundry bag for dirty clothes and hung a shoe rack from our ceiling.
4. Get creative about your storage space. We turned a cheap laundry bag into a double-level produce holder. Here are the simple steps:
- I started by sewing in a line completely across the bag. (I sewed in the shape of a slightly concave arc instead of straight, and reinforced it a few times.)
- Then I made a horizontal cut in one side of the bag near the middle.
- Lastly, we hung it from the van’s ceiling.
It’s as simple as that! We were careful not to put too many vegetables or fruit inside at once so that it didn’t tear, but it was a nice place to store fresh produce!

Step 10: Final touches to make the van feel like “home”
This was the step I was most excited about, but Ben kept telling me to wait until everything else was done. And he was right, of course.
Since we were working on a small budget, we frequented the thrift stores near us to find lots of little touches that make our DIY van feel like home.
I found a cute set of pillows for $1.50 each, a mirror for $1.25 and seat cushions that worked perfectly in our “nook” for a total of $12.
It’s certainly not necessary, but I loved our $5 battery-run fairy lights that gave our back door a little personality! (Ben came around to love them too!)
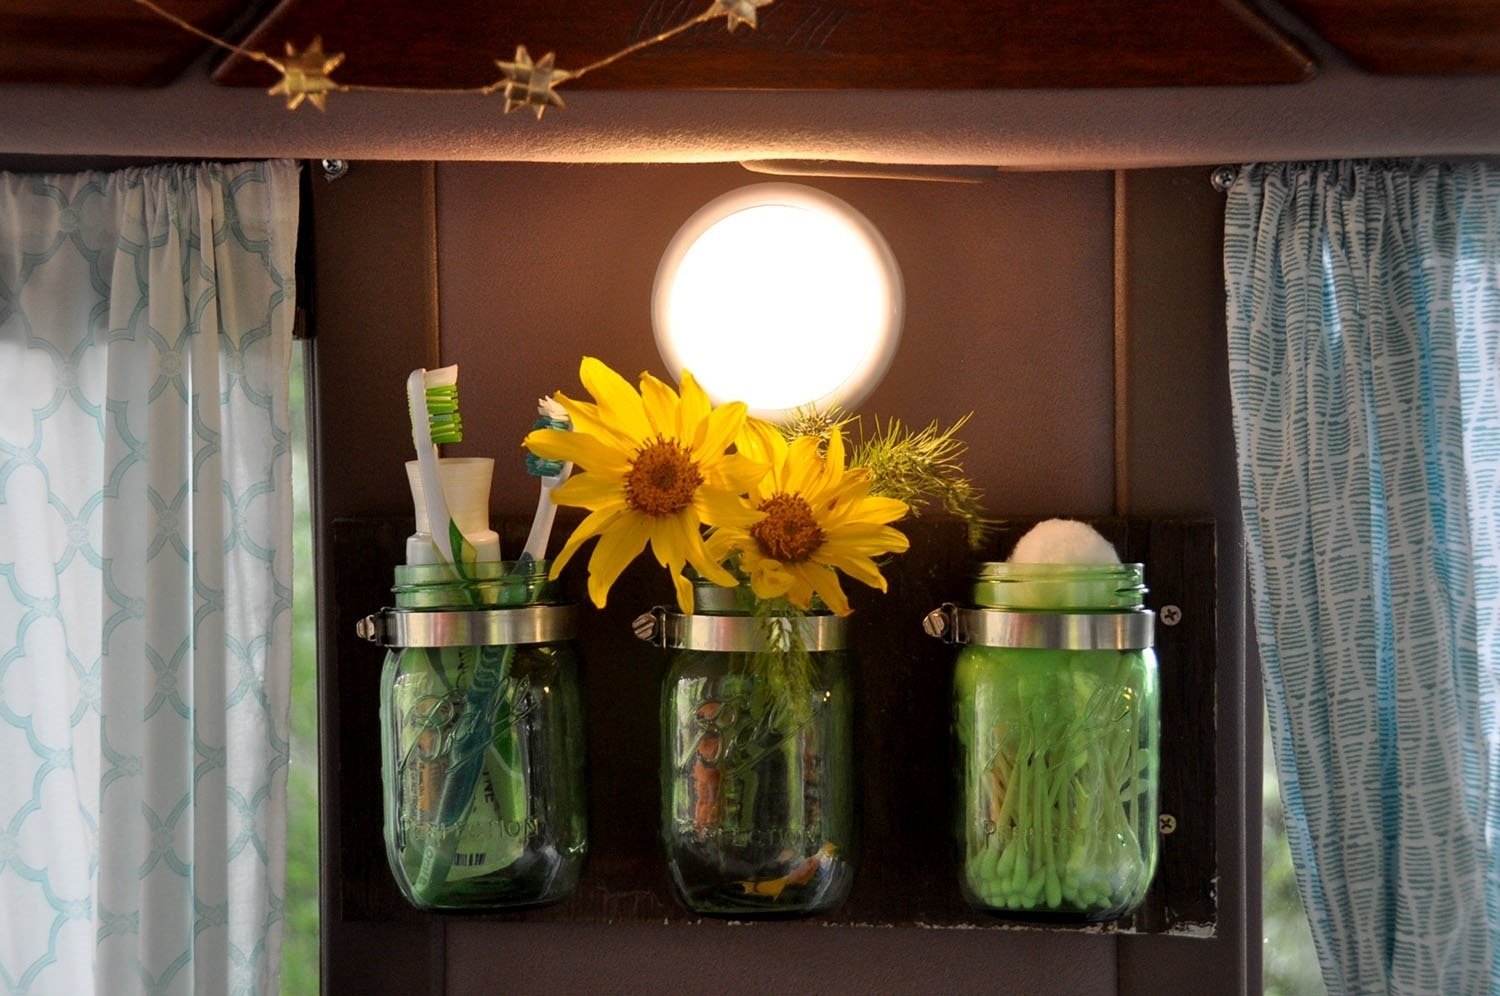
Cute, easy and cheap mason jar storage project
One of my favorite projects was making a place to store our toothbrushes and other odds and ends using Mason jars, an old scrap of wood and hose clamps.
You can make this fun and practical addition in less than 20 minutes!
Simply use screws to attach the hose clamps around the necks of the Mason jars to the wood (measure first so it fits the jars and inside your campervan).
Make sure they’re secure, screw the wood to the wall panel, and you’re all done!
Start small in this category, because as we’ve learned, keeping it simple and uncluttered will make it feel bigger and more like home.
Budget camper van conversion essentials
- Campervan kitchen sink: This is the perfect size for what we needed and has a stopper drain. We bought it online at Bed, Bath and Beyond, but you can find it on Amazon too.
- Coleman Stove: When it comes to camping stoves, you can’t get better than a Coleman 2-burner stove. This stove makes it easy to cook inside (with the windows open) or move it to a campground picnic table. Make sure to pick up the portable propane tanks.
- Hanging shoe rack: Get some use out of your vertical space in your van and hang one of these bad boys from the ceiling so you can easily store shoes or other supplies.
- Behind the door organizer: Hanging behind the driver’s seat right next to the “kitchen” makes this convenient for spices and oils. It’s a great way to stay organized and make use of vertical space.
- Ottoman with storage: Doubling as a coffee table, this ottoman comes in handy to store jackets, blankets and other puffy gear.
- Packing cubes: We never leave home without them. In the van, you’ll have to keep things organized and packing cubes work the best to keep your clothes compact and in one place.
- Trash can: You will definitely want a trashcan with a lid. Trust us. Choose a small trashcan so it doesn’t take up much space, and you can use reused plastic bags from the grocery store as garbage bags. Also, you’ll want to empty it frequently to prevent your van from smelling, so the small size helps you keep on top of this.
Tip #1: We secured our trashcan to the kitchen counter using a bungee cord so it didn’t move around while we were on the road.
Tip #2: If you are concerned about your trash can smelling up your tiny home, sprinkle some baking soda in the bottom of the trash can. You can also keep a dryer sheet in the bottom before lining it with a plastic bag.
Easy ways to save money on a DIY campervan conversion
It can be so easy to fall into the traps of wanting to add everything to your van. Believe me, we’ve been there.
We are firm believers that anyone at any budget can start van life. And you can always modify or upgrade your rig along the way. Heck, we are still making changes to our van as I type!
Here are a few hacks we’ve learned through our 3 campervan builds that you can apply to your DIY conversion:
- Skip on solar. Start small when it comes to your electrical system. Buy a car inverter and tap lights or headlamps. Then buy a power station like the small but powerful Jackery Explorer 240. Then upgrade to a house (campervan) battery with a DC to DC charger so it charges as you drive your van. That would allow you to install lights! Then when the time is right, you can invest in solar and a solar charge controller.
- Cool it on a fridge: You can get by with just a cooler in the beginning. Especially if it is a Yeti or a Rtic super-insulated cooler. A bag of ice can last a few days or dry ice will last even longer. Plus, coolers make great additional seating in a low-top van!
- Hold off on a fancy kitchen: All you need is a portable Coleman propane stove and a gravity-fed or foot pump sink. Cooking outdoors is way better anyway.
- You may not need insulation: Depending on where you are traveling, loading your van walls up with insulation may not be necessary or even possible with an older passenger van. That being said, having a van insulated on a cool mountain highway is kind of a nice luxury. Check out our entire article on how to install van insulation.
- Don’t install a rooftop fan: Stick with portable fans, rechargeable fans, or window fans. These are cheap and you’ll be able to get by with them. When the time comes, you can plan out the hole in your ceiling and install a Maxx Air Fan, but you don’t need it right away.
How much does a campervan conversion cost?
By now, you might be trying to tally up all our costs to get an idea of the grand total. Don’t worry, we’ll tell you how much it all added up to so you don’t have to strain your brain (Note: these are 2017 prices).
Our grand total for the van AND everything it took to convert it into a livable space adds up to $2,900.96.
Here is the breakdown:
- $2,000 Van
- $310.25 Van title and tabs (in most states, this cost will be cheaper)
- $58.31 Auto parts and fixes
- $7.83 Cleaning supplies
- $50 Lumber and screws
- $6.90 Decorations
- $32.68 Curtain supplies
- $23.78 Kitchen sink
- $408.51 Gear and miscellaneous (aka pots, pans, cutlery, camp chairs, stove, carpet, etc.)
Not too shabby, huh? While buying a new camper or doing a “fancy” conversion can cost a hefty sum, it certainly is possible to live the van life on a small budget.
DIY campervan conversion: Build steps for a budget van
- Buy a van
- Gut and clean
- Take measurements
- Make a plan and design the van layout
- Build the van bed and storage
- Build the van kitchen
- Make privacy curtains or window covers
- Plan an electrical setup
- Plan for ventilation or fans
- Buy all the campervan essentials
- Organize the van
- Campervan final touches
Related: Find out exactly how much a campervan costs, from budget to luxury builds, in our detailed breakdown of costs.
Now you know how to convert your campervan, all you need is a travel partner. But before you hit the road, be sure to run these questions by that special someone to avoid complete breakdowns.
How much does daily van life cost?
We kept track of every single expense while we were on the road, from gas to ice, to coffee. In this article, we share those costs and the breakdown of all our expenses on the road soon so you can get an idea of what daily van life costs.
Are you planning a campervan conversion of your own?
We have TONS of resources on converting your own campervan and living the #vanlife. Check out our Ultimate Guide to Van Life for all the answers to your most burning questions, or read some of our favorite articles below.
- Best Vans for Conversion: Van Specs + What to Look For
- DIY Camper Van Kitchen for Less than $50
- DIY Camper Van Bed Frame with Built-In Storage
- How Much Does a Campervan Cost: Budget to Luxury Van Builds
Interested in engaging with others about all things #vanlife? Join our Vanlife Facebook community!
Save this article on Pinterest for later!
We want to hear from you!
Are you planning on building a campervan by yourself? How did you like the article? What questions do you still have? Let us know in the comment below and we’ll get back to you!
In today’s article, you have been given very good information about downloading apps. We liked the information you provided about downloading this app.
Successful and useful content is very good.
Hello,
I found your site (twowanderingsoles.com) from SERP and found it extremely awesome! I wanted to know if you accept paid content in the form of guest posts and give a do-follow link to our client’s site.
Kindly let me know the price per post (if you are interested to sell sponsored posts on your blog).
Also, we might be interested in placing in-content text links (link from an existing blog post) please do let me know the price per text link placement as well.
So tell me the prices, and we’ll get an agreement ☺
Have a nice day!
Regards,
Tina
Outreach Manager at Webs cordial
We have liked your article very much, keep giving information about similar articles on this website, I will tell my friends about it.
Thank you Ayesha! We have tons more campervan build articles on our site. Feel free to browse!