
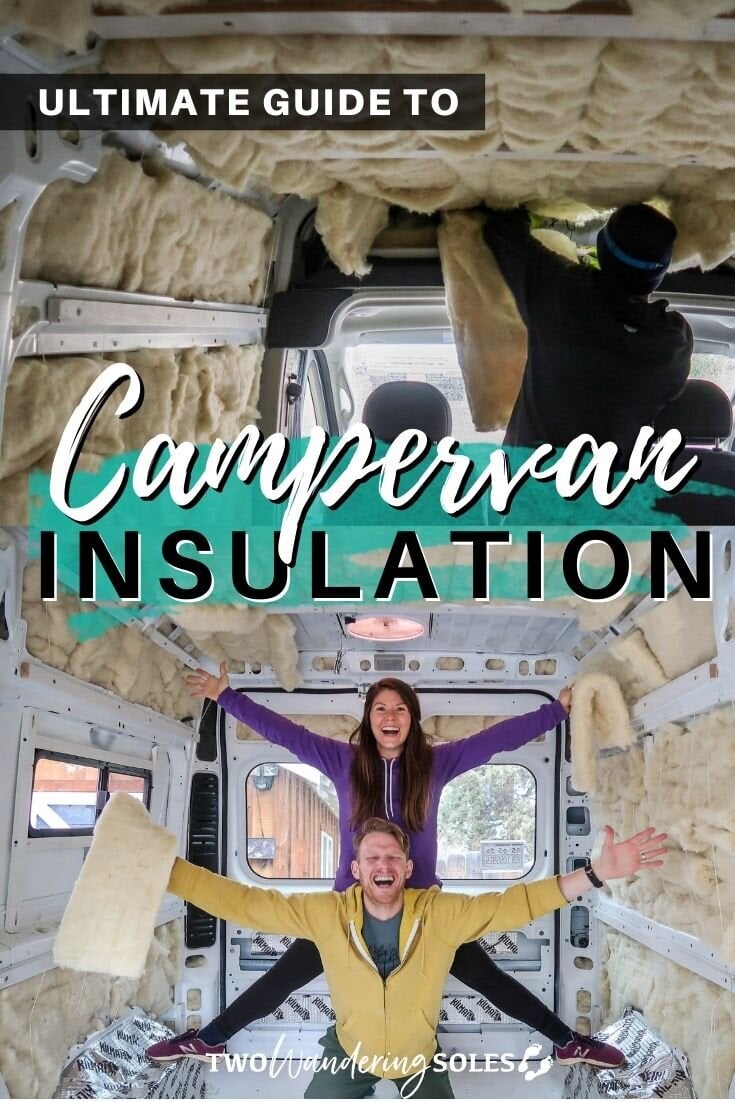
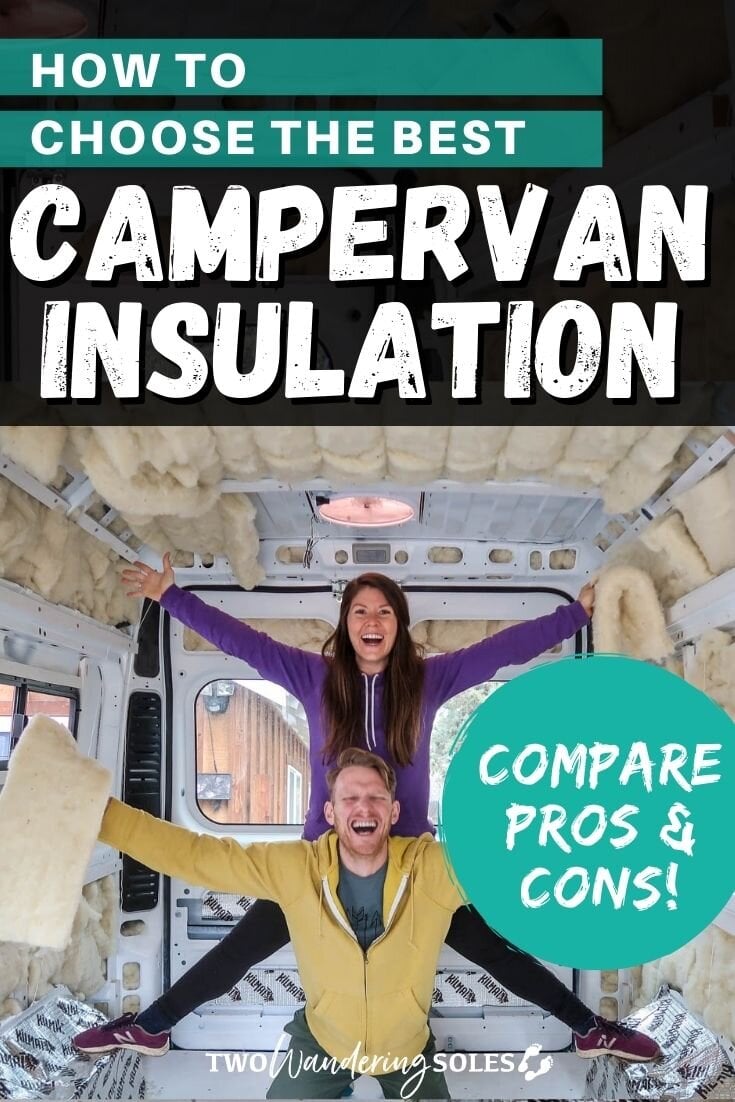
While it may not be the sexiest subject, choosing your campervan insulation is one of the biggest decisions you’ll need to make early on in your van build. From natural wool insulation to 3M Thinsulate (and all the options in between), we’re sharing the best types of van insulation along with their price points and pros and cons to consider.
As you’re doing a custom campervan build, one of the first big projects you’ll likely take on is insulating your vehicle.
Do you really need to insulate your campervan?
It depends… but you probably should.
If you’re doing a DIY conversion or a totally gutted cargo van (like a Promaster or a Sprinter), you’ll definitely want to insulate your campervan. If you’re converting a van that already has walls and flooring, you could potentially get away without it.
In this article we’ll walk you through why insulating your campervan is important, and which van insulation we choose for both our second and third campervan builds. Then we’ll walk you through the step-by-step process to install insulation in your DIY campervan build.
Van Insulation Guide
- Why van insulation is important
- Best types of campervan insulation
- Van insulation we don’t recommend
- Why we chose wool insulation
- Cost of wool insulation in a campervan
- How to install wool insulation in a campervan
- Van insulation installment video tutorial
- Soundproofing
- Don’t forget about window coverings
- Why proper ventilation is important in a van
→ Psst! Save yourself hours of research and headaches and jump straight down to our DIY campervan conversion guide!
Glossary of van insulation terms
- R-Value: An insulating rating given to a material’s ability to resist heat flow. The higher the R-Value, the better the material is at insulating. Typically noted as per inch thickness, example: “3.4 per inch”
- Vapor barrier: Typically installed for house construction, a vapor barrier is more or less a plastic polyethylene covering put over insulation to keep it dry from moisture in the household, thus reducing condensation issue. However, with van insulation, vapor barriers will eventually create holes and tears, allowing moisture to enter the insulation can cause mold over time. Vapor barriers do not need to be used in a campervan build.
- Off-gas: “Pull my finger…” okay, not exactly that type of gas. Off-gassing often refers to the release of harmful volatile organic compounds (VOCs) into the air, typically after spray foam insulation is performed.
- Thermal bridge: The simplest way to define this thermodynamics term is an area that is most susceptible to heat transfer relative to other areas. If you insulate everywhere in your van except for the framing, then your frame will transfer heat in or out of your van, thus reducing the overall effectiveness of your insulation. You are only as strong (warm) as your weakest link. The same applies to cool temperatures as well.
- In a van, thermal bridging will almost always occur on the frame of the van, a.k.a. the ribs. This is why it is important to insulate inside the frame/ribs of the van to increase your van’s insulating potential.
- If you plan on spending a lot of time (multiple weeks) in sub-freezing temperatures (chasing fresh pow!), we recommend insulating the exposed metal of the frames with a thermal break, like this one, to give you extra insulating power.
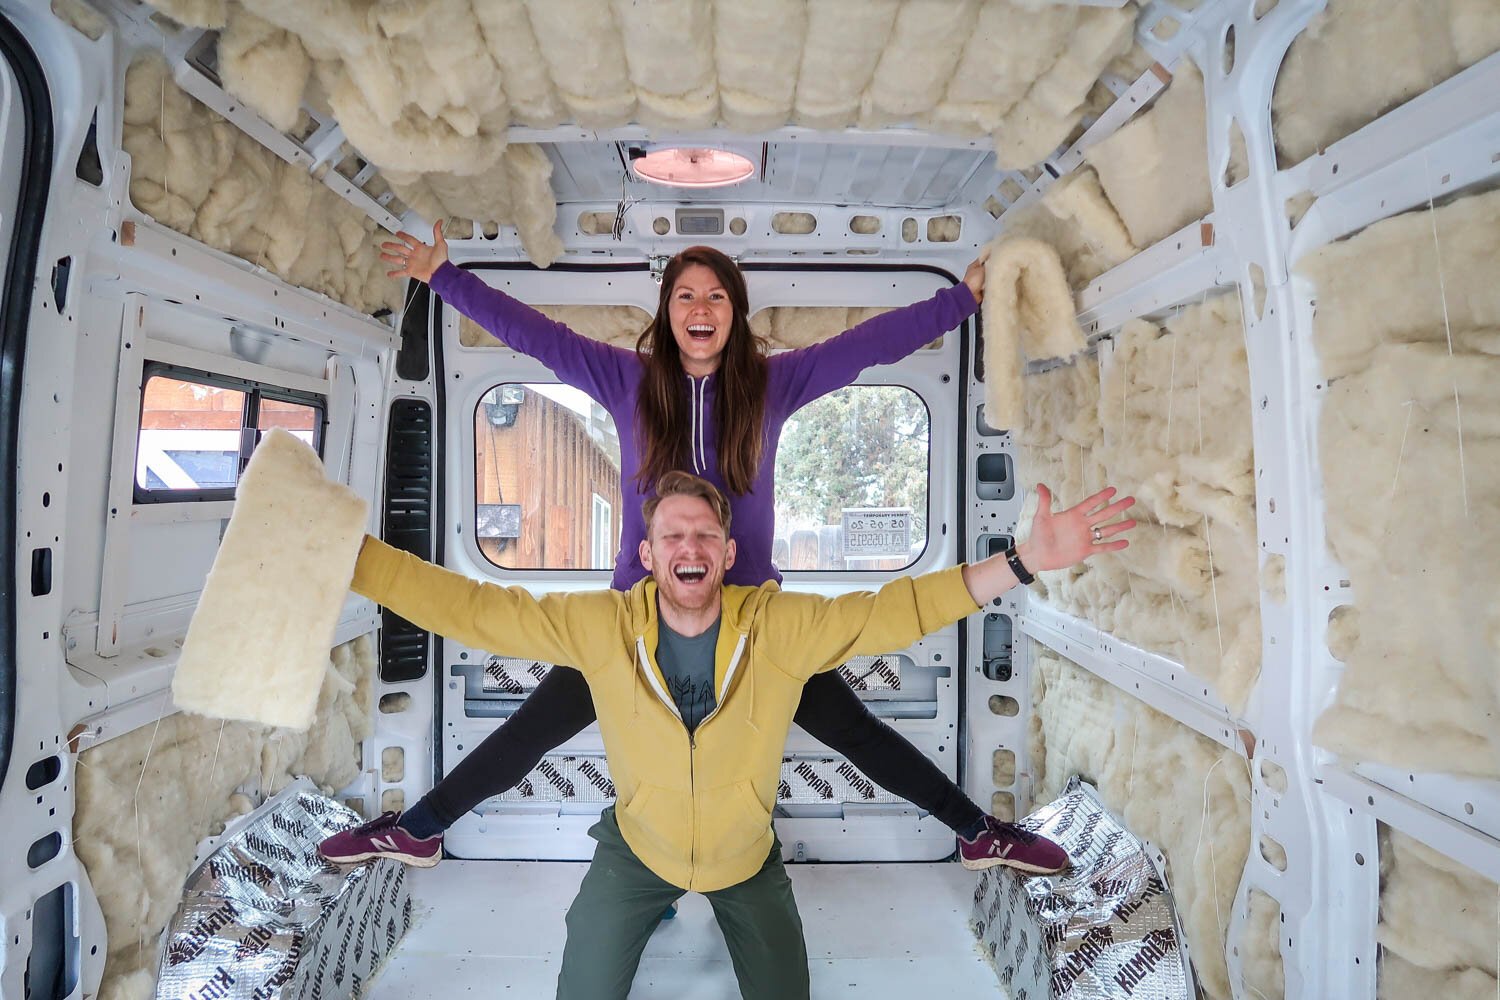
Our first campervan build was done on a Chevy G20 van. The interior of the van came standard with carpeted floors and walls, and we made the decision not to insulate any more than that because of our limited time and budget.
It worked fine for what we needed, but I will say we had some extremely sweaty nights in Utah’s summer heat, and some chilly spring evenings in the mountains as well. Our lack of insulation (and excess amount of windows) meant we were kind of stuck dealing with whatever temperatures Mother Nature threw our way.
For our second and third van builds, we knew insulation was a priority for us. Here’s why…
Why insulation in a van is important
- Temperature control: The most important reason to insulate your van is to help to regulate the temperature inside; keeping it cooler when outside temps soar in the summer, and keeping it warm during the cold winter months. I don’t know about you, but going to bed in super hot temperatures is not my idea of a great night of sleep.
- Moisture control: Condensation inside a campervan is inevitable. There will be moisture in the air in your van due to many factors like breathing, cooking, and drying out clothes. When this vapor makes contact with a cold surface (like a van wall), the moisture will condensate and form water droplets. Lots of water over time can lead to rust and mold around your van.
- Some forms of insulation (like sheep’s wool) can help manage that moisture by absorbing and releasing water particles back into the air.
- Noise reduction: An added bonus to insulating your vehicle is that it will reduce the road noise, as well as creating a bit of a noise barrier even when you’re parked.
- Good to know: If you will be living or traveling in your van with a dog or a baby, it is important to properly insulate so you have more control over the temperature for your furry (or not-so-furry) partner.
Best types of campervan insulation
Just like every project with your van build, you’ll quickly find there are several different insulation options to choose from. You could go down the rabbit hole of research for days about camper van insulation. Trust me, I have. But I did it so you don’t have to!
We’re going to walk you through the different options out there and we’ll discuss the pros and cons of each, as well as the respective pricing.
We’ll also share which type of insulation we chose and why we went with it.
Sheep wool insulation

- R-Value: 3.4 per inch
- Where to Buy: Havelock Wool – they specialize in campervan insulation and have built out a few vans themselves.
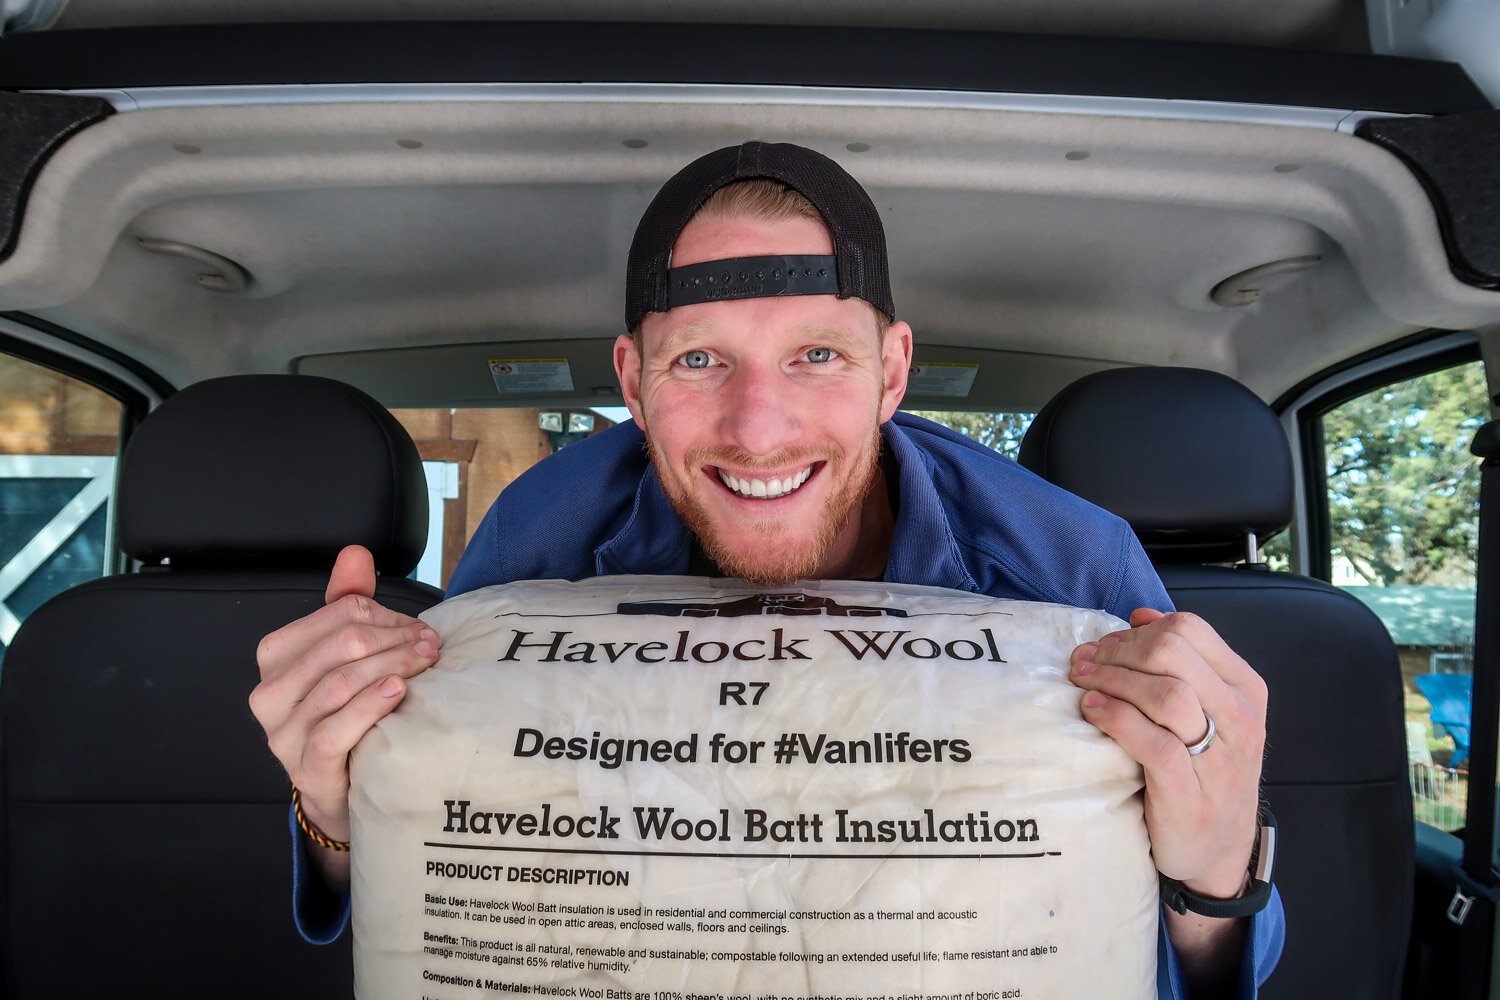
Made from 100% sustainable and natural materials, sheep’s wool is our top pick for insulating a campervan. If you have the budget, this is great stuff to install in your van build. Just check out all the reasons to use sheep’s wool below:
Pros (why install wool insulation in a campervan)
- Moisture control – Condensation is inevitable in a campervan and wool does the best job at managing that moisture compared to any other insulation. Just think about what your van goes through from cool mornings to hot days and back down to chilly nights. There will be condensation and the wool has unique properties to absorb and safely release that moisture.
- Thermal insulation: Sheep’s wool is the only natural insulation product that provides adequate thermal insulation in your van build. It protects from heat transfer and keeps you warm in cold temperatures.
- Non-toxic, natural material – Some of the other insulations in this article are extremely dangerous to your health and you would not want to be sleeping in a confined space with fiberglass in your walls. Wool is all natural and safe to breathe.
- Sound absorbent – Wool does a great job of deadening the sound of road noise in your van. The difference is really night and day. It also won’t squeak like rigid foam insulation. It will also do a good job of keeping out noise when parked at your campsite.
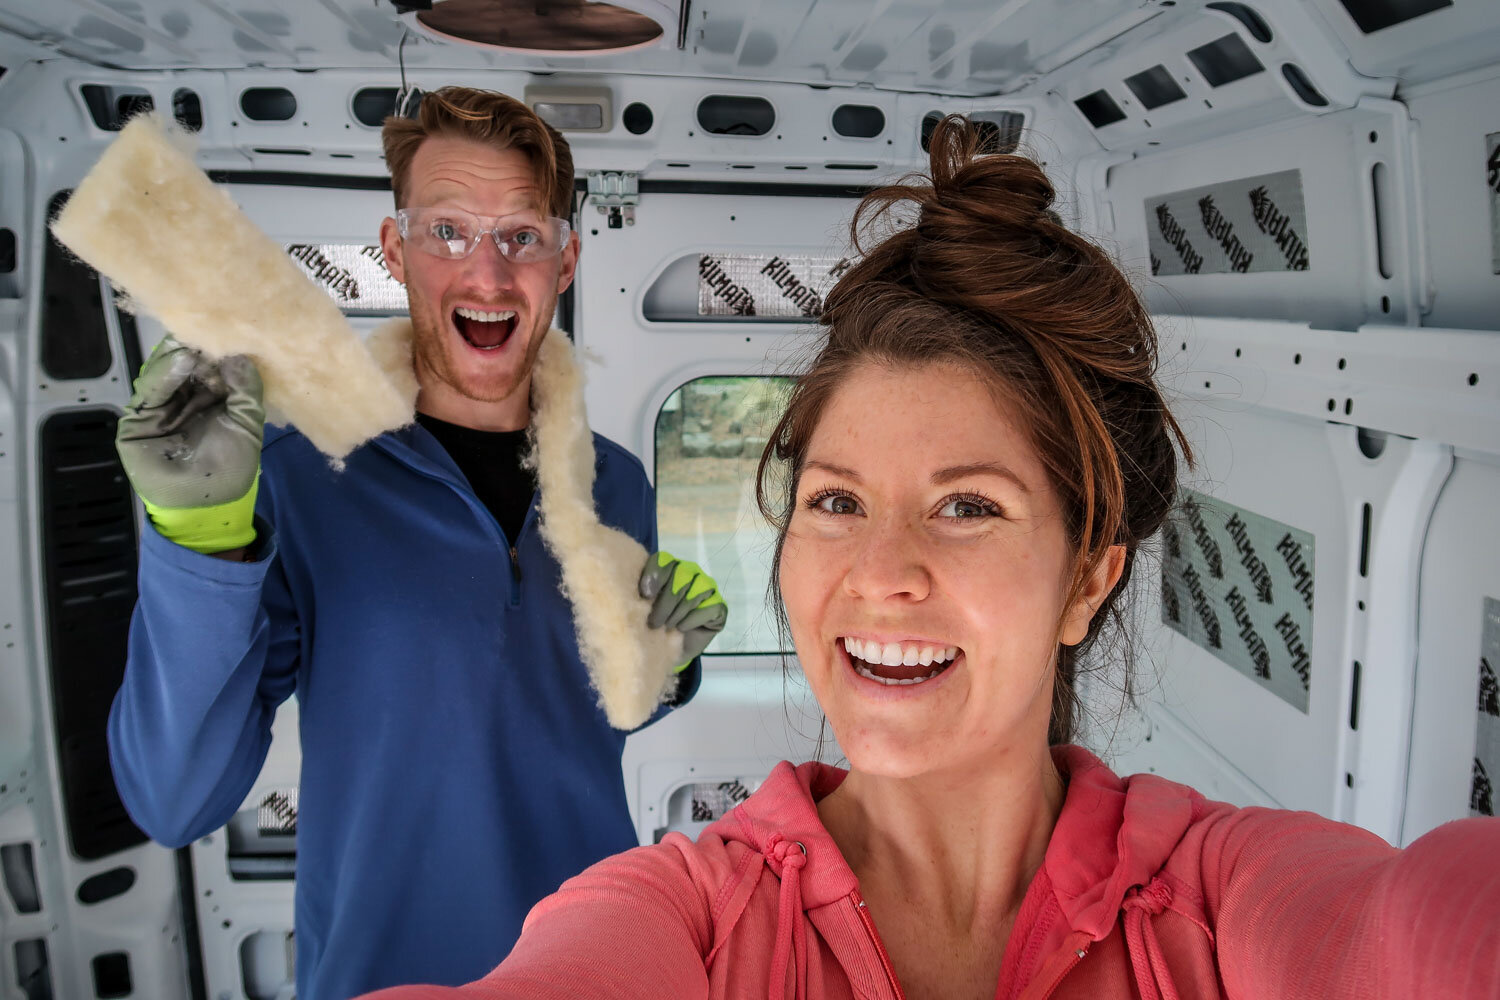
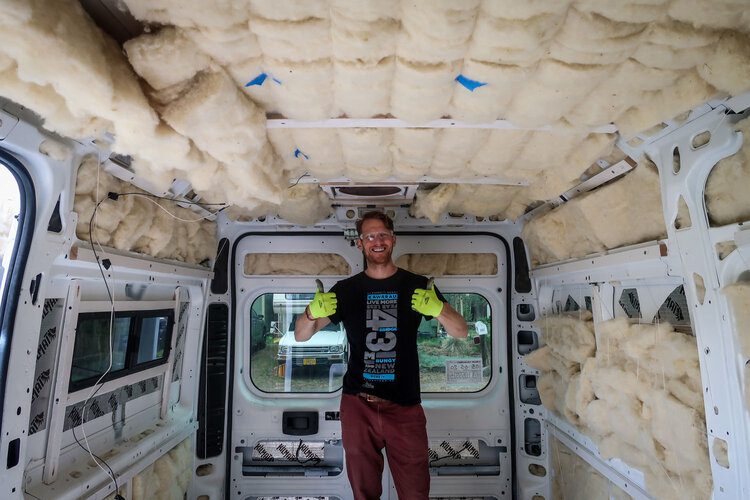
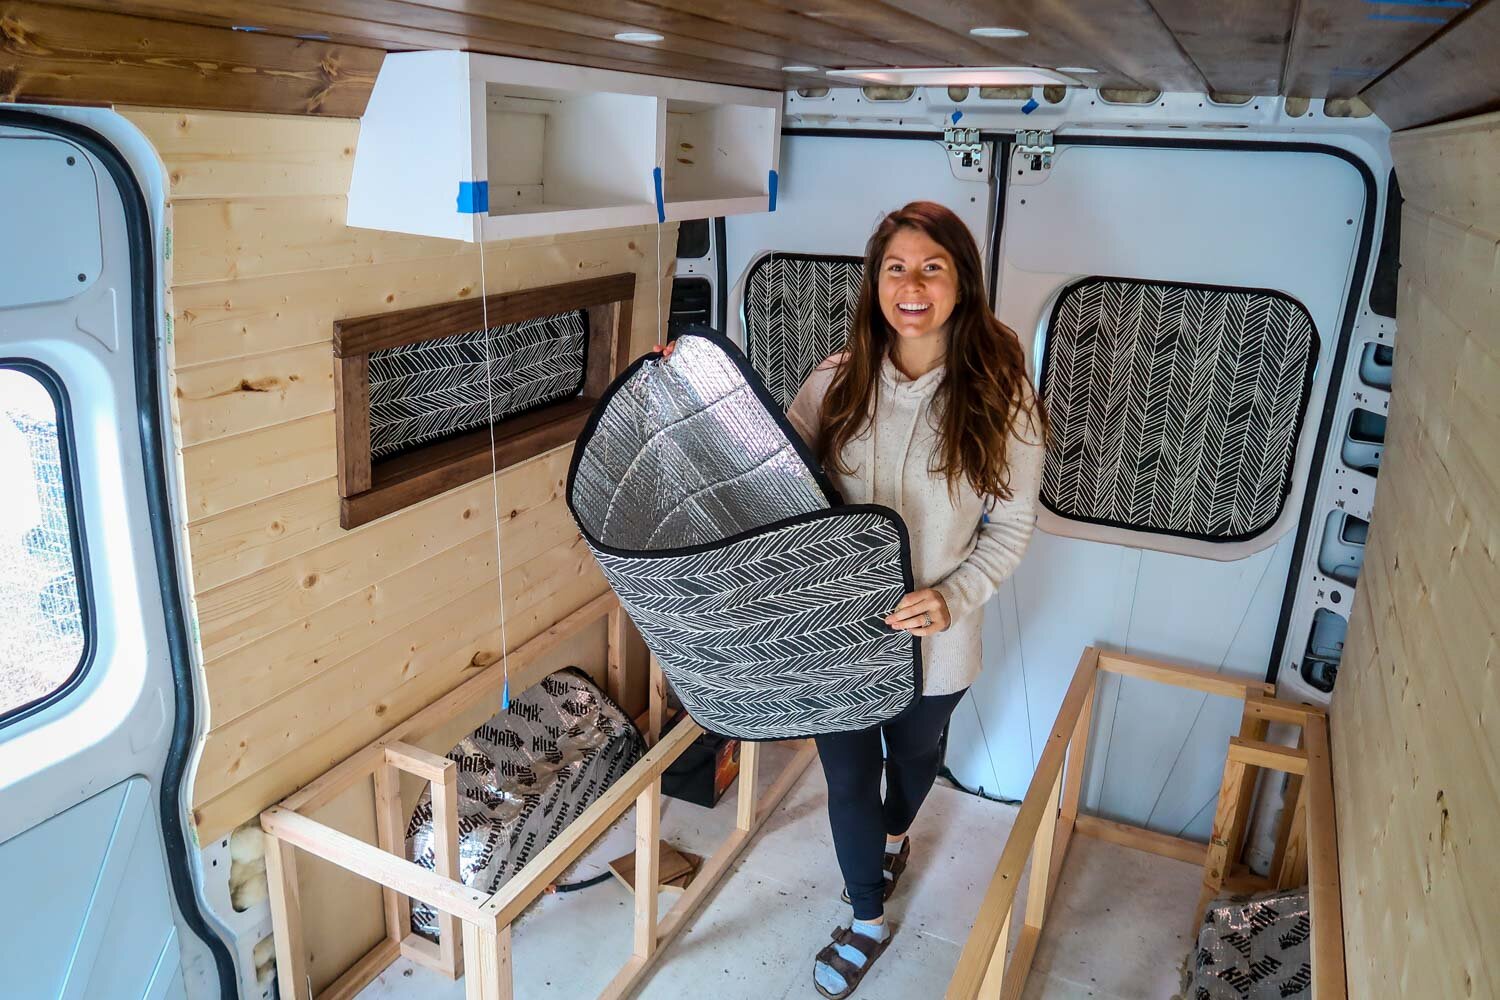
- Super easy (and fun) to install – Since you can handle wool with your bare hand, it’s extremely easy to cut your batts to size and install. You can install wool in your van’s subfloor, walls and ceiling. The only tricky part was during the ceiling install and keeping the strings tightly strung as you slide in the batts.
- Sustainable, natural resource: fleece trimmed from sheep is a 100% renewable resource.
Cons (why NOT install wool insulation in a campervan)
- Since wool is an animal product, it is not a vegan option. If you’re a strict vegan then you might want to look into other options
- Installing wool can take a little bit of time compared to other methods where you spray adhesive chemicals inside your small space and stick your insulation the walls. Our recommendation is to schedule out a weekend and insulate a campervan with wool because it can be done that fast.
3M Thinsulate Insulation
- R-Value: 3.3 per inch
- Where to Buy: 3M
Made by 3M, Thinsulate is a synthetic material that does not off-gas or have added chemicals. It also has sound deadening properties and can be cut apart to stuff into cracks and the frame of your van.
If sheep’s wool was not on the market, we would have chosen Thinsulate.
Pros:
- Good at insulating
- Sound Deadening properties
- Doesn’t retain moisture
- Doesn’t release fibers into the air
Con:
- Expensive
Rigid Foam Board Insulation
Foam board has been used in building insulation for many different applications. This is a great budget option for any van lifers looking to save money on their insulation project.
Where to Buy: Home Depot
Pros:
- High R-Value (High Insulating Properties)
- High Compression strength – could be used for insulating your subfloor
- Polyiso and XPS Board do not retain water
Cons:
- It is rigid, your van floor, walls, and ceiling are not. There will be air pockets, which reduces the effectiveness of this type of insulation.
- Need to glue board to walls using a strong chemical adhesive and spray foam
- Still need to use spray foam for all the cracks and framing in the van. Can get really messy
- Can squeak behind the walls and floor
There are few types of foam board insulation:
Polyiso foam board insulation (Polyisocyanurate)
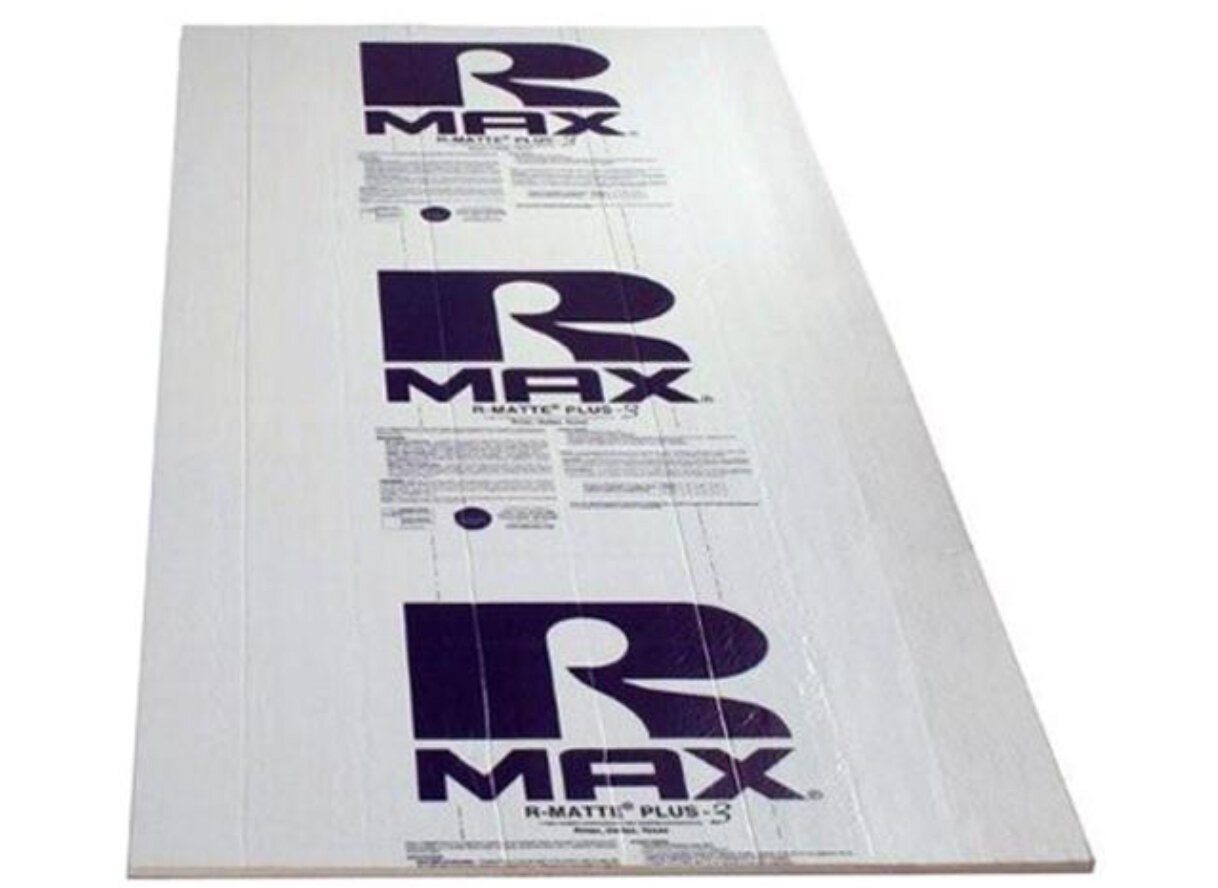
- R-Value: 6.0 per inch
- White foam insulation board with foil that acts like a vapor barrier
- Best Choice of all Rigid Foam Boards
XPS Rigid Board (extruded polystyrene)
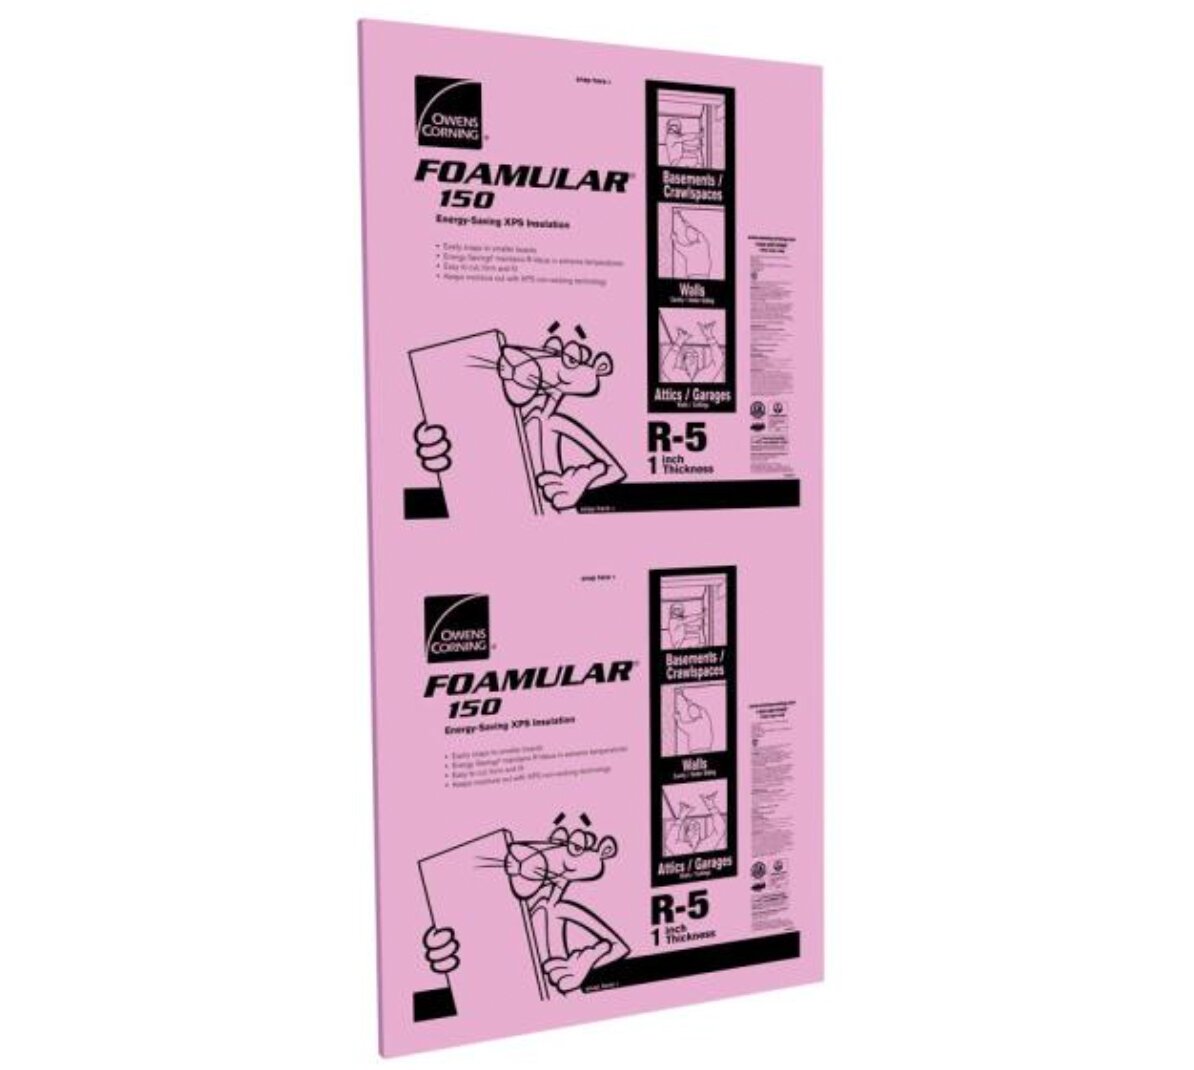
- R-Value: 5.0 per inch
- Pink or Blue foam boards
- Cheaper than Polyiso, but the manufacturing process releases hydrofluorocarbons (HFCs, a.k.a. greenhouse gases)
EPS Rigid Board (expanded Polystyrene)
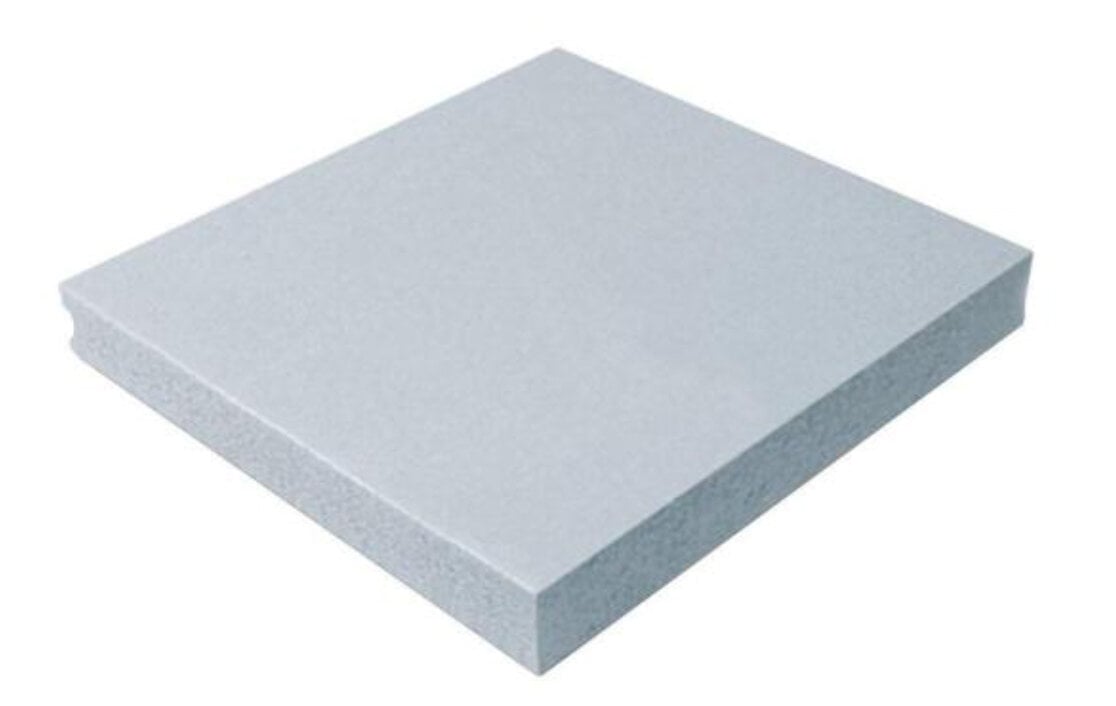
- R-Value: 4.0 per inch
- White foam board (similar material to styrofoam coolers, but slightly denser)
- Cheapest but it retains water, which will cause mold over time.
Campervan insulation we don’t recommend
There are a few types of van insulation we would highly recommend steering clear from for various reasons.
Spray Foam Insulation
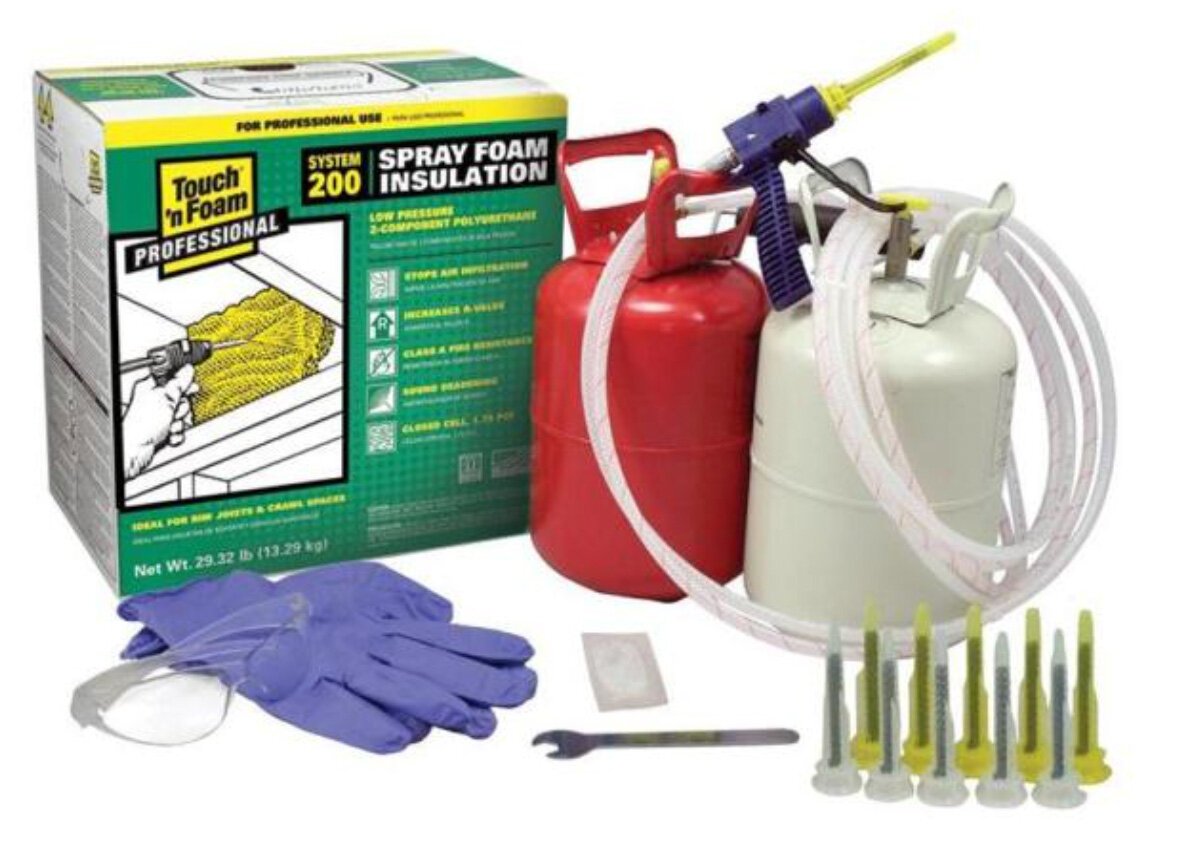
This insulation material typically comes in a spray foam kit. Spray insulation is expensive, messy and can cause issues with your van and that is why we don’t recommend it.
R-Value: 7.0 per inch
Pros:
- High R-Value
- Resistant to water
Cons:
- Cost: several hundred dollars
- Off-gas: should be installed by a professional
- Extremely messy to apply
- Can shift van panels if apply incorrectly
- Can get into doors and door slides making it hard to use.
Fiberglass Insulation

Commonly used in household insulation, fiberglass is a good insulator for a house but not a campervan. Fiberglass retains water and is harmful to breathe in and that is why we don’t recommend it.
R-Value: 3.7 per inch
Pro:
- Inexpensive
Cons:
- Release fibers in the air that are harmful to breathe
- Retains moisture that can lead to mold
- Difficult to install, must wear proper protective equipment
Rock Wool Insulation
Also known as mineral wool, Rock Wool is a semi-rigid insulation made from rock spun into fine fibers. Rock Wool is a pain to work with and can release fiber in the air and that is why we don’t recommend it.
R-Value: 3.0 per inch
Pros:
- Resistant to water
- Does not off-gas
Cons:
- Can release fibers into the air
- Itchy process to install
Denim Insulation
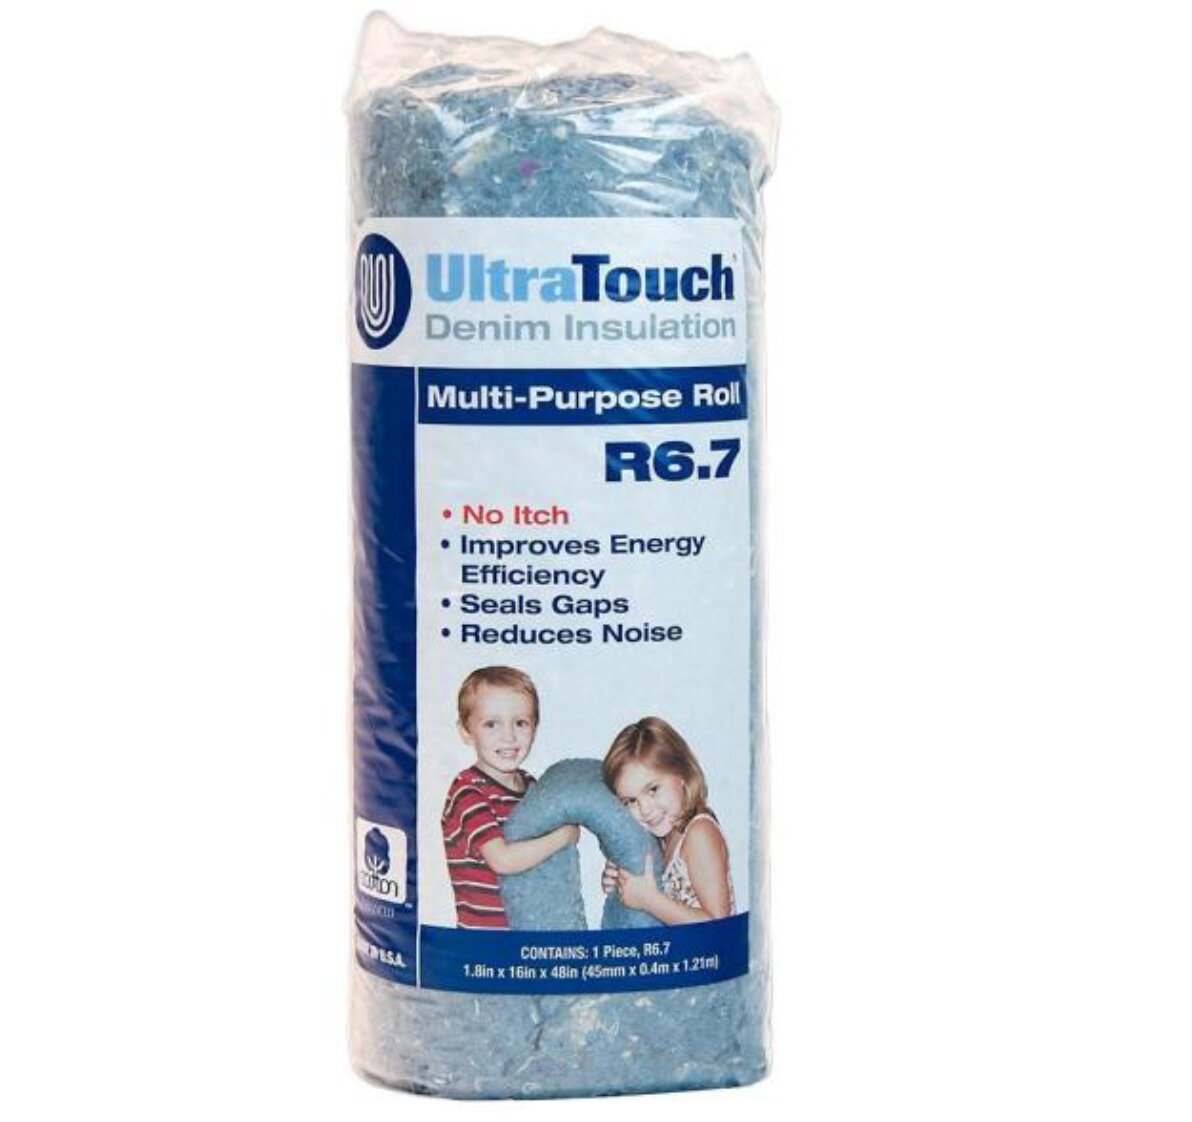
Yep, you guessed it, recycled jeans and formed into non-toxic denim batts. However, it retains water that can cause mold and that is why we don’t recommend it.
R-Value: 3.5 per inch
Pro:
- Environmentally friendly because it’s recycled materials
Cons:
- Retains water and can cause mold
- Expensive compared to fiberglass
Double Reflective Insulation – Only Use on Windows
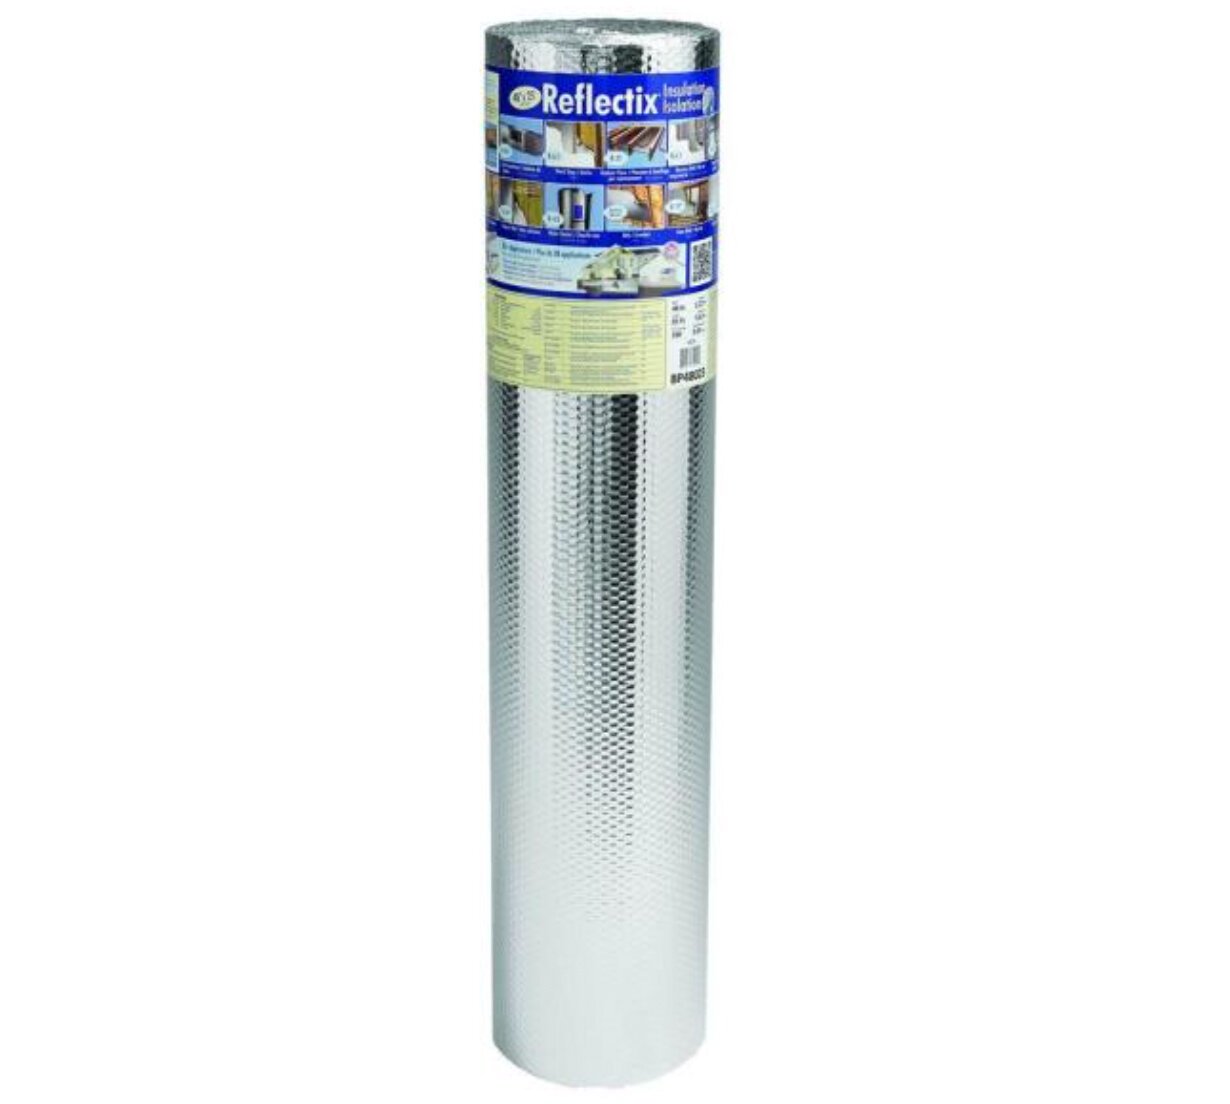
We only recommend using double reflective insulation as a window cover to reflect heat from entering your van. However, this type of insulation is mostly used as a radiant barrier and it has poor insulating properties.
R-Value: 1.0 per inch
Pros:
- Cheap and commonly available
- Great for window coverings
Cons:
- Poor at insulating
- Ineffective once you put it behind a wall
Why we chose wool insulation
It’s simple, really. We chose wool insulation because it is:
- Free of toxins and chemicals
- noise dampening properties
- environmentally friendly, 100% renewable resource
- deals well with moisture
Plus, it isn’t that much more expensive than the other options, and it is easy to work with.
Truthfully, it seemed like a pretty easy decision to us.
Click the button below to learn more about the Havelock wool insulation and buy some for your build. Keep reading below for our step-by-step instructions on how to install sheeps wool insulation in your van.
Cost of wool insulation in a campervan
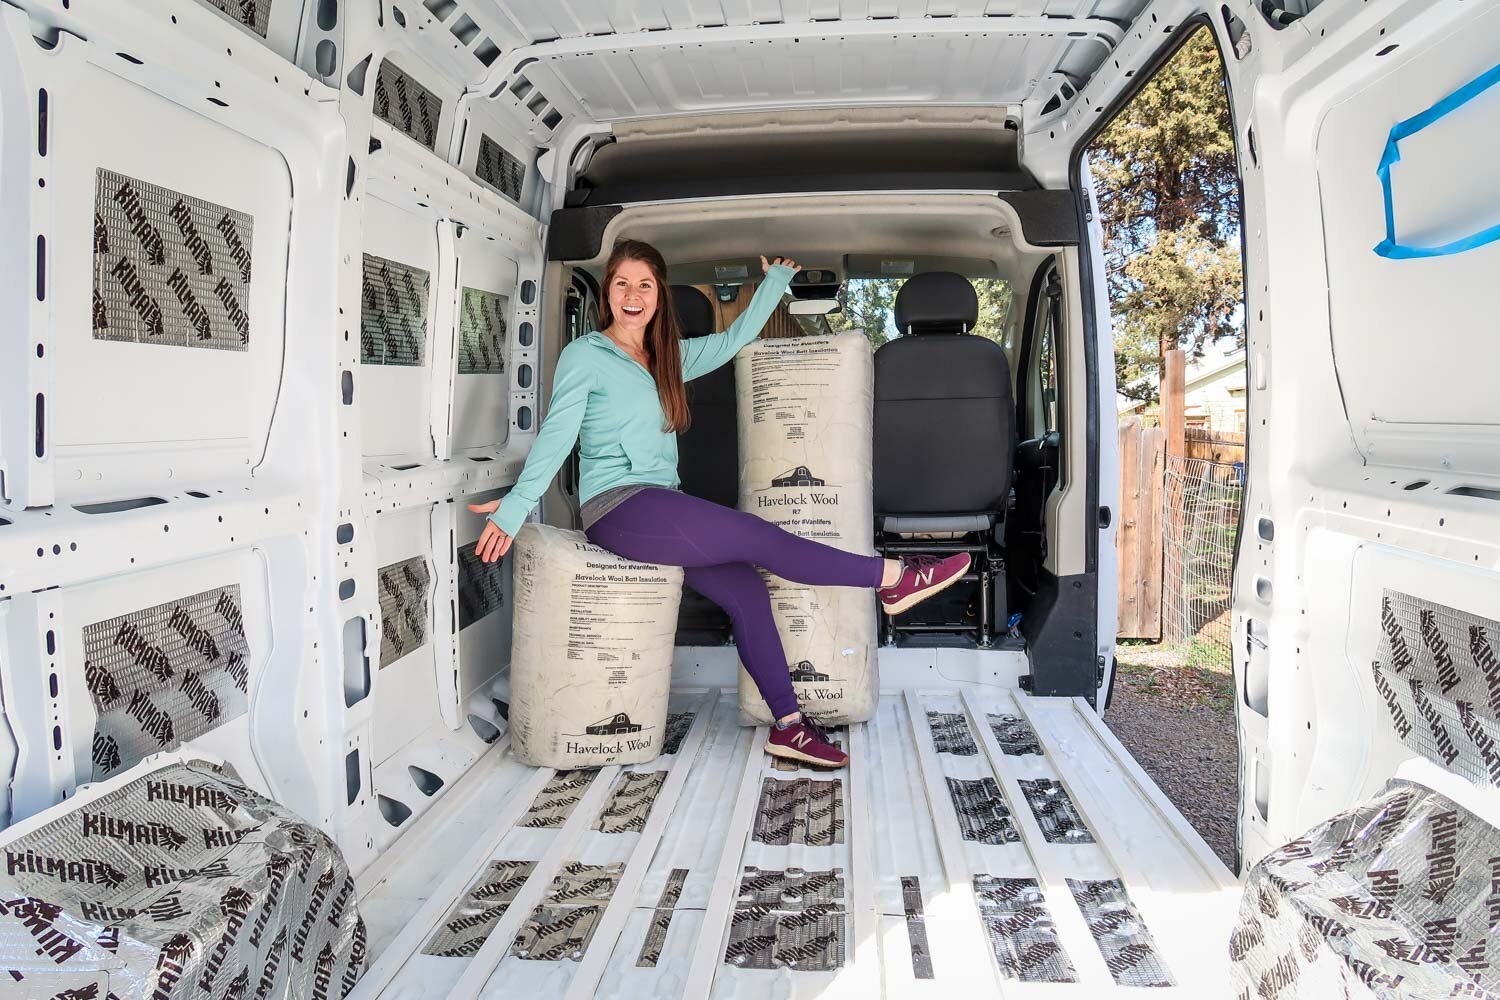
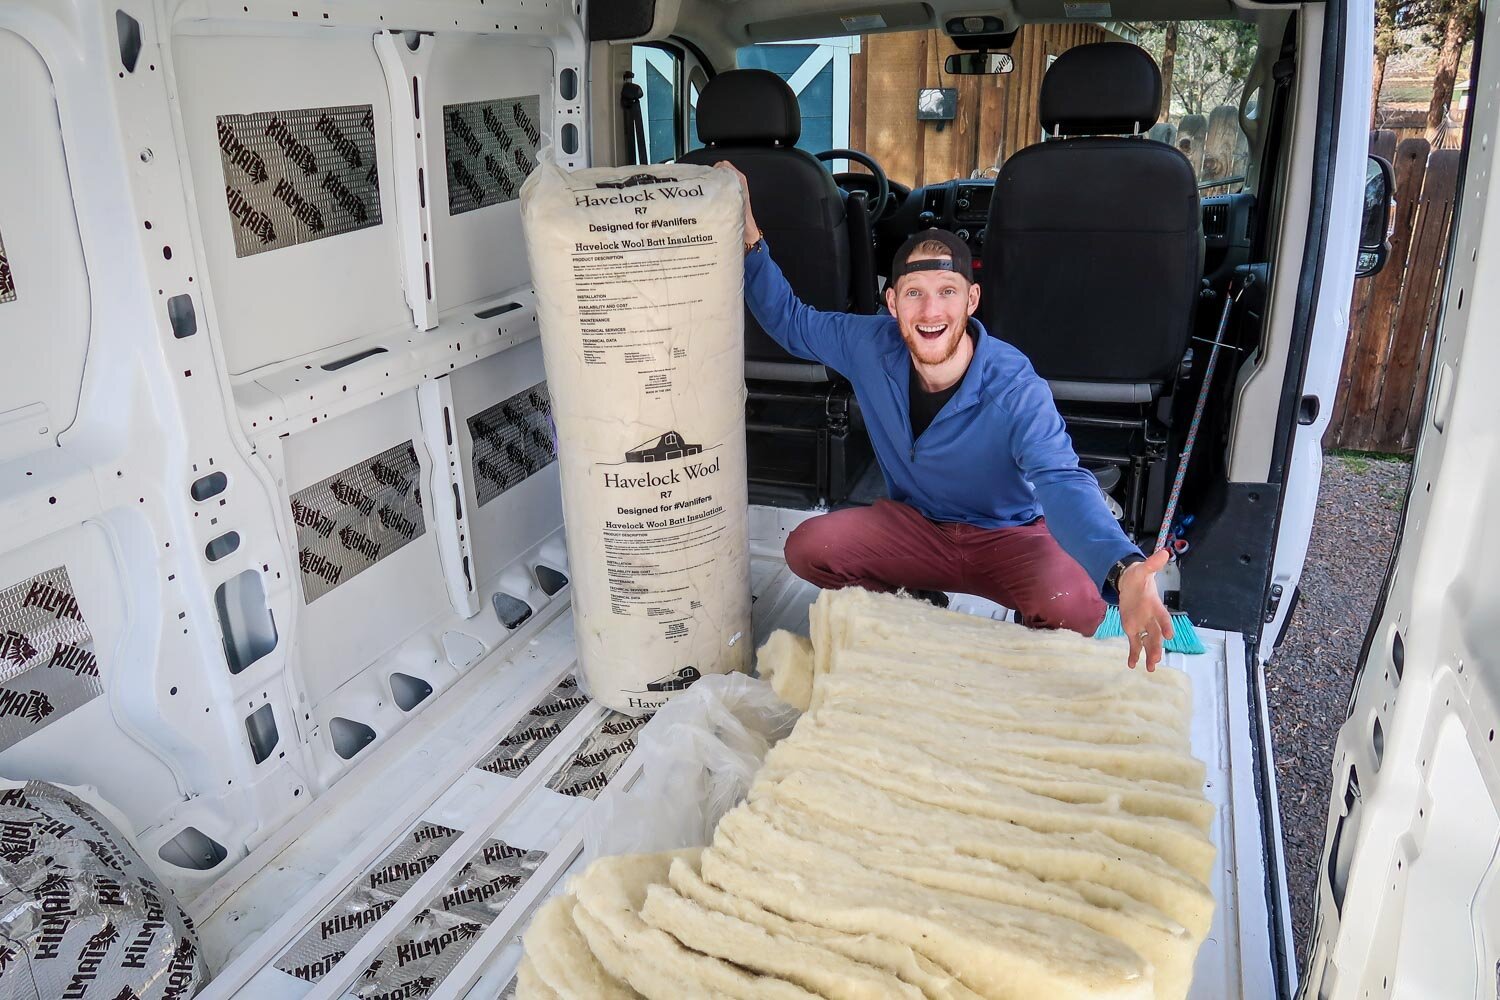
Sheep wool insulation comes in batts and loose fill. One batt is approximately 16” wide by 48” long and 2” thick. We went with Havelock Wool and they package their wool into bags of 20 batts each. Depending on your type of campervan, you’ll want anywhere from 2 to 4 bags of wool.
Each bag covers about 100 square feet of insulation. Havelock has already done the hard work for you in estimating how many bags you need. Check out their chart for various campervan builds (Note: these estimates do not include floor measurements):
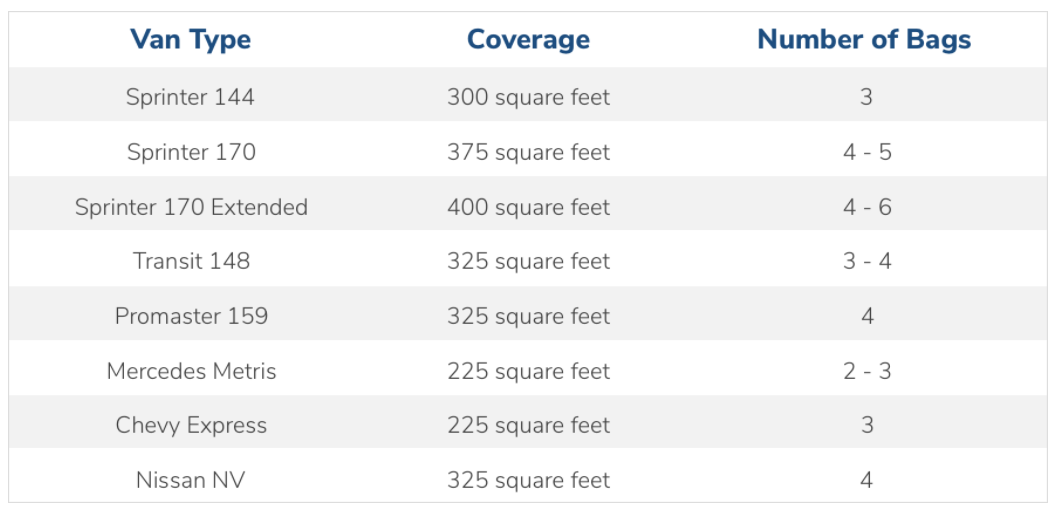
For our 2500 Promaster with a 136” wheelbase we bought 3 bags and it was enough for our subfloor, walls and ceiling.
In 2020, one bag of Havelock wool cost $120 dollars plus shipping (from Reno, NV). Our total price tag for three bags of Havelock Wool came to $439.03 ($360 for 3 bags and $79.03 for shipping to Oregon)
As of 2022, one box (yes, they now ship in boxes, yay less plastic!) of 100 sq. ft. costs $150 USD.
How to install wool insulation in a campervan
Before we get into the steps for installing proper insulation, it’s a good idea to note that soundproofing should be installed before you install insulation. Jump down to our section on soundproofing to see if that is an option you want to try first.
Installing campervan floor insulation
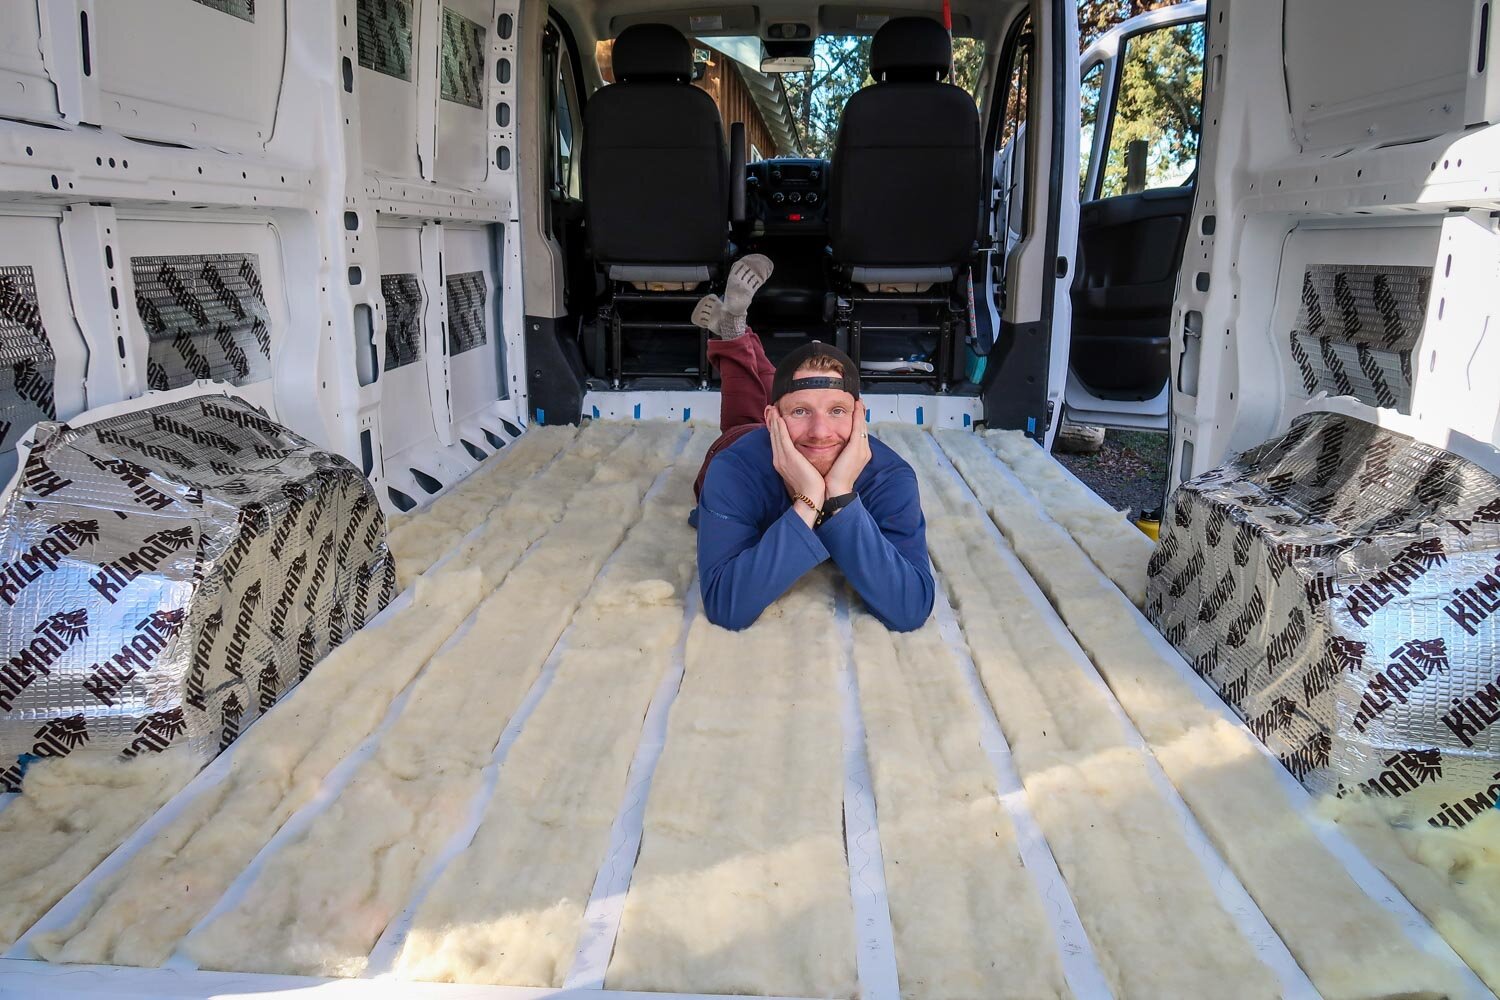
- Clean van floor surface
- Frame subfloor using 1×2’s or which ever thickness works best for your corrugated van floor
- When spacing out framing, leave space for wool subfloor of a width of about 6”-8”
- Use construction adhesive to glue down the subfloor framing. Let it harden overnight while apply pressure with weights
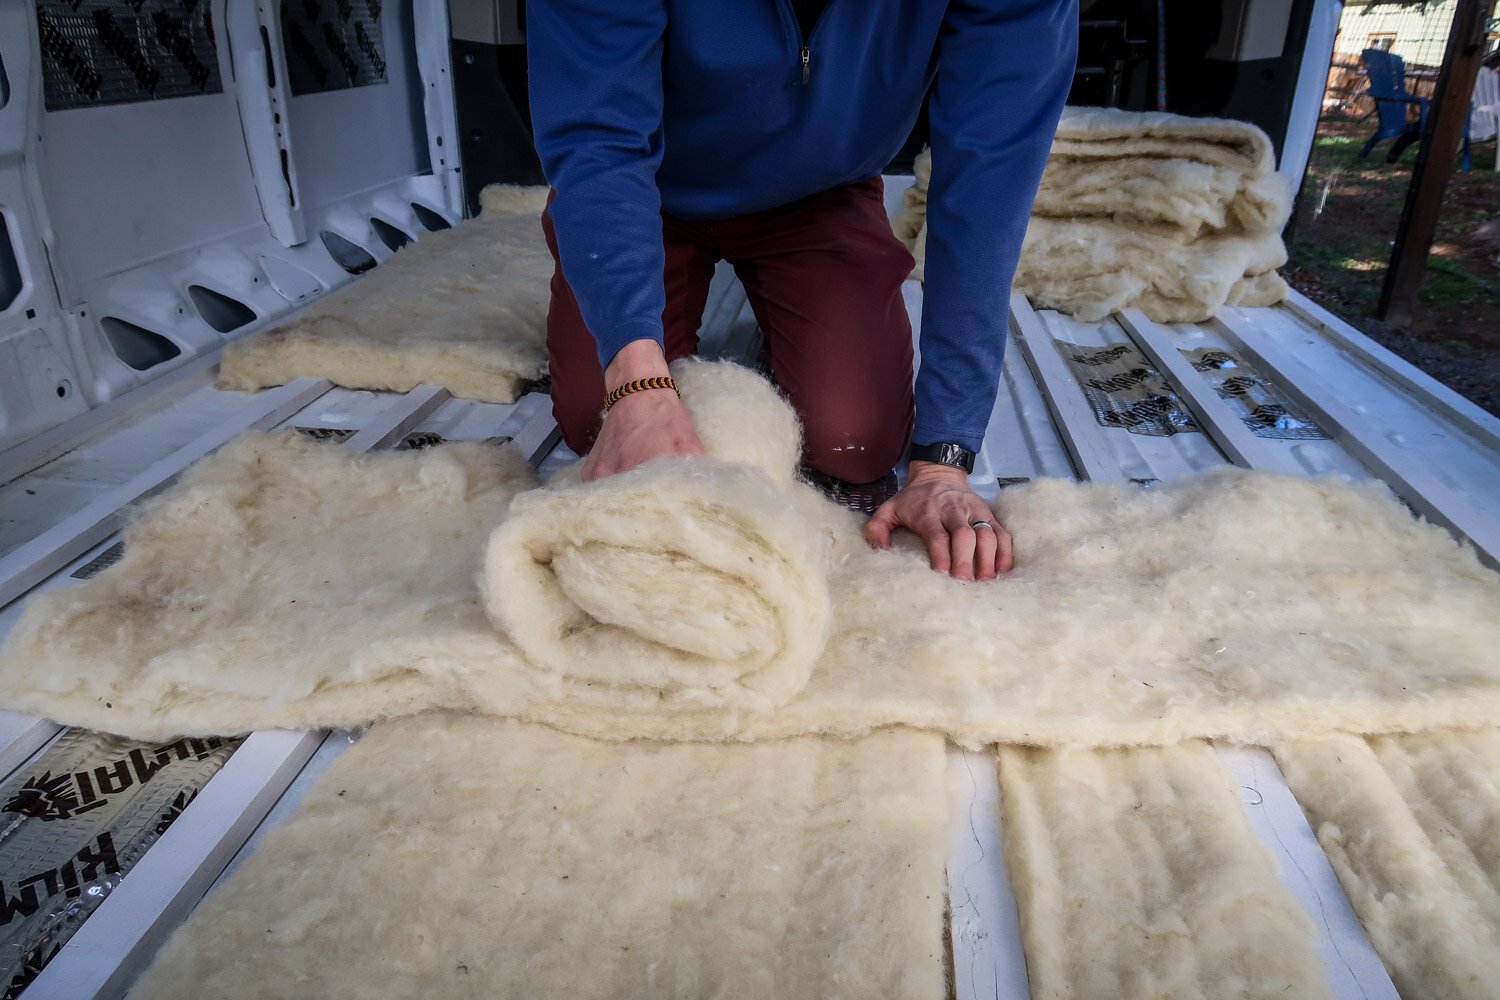
- Open a bag of Havelock wool and remove a batt of wool
- Use half a thickness of wool (about 1” thick), since the floor will not need as much insulation as the walls or the ceiling.
- Split the wool thickness by rolling from one end to the other. As you roll, slowly peel and split the wool in half
- Using a scissors, cut the wool to the width of the empty space between the framing (about 6” to 8” wide). Place in the empty space and continue until the entire subfloor is insulated.
- Measure and cut a subfloor that is ½” thick plywood. This may need to be cut into sections so plan and measure accordingly.
Installing campervan wall insulation

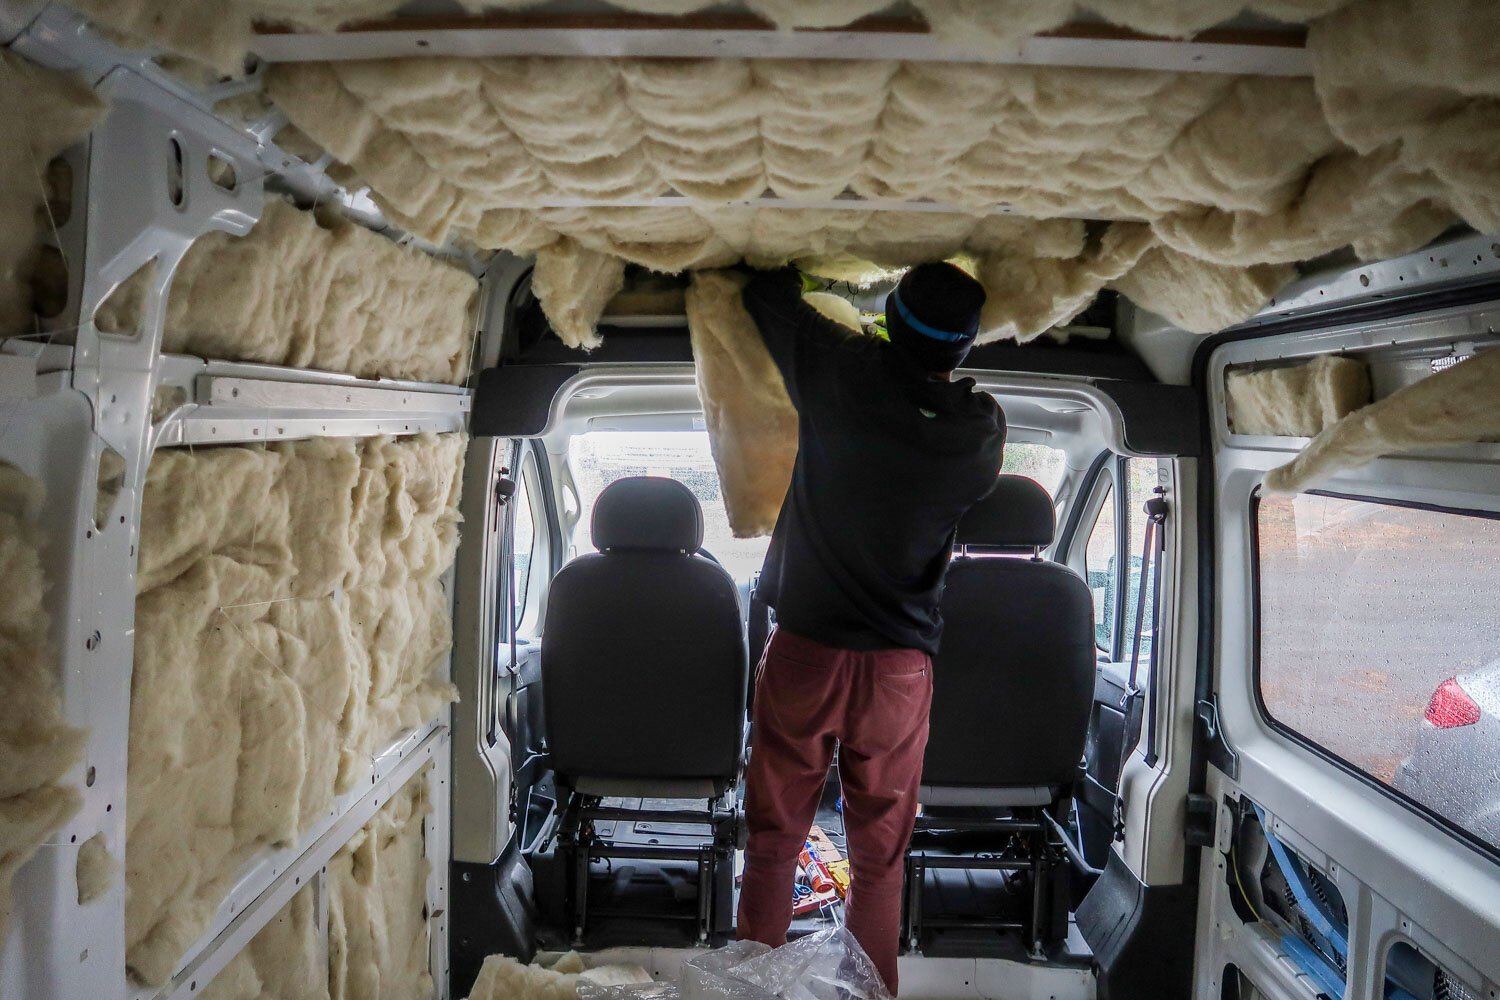
- Using Mold-Resistant Nylon string, create a netting or multiple lines of string that will hold up the insulation to the ceiling.
- String the lines underneath the ceiling support beams as close to the ceiling as possible to reduce sagging. You may use a pencil or flat piece of metal and tie the string to it in order to slide underneath the support beams
- You may want to string in a zig-zag pattern within each section of the ceiling. Or you could bring the string all the way from the front to the back of the van.
- The string lines should be no more than 6” apart.
- Place the 2” thick wool batts between the string and the van ceiling.
- Depending on the size of your ceiling section you may need to cut the wool insulation to fit.
- Be generous with the insulation on the ceiling. Heat rises in a van so you want to be able to trap that heat in.
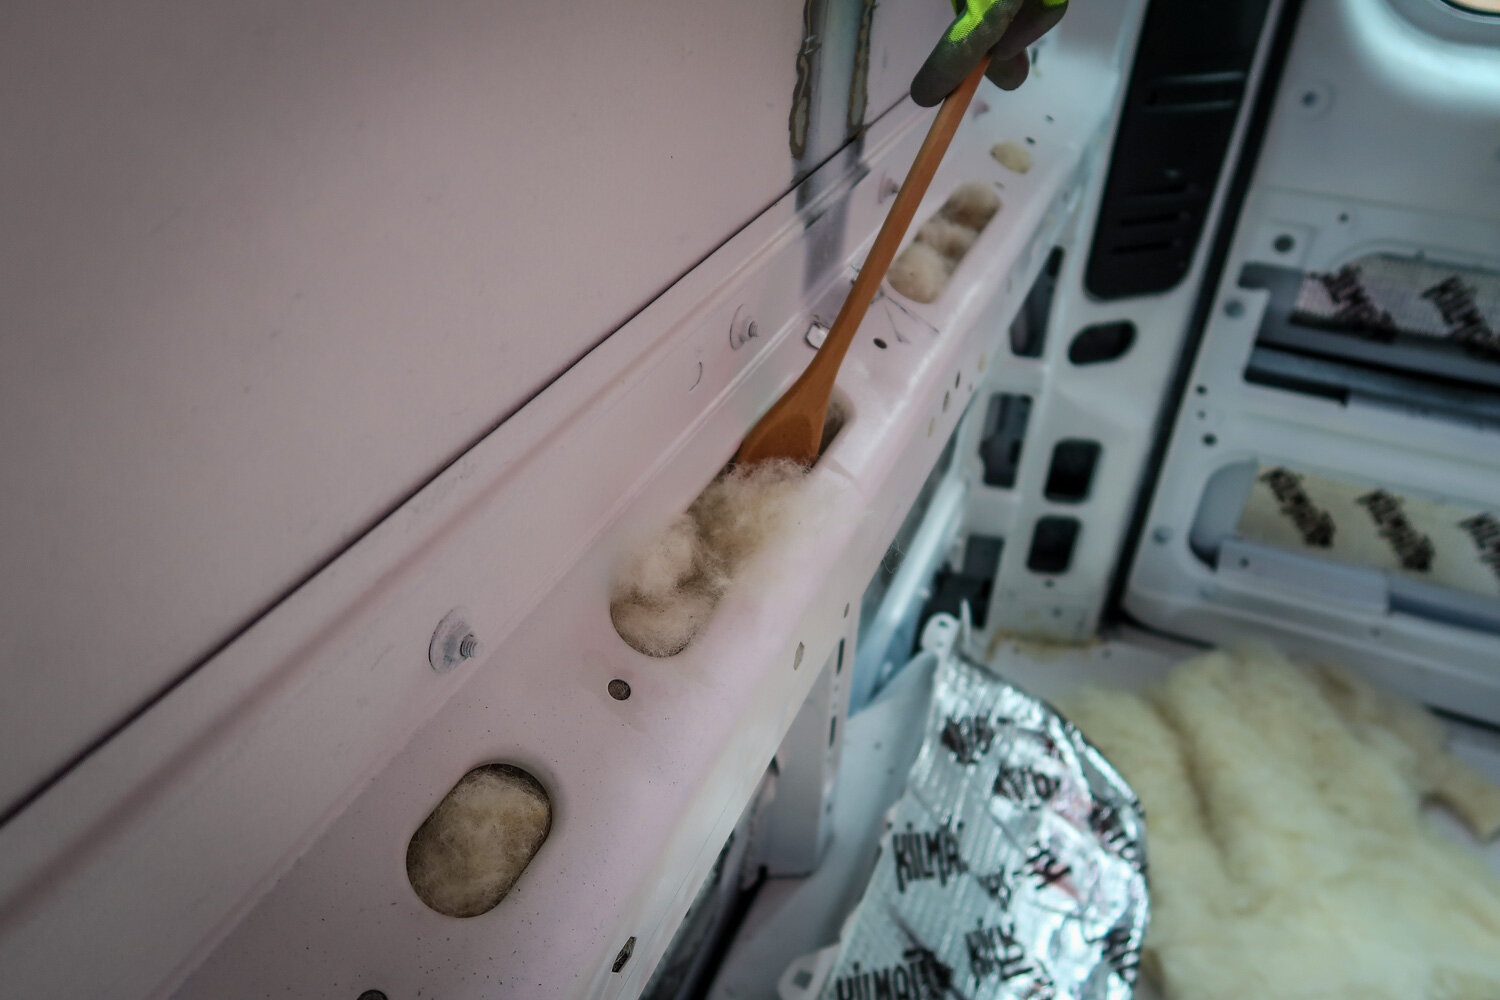
3. Once all the ceiling sections have been filled, stuff the van’s support beams with loose insulation.
- You may need to use a wooden spoon or screwdriver to stuff into the small holes where your fingers cannot reach.
- Again, be generous with the wool insulation.
Installing campervan ceiling insulation

- Using Mold-Resistant Nylon string, create a netting or multiple lines of string that will hold up the insulation to the ceiling.
- String the lines underneath the ceiling support beams as close to the ceiling as possible to reduce sagging. You may use a pencil or flat piece of metal and tie the string to it in order to slide underneath the support beams
- You may want to string in a zig-zag pattern within each section of the ceiling. Or you could bring the string all the way from the front to the back of the van.
- The string lines should be no more than 6” apart.
- Place the 2” thick wool batts between the string and the van ceiling.
- Depending on the size of your ceiling section you may need to cut the wool insulation to fit.
- Be generous with the insulation on the ceiling. Heat rises in a van so you want to be able to trap that heat in.
- Once all the ceiling sections have been filled, stuff the van’s support beams with loose insulation.
- You may need to use a wooden spoon or screwdriver to stuff into the small holes where your fingers cannot reach.
- Again, be generous with the wool insulation.
4. Don’t forget to insulate above the cab of your van with wool insulation.
- Remove the fabric that is attached to the ceiling above the cab. Typically is it held up by clips and simply pop out with a little bit of effort
- Place 3 to 4 whole wool batts between the ceiling and the fabric.
- Clip the fabric back into the ceiling.
Video tutorial
Check out our Van Insulation Tutorial where we explain why we chose Havelock Wool and show exactly how we install it in our van. We have quite a bit of fun doing it too! (While you’re watching, be sure to Subscribe to our YouTube Channel!)
Soundproofing
Installing soundproofing in your campervan offers several benefits that can significantly enhance your travel experience:
- Noise reduction: Campervans can be noisy, especially while driving on highways or rough roads. Soundproofing helps minimize external noise from traffic, wind, and other vehicles, creating a quieter and more peaceful environment inside the van.
- Improved comfort: A quieter interior creates a more comfortable and relaxing atmosphere for both passengers and drivers. Whether you’re on a long road trip or camping overnight, reducing noise levels can lead to better sleep quality and overall well-being.
- Enhanced privacy: Soundproofing your campervan can also improve privacy by minimizing the transmission of sound in and out of the vehicle. This is particularly useful if you’re parked in a crowded campground or urban area, allowing you to enjoy personal conversations or activities without disturbing others or being disturbed.
- Better audio quality: If you enjoy listening to music, podcasts, or audiobooks during your travels, soundproofing can enhance audio quality by reducing external interference and improving acoustics within the van.
- Temperature regulation: Some types of soundproofing materials also offer thermal insulation properties, helping to regulate the temperature inside the campervan.
If you choose to install sound dampening material, it’ll be one of the first steps you do in your van conversion. It will come before insulation.
What is it?
Thin pieces of adhesive material that are applied to the interior surfaces of an empty van.
What’s the purpose?
This material will reduce the sound of road noise inside your vehicle. (Cargo vans can be noisy on the road.) If you want to get technical, this material has a layer of rubber, which lowers the frequency of vibrations, thus reducing the sound that gets inside, or escapes outside.
Do you need to install sound dampening material?
This step is optional, and won’t affect the structure of your build. That said, it is relatively inexpensive, and it cannot be added later on.
Depending on the type of insulation you choose, this step may not be quite as necessary. For example, wool insulation absorbs noise pretty well so you could potentially skip this step and not have too many issues with road noise.
Personal experience: Even though we chose to go with wool insulation, we also added sound dampening material because we wanted to do everything we could to keep the van as quiet as possible. Plus, it wasn’t very expensive, and it was a pretty quick and easy installation process. The final result is our van is soundproof and essentially lets in zero road noise.
Types of sound dampening material
As with van insulation, there are lots of different choices for sound deadening material you can install in your van. Here are the top options:
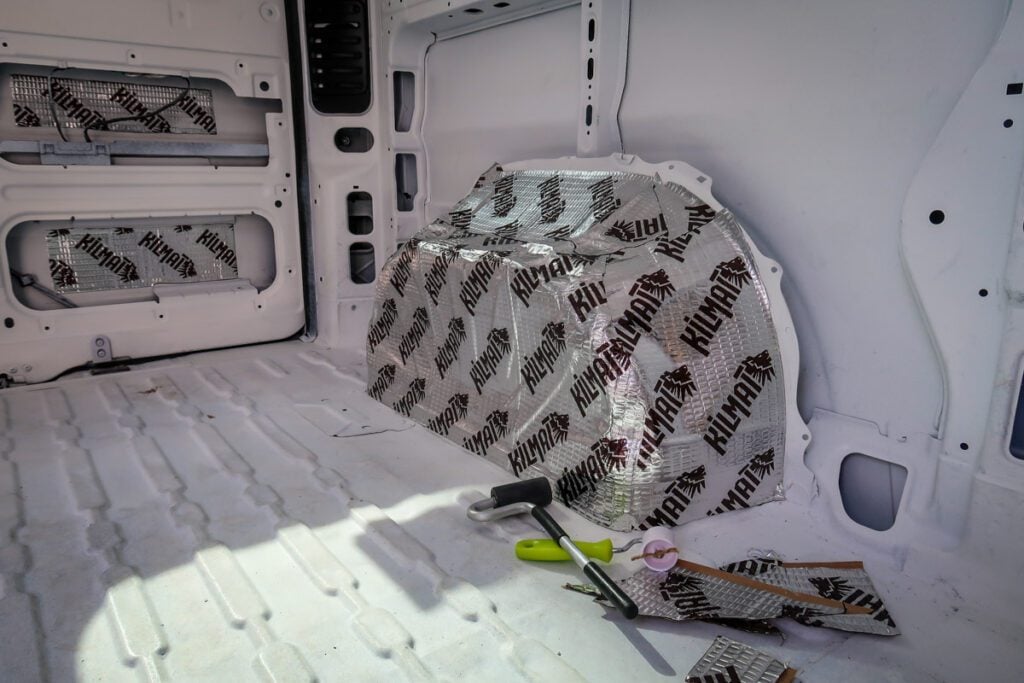
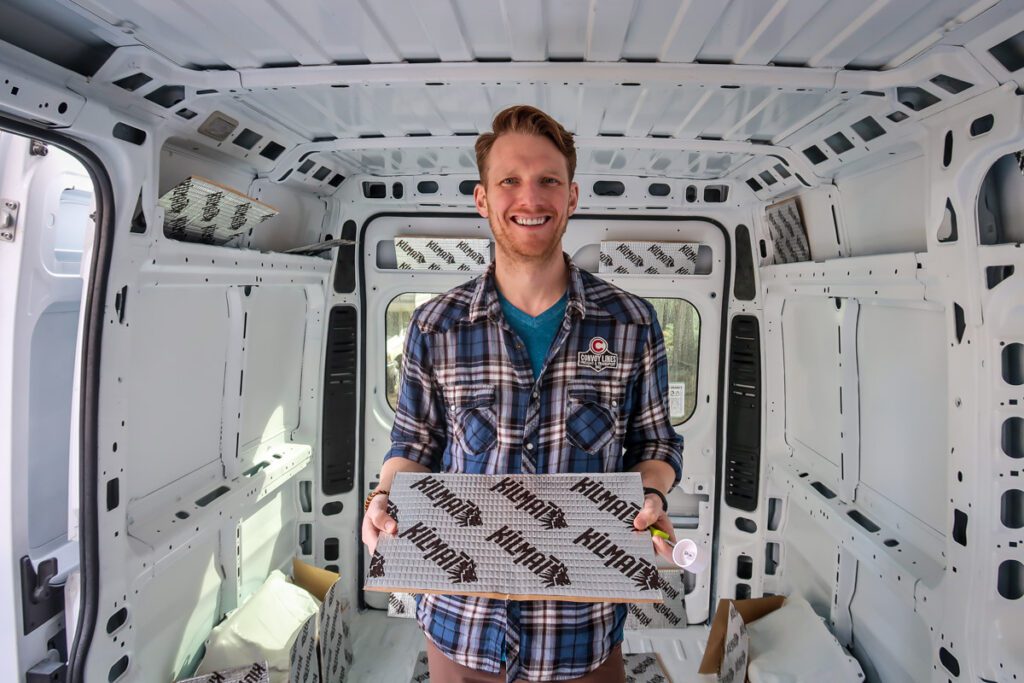
- Kilmat 50 mil Sound Deadening Mat: This is the exact soundproofing material we used in both our second and third van builds. Easy to install, Kilmat features a self-adhesive backing that allows for quick and hassle-free application to various surfaces within the campervan.
- To give you an idea we used 50 sq ft for 2500 Ram ProMaster 136” WB
- Dodo Mat: For our friends overseas, this British company is known for its heat-insulating properties, helping to regulate temperature inside the vehicle and improve energy efficiency. Additionally, its lightweight design ensures minimal impact on the vehicle’s weight and fuel efficiency.
Don’t forget about window coverings
One of the last places to insulate in your van is your windows. If you do not insulate your windows, heat will enter your van in the summertime and warmth will escape in the colder months. The best and simplest ways to insulate is to use Reflectix.
We made our window coverings using Double Reflective Insulation, fabric and attached small magnets to the edges so that they stay in place and go up easily.
For winter months, you could even add some insulation, like wool or Thinsulate, between the Reflectix and the fabric to give them even more insulating properties.
I am so stoked about these that I created a tutorial so others can experience the game-changing magic of these window covers too!
Grab your Insulated Window Covering Tutorial now!
If you’re not into crafts or just don’t want the hassle of making window coverings yourself, check out Moohah Creatives. This vanlife father and his daughters have teamed up to make hand-crafted magnetic window coverings with ethically sourced materials. You can customize your fabric to fit your style in your van.
Use our discount code: WANDERINGSOLES for 10% off your purchase.
Why proper ventilation is important in a campervan
Having a good source of ventilation in your van will help with moisture and temperature control. You should also vent your van when cooking or running a heater to stay safe from CO2 or propane poisoning.
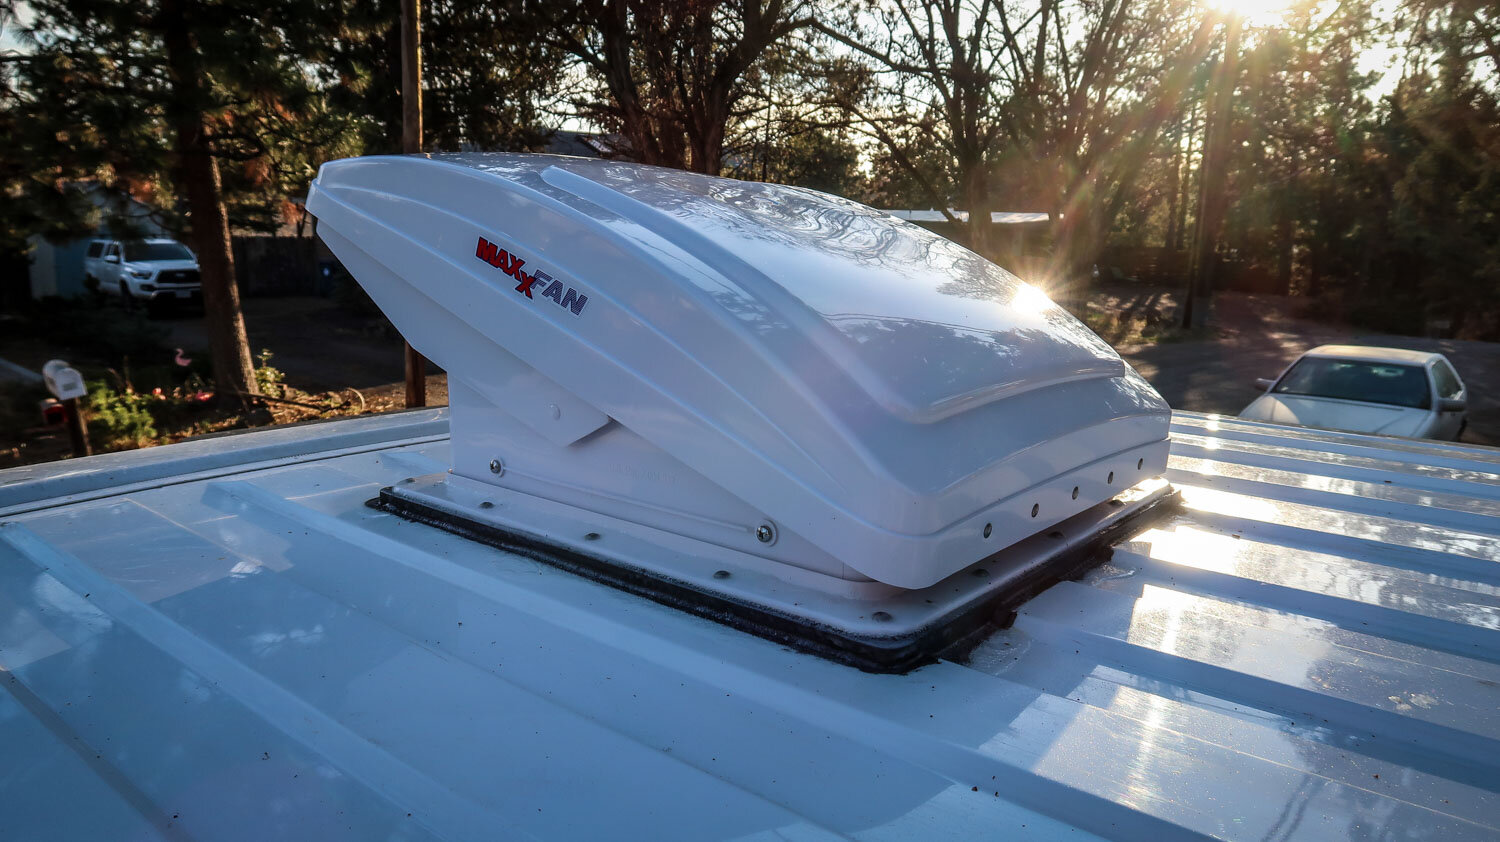
Of course having a window open is a way of passive ventilation, but if you want to be more comfortable in your campervan you should really install a roof top fan or vent. There are two major roof top fans on the market: Fantastic Fan and MaxxAir Fan.
We recommend the MaxxAir Fan Deluxe because it has a built-in rain cover, very efficient 10-speed fan, air in and air out function, and a remote control. It was really simple to install and works great to keep us cool in the summer and removes moisture in the winter.
DIY campervan conversion guide
Simplify your van build & get on the road faster!
Want to save yourself the headaches and hours of research we went through and get straight to the building process?
We created Van Conversion Academy, a DIY campervan conversion guide, because it’s exactly what we wished we’d had when we were building our campervans.
Save yourself the time and money and get straight to the building process with step-by-step instructions, video tutorials, blueprints you can actually copy and tons of insider tips and recommended products to get you on the road faster!
Click below to learn more about Van Conversion Academy.

Are you thinking about living the campervan life?
We have TONS of resources on converting your own campervan and living the #vanlife. Check out our Ultimate Guide to Van Life for all the answers to your most burning questions, or read some of our favorite articles below.
- How Much Does a Campervan Cost? Budget to Luxury Van Builds
- Living in a Van: The Best Parts of Campervan Life
- Campervan Gear Essentials: The Ultimate Packing List
- Campervan Storage Solutions: Creative Ideas for Your Van Build
Interested in engaging with others about all things #vanlife? Join our Vanlife Facebook community!
Don’t forget to grab your FREE Vanlife Jumpstart Toolkit!

Save this article on Pinterest for later!
We want to hear from you!
Have you thought about what type of van insulation to choose for your campervan build? Are you interested to hear more about Havelock Wool for van builds? What other campervan insulation questions do you have still? Comment below and we’ll do our best to get back to you!

Ben Zweber is a former engineer‑turned‑chief navigator and behind‑the‑scenes whiz at Two Wandering Soles, where he teams up with Katie to turn big travel dreams into real adventures. With an MBA in one hand and a love for maps, puns, and good food in the other, he keeps the blog running and the journeys fun. When he’s not crafting SEO magic or tinkering with campervan builds, you’ll find him exploring new places with his family.
Debating mineral wool vs sheep wool. Have you had any problems with mice getting into your sheep’s wool? I can’t imagine that mice are going to want to bother with mineral wool.
I’m considering wool insulation for my van and wondering about wool dust and fibres blowing around, also does odour become a problem over time?
Hi, thanks for awesome article, im just wondering, why havent you used 1way vapor barrier?
Hi, I’m hoping to have a van within the next two months and I have a couple questions about insulation.
So you used wool insulation for the floor, ceiling and walls and reflectix for the windows – did you use anything else for the floor, wheel arches, etc?
Thanks heaps in advance!
Get Local Safe FREE mildew resistant and itch free insulation comparable to thinsulate for your van!
Yes it’s free and your recycling-reusing, sparing filling up our land fills.
That’s what I did and you can too, here’s how:
Inside discarded living room sofa’s and chair’s, the pillows and pillow backs and arms are FULL of loose polyfil and on top of foam, are sheets of poly Dacron batting that peel right off.
This material is made from plastic.
These discarded living room sofas and chairs are constantly being left and found piles up outside dumpsters at: apartment complexes and donation thrift stores.
Law allows you to take trash so it’s a free for all and a visit after a thrift store has closed is a great time to go so you don’t get in the dumpster staff’s way.
With gloves and a box cutter knife, you simply cut open the fabric to reveal these two types of desired protected stuffing inside.
It’s often surprisingly still clean inside. If any is dirty, from say a spilled soda pop, simply garden hose it off when you get home.
Hey i am glad to appreciate your work. I am a frequent visitor of your website and i find your content very helpful