
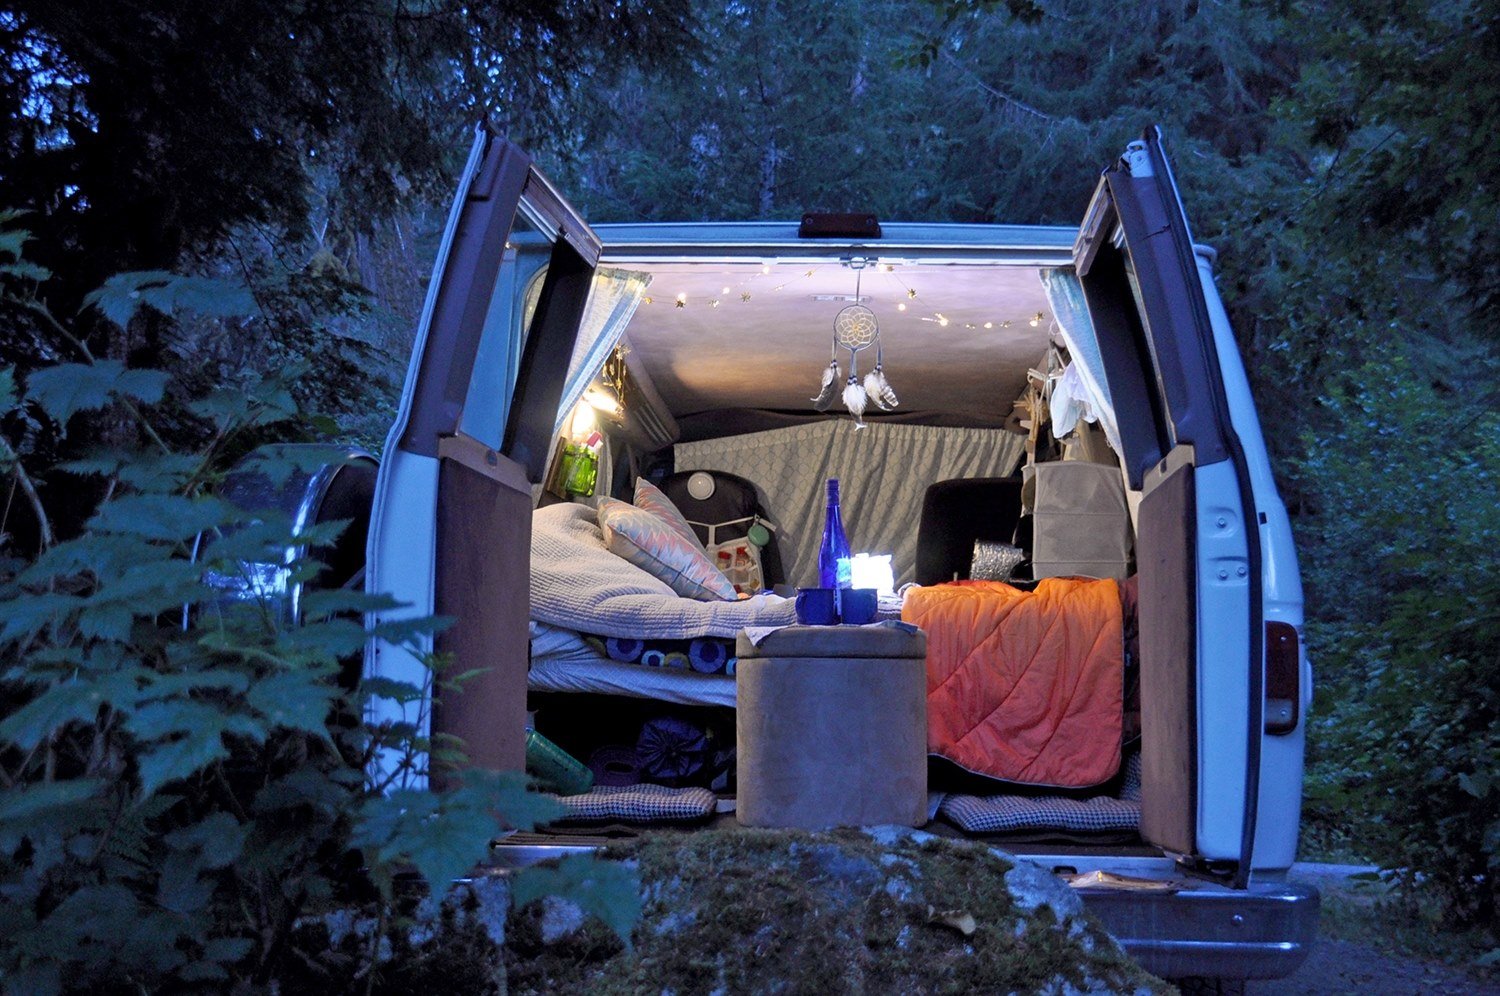
If you have a campervan or RV, you will need to make curtains or window covers to block out the light (and give your tiny home added privacy, of course!). We’re comparing different types of window covers as well as providing a detailed yet simple tutorial that will walk you through making your own DIY campervan curtains quickly and on a budget!
Window coverings are a very important part of your van build that often gets overlooked.
The two most important things a window covering will offer are:
- privacy
- blocking out lights
Without proper curtains or window covers in your campervan, you will likely moon the world while getting dressed. It’s not so bad if you’re in the wilderness, but not a great look if you’re urban camping!
In addition to much-needed privacy, campervan curtains block out lights — whether it be the full moon or street lights in a Walmart parking lot. No matter the source, you’re not getting a good night’s sleep with light streaming in.
In this guide we’ll walk you through the pros and cons of different types of window covers for your camper van.
Campervan Window Covers Guide
- Types of window covers
- Which is better
- Insulated window covers
- Why choose insulated window covers
- How to DIY insulated window covers
- Insulated window cover FAQS
- Where to buy insulated window covers
- Campervan curtains
- How to DIY campervan curtains
- Campervan curtain FAQS
→ Psst! Save yourself hours of research and headaches and jump straight down to our DIY campervan conversion guide!
Types of window covers for your campervan
Everyone has a different window situation with their van. Some people have a passenger van that has tons of windows that need covering (been there!). And others purchase a cargo van with no windows but decide to install some themselves for natural light (also been there!).
Maybe you only have one window… Maybe you have 6.
Whatever your situation, you will need some sort of window covering for your campervan.
We’ve gone about this two (very!) different ways. We’ll go over each method in detail, but here is the basic breakdown:
DIY Campervan Curtains
- offer some privacy
- block out some light
- do not help regulate temperature (unlike insulated covers)
- cheaper
- easier to make
- totally possible to DIY
Insulated Window Covers
- these are magnetic and have a tight seal, giving you complete privacy
- block out light
- help insulate your van (which is huge, and we’ll go over in detail below)
- more expensive
- more time consuming to make
- totally possible to DIY
Which is better: Curtains or Insulated Window Covers?
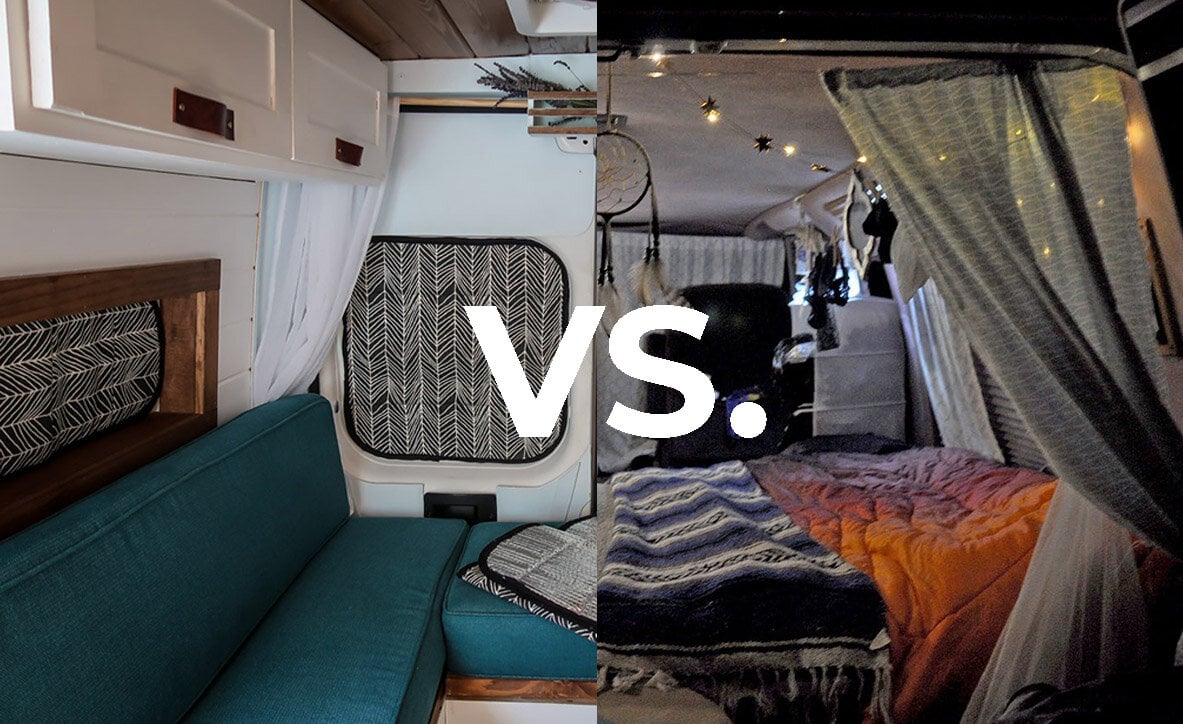
Both are good options for different reasons.
In short, insulated window covers will be of higher quality and give you more benefits (insulation, total blackout, complete privacy) than simple curtains.
That said, making curtains is simpler and a bit cheaper. Not by a ton, but if saving time and money are your absolute top priorities, I think you’ve got your answer.
After reading through the basic bullet points above, you may already have an idea of which solution is going to be best for you.
If you’re still unsure, this is where we’re going to dive in deeper so you know what’s involved with each option. We’ll go over how to make each as well as the estimated budget and timeframe.
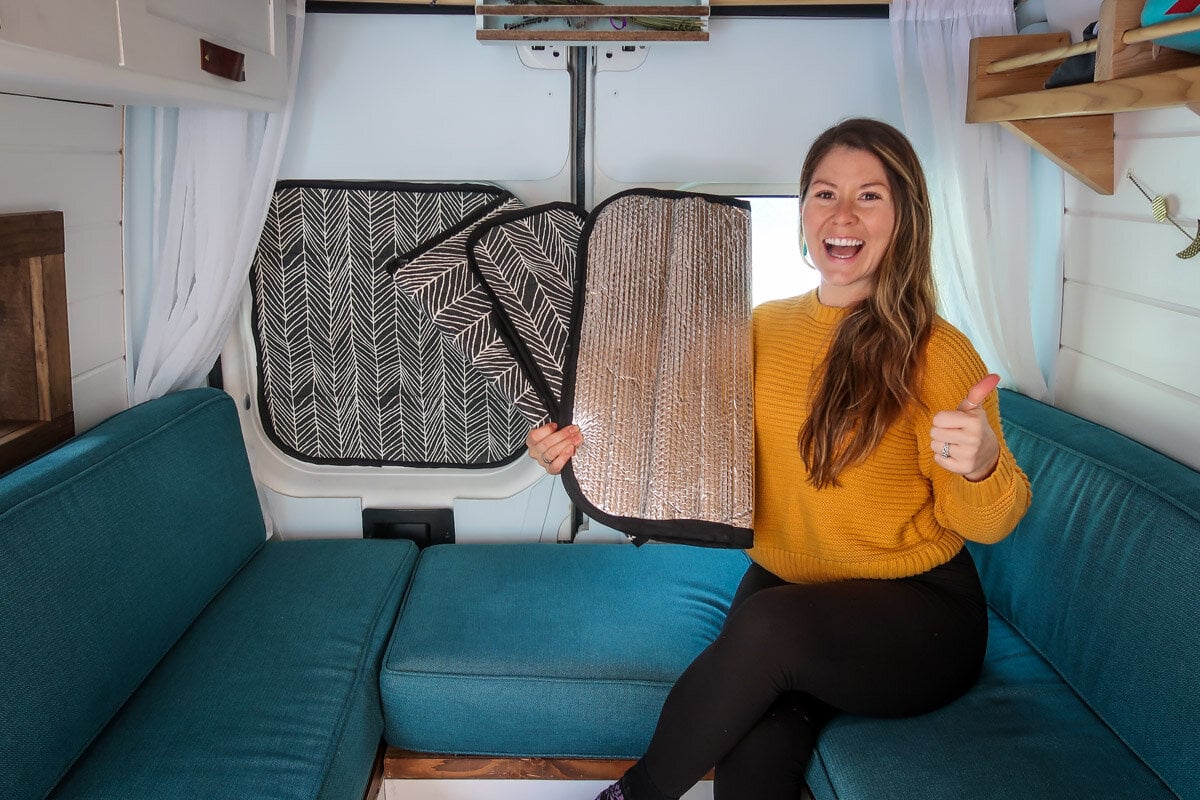
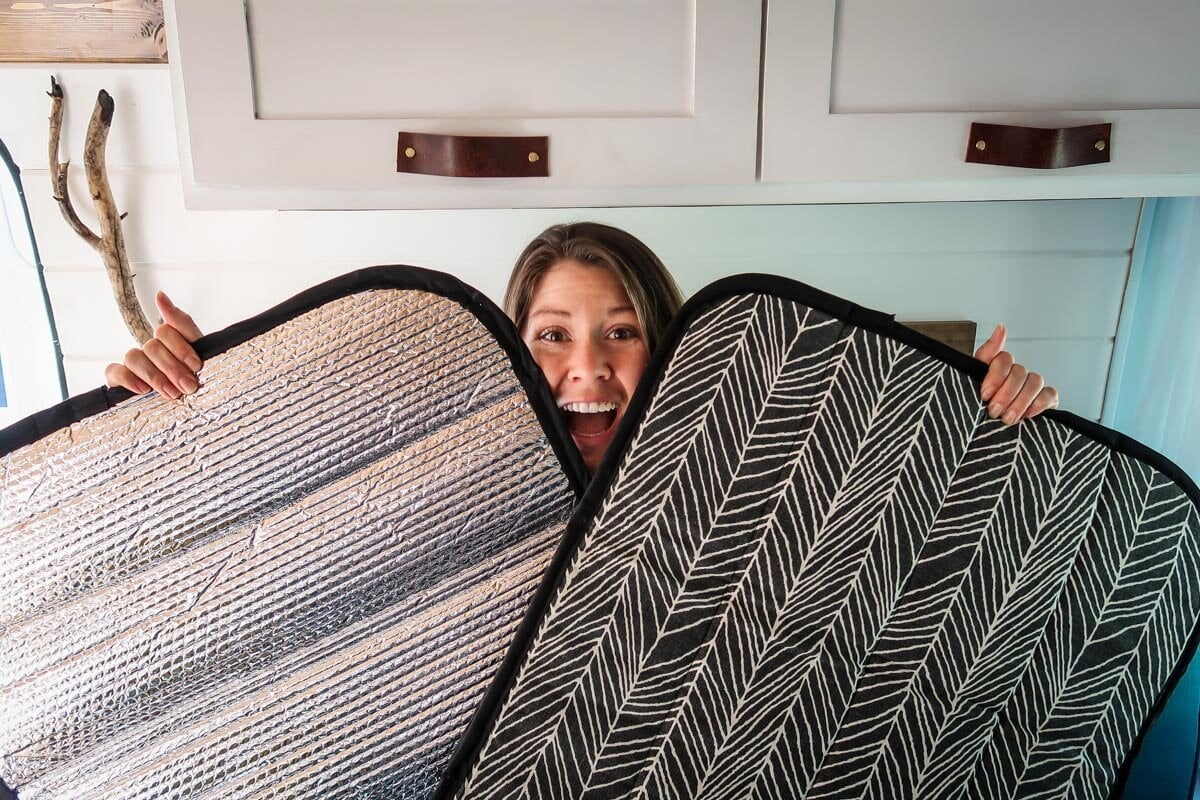
Insulated Campervan Window Covers
After seeing a few others rave about their magnetic window covers that magically snapped in place, I was sold.
“We are definitely getting these,” I told Ben when we began our second campervan build. And then I saw the price.
If you’ve done any research on buying insulated window coverings for your vehicle, you’ve probably noticed they ain’t cheap.
We actually sought out quotes from four different companies — from a small family-run business that uses ethically-sourced materials and has really cute designs (the most expensive!) to one that makes bare-bones coverings with function over looks (the cheapest of the bunch). And then there were two in between.
The average price (between the 4 companies) was $627.
Yep, that’s right…
The absolute cheapest quote we saw was $460 for the 4 window covers (here’s that company if you want to check them out!).
While this is a worthy investment for some — privacy + blackout-curtain + temperature control — we totally get it if your eyes are watering at that price tag. Ours were too.
There are other options…
Make curtains instead
If you’re on a really tight shoestring budget, you can certainly follow our easy DIY curtain tutorial. Just know that an insulated magnetic cover is going to be a much, much better way to cover your windows. This is something you could always “upgrade” later on.
Make your own insulated window covers and save $$$!
Alternatively, if you’re reading this nodding your head, “Yes, I need insulated window coverings now but don’t want to shell out hundreds of dollars,” I have very good news for you.
I spent hours researching, plotting, and designing my own window coverings. I bought and tried out all sorts of different materials.
And I hit the jackpot.
I figured out how to make these notoriously expensive window coverings totally on my own… and I’m sharing my exact process with you!
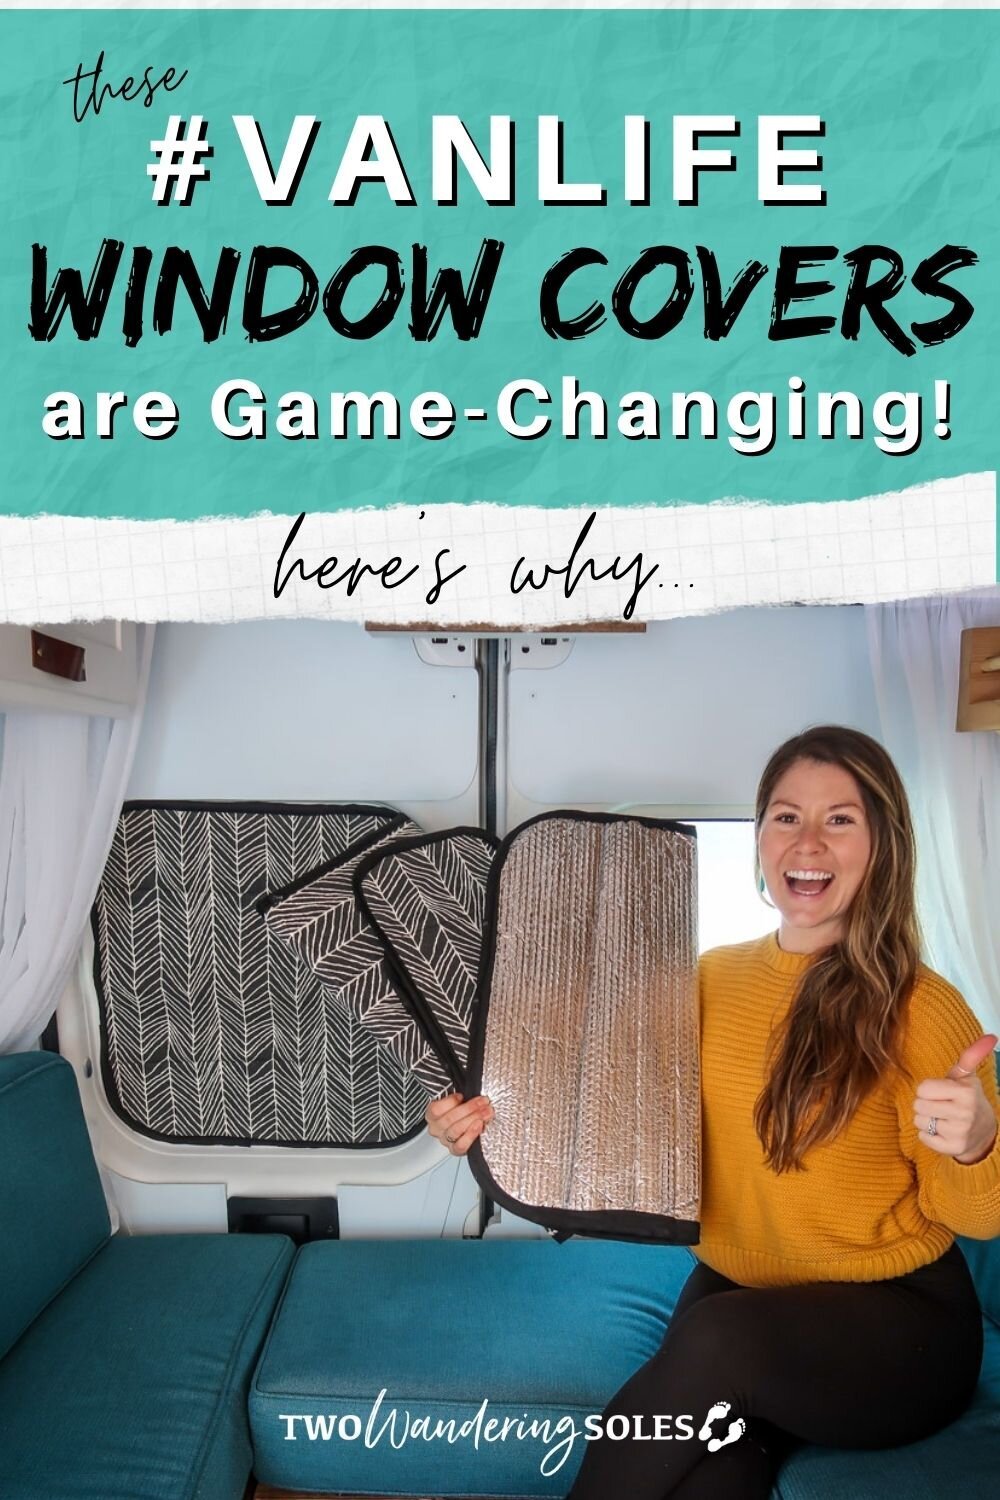
I cannot even tell you how big of a difference these window coverings have made… they are seriously game-changing. I thought my DIY curtains were pretty decent, but after discovering these insulated window covers, there is no going back for me!
Psst! I’m not at all an experienced sewer. I promise that if I can make these window covers, you can too.
Here’s why insulated window covers are game-changing
There are a lot of reasons to choose insulated window covers for your campervan. Here’s why…
a) Temperature Control
In the summer months, these insulated covers helped keep the inside of our van cool. When we’d pull them back, you could feel the heat on the glass that the cover was keeping out.
And alternatively, we’ve been inside our van in the Oregon winter and our magnetic window covers help keep the cold air out.
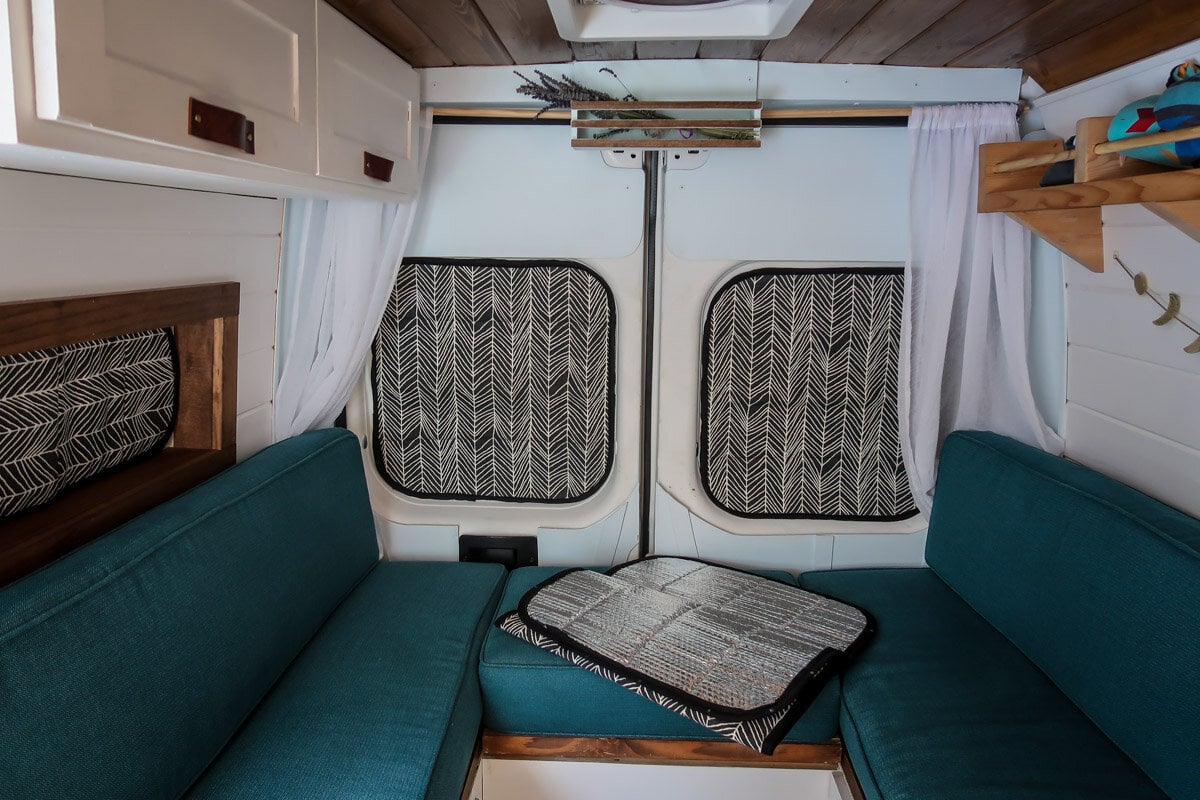
b) Privacy
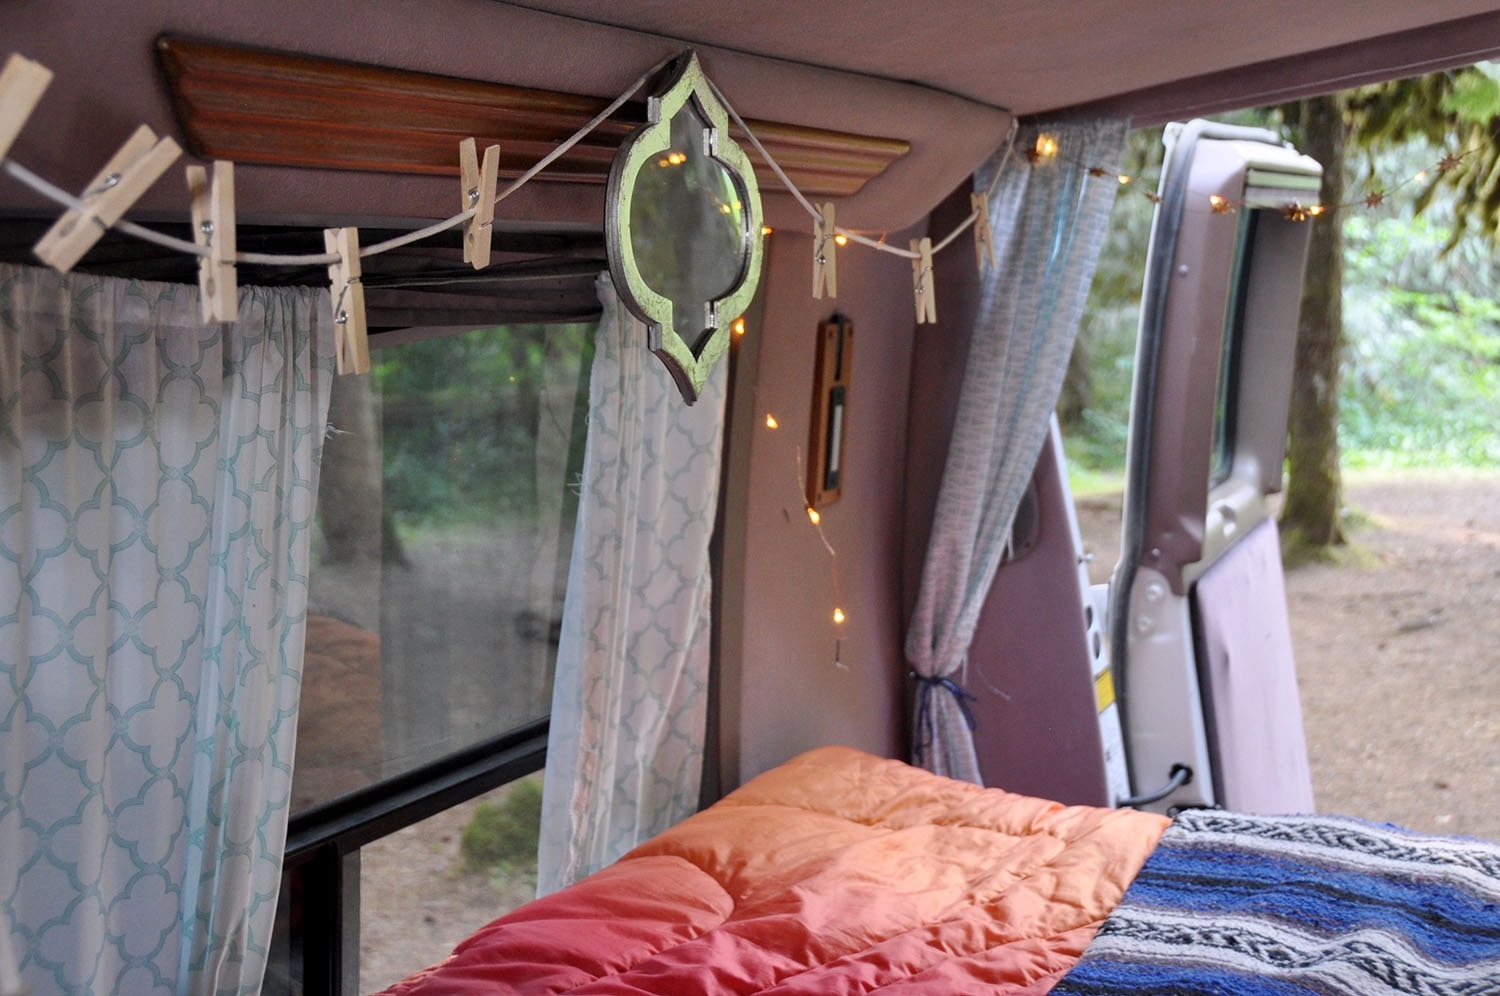
Remember how I said our curtains gapped a bit around the edges? There were a few awkward moments when we’d be pared somewhere and we’d catch people trying to peek inside those gaps. Umm, why?!
But with these magnetic window covers, there’s no gappage (is that a word?!) at all. No way someone can peek inside.
c) Blackout status
If we were to make DIY campervan curtains again, I would probably choose a heavier and darker fabric. I loved the look of the lighter material, but it really didn’t do much for blocking out light.
Embarrassing story time: We soon realized that even when we had the curtains pulled completely closed, you could see our shadows from outside. Ben discovered this while walking back to our van after going to the bathroom and seeing my shadow get undressed. Yikes!
Our magnetic covers, on the other hand, have complete blackout status.
In the middle of the night, we’ve gone outside to look at the stars and you can’t even see a speck of light coming from inside our van. Total blackout. As a passerby, you’d never know there was anyone inside the van, which can be nice when you’re urban camping.
This is also nice for falling asleep because we’re never woken up by headlights or a full moon.
The only teeny drawback is that it can be hard to wake up since it stays so dark inside! But that’s what alarms are for, right?!
d) Simplicity
With magnets around the perimeter of the window cover, these babies snap right into place.
Remember those addicting snap bracelets that were popular in the late nineties? (Or am I aging myself?!) Well, these window covers kind of feel like that — they snap right into place with a satisfying click.
Unlike curtains that have to be adjusted or tied back when not in use, these window covers are ultra slick.
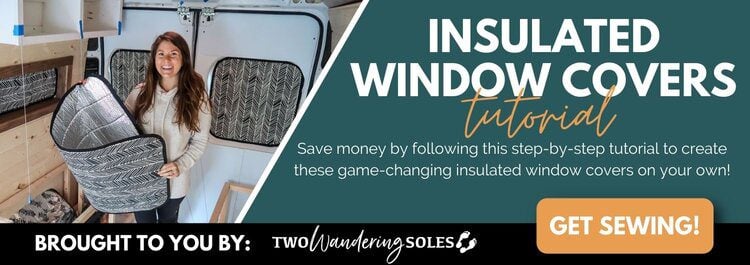
How to make insulated van window covers
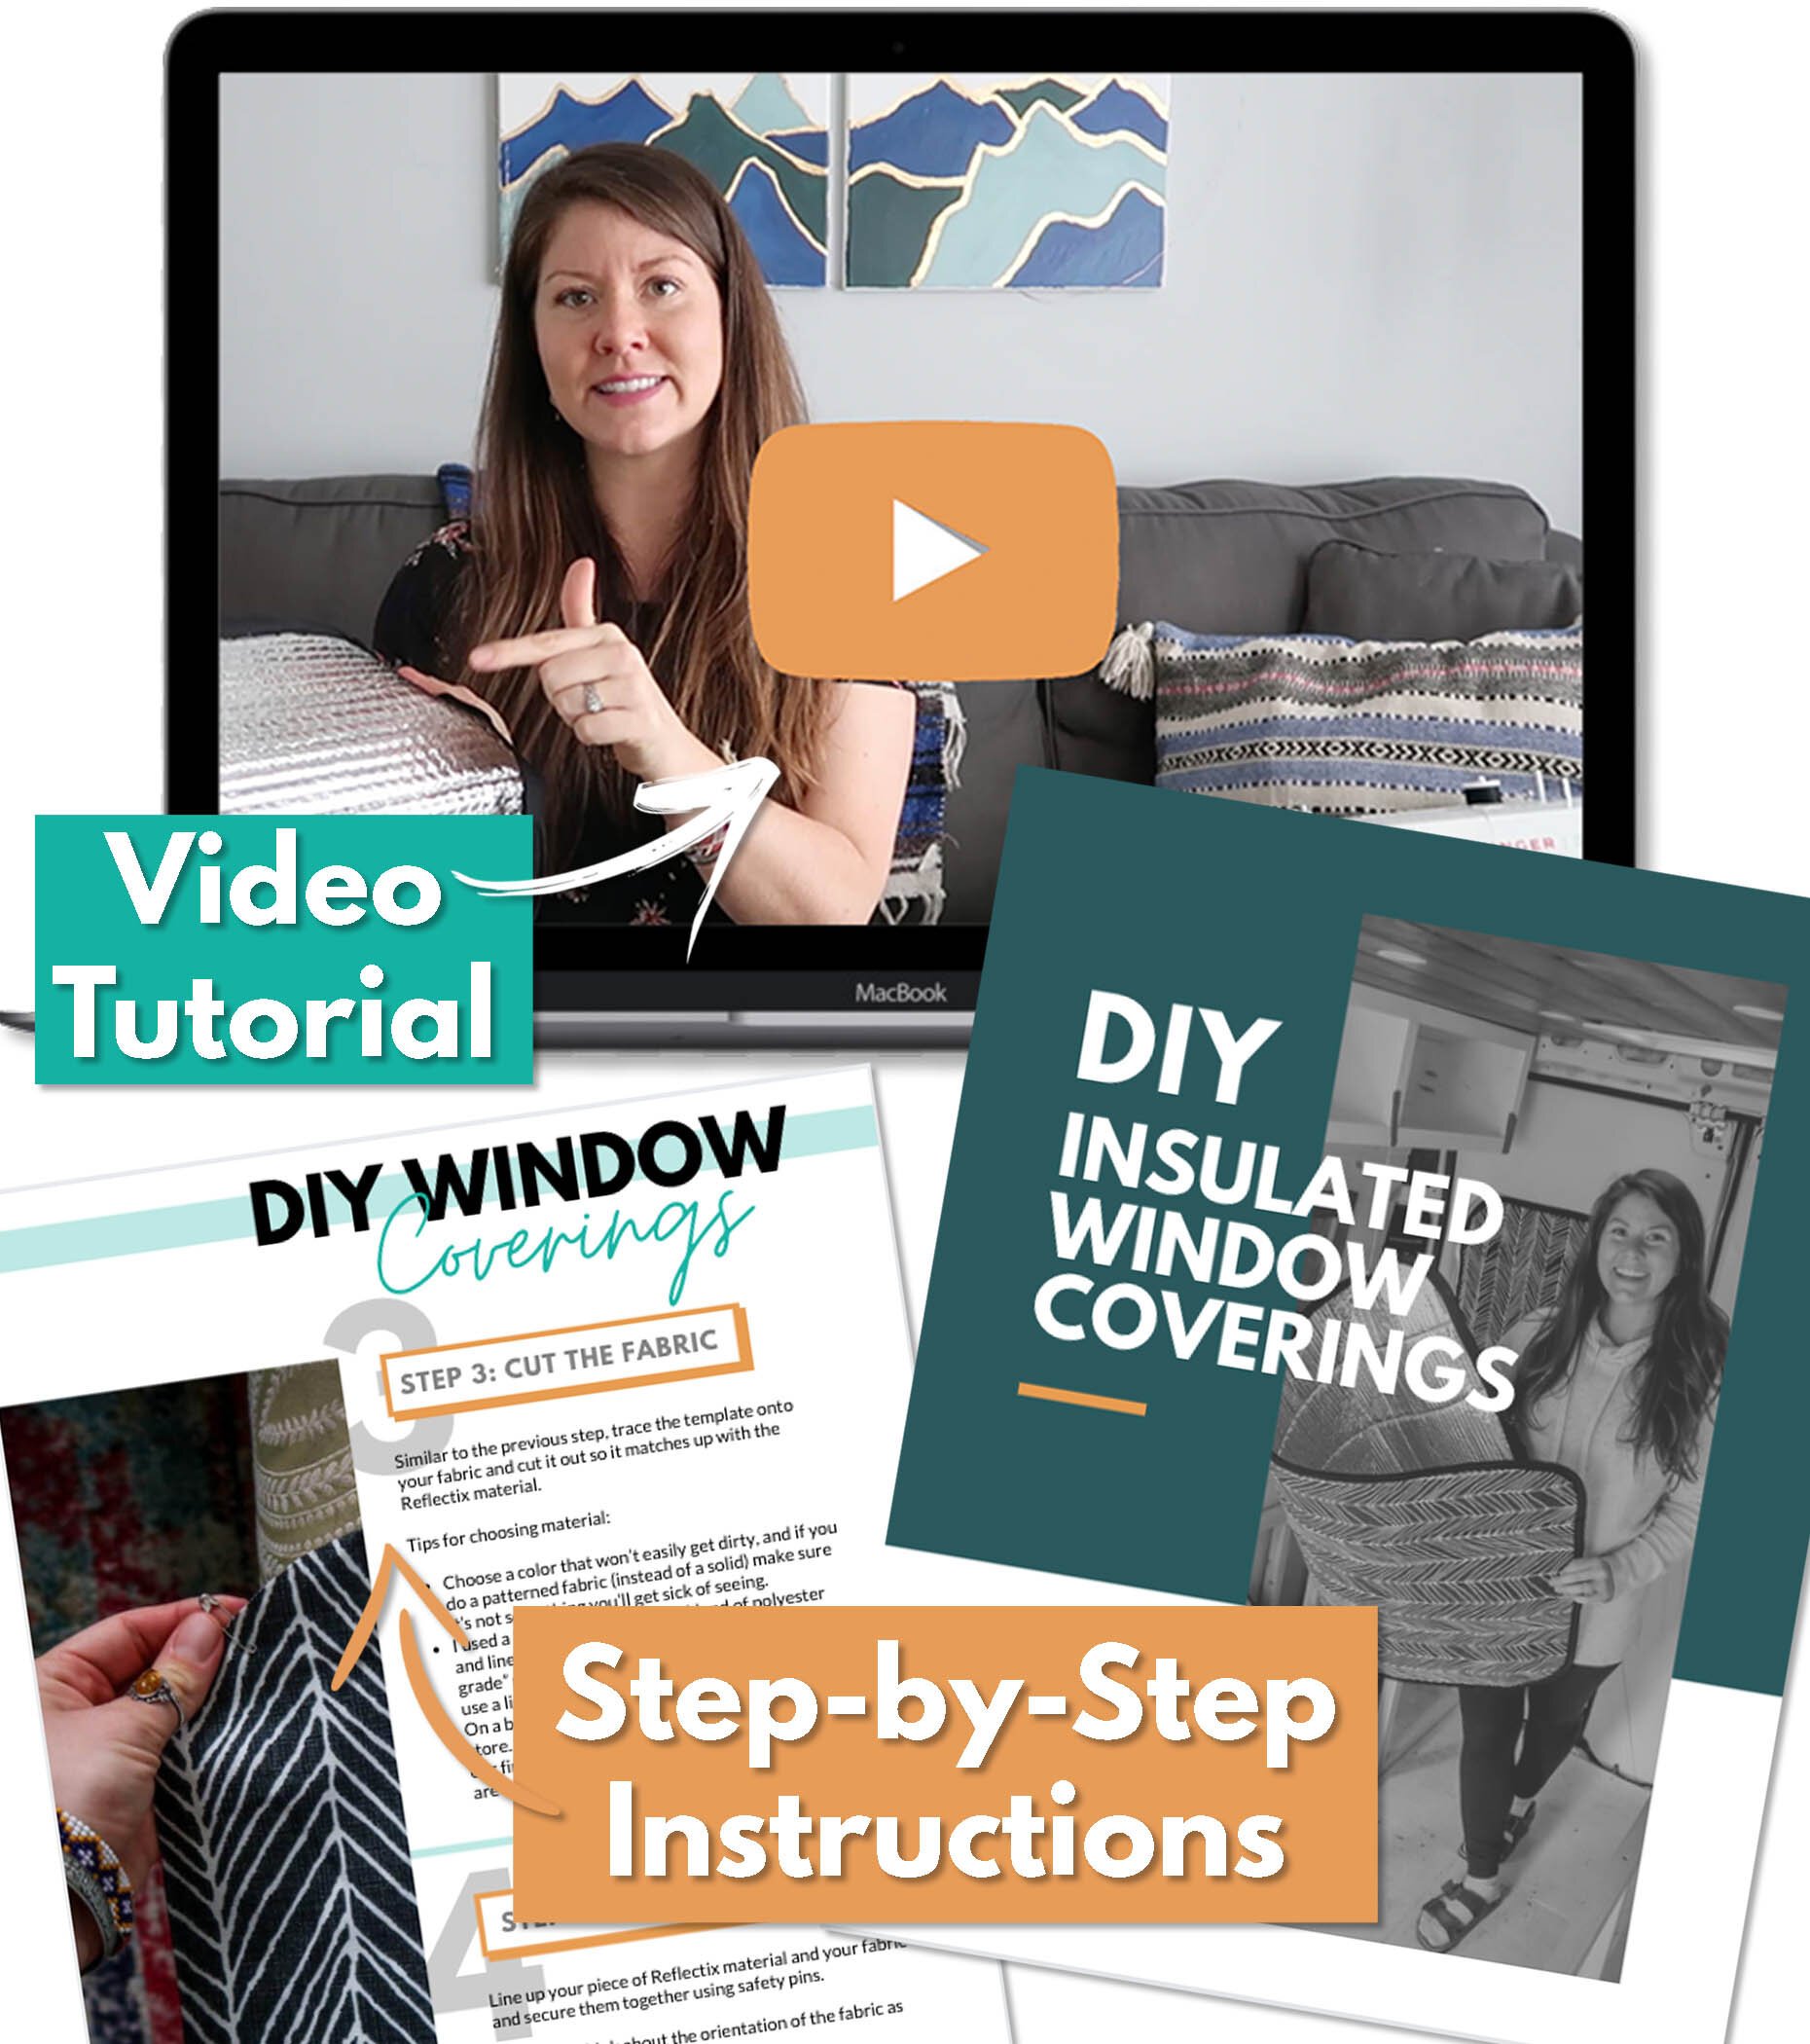
I am so stoked about these that I created a tutorial so others can experience the game-changing magic of these window covers too!
What you’ll get:
- a list of the exact materials I used so you can get started right away
- my proprietary step-by-step instructions that take out the guesswork
- video tutorial where I walk through each step with you
Grab your Insulated Window Covering Tutorial now!
Insulated window cover FAQS
Still have questions?
Will I need a sewing machine for this project?
Yes, you will need to have access to a sewing machine. If you don’t already have one, see if you can borrow a machine from a friend or family member. Alternatively, ask in local FB Groups if someone has a machine you can borrow (Buy Nothing Groups are a great resource for this!).
Want to buy your own sewing machine? I bought a super budget-friendly Singer Start specifically for this project (and for future uses!) and it worked wonderfully.
How much will the materials cost?
The total for you will depend on how many window coverings you make as well as the specific fabric you choose. I tallied every single cent I spent on materials for this project, and it totaled $86.42 for 4 different window coverings.
That’s just under $22 per cover — an absolute STEAL compared to what you’d pay to have them made for you.
All in all, between the materials and the tutorial, you’ll be spending about $100 on your window covers, saving you literally hundreds of dollars! And you’ll be getting a much, much better result than by going the curtain route.
Trust me. I’ve had both, remember?
How much money will I save by making them myself?
Making window covers yourself will literally save you hundreds of dollars. Buying pre-made insulated window coverings is NOT CHEAP!
We got quotes from 4 different companies, and by making them ourselves we saved a whopping $540.58! (True story!)
We want you to save money too! This tutorial will walk you through all the steps so you can make beautiful & functional window coverings on your very first try!
I have never sewed before in my life. Can I still follow this tutorial?
ABSOLUTELY! I hadn’t really sewn much of anything since 8th grade Home Economics class, and my window coverings turned out great. If I can make these, you can too!
Can I still use this tutorial if my windows are different sizes than yours?
Of course! This tutorial will teach you how to make coverings for your exact windows (no matter the dimensions).
Where to buy insulated window covers
Don’t want to DIY?
If you don’t have the time (or patience!) to make these window coverings yourself, buying them isn’t a bad idea at all. They really do make a difference, and there are some great (small) companies out there that your purchase will support.
Shop around and see which ones are best for your van:
- Xplr Outfitters: The least expensive option we’ve found for buying pre-made van window covers.
- Overland Gear Guy: Window covers and other van accessories for sale
- CocoVan: With some patterns available, this one offers a little more “personality” than the two options above.
- Moohah: With ethically-sourced fabrics, this family-run brand has the prettiest window coverings of the bunch (in our opinion!), but they’re also the most expensive.
- While Moohah is on the higher end price-wise, we do have an exclusive discount code just for our readers that’ll give you 10% off your total purchase: WANDERINGSOLES
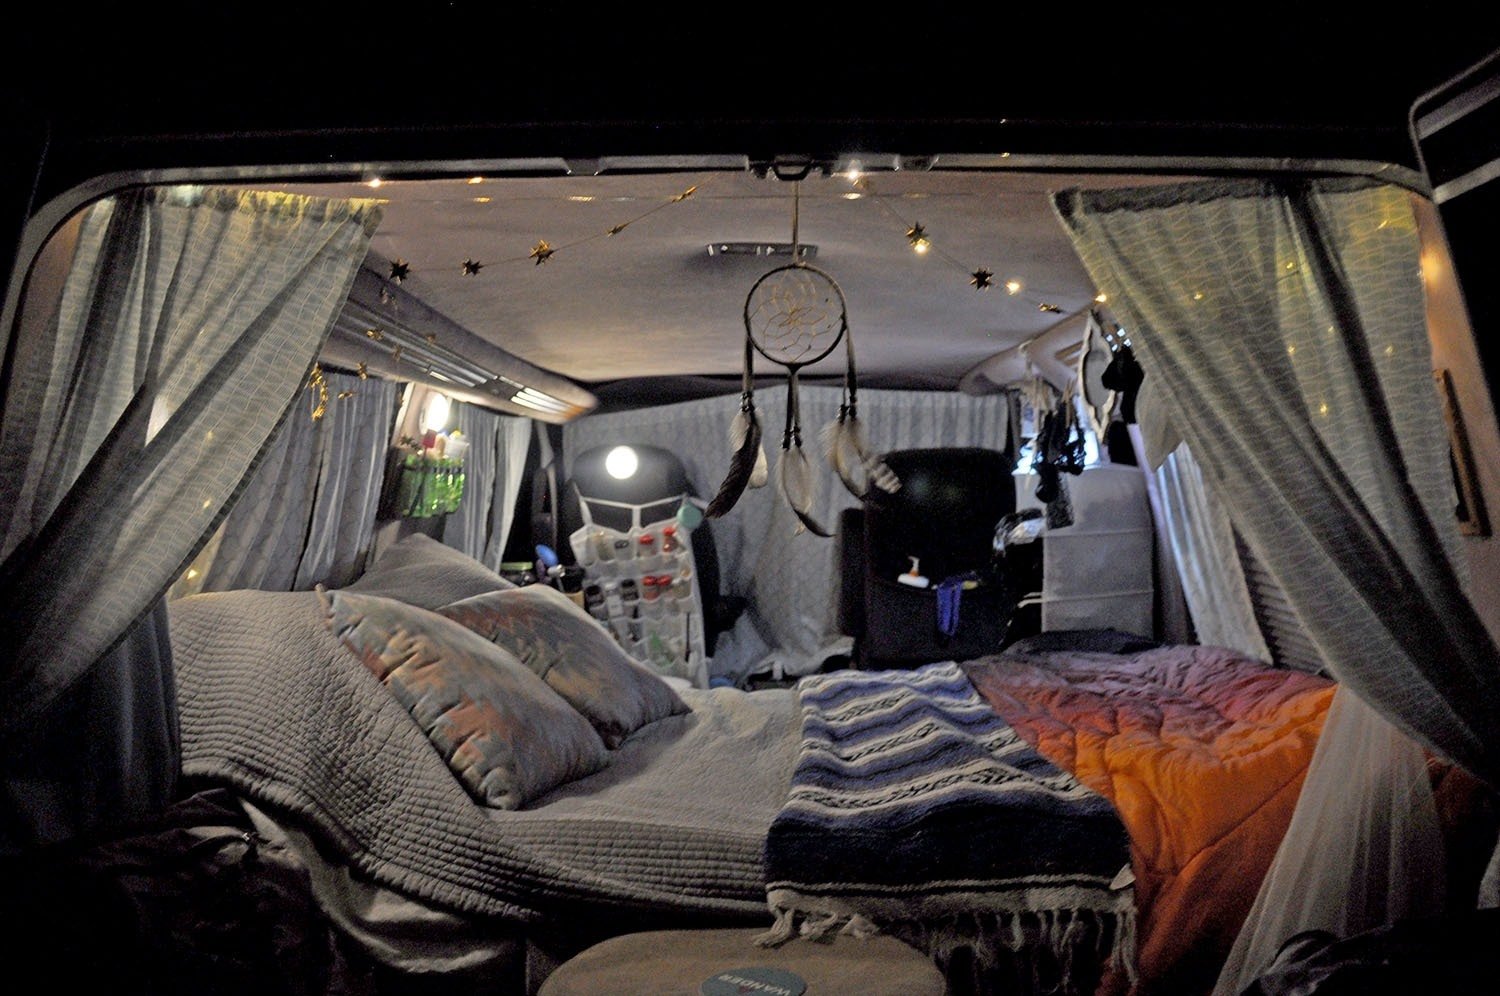
DIY Campervan Curtains

As an alternative to insulated window covers, there is always the option for curtains…
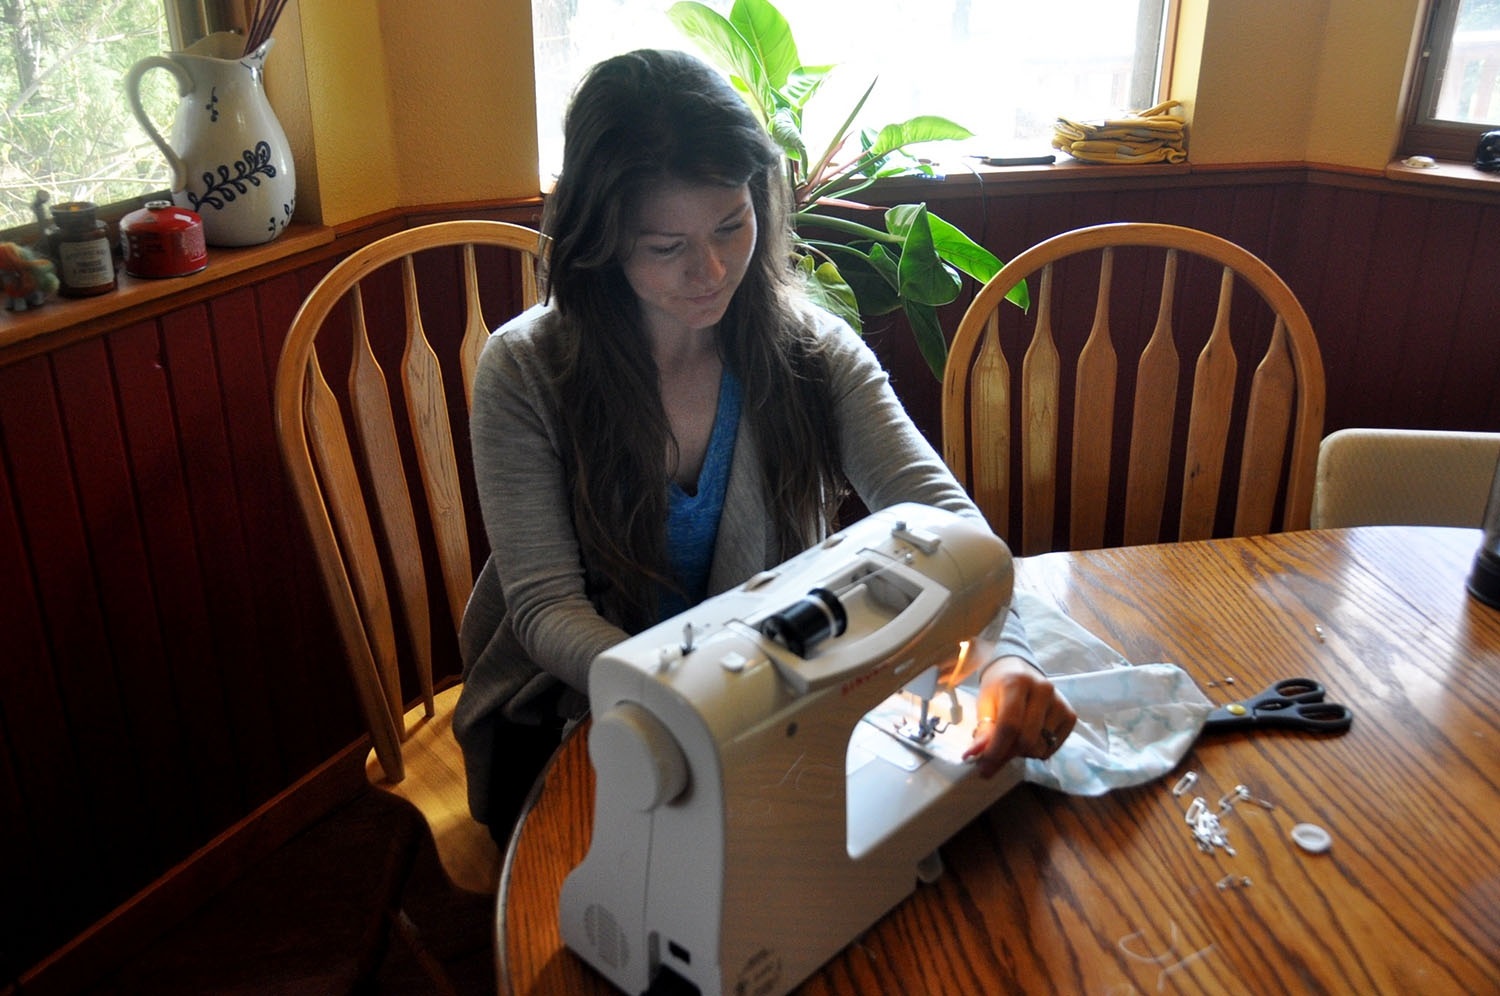
For our first campervan build, we were on a tight budget, so we went super simple. We made DIY curtains that were incredibly cheap (I used sheets found at a thrift shop and a borrowed sewing machine!).
While they were good for keeping our van build budget to a minimum, they served only the most basic function — they gave us some privacy. And when I say some privacy, I really only mean some.
The curtains gapped a little at the edges and they were also pretty lightweight, meaning at night our shadows could be seen through them. Since they were so lightweight, it makes sense that they didn’t do a very good job of blocking out light.
And they did absolutely nothing to control the temperature inside our van. I didn’t even know that was a thing until I learned more about insulated window covers on Instagram.
Simple DIY campervan curtain tutorial
Still set on going the curtain route?
That’s totally fine! As we mentioned earlier, making your own campervan curtains is certainly a bit cheaper and simpler than going with insulated window coverings.
We are sharing exactly how we made our own budget-friendly campervan curtains as well as letting you in on some things we would change if we were to do it again.
Hindsight, amiright?!
Alright, let’s jump in…
Materials needed:
- Fabric or sheet
- The amount you get will depend on how many windows are in your vehicle. Step#2 will go over how to measure the windows.
- Picture hanging wire
- Get the plastic-coated kind! It’s a bit more expensive, but it is SO much easier to slide the curtains on. We used both, and wished that all of ours were coated. Again, the amount you need will depend on how many curtains you need to make.
- Screws (4 per window)
- Thread
- Safety pins
- Pencil
- Measuring tape
- Scissors
- Sewing machine (hand-sewing will take infinitely longer!)
- Don’t have a sewing machine? Try borrowing one from a friend or family member, or ask in a local FB Group (Buy Nothing Groups are a great resource for this!).
- Drill
- Velcro (optional)
- Twine or rope (optional)
Psst! Want to save yourself the headaches and hours of research we went through and get straight to building the campervan of your dreams?? Learn more about Van Conversion Academy.
1. Plan where you want curtains
Obviously, you’ll want them covering each window, but there are some other less obvious spaces you’ll likely need curtains.
- Divider Curtain: We made a large curtain that is strung up right in front of the driver and passenger seats to keep out all light (and wandering eyes!) from the front of the car.
- Storage Curtains: We also made a curtain for beneath the counter on our simple campervan kitchen so we could store our pots, pans, waste bucket, and water tanks. (See photo below)
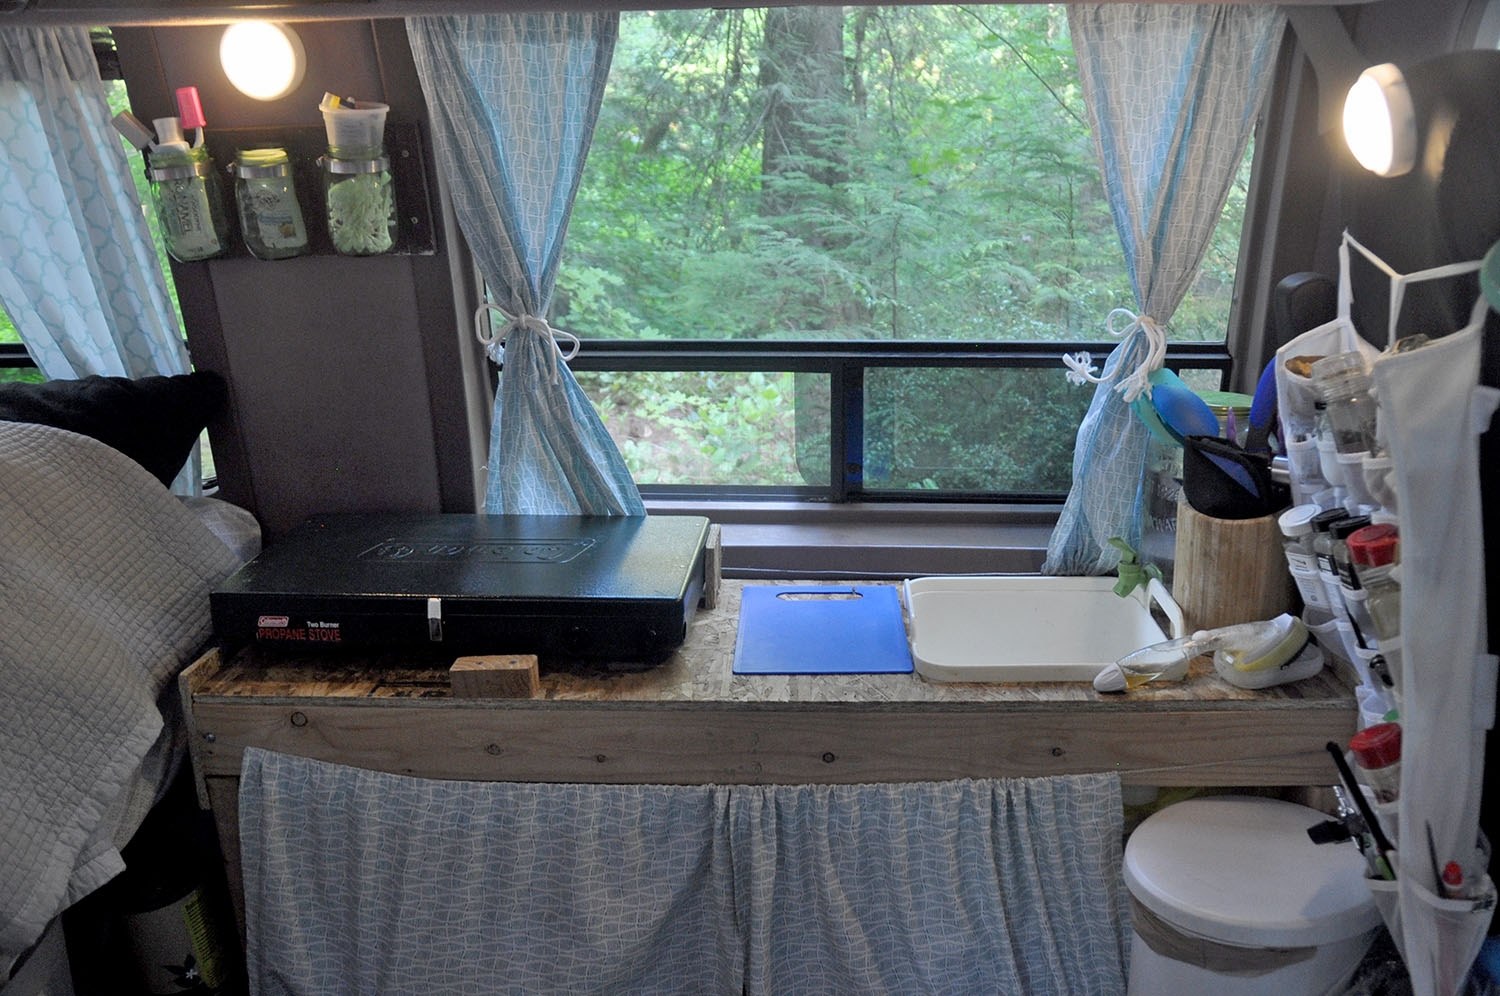
This is a fun and practical way to add a splash of color to your interior while concealing those not-so-pretty things. Talk about a cheap and creative storage solution for a campervan!
2. Take measurements
Some windows may be slightly different sizes, so be sure to measure each one individually. Write down each measurement. Then add 2 inches to each window’s vertical height, and two inches to the window’s horizontal length. (You will need each piece to be larger than the space itself.)
Tip: Don’t forget to make one giant curtain that blocks light from the main windshield – the biggest window in your car! We kept this curtain open during the day, but closed it at night to block out lights and give us privacy.
3. Get your materials
You’ll find all the materials listed above. In this section, we have a few tips on two of the most important materials.
a) Fabric
We bought 2 sheets from Goodwill for $3 each. We would have only needed one, but I liked both patterns and wasn’t sure how much I would “screw up”.
Money-saving tip: Buying sheets was way cheaper than buying fabric at the craft store, by the way. And the ones we picked out at Goodwill were in perfect shape. You could even use old ones you have lying around at home!
What we’d change: While going with sheets will save money, you may want to choose a heavier fabric in order to do a better job at blocking out light and giving you more privacy. I really liked the look of the white sheets, but as we’ve already mentioned, the thin material wasn’t the best at blocking out light or giving full privacy. Perhaps even a darker color sheet would have worked better in our case.
b) Picture Wire
Your measurements should also give you an idea of how much picture wire you’ll need.
You’ll need 2 pieces per window that stretch the horizontal length of the opening. Add 2 inches to the actual measurement so you have enough to secure it to the screw.
And before you ask, yes, you will need picture wire along the bottom of the window. I didn’t think it was necessary at first, but without this second line of wire, the curtains will fall inward and leave an awkward gap.
Where to buy picture wire? You can find picture wire at craft stores, Walmart/Target or for cheaper online here.
4. Cut curtains according to window measurements
See Step #1 for details.
Don’t forget to add 2 inches to the vertical height of the window, and two inches to the horizontal length of the window.
4. Fold and pin
Place your fabric underside-up on the table you’re working on. It should be laying horizontally in front of you, the way it will cover the window.
Using the tape measure and pencil, make two markings:
- The first marking should be 1/2 inch from the top
- The second marking should be 1 inch from the top
Fold the fabric over so the crease is on the 1/2-inch mark. Use safety pins along the length of the fabric to hold the fold in place. (Since you cut your fabric 2 inches taller than the window’s height, you’ve already accommodated these folds.)
5. Sew a “tunnel”
Now, sew a straight line near the 1-inch mark, to create a “tunnel” for the wire to be strung through.
Make sure the “tunnel” is not too tight because this is where the wire will be strung through. If it’s too tight, you won’t be able to move the curtain easily. I accidentally did this with my first attempt and had to start over.
6. Repeat Step #6 on the bottom edge of the fabric
Now you should have a “tunnel” on the top and bottom of this piece of fabric.
7. Cut each piece in half (vertically)
We will be creating 2 curtains for each window — one on the left and one on the right. This allows you to open them more easily, and you simply pull them to the middle when you’d like them closed.
Now that you have both the bottom and top “tunnels” completed, find the middle of the fabric, and cut it in half vertically.
8. Clean up the edges
Now, your horizontal edges should be looking nice, but the vertical edge is still raw. Fold the vertical edge over and sew it up on either side.
You don’t need to worry about creating a “tunnel” since no wire will be strung through this vertical edge.
Note: As you fold this edge over and hem it, you will be closing the tunnels at the top and bottom of the fabric. Don’t worry, we will address this in Step #11.
Repeat this step on the other half of the fabric to complete two curtains for each window.
9. Repeat the process for all windows
Repeat this process until all curtains have been sewed.
10. Secure picture wire to each window
Using a drill, put screws in the 4 corners of each window, only screwing them in halfway.
Start on the top left screw and attach the picture wire by wrapping it around the screw tightly. Now, drill the screw in until it is firmly in place and holding the wire.
11. Thread the curtains
First, cut a small hole in the outer edge of each corner of the fabric with scissors into which you can insert the wire.
Now, thread the wire curtain through the “tunnel” you created in the fold of the fabric.
Repeat this process on the bottom edge. Now thread the second half of the curtain.
12. Drill it into place
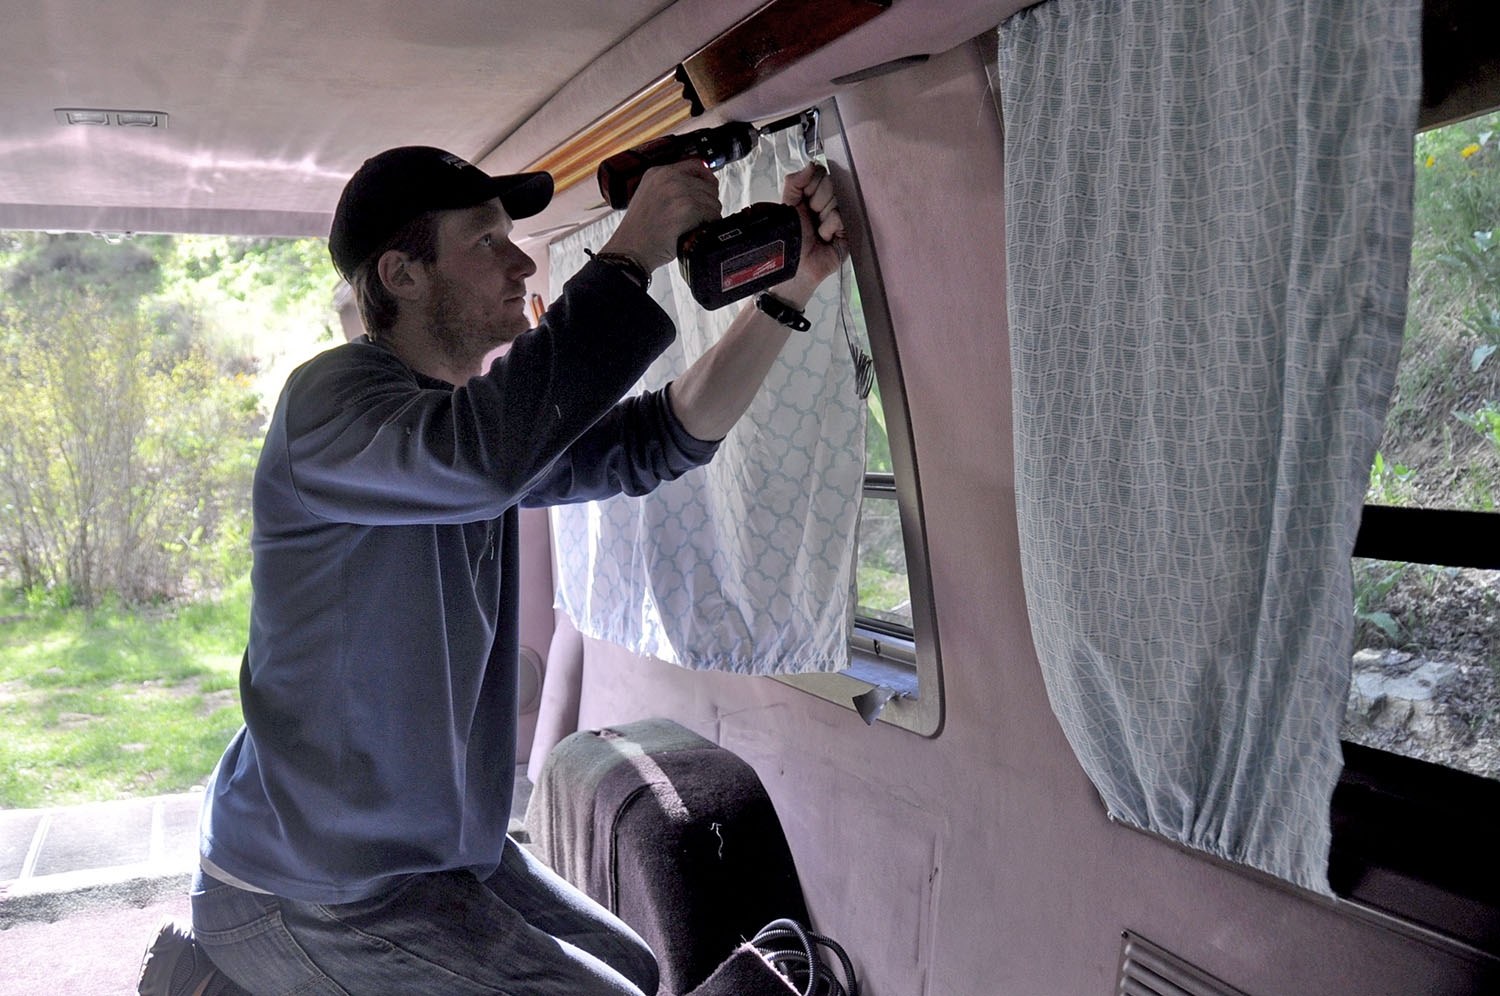
Now, pull the wire along the length of the window, keeping it super taut.
Wrap the wire around the second screw and use the drill to tighten the screws until the wire is secure.
13. Final (optional) touches
If there are any gaps between the curtains, you can add velcro to close them. You can also use twine or a rope as ties to hold the curtains back when you’re not using them.
Now you have privacy curtains that not only keep the light out but also add a touch of style to your new home.
FAQs about DIY campervan curtains
Still have questions?
We’ll do our best to answer them…
How much do DIY campervan curtains cost?
With the thrift store sheets, thread, picture wire, screws, and velcro, we spent a total of $26 for all our curtains.
This cost will be higher if you get your fabric from a craft store.
Keep in mind that our Insulated Window Covers only cost $86.42 for 4 different window coverings (aka just under $22 per cover). That’s not that much more expensive than making curtains (especially if you choose to go with a heavier fabric). So it might be worth the extra bit of money to “upgrade” to an insulated covering instead.
How long will it take to make DIY campervan curtains?
This will vary depending on your sewing experience. I’m a bit embarrassed to admit that I had to start with a video tutorial on how to use the sewing machine, so I started out pretty slow.
Personal Experience: I worked on this project for a couple of hours a day for 3 days. I would say in total, I spent about 6 hours on this project.
If you’re pretty savvy with a sewing machine, I bet you could whip out some curtains in just a couple of hours. You’ll also need another half hour or so to secure them in your van.
Building a campervan on a budget?
We feel you. We build our first campervan for a grand total of less than $3,000. That included the vehicle, all the title and registration fees, plus everything inside!
We put together some resources for others that want to get into vanlife without spending a ton of time or money on the build:
We truly hope these guides are helpful for you as you begin your vanlife journey!
DIY campervan conversion guide
Simplify your van build & get on the road faster!
Want to save yourself the headaches and hours of research we went through and get straight to the building process?
We created Van Conversion Academy, a DIY campervan conversion guide, because it’s exactly what we wished we’d had when we were building our campervans.
Save yourself the time and money and get straight to the building process with step-by-step instructions, video tutorials, blueprints you can actually copy and tons of insider tips and recommended products to get you on the road faster!
Click below to learn more about Van Conversion Academy.

You may also like…
We have TONS of resources on converting your own campervan and #vanlife in general.
Check out our Ultimate Guide to Van Life for all the answers to your most burning questions, or read some of our favorite articles below:
- Campervan Gear Essentials: The Ultimate Packing List
- Inspiring Campervan Experts and Their Advice for You
- Living in a Van: Road Trip Budget & Daily Costs of Vanlife
- Van Life Q&A: All You Need To Know About Campervan Life
Interested in engaging with others about all things #vanlife? Join our Vanlife Facebook community!
Don’t forget to grab your FREE Vanlife Jumpstart Toolkit!
Save this article on Pinterest for later!
We want to hear from you!
What questions do you still have about making your own campervan curtains or insulated window covers? Let us know in the comments below!

Katie Diederichs is the lead writer and co-founder of Two Wandering Soles, where she creates in-depth travel guides, itineraries, and tips designed to help readers plan better trips with confidence. With a background in journalism, photography, and design, she combines thorough research with firsthand experience to deliver clear, practical, and visually driven travel content. As the primary trip planner, Katie turns complex logistics into easy-to-follow advice travelers can actually use.
Hi, it looks like the link is not working for your DIY tutorial and I am very interested in it!
Hey Kristi, the link to the DIY window cover tutorial is linked throughout the post, but I’ll add it here too: https://vanconversion.academy/courses/window-covers
If you’re looking for the instructions on how to make our simple window curtains, those instructions are just in the second half of the article. Cheers!
What are the key differences between DIY campervan curtains and insulated window covers as outlined in the article?
This drapery hardware can make your home have a beauty and a style that is beyond one’s imagination. For better reference
G’day,
Will I be able to buy the materials for the magnetic covers in Australia? To buy from Amazon we have to use the Australian Amazon
I am looking forward to your reply
Hi there!!! I LOVE your curtains, great job and thanks for doing all of the research ! I know that’s the let that takes the longest. I was wondering how you screwed into the metal? I’ve tried and can’t get the screw to go in. Are there certain ones that work best or am I just doing it wrong?
Hi there! I could have sworn I’ve been to your blog before but after browsing through some of the articles I realized it’s new to me. Regardless, I’m definitely happy I stumbled upon it and I’ll be bookmarking it and checking back frequently!
Hey there! Thank you so much for sharing! Looks like the link to (https://vanconversion.academy/courses/window-covers) is no longer active. Is there somewhere else I should look for inspiration on insulated covers? Excited to dig in 🙂
Hey Adam, the link seems to be working so I’d say give it a go one more time. We love our window covers and they are definitely game-changers when it comes to keeping your van cool in the summer and cozy in the winter. Feel free to reach out if you have any other issues. Cheers!
https://vanconversion.academy/courses/window-covers
Nevermind, just my work connection 🙂
Keep up the great work and thanks for the guidance!