
Havasupai is one of the most magical places in the USA, but hiking there requires a bit of preparation. We’re sharing exactly what to expect, things to pack, and tips for your Havasu Falls hike that’ll make the experience even better!
If you’re planning a backpacking trip to Havasupai, one of the biggest things you’re likely wondering is what to expect on the hike to Havasu Falls.
Many people get a little overwhelmed at the prospect of hiking from the rim down into the Grand Canyon (and out again). Plus, the distance of this hike – at 20+ miles round trip – can sound like a lot.
However, I will assure you right now that with the right planning and preparation and the right attitude, the Havasu Falls hike truly won’t be so bad.
Still not convinced? I understand the apprehension…
You might be wondering:
How long does the hike to Havasu Falls take?
How difficult is it?
What’s the toilet situation like?
Good news: We’re about to cover the answers to all of these questions and more in this complete Havasu Falls hiking guide.
We’re also going to explain exactly what to expect on the hike, some of our top tips that will make your journey (so!) much better, as well as what we think is the perfect Havasupai itinerary.
Our personal experience hiking to Havasupai
Havasupai has been on our bucket list for years. In February 2020, we scored permits in the lottery system (which no longer exists) and we were so stoked… until, well, the world fell apart and our permits were pushed back again and again.
Finally when we went in 2023, it felt like an eternity of waiting. Well, it lived up to all our expectations and more. And let me tell you, the hike in is not all that bad (in my personal opinion).
I personally felt like the hardest part was the sheer distance and some of the logistics, all of which we’ll be diving into throughout this article so you have the best possible experience!
Let’s GO!!
Havasupai hiking guide
- Hiking map
- Hike stats
- What to expect on the trail (mile by mile rundown)
- Tips for hiking to Havasupai
- Havasu Falls general FAQs
- Getting to and from the trailhead
- Itinerary for hiking Havasu Falls
Good to know: You’ll see it referred to as both Havasu Falls and Havasupai in this article (and elsewhere on the Internet). Click here for more info on the difference.
Havasu Falls hike map
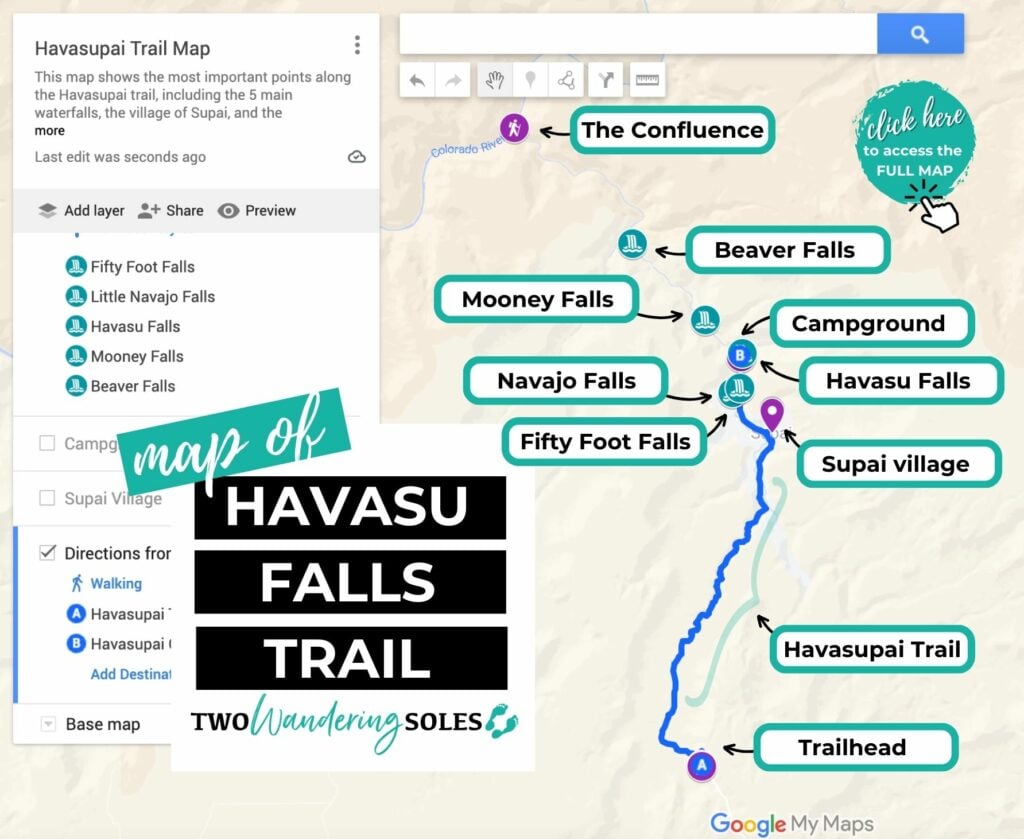
Above is a rough map of the hike to Havasupai so you can see the trail in proximity to all of the waypoints, such as the village of Supai, the campground, and the waterfalls. Click on the map to get directed to the interactive version in Google Maps.
Havasu Falls hike stats

- Starting point: Havasupai Trailhead (also known as Hualapai Hilltop)
- Ending point: Havasupai Campground (this is the start of the campground – you will likely need to hike further through the 1-mile campground to find a spot)
- Distance one way: 10 miles*
- Elevation: roughly 2,400 feet of elevation loss on your hike in, and 2,400 feet of elevation gain on your way out
- Type of hike: Out and back (multi-day)
- Difficulty: Moderate
- Some ratings have this trail marked as “hard”, but I think that’s because it is long. The hike itself is mostly flat. For more info on the trail’s difficulty, jump here.
- Permit: Required
Before we go any further: Do you have your permit yet? If not, be sure to check out our step-by-step guide that explains how to get a Havasupai permit.
*A note on total distance
When it says the hike is 10 miles one way, you may be thinking, Okay, great – it’ll be 20 miles total.
But I can tell you right now that you’ll be hiking far more than 20 miles on this backpacking trip.
It’s hard to really give a definitive total distance to expect for a few reasons:
- It depends where you camp: It is roughly 10 miles from the trailhead to the start of the campground. The campground is about 1 mile long, and if you camp towards the end of it (like we did), you’ll likely do at least 11 miles just on your way in.
- It depends how many waterfalls (and which ones) you choose to visit: The 10-mile distance only refers to the hike to your campsite. You will undoubtedly do lots more hiking during your time at Havasupai, as the main waterfalls are spread out and getting between them will rack up more miles. Just getting to and from Beaver Falls from the campground is about a 6-mile round trip.
- It depends if you do the confluence hike: If you choose to add the optional hike to the confluence of the Colorado River, you’re looking at adding at least another 12 miles.
Our personal experience: We personally racked up 40+ miles of hiking during our 4 days on this backpacking trip (including the confluence hike).
Psst! If you are a newbie to backpacking and not sure where to start. We have a guide to backpacking for beginners on our sister site that has everything you need to know to feel comfortable hitting the trails!
What to expect on the trail
If I were to sum up the trail in one sentence, here’s what I would tell you:
The trail is long but mostly flat, and the switchbacks near the trailhead weren’t nearly as challenging as I built them in my head to be.
I will say that we hike and backpack a lot, so we’re pretty used to long days of hiking and carrying a big pack. If backpacking is totally new for you, it might feel more difficult.
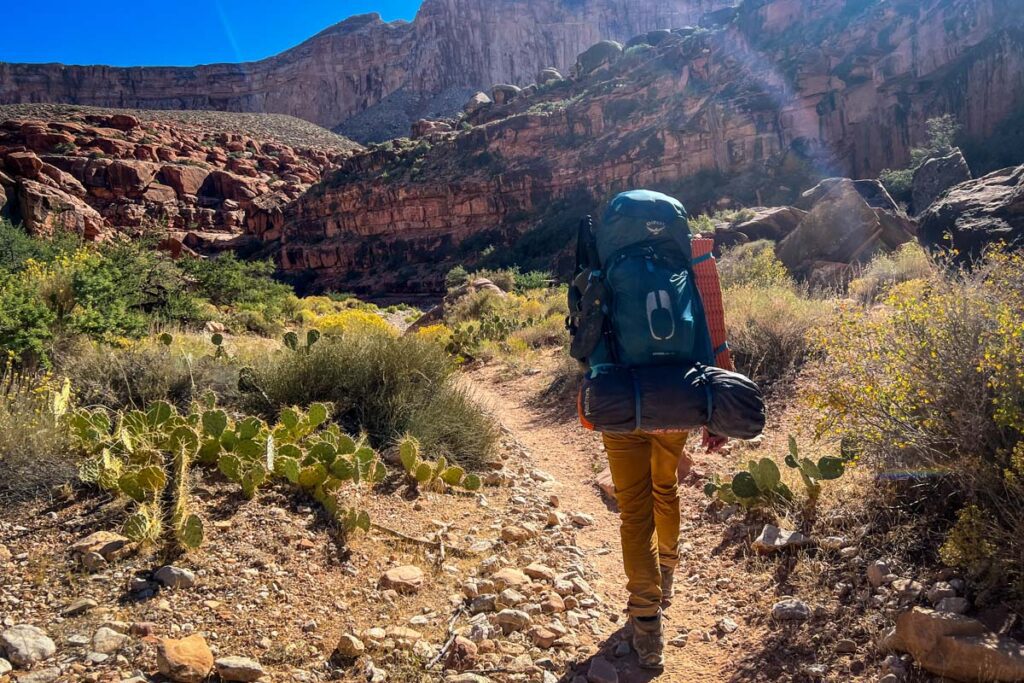
1st section: Descending into the Grand Canyon
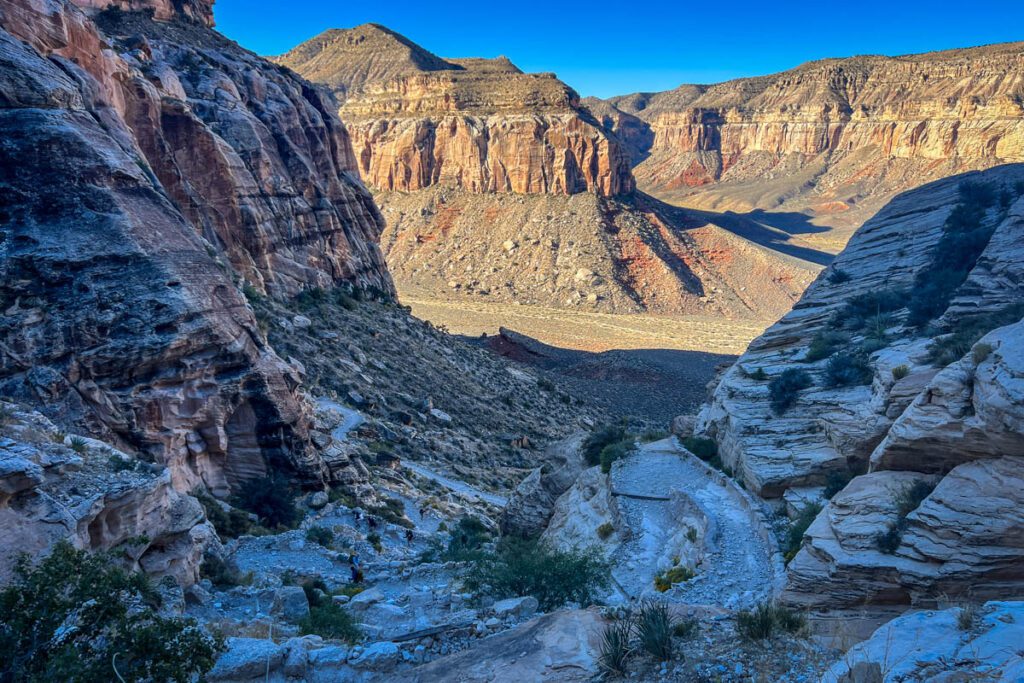
- Mile 0 – 2
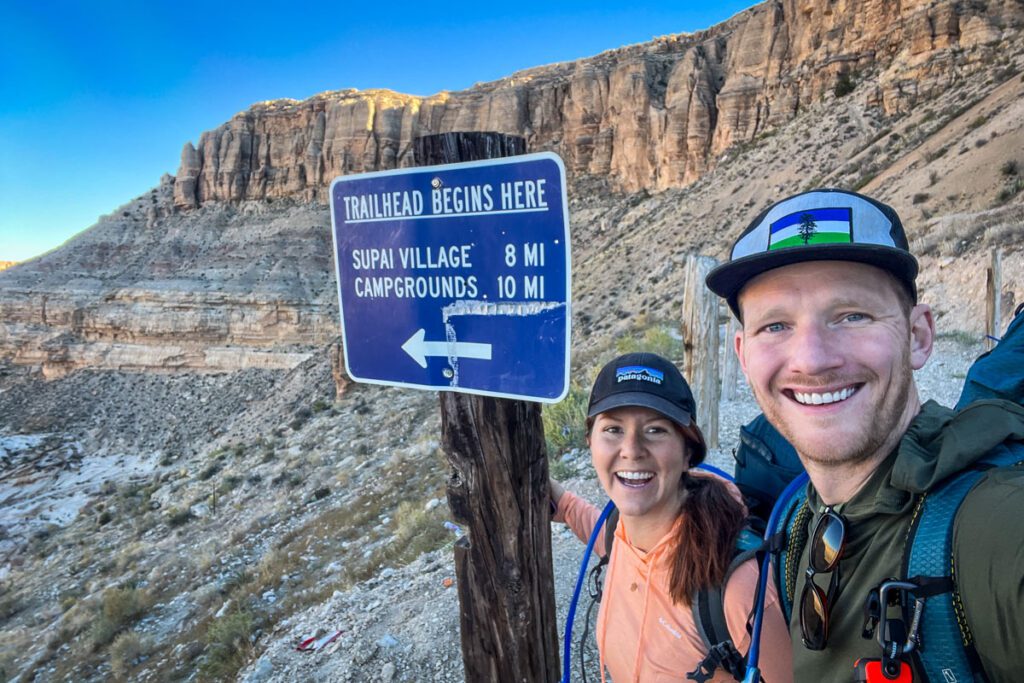
You’ll begin the hike at the Hualapai Hilltop, where you will descend down a series of switchbacks until you get to the bottom of the Grand Canyon.
This went much more quickly than I expected. You’ll continue on a more gradual downhill until you reach a narrow canyon.
Good to know: This section is entirely exposed to the sun, but hopefully you’ve started your hike early enough that the walls of the canyon still provide shade.
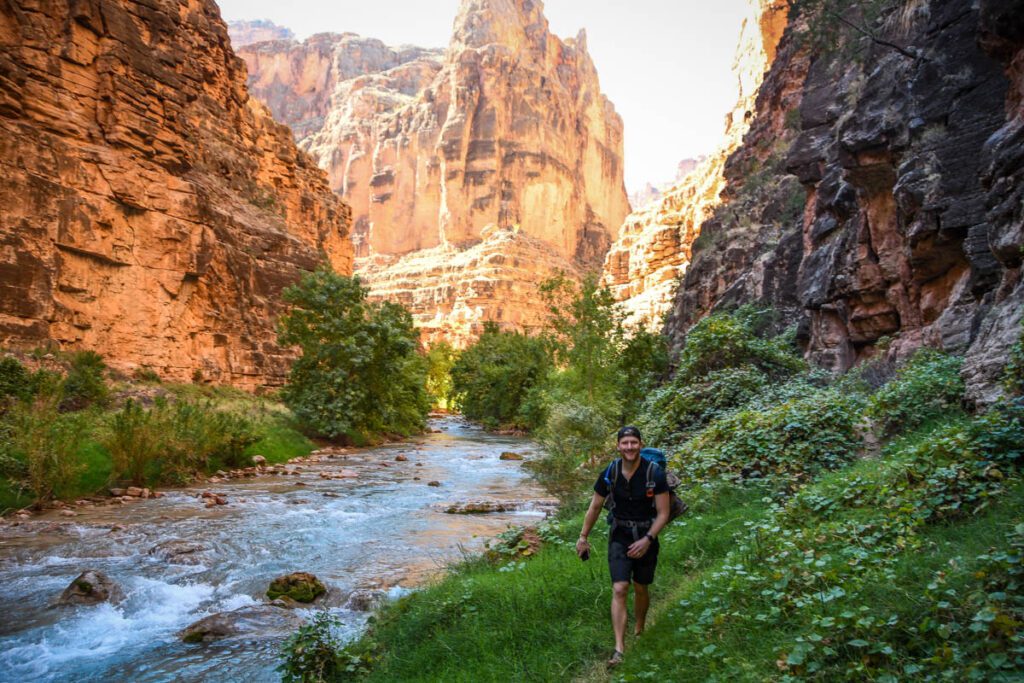
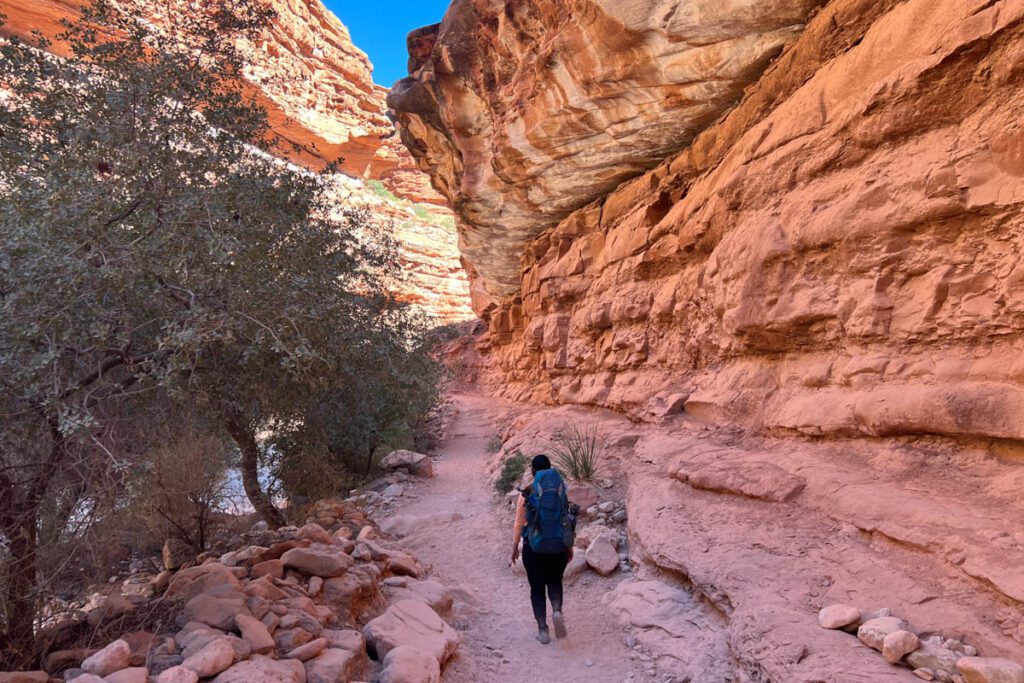
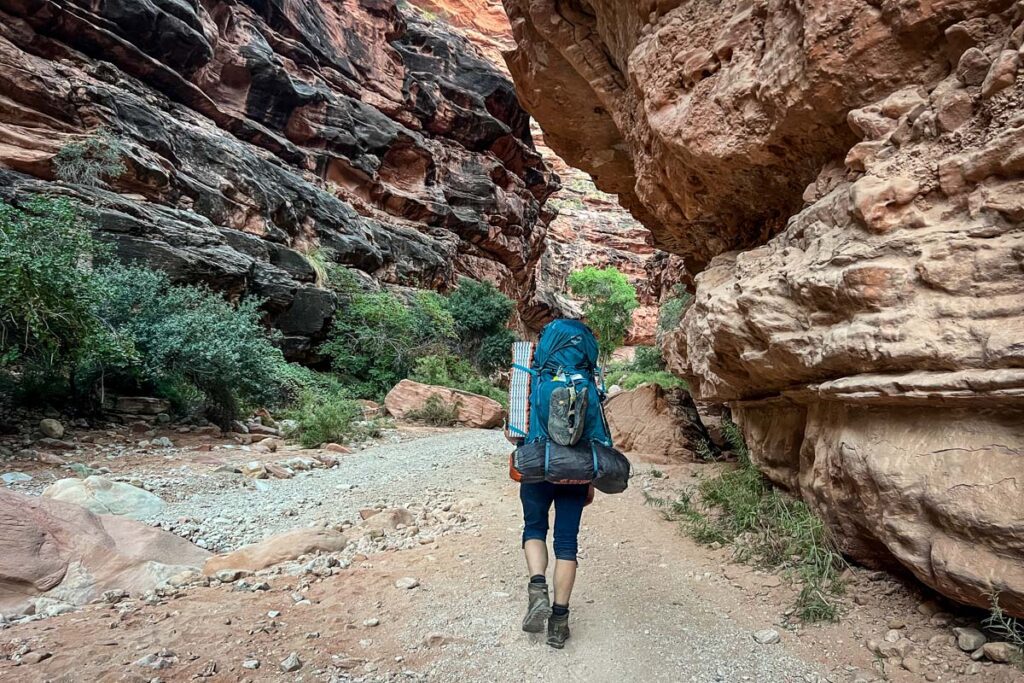
2nd section: Hiking through a narrow canyon
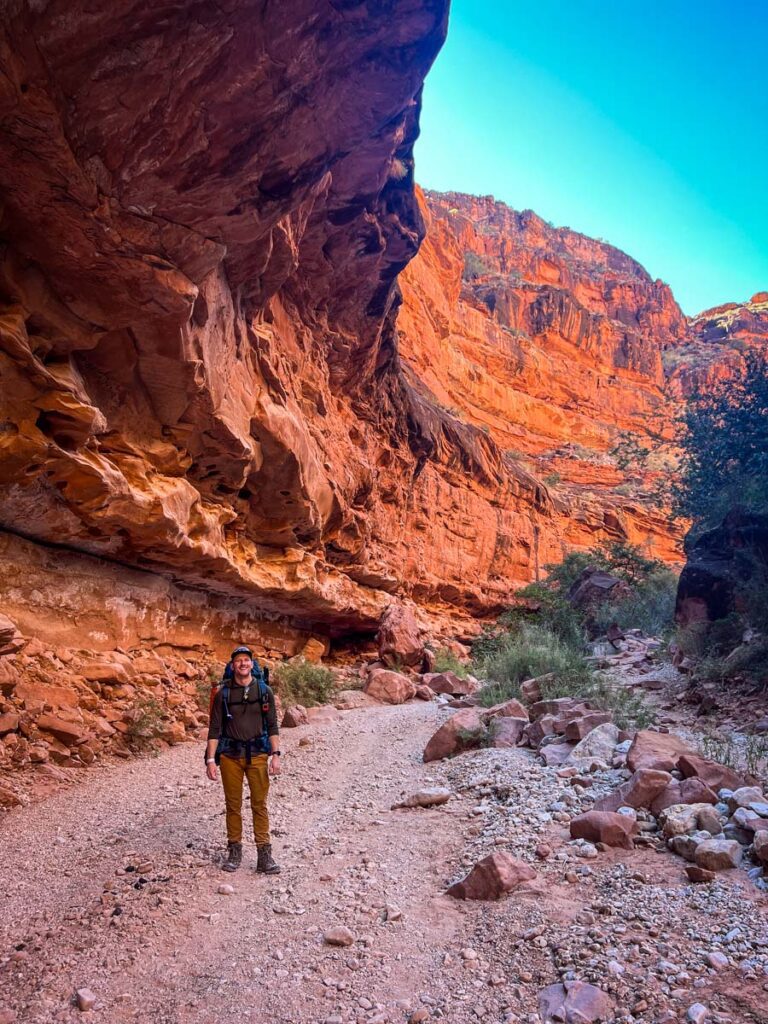
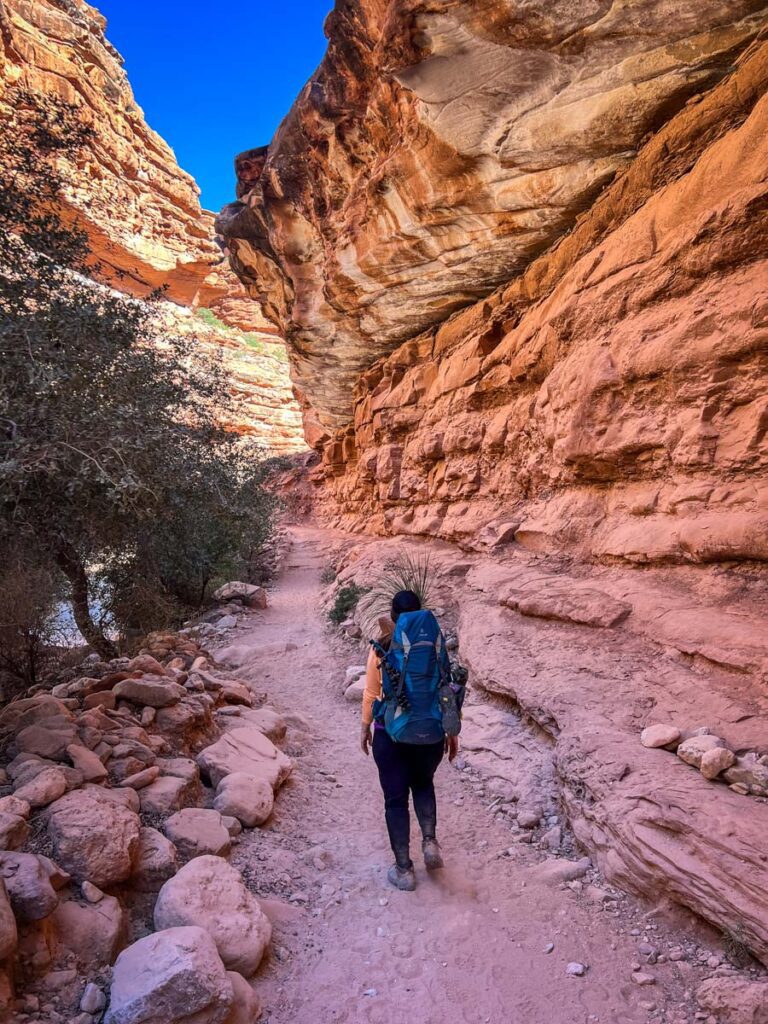
- Mile 2 – 7.5
The next 6 miles are relatively flat. There is a gradual decline, but you likely won’t even notice it.
You will be hiking through a narrow canyon atop a dry river bed for the majority of these 5.5 miles.
There are parts of the path where you’re walking on gravel, which can be a bit more challenging than a typical path. For this reason, it’s important that you have good ankle support.
It is more beautiful than we expected, and if you start your hike early, you have a good chance of being in the shade most of the way. We hardly had any direct sunlight, which was so nice.
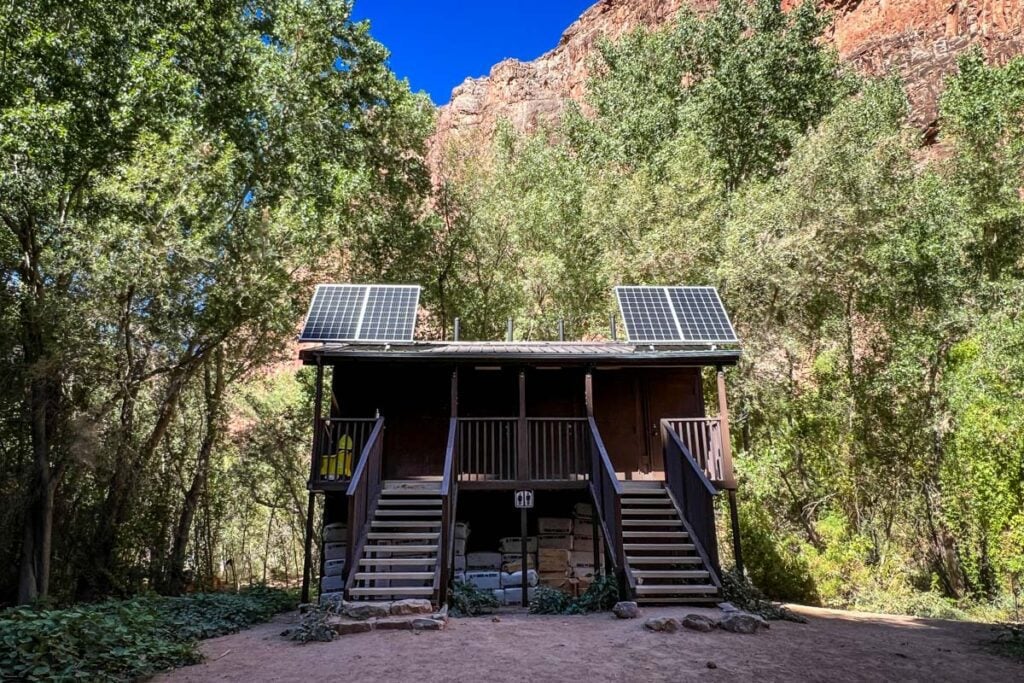
3rd section: Supai village
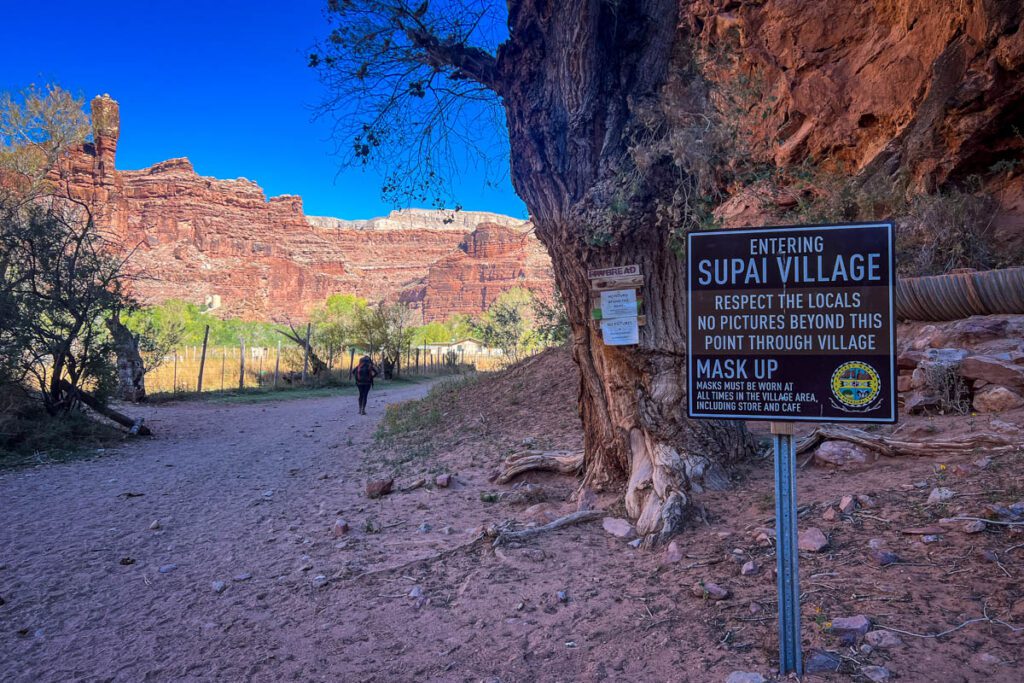
- Mile 7.5 – 8
At around mile 7.5, you will see signs that tell you you’re entering the village of Supai. (Photos are not allowed past this point.)
You will walk past some farmsteads with horses and cool rock formations looming in the distance. Then, you’ll pass through the small town.
There is a nice, new building for the village’s Head Start program as well as a brand new (in 2023) medical center.
You may also see a church, the Havasupai Lodge, a small grocery store, and a cafe. You’ll walk past an open field, which is the heli-pad. When we walked past this around noon, there were at least 20 people standing around waiting.
4th section: Pass by waterfalls
- Mile 8 – 10
After leaving the village, it is roughly 2 miles to the start of the campground. This section has a more noticeable decline, but it’s still not too drastic.
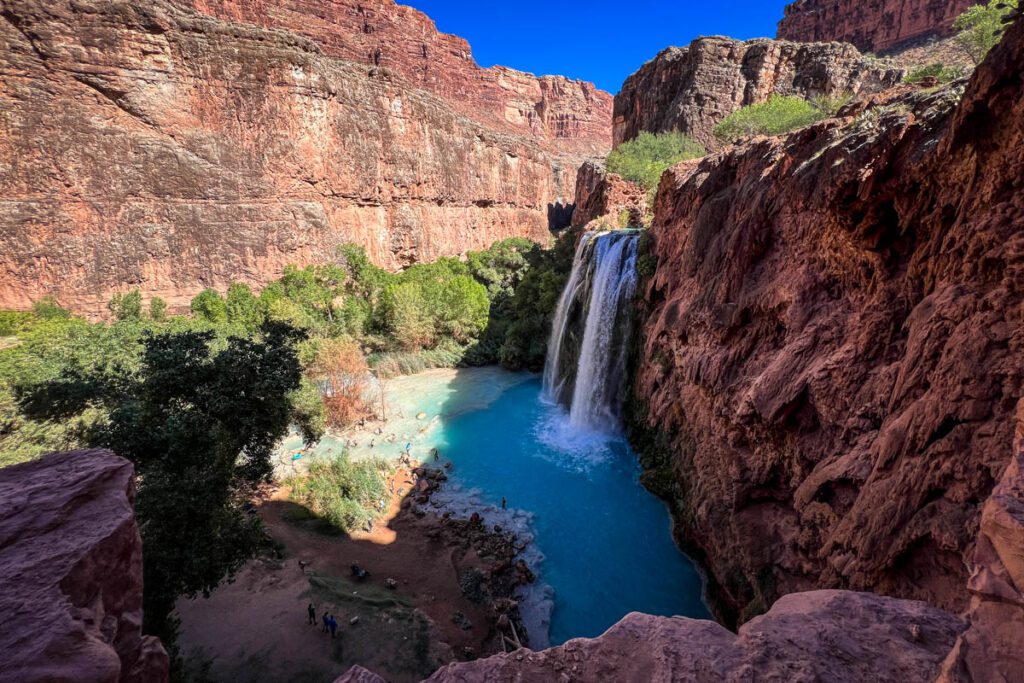
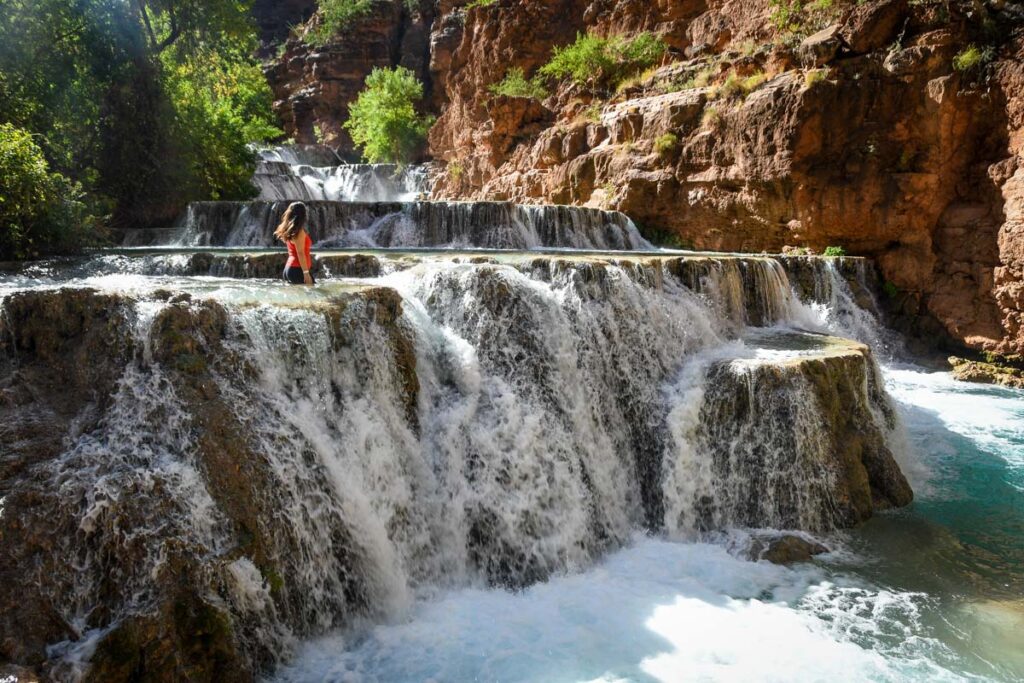
On this walk, you will pass by 3 waterfalls: Fifty Foot, Lower Navajo, and Havasu Falls.
Our advice: We’d personally recommend you keep walking (and not stop too long) because finding a campsite can be difficult and you want to give yourself as much time as possible. Instead, plan to come back to these waterfalls later or on another day.
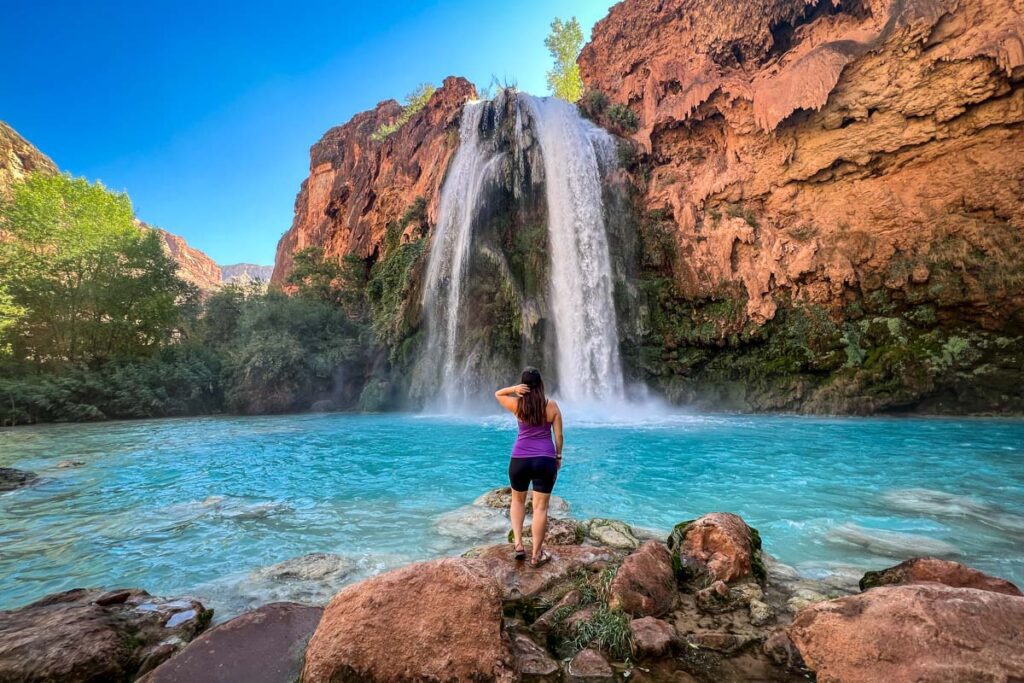
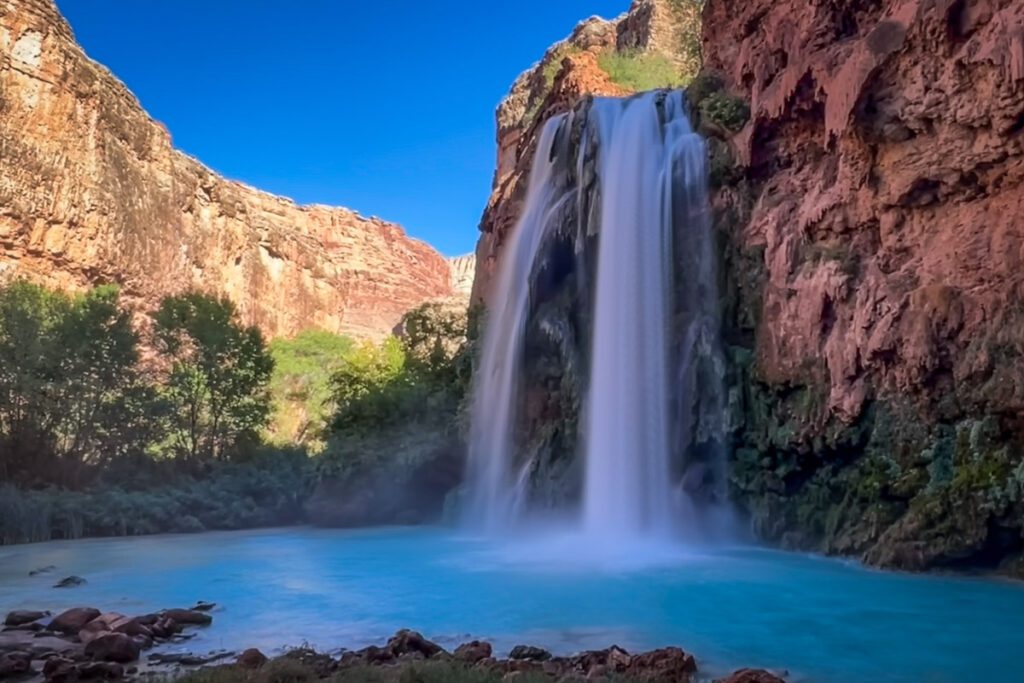
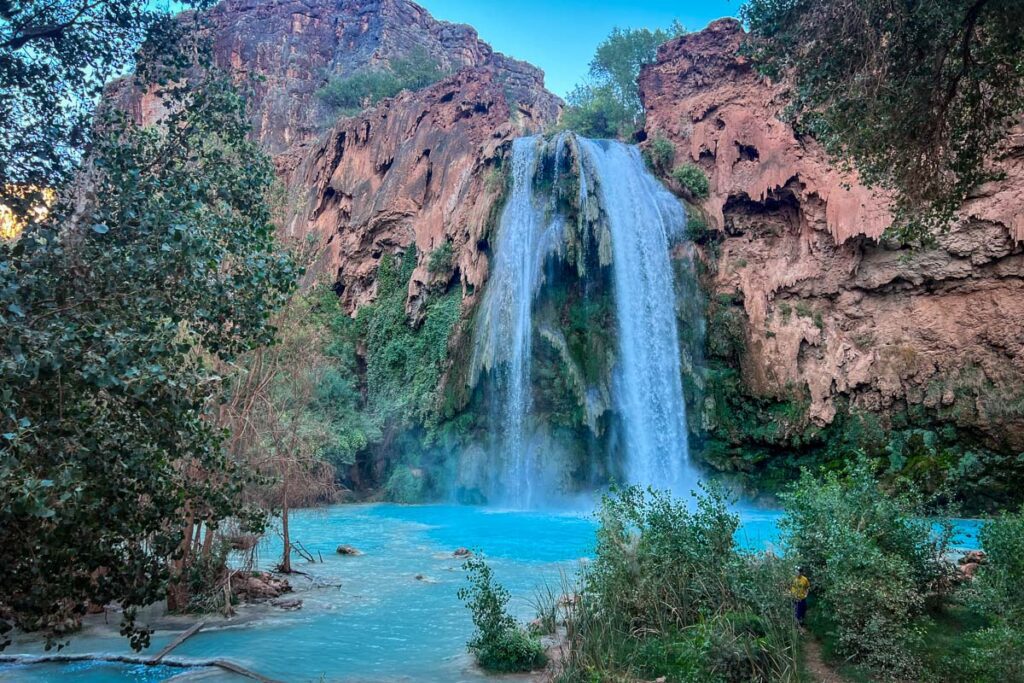
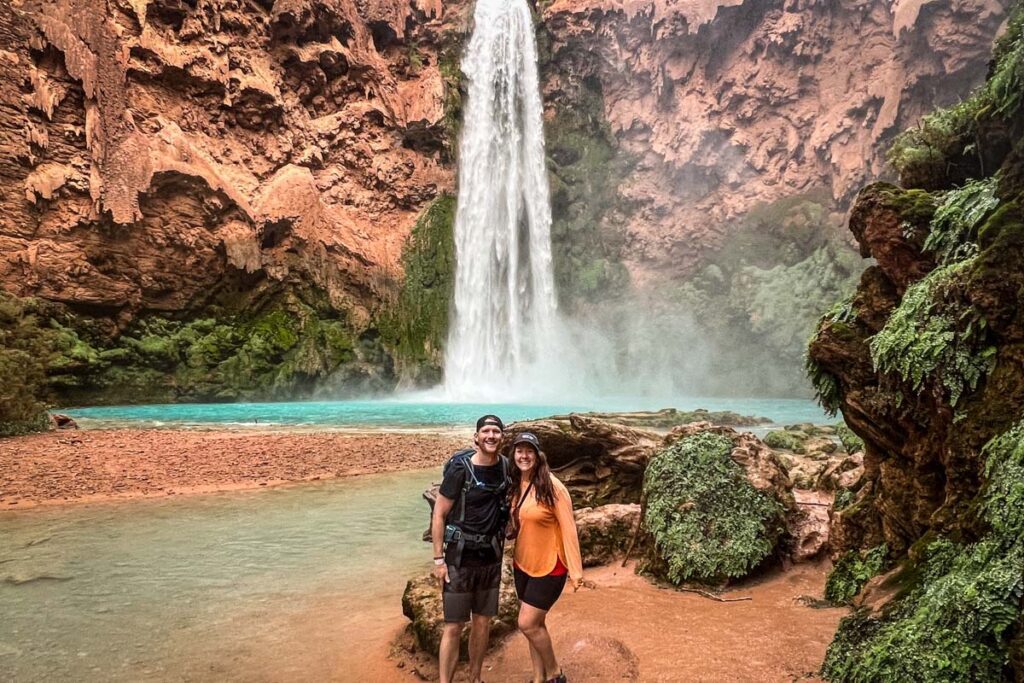
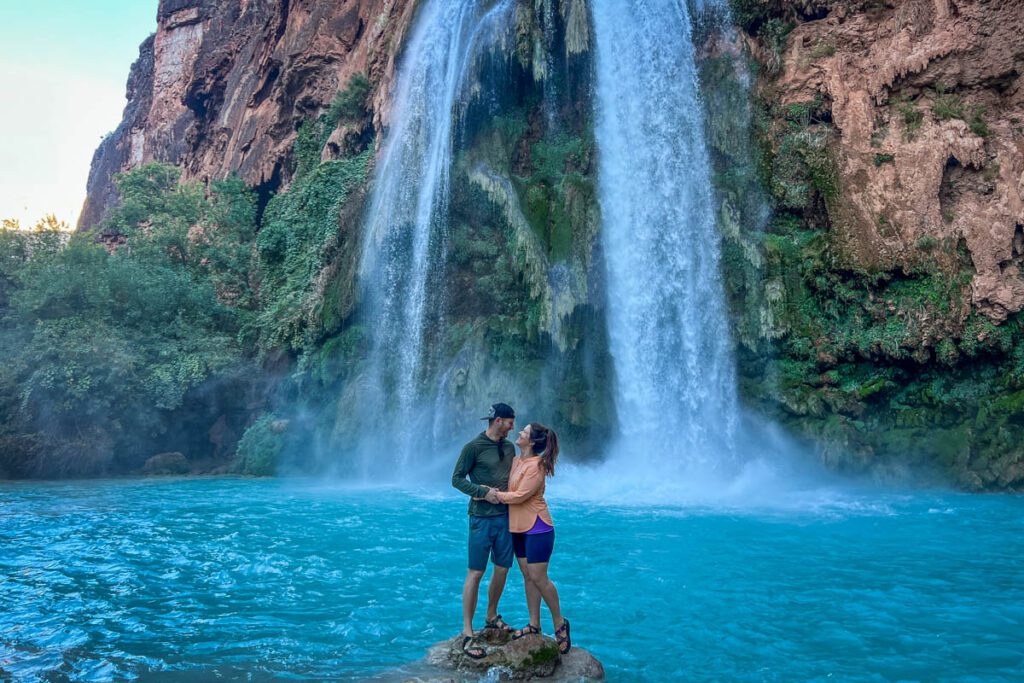
It is a really special moment when you start a short descent and see Havasu Falls come into view because you know you’ve made it!
It is just as stunning in real life as it is in the pictures, and it quite literally will take your breath away. We shrieked a little, and over the next 4 days, we saw many other people have a similar reaction.
Plus, this marks the beginning of the campground, so you know you don’t have much hiking left.
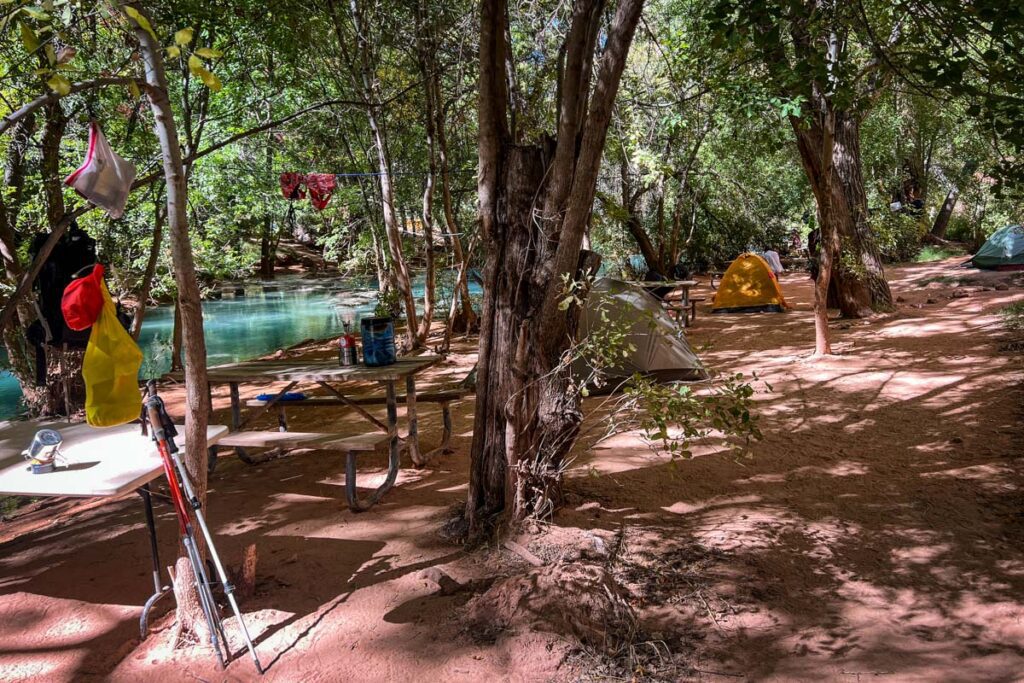
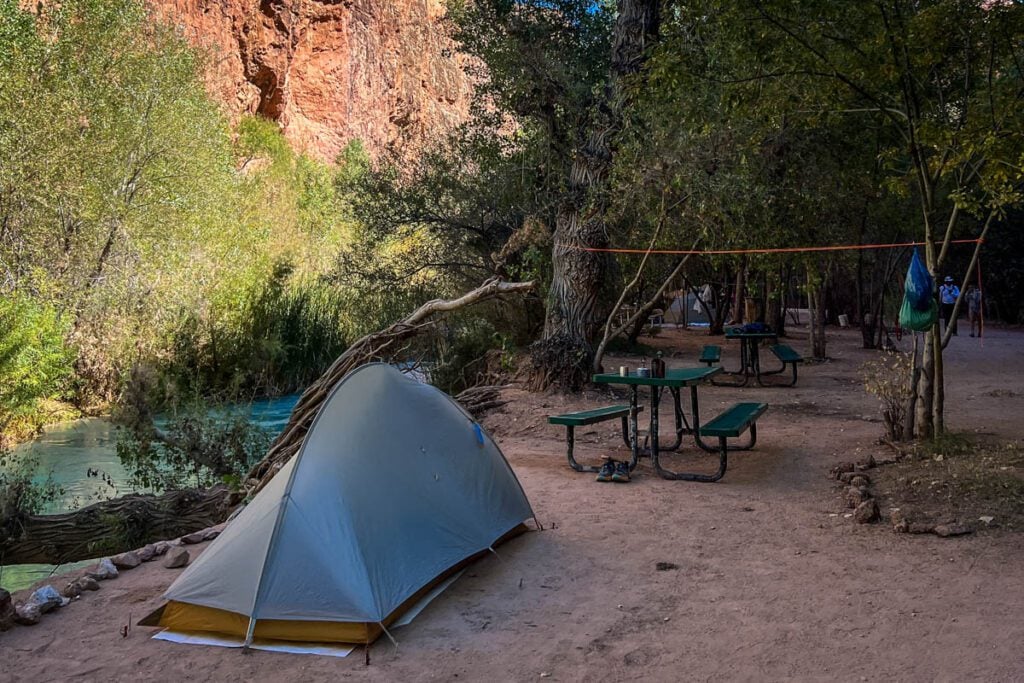
5th section: Campground
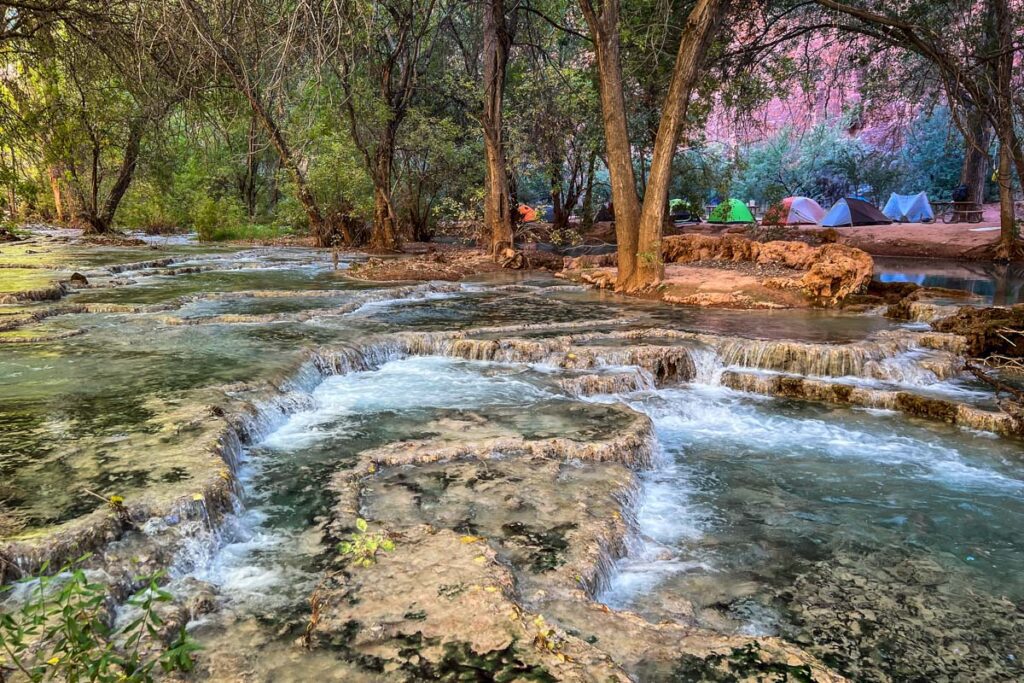
- Mile 10-11
This is the part nobody talks about! While you’ve made it all the way to the campground (yay!), you still need to find a campsite.
The campground is roughly 1 mile long, so depending on how busy it is at the time you arrive, you may need to walk the entire additional mile.
Be prepared to spend a bit of time scouting sites. It took us nearly 1.5 hours to find one!
Hiking out
On your way out, you’ll hike these sections in reverse. There are a few sections where you’ll notice the uphill a bit more than on your way down, but overall the incline is so gradual that you won’t notice it most of the way.
The one exception to this is the final mile of the hike. This is where you’ll see some notable elevation gain, and the final bit is steep switchbacks.
How bad are the final switchbacks? The really steep section isn’t all that long, so honestly, I don’t think it is as bad as it’s sometimes made out to be. Plus, you’re so close to the parking lot that you’ll probably have a little adrenaline kick in because you’re almost there!
We’ve encountered hikes with much more gnarly inclines, like hiking the Enchantments in Washington and Angel’s Landing in Zion. If you do a decent amount of hiking, this section won’t be too bad for you.
→ Love hiking? These jaw-dropping bucket list trails around the world deserve a spot on your adventure list!
Tips for hiking to Havasu Falls
These tips will come in handy during your hike – trust us!
1. Download the offline version of AllTrails before this hike
Since you won’t have cell reception during this hike, we’d highly recommend downloading the offline AllTrails map onto your phone.
Paper maps are great (and a very reliable backup), but we find it really helpful to see our current GPS location as well as upcoming elevation gain at any point along the trail.
Also, it’s worth mentioning that if you plan to use your phone for navigation, you should set it in airplane mode to save battery and travel with a battery pack so you can keep it charged. (This is our favorite battery bank – it holds 7 full charges).
Psst! In order to get access to offline trails, join AllTrails+. We’ve been Plus members for a few years and it’s the only app we pay for that we can confidently say we will never quit!
2. Know that GPS signals frequently get mixed up
Since you’ll be hiking for 10+ miles into a remote part of Arizona far from any town or city, it’s to be expected that your cell signal and GPS signal won’t be strong. Then add that you’ll descend into a deep canyon and you can say goodbye to any bars on your phone.
We always use AllTrails for our GPS navigation and have never had a problem, until hiking the Havasupai Trail.
It worked maybe 85% of the time, but at certain points our GPS got really confused and jumped around the map, which never happened before.
We want to share this with you so that you can prepare in case this happens to you. It makes me think of 3 things:
- Carry a SOS device, like a Garmin inReach, at all times with you on the trail. Our Garmin inReach worked our entire time we were on the trail and we were able to send preset messages to our parents (who were babysitting our daughter for 4 days).
- If you get lost or in trouble, the Garmin can really save your life. Again, carry a battery bank to charge it.
- Get familiar with the trail. I was still confident we were traveling in the right direction when the GPS went haywire, because I had studied the map and knew how far apart landmarks were.
- Carry a paper map or download a backup phone map like Maps.Me or Gaia GPS. It’s good to have redundancies when it comes to navigation on the trail.
3. Start early
It gets hot on the trail, so the more miles you can clock while it’s still (relatively) cool, the better!
The first 3 or so miles from the trailhead are pretty exposed so it’s best to start earlier so you are in the shade as much as possible for this section.
Our personal experience: We decided to leave from Flagstaff, AZ at 3:30 a.m. on the morning of our permit start day. After loading our car, driving to the check in, getting checked in, then driving to the trailhead, finding parking (the lot was full) and gearing up, we started the hike at 8:40 a.m. It was mid-October so we were in the shade for most of the hike into the Havasupai campground.
3. Make sure you have a full tank of gas
The trailhead parking is far away from everything, so it is best you have a full tank of gas so you don’t get stranded on the way back out.
From the trailhead to the closest gas station is in Seligman which is almost 100 miles away and will take you about 1.5 hours to get there. If you’re heading back to Las Vegas, then the closest gas station is 2 hours away in Kingsman.
There is a 76 gas station in Peach Springs on the reservation (which is a 15-minute drive from the Grand Caverns Inn check in location), but reviews say the open hours are not very accurate.
4. Leave a jug of water and some snacks in your car
There are no water fill locations on the 10 mile hike in or out of the campground.
We left a gallon jug of water and some granola bars in our car so that once we hiked out, we could fill up our waters and have something to eat for the ride back.
5. Use the trailhead bathroom
There are 5 or 6 toilet stalls at the trailhead. We recommend using them before you head down the canyon as there are no restrooms until Supai village about 8 miles away.
6. Wear sun protection
This hike is in the desert of Arizona…wear sunscreen…enough said. Pretty sure this is the first thing Ben packed (oh the joys of being a pale-skinned ginger).
We also recommend a lightweight UV protection long sleeve, a sun hat, and of course sunglasses.
We even saw a couple people carrying umbrellas. Whatever works for you, the sun can be brutal out there.
7. Drink plenty of water
There are no water fill ups on the trail until the spring at the campground. So you have to carry your own water in. Drink plenty of water from your stash in the car before you head down the trail.
Our personal experience: For both our hike in and our hike out, we brought 3 liters of water each (as well as 1 extra liter “just in case”). We didn’t finish all of it either way but it’s best to have excess than not enough.
It’s also worth mentioning that we hiked mostly in the shade during October, which tends to have cooler temperatures than other times of the year. If you are hiking during a hot month, we’d recommend potentially even more water.
8. Pace yourself
The trail down to the campground is 10 miles and usually takes 4-7 hours to hike. The hike out will take a bit longer since you’ll be going up elevation, so plan about 5-8 hours out.
Our advice is to take water breaks, go at your own pace, and try your best to walk in the shade.
Our personal experience: We are avid hikers and it took us 4 hours in and 4 hours and 20 minutes out with a few snack and photo breaks sprinkled in.
9. Get a campsite before stopping at waterfalls
It will be super tempting to take off your boots and your pack and splash around in the turquoise water of Havasu Falls, but we’d recommend searching for a campsite first.
Our personal experience: We arrived at the campground around 12:20 p.m. and it was very hard to find a secluded camp spot that wasn’t right up next to other tents. We walked up and down the campground on both sides of the creek for about an hour and a half (racking up quite a bit more hiking mileage!) to find a decent campsite. It was super frustrating as there are so many nice campsites right on the river but they were all taken by mid day.
Our advice is to get to the campground as quickly as possible to find a nice spot. Hikers tend to leave early in the morning on their last day so many campsites become available really early but fill up fast.
10. Always let the pack mules pass
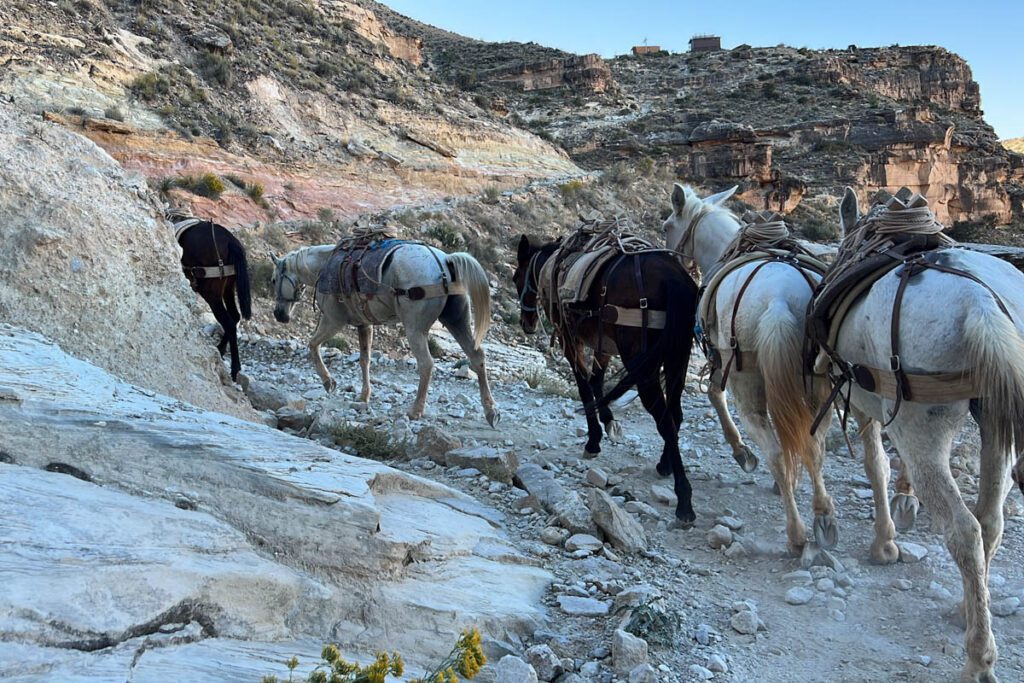
The Havasupai Tribe gives hikers the option to reserve a pack mule to bring your gear down the canyon for a fee. These mules travel up and down the trail in groups guided by a person on horseback.
You should always step aside and let the pack mules pass on the trail. They have the right of way and tend to be going pretty fast so you don’t want to be in their way.
Havasu Falls hike FAQs
Here are answers to some commonly asked questions specifically about the hike.
How long does the hike to Havasu Falls take?
It can take anywhere from 4-7 hours of hiking on the way there, and 5-8 hours on the way back.
The total time it takes you depends on your fitness level as well as other factors, like how heavy your pack is as well as the weather.
Our experience:
- It took us just under 4 hours on the way there (going at a pretty quick pace with only a couple of short stops)
- It took us 4 hours and 20 minutes on the way out (again, at a quick pace with only short breaks)
How hard is the hike to Havasu Falls?
This is a subjective question and the answer depends a lot on you, your fitness level, and your backpacking experience.
All we can do is share our personal opinion on the difficulty level, but know that we do quite a bit of hiking. Take our opinion with a grain of salt if you’re not much of a hiker, as it might feel more challenging.
But before we spill our take, here are some things to consider:
- It is not a technical hike, so most people with a decent level of fitness should be able to do it without a problem
- The most difficult part of the trail is the steep (but short) section of switchbacks near the trailhead
- The biggest challenge for most hikers is the sheer distance. 10+ miles is a long way to walk, so we’d recommend doing some long walks in preparation for this hike.
- Remember that you will likely be moving for 4-7 hours on the hike to the campground (depending on your pace), and 5-8 hours on the return hike.
- You will also be carrying a pack with all your gear (unless you hire a pack mule), so practicing your long walks while carrying a pack can be a good idea if you’re rusty. You’ll also want to pack as light as possible to minimize the weight.
Our personal opinion:
Personally, we found this hike to be pretty easy overall. It was much easier than we expected, actually. The hardest parts for us were the fact that we were carrying heavy packs and that it is a long hike.
So what about the hike back up? Again, you’ll hardly feel that you’re gaining elevation. It is really gradual. The last mile of the trail is the steepest. But again, nothing crazy or too long.
How difficult is The Confluence hike?
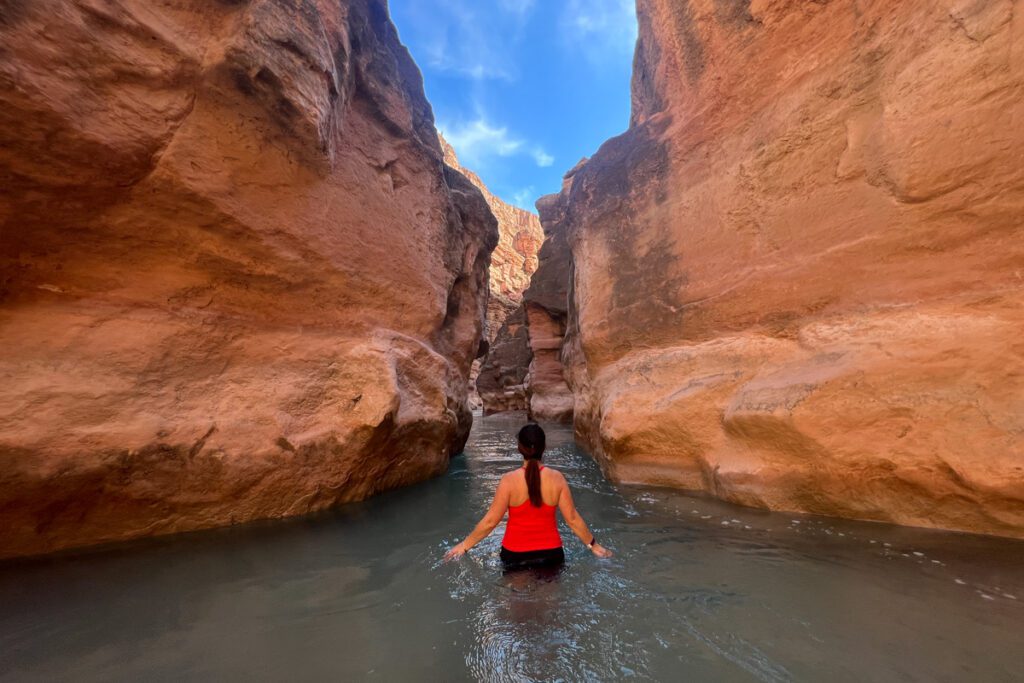
Now, the hike to the confluence is another story!
The Confluence — aka the point where the bright turquoise Havasu Creek meets the muddy brown waters of the Colorado River — is notorious among backpackers who make the trip to Havasu Falls. If you’re in the process of planning your trip, you might be wondering if this day hike is worth it.
We have a guide to hiking to the Confluence that goes over all the details you need to know, but here are a few notes on the level of difficulty:
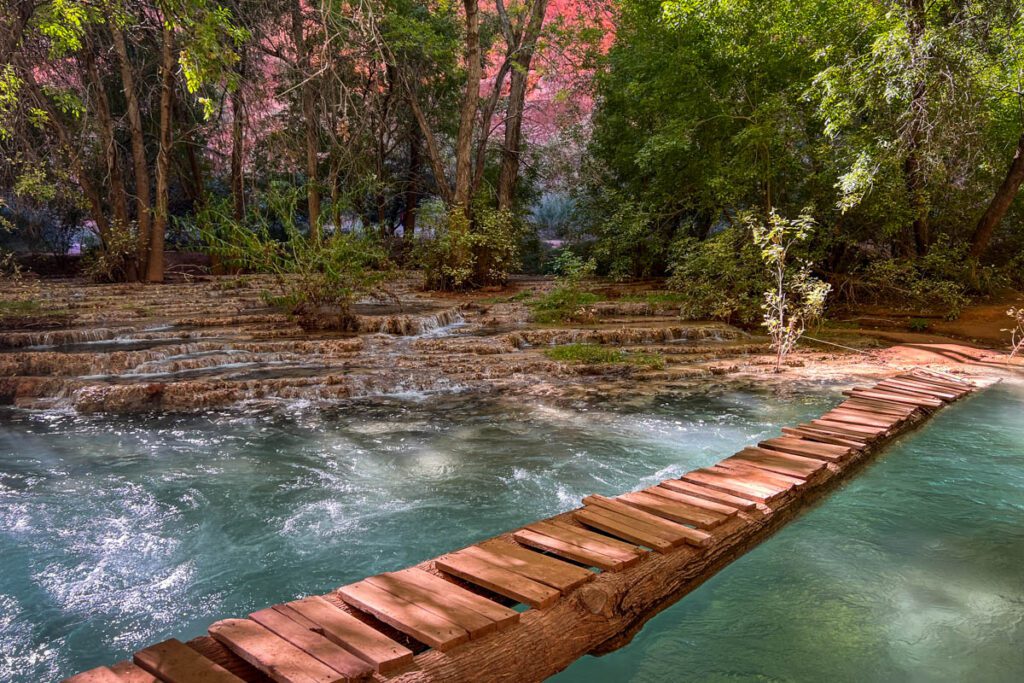
- There’s very minimal elevation gain, so it’s not difficult in the way that you think of hiking in the mountains.
- However, there are several river crossings and some areas where you will need to scramble a bit.
- There are also places where it is easy to lose the trail and get lost, so you need a certain level of patience.
- I think the most difficult part is that it is a long hike, and due to sunset times (which vary throughout the year), you may need to hustle in order to get there and back. Combine this long hike with the already long hike to reach Havasupai, and you’re looking at some very tired legs!
What is the elevation gain to Havasu Falls?
While there is almost a half mile of elevation change between the trailhead (5,200 feet above sea level) and the canyon floor (2,800 feet above sea level), you tackle a lot of it very close to the trailhead. The rest is a very gradual decline/incline, depending on which direction you’re hiking.
To clarify: On the hike to Havasupai, you will lose elevation. On the hike out (back to the trailhead), you will gain elevation.
Are there toilets on the trail?
No, there are not any toilets on the trail to Havasu Falls.
Your last chance to use the bathroom is at the trailhead, so I’d highly recommend taking advantage of that.
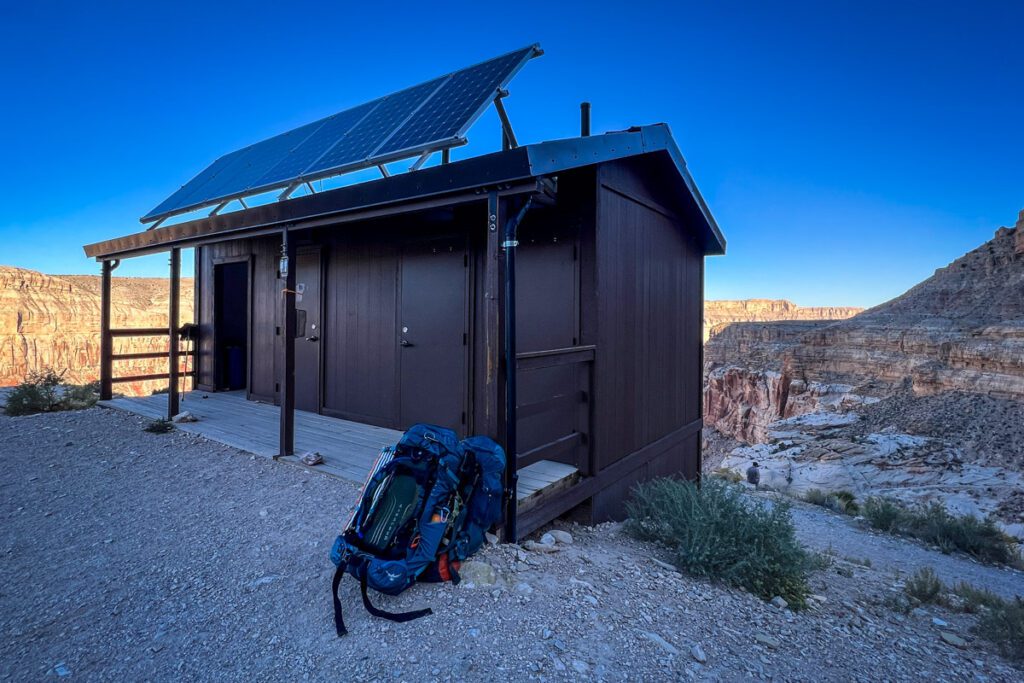
There is a toilet in Supai village, and there is a block of toilets at the entrance of the campground that you can’t miss.
What if I need to go where there is no toilet?

Good question! It happens. Ya gotta go when ya gotta go, right?
Well, listen up because there are some very important things to keep in mind if you plan to do your business in the wild and it does require some advance planning…
- Get off the trail. Nobody wants to walk where you went to the bathroom. This can be hard (especially for ladies) on some sections of this trail, as you’re walking through a narrow canyon without much vegetation or areas where you can get far from the trail.
- If you gotta go, start looking early because it might take you a while to find a suitable place to pull over.
- Make sure you are at least 200 feet from a water source. Aka don’t go right next to rivers or streams.
- If you need to go number 2, dig a hole that is at least 6 inches deep. Cover it up once you’re done so nobody steps in it. *cue me vomiting* For this reason, we never hike without a poo shovel. They are very lightweight and inexpensive and should definitely be on your packing list.
- Pack out your TP. Toilet paper takes much longer than you think to disintegrate, and it is recommended that you pack it out with you. Carry a plastic baggie for this purpose.
- Refresh your knowledge on going in the wild by reading these guidelines from Leave No Trace.
Insider tip for ladies: When you go number 1 in the wild, instead of using TP (and having to pack it out), drip dry or carry a Kula cloth which makes it easy to feel dry and fresh without using toilet paper.
Are there water fill ups on the trail?
No, there are not any places to fill water on the trail.
It’s also important to point out that while there is a block of composting toilets at the trailhead, there is no water fill. This means all water must be brought in.
When you reach Supai village, you could purchase some from the small shop there, but we wouldn’t plan on that.
Instead, make sure you are carrying plenty of water when you hit the trail. We personally hiked in with 3 liters of water each and would recommend the same. (We each have a 2-liter bladder plus a 1-liter bottle.)
Our advice: We highly recommend hiking with a hydration bladder because it makes drinking water so much easier and helps ensure you’re getting enough. You can sip while you’re walking instead of having to stop and get your bottle.
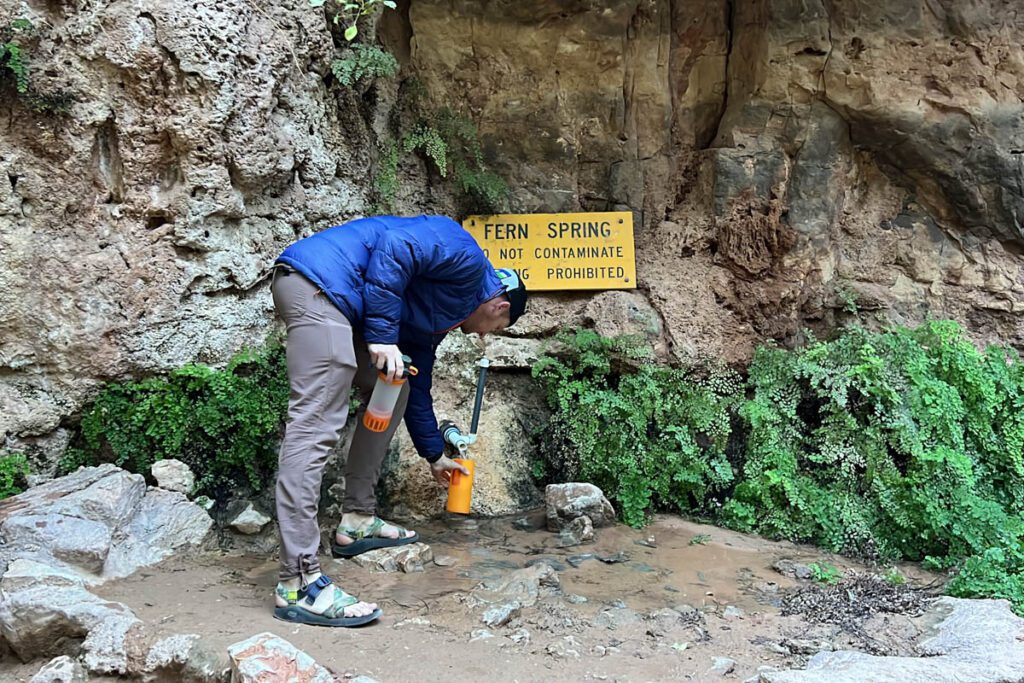
There is one water fill up station called “Fern Spring” at the Havasu Falls Campground. We used our Grayl filtered water bottles to be sure we were drinking purified water that wasn’t contaminated. Another option we’ve used in the past is our Steripen.
Do you need hiking poles?
This comes down to personal preference. We don’t use hiking poles all that often, though there are some hikes we’ve done where we feel they are necessary, like hiking to Everest Base Camp, the Kalalau Trail, and the Inca Trail.
We brought poles on this hike and didn’t find them necessary. We thought they just got in our way so we hardly used them and mostly kept them strapped to our packs. I used mine on the final switchbacks, but that is such a short section that I personally didn’t think it was worth bringing them just for that part of the trail.
If you don’t typically use poles and you’re debating it, I’d say you don’t need them. That said, if you really like hiking with poles, you might find them helpful.
If you’re still undecided, bring just one pole so you have some extra stability but not the bulk of two. It is worth pointing out that a pole could come in handy if you happen to get injured.
FYI: We also brought poles on the confluence hike, thinking they’d be helpful for river crossings, but again, we didn’t really need them. They were hard to secure to our daypack and got in the way when we were bushwacking (a common theme of this trail), so we wished we hadn’t brought them.
Is this trail child-friendly?
The official Havasupai website says this on the topic of children:
“Due to the many challenges and hazards of bringing young children (distance, elevation, remoteness, climate, extreme weather, challenging terrain, water hazards, lack of medical facilities, etc), bringing young children is NOT recommended.”
That said, we think it really comes down to you and your child, as well as their age and experience with backpacking.
Out of the roughly 350 people staying at the campground, we saw maybe 4 children, all of whom looked to be 8-12 years old. On our hike out, we saw a couple carrying a 9-month-old baby (they had hired a pack mule for the rest of their gear).
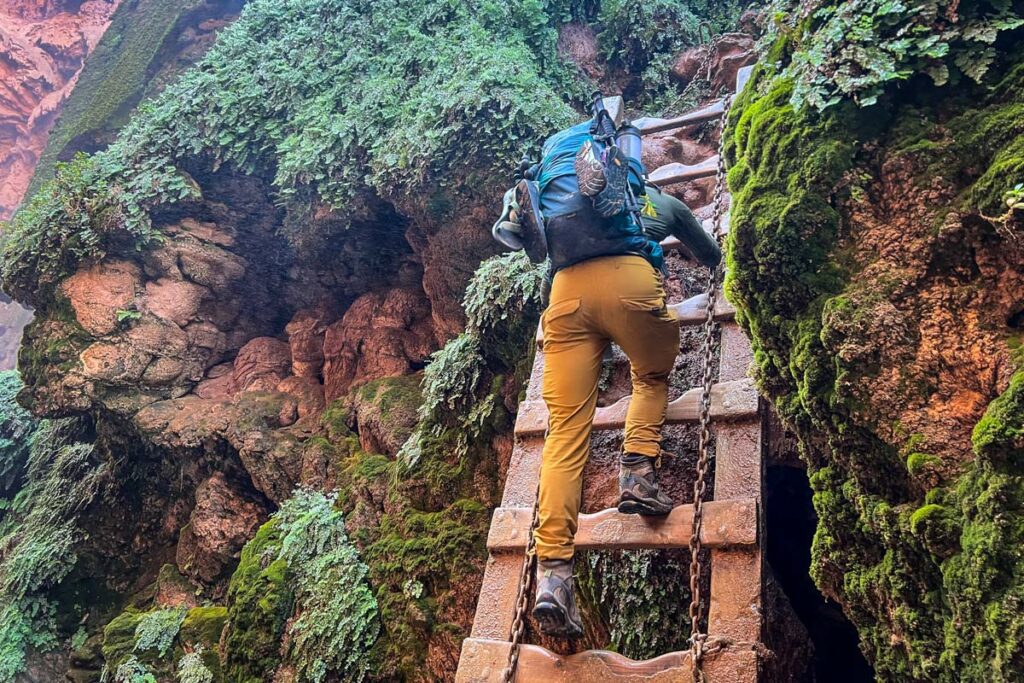
We actually camped next to a dad and his 9-year-old daughter, and she absolutely crushed this hike. They told us they go hiking and backpacking a lot, so this was nothing new to her. In fact, she did the ladder section at Mooney Falls (4 times) and hiked the notoriously challenging trail to the confluence and she had a blast.
Personal story:
We got our permits back in February 2020 and were originally supposed to do this hike in May of that year. We all know why that didn’t happen!
Our permit kept getting pushed back further and further and by the time we were able to go (3.5 years later), we had a toddler! We found ourselves debating whether we should bring her, but ultimately we decided to go on our own while she stayed with Grandma and Grandpa.
We’re really happy with our decision, as we think it would have been a hard hike to bring a toddler on.
Here’s why:
- There are several really long days of hiking on this trip. Our daughter is at an age where we would have needed to carry her which would have been difficult with all our gear and I don’t think she’d want to sit in a carrier for 4+ hours at a time.
- The area is pretty exposed, and I wouldn’t want her to be in the sun all that long.
- I also would worry about her disturbing other campers at night since the spaces are so close together.
- There are some parts of this hike – like the ladder section at Mooney Falls as the hike to Beaver Falls and the Confluence – that I personally wouldn’t feel comfortable bringing her on.
In conclusion: We had a really fun time just the two of us without having to worry about our 2-year-old. We got to do all the challenging sections and hike as fast as we wanted to without making tons of stops. We could also go swimming and take naps and just enjoy ourselves. That said, I think this would be a fun hike to bring her on when she is older (as long as she enjoys long hikes).
Are dogs allowed on this trail?
No, dogs are not allowed.
What kind of shoes should I wear?
We recommend wearing hiking boots and also packing hiking sandals.
- Hiking boots: We’d strongly recommend wearing a good pair of hiking boots that have been worn in!
- Water shoes / hiking sandals: In addition to hiking boots, we’d recommend bringing a pair of hiking sandals that do well in the water. (Our personal favorite is Chacos!) These are great for swimming, hanging out at camp, and doing the confluence hike (which has many river crossings).
Can I go to Havasu Falls as a day trip?
No, you can not visit Havasupai as a day trip.
First of all, this would be nearly impossible from a logistical standpoint. And secondly, the Havasupai tribe prohibit this.
Getting to and from Havasupai Trailhead
Getting to and from the Havasupai trailhead is something you’ll want to put a fair amount of thought into. Here’s why (let’s backward plan a little bit):
- You’ll want to start your hike as early as you can to avoid the sun and heat as well as getting a good camping spot. The hike in will take about 4-7 hours, depending on your pace.
- The trailhead is about 1 hour and 10 minutes drive from the closest hotel (Grand Canyon Caverns Inn)
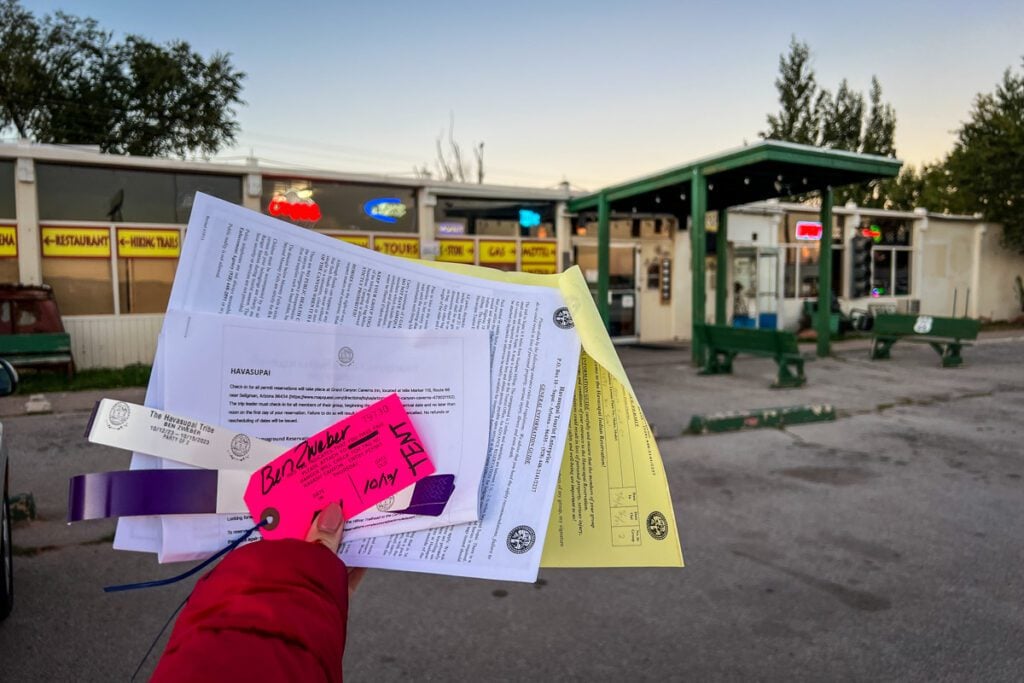
- You have to check in at the Grand Canyon Caverns Inn the day of or the day before you permit start day.
- From Flagstaff, AZ, Grand Canyon Caverns Inn is about 1 hour and 30 minutes drive away
- From Las Vegas, NV, Grand Canyon Caverns Inn is about 2 hours and 45 minutes drive away.
You can see how if you try to do everything on the day of your permit starting (drive to Grand Canyon Caverns Inn, check in, drive to trailhead, park, hike 10 miles, and find a campspot) it can make for a really long day.
This is what we did and we started at 3:30 a.m. from Flagstaff and found our camp spot around 1:30 p.m. It was a long day and it took a lot of planning.
You just have to figure out what makes the most sense for you.
Before you hit the road, make sure you have:
- Full waters for hiking: There is no water fill up at the trailhead, so you will need to bring 100% of your water in.
- Two copies of your permit (one for your car, one to carry with you)
- Pack a breakfast so you can eat in the car.
- Water jug to leave in your car + snacks: When you hike out of the Grand Canyon, you’ll want to make sure you have water waiting for you at the hilltop. Snacks are nice as well.
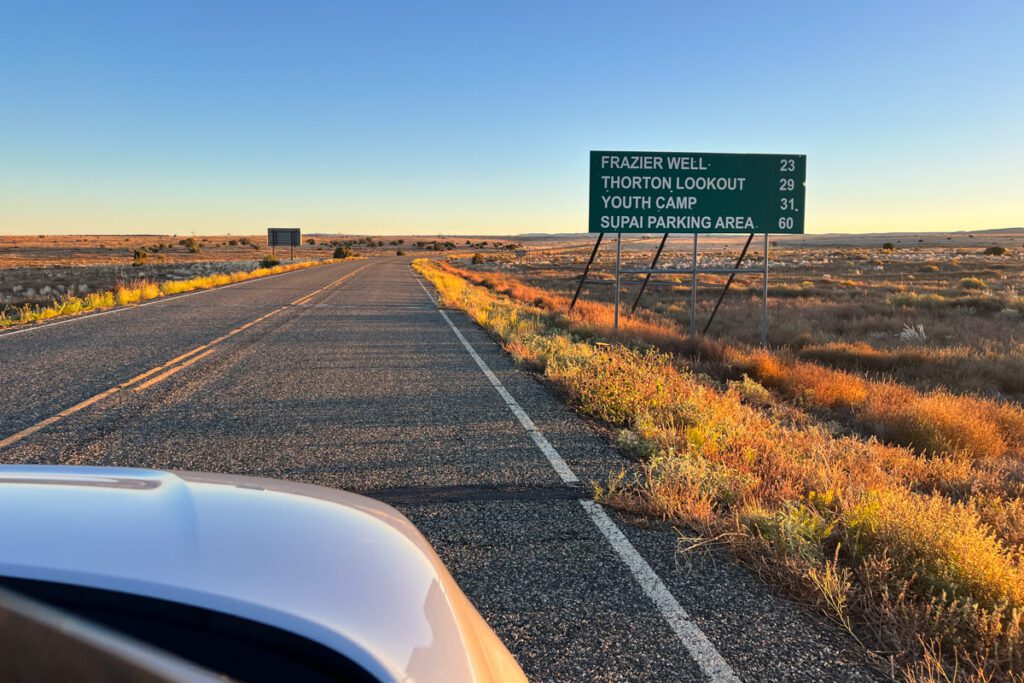
Parking at Havasupai Trailhead
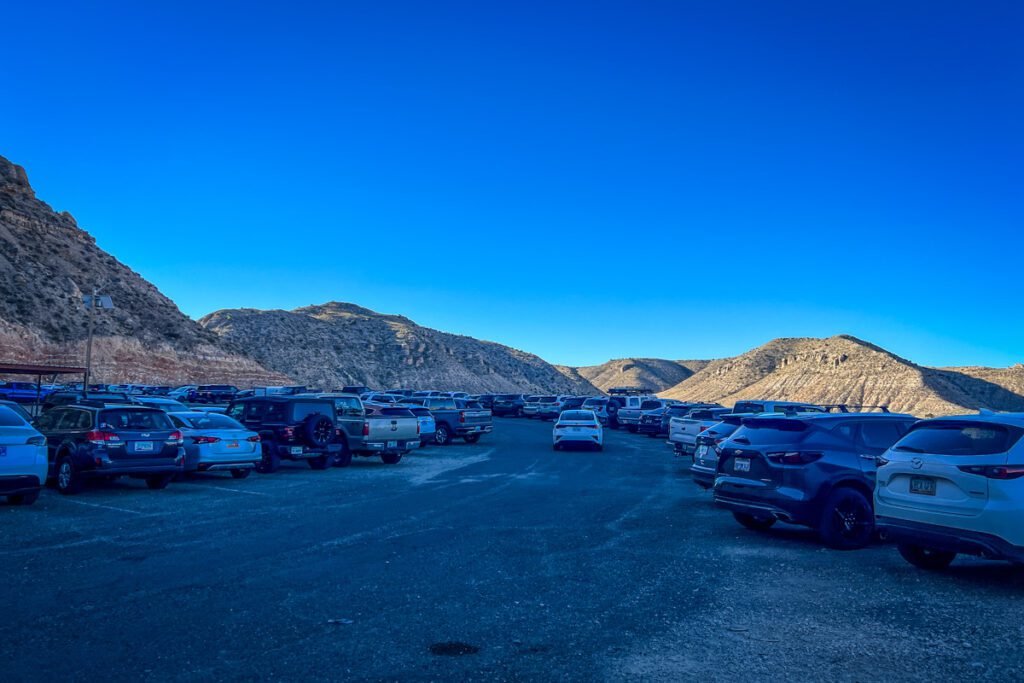
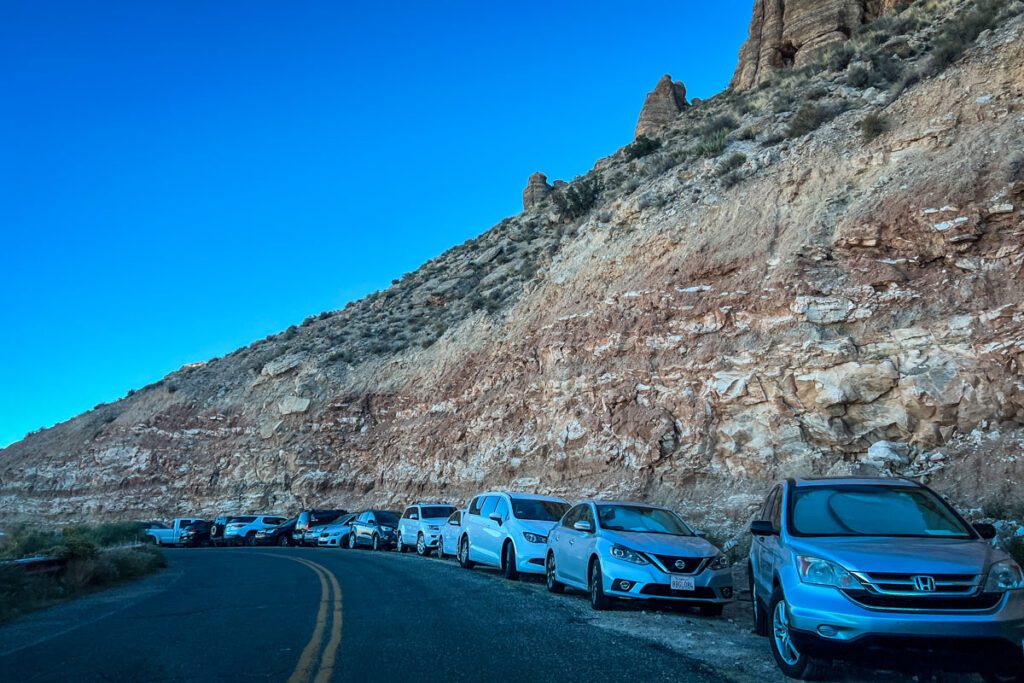
There is a parking lot with about 50 spaces at the trailhead hilltop. However, when we arrived it was full and so was the parking along the rock wall for about ½ mile down the road. We had to circle back to the park on the side of the road next to the rock wall.
Note: There have been reports of small rocks tumbling off the rock walls along the road and damaging cars. We’d recommend to park clear of the steep rock walls for a little piece of mind while on the trail.
Can I sleep in my car at the Hilltop parking lot the night before my reservation?
No, this is prohibited. There is no camping allowed at the Hilltop (including sleeping in your car).
Where can I stay nearby?
The closest hotel is the Grand Canyons Cavern Inn; the same location you check in for the hike. It is right on the historic Route 66 and has that whole kitschy vibe. Many people decide to stay here for the night before their reservation day to get an early start at the trailhead.
From the reviews, it is nothing special but tolerable because of the location.
A little further away is the Hualapai Lodge in Peach Springs (about 1 hour and 10 minutes away from the trailhead). It is a resort lodge on the reservation and appears to be decent for a night before the hike.
Our personal experience: We decided to stay in Flagstaff, Arizona both before and after our hike. It is quite a drive from the trailhead (2 hours 40 minutes), but we preferred waking up early in a place we really liked instead of spending the night somewhere we weren’t crazy about staying. Plus, my parents watched our daughter while we backpacked Havasupai, so they hung out at our Airbnb in Flagstaff while we were gone.
If you want to extend your trip to see more than just Havasupai, we’d recommend exploring Flagstaff and nearby Sedona for a few days as they both have lots to do and great hiking.
Where is the closest major airport to Havasupai Trailhead?
The closest major airport to the Havasupai trailhead is Flagstaff Pulliam Airport (FLG). It is about 2 hours and 40 minutes away from the hilltop trailhead. It mainly services American Airlines with connecting flights to Phoenix and Dallas-Fort Worth.
The next closest airport is Las Vegas Harry Reid International Airport (LAS). It is 3 hours and 30 minutes away from the hilltop trailhead.
Distances to the Trailhead from major destinations:
Las Vegas, NV
- 222 miles
- 3.5 hours
Flagstaff, AZ
- 166 miles
- 2 hours and 40 minutes
Sedona, AZ
- 193 miles
- 3 hours and 15 minutes
Phoenix, AZ
- 259 miles
- 4 hours and 30 minutes
Grand Canyon South Rim
- 193 miles
- 3 hours and 10 minutes
Havasupai hike itinerary
All permits for Havasupai are for 4 days and 3 nights, so most people’s itineraries will look somewhat similar.
We think it’s important to have a rough plan for how you want to spend your time so you:
- know what to expect (energy wise)
- know what time you’ll need to wake up by each morning (some may be early)
- can plan meals accordingly
Below is our recommended itinerary with a couple of options, depending on how you want to spend your time:
Day 1: Getting there and setting up camp
This will be a long day: You will need to check in and get wristbands, drive to the trailhead (which may take several hours depending on where you’re staying), hike 10-11 miles to the campground, and set up camp. Whew!
It’s a lot, but it is the start of your big adventure. Be sure to pack lots of snacks for today!
Morning: Start your hike!
- We’d recommend that you try to get on the trail before 9 a.m.
- Backwards plan the driving time (including time for check-in at Grand Canyon Caverns Inn) so you know when you need to hit the road in the morning.
- We personally stayed in Flagstaff the night before and left our Airbnb at 3:30 a.m. and we started our hike at 8:40 a.m.
- Be sure you’re drinking plenty of water and stopping for snack breaks to fuel up. However, we’d recommend trying to keep a quick pace (read the next section for why).
- You may even want to wait until you reach the campground to have a full lunch, depending on what time you started your hike.
Afternoon: Find a campsite
- Once you get close to the campground, It can be tempting to stop off at the waterfalls along the way. However, we’d advise against this.
- We recommend getting straight to the campground and choosing a site to set up camp as soon as possible.
- Why? As Havasupai has become increasingly popular, the campground is almost always at full capacity and it can be difficult to find a site if you arrive later.
- Read more about what to expect at the campground
Evening: Relax
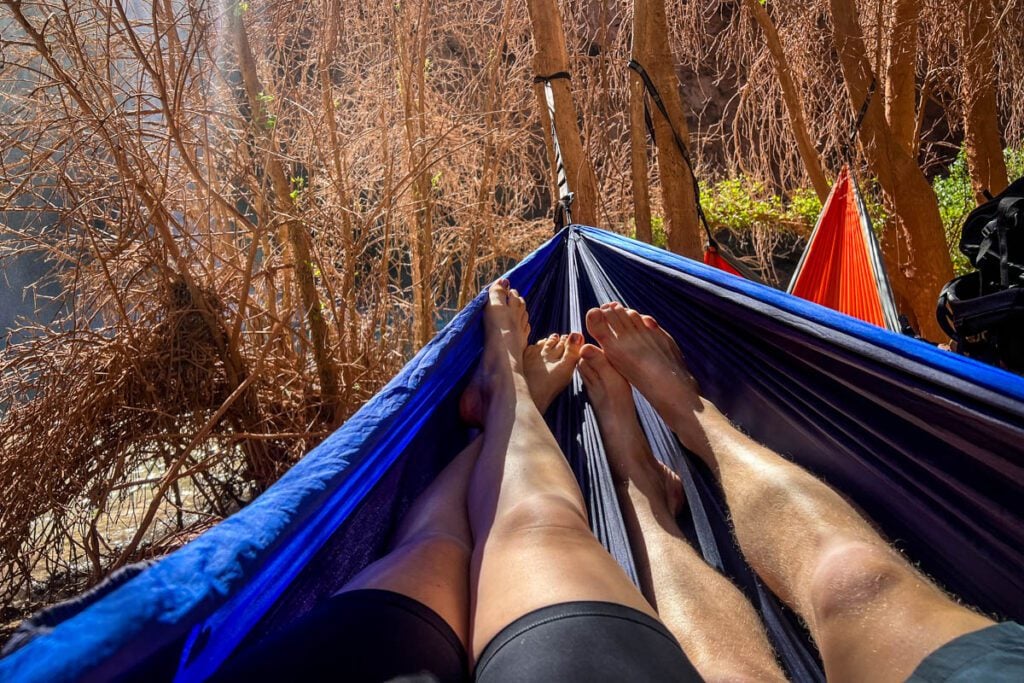
- Do whatever your body (and energy levels) are telling you: Have lunch, set up your campsite, fill your water, hang a hammock, read, take a nap, cook dinner, get to know your tent neighbors, walk to one of the closer waterfalls (Havasu Falls or Mooney Falls), hike back up to Navajo or Fifty Foot Falls, if you’re feeling up to it.
- Make it an early night.
Day 2: Adventure day
If you plan to hike to The Confluence or see Beaver Falls, we’d recommend doing it on your second day. It may feel hard to wake up and do lots more hiking after the trek into the campground, but you will need to feel ready and have enough energy for the hike out on Day 4.
If you’re like us, you’ll have excited energy on Day 2 because you just arrived and you’ll want to explore the area!
We have 2 options for exploring today.
Morning: Waterfall hikes
- Wake up early so you can get a start on the day and beat crowds to the waterfalls.
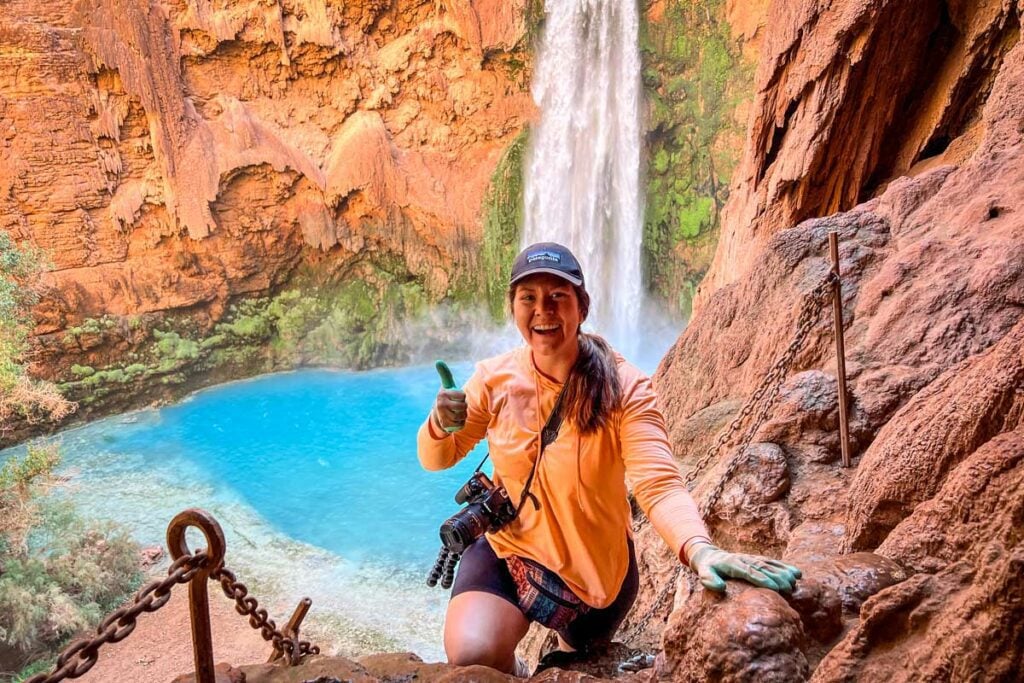
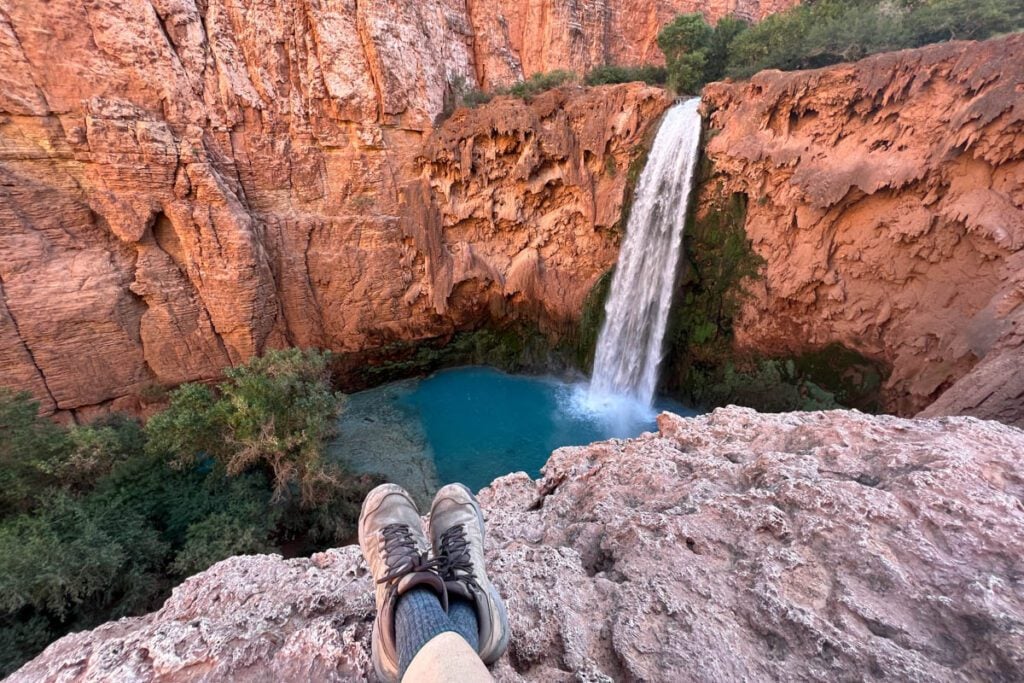
- Hike to Mooney Falls. This is located roughly 1 mile from the start of the campground, so depending on where your tent is pitched, it may be pretty close to you. Appreciate the view from above, then descend the ladder system to the bottom of this magnificent waterfall.
- Hike to Beaver Falls. A lot of people skip this waterfall because it is the furthest waterfall from the campground, but we would highly, highly recommend you get here. With several cascades and perfect pools for swimming, it was our favorite of all the waterfalls. Plus, it tends to be less crowded than the others.
- From Mooney Falls, it is a 1.5-mile hike (one way) to get to Beaver Falls, and it is noticeably more difficult than the trail from the parking lot to the campground.
- If you get here early, you have a good chance of having it all (or mostly) to yourself (we did!).
- The lighting is best early in the day and late in the afternoon, so if you are a photographer, keep this in mind. (More photo tips here)
Afternoon: Choose your own adventure
- Option A: Continue hiking to the confluence of the Colorado River.
- Beaver Falls is on the way, so you’re already on the right path.
- This hike is epic, but it is no joke. It is not well-marked, there are many river crossings, bush-whacking, and places where you can lose the trail. Be prepared.
- It will be a full day. You will likely get back to your campsite not long before sunset.
- If you plan to do the confluence hike, do not leave Beaver Falls any later than 10:30 a.m. or you will likely run out of daylight. This means you really need to get an early start today!
- Read this guide before you plan to hike to the confluence.
- Option B: Have a slower paced afternoon
- Hang out at Beaver Falls as long as you’d like, have a picnic lunch, set up a hammock
- Make your way back to Mooney Falls (climb the ladder section) and relax at your campsite or Havasu Falls.
- If you have more energy, hike up to Navajo or Fifty Foot Falls
Evening: Dinner and hang out
- If you’ve made friends with your tent neighbors, tonight is the night to hang a bit as tomorrow can be your latest wake up. Swap stories, play cards, watch the stars.
Day 3: Relaxing day
Tomorrow will be a big day, with breaking down camp, hiking out, and getting to wherever you’re staying for the night.
We recommend taking this day easy. Depending on how much you did on Day 2, you may want to hike to some of the closer waterfalls, or you may want to take today as a total “zero day” as we call it – and do nothing but relax!
Morning: Slow morning
- Wake up whenever you’d like.
- When planning our backpacking meals, I like to bring a bigger, more involved meal for lazy mornings like this one.
- Post up at a waterfall and hang out for a bit.
- We’d recommend Havasu Falls because it has a nice swimming area, it’s close to the campground, and there’s trees (on the island) where you can set up a hammock. (Get there somewhat early-ish if you want to snag a hammock spot.)
Afternoon: Lunch and relax
- Walk up the hill beside Havasu Falls and have lunch at the Indian fry bread stand.
- Make sure you have cash (fry bread is between $10-$15 depending on toppings, and drinks are more)
- Pack a “back-up” lunch/snacks, as this stand is known to sometimes be randomly closed
- After eating, you can continue up the path and hike to Navajo Falls and/or Fifty Foot Falls or you can head back to Havasu Falls and relax some more
- We personally went right back to our hammock on the island at Havasu Falls and read, talked, napped, swam (aka a perfect “zero day”!). We also brought a set of mini watercolors and did some painting around sunset time.
Evening: Dinner and get organized
- Enjoy your last camp dinner.
- Tomorrow’s going to be an early wake up, so go to bed at a reasonable time.
- If you can, it really helps to clean up your campsite and get some stuff packed in the daylight so you won’t have to do it in the morning before sunrise.
Day 4: Hiking out
Today is another long one. You have to break down your campsite, hike back to the trailhead, then drive to your accommodation.
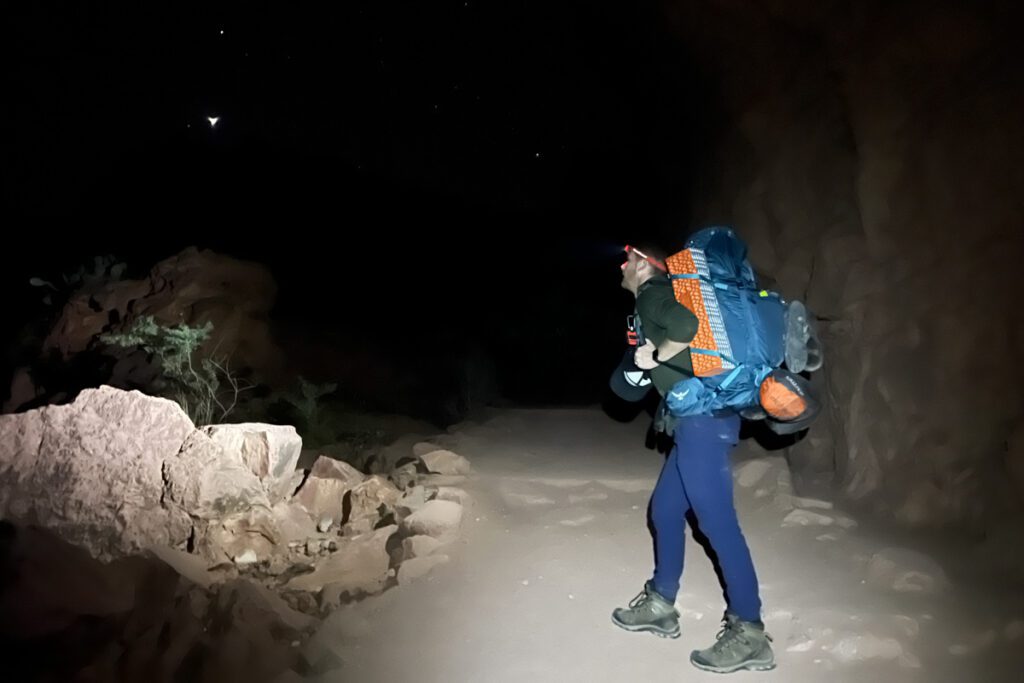
We highly recommend starting your day as early as possible. Yes, even before the sun rises. If you don’t get an early start, you risk doing a lot of the hike in direct sunlight which would not be very pleasant.
Morning: Set your alarm for an early morning
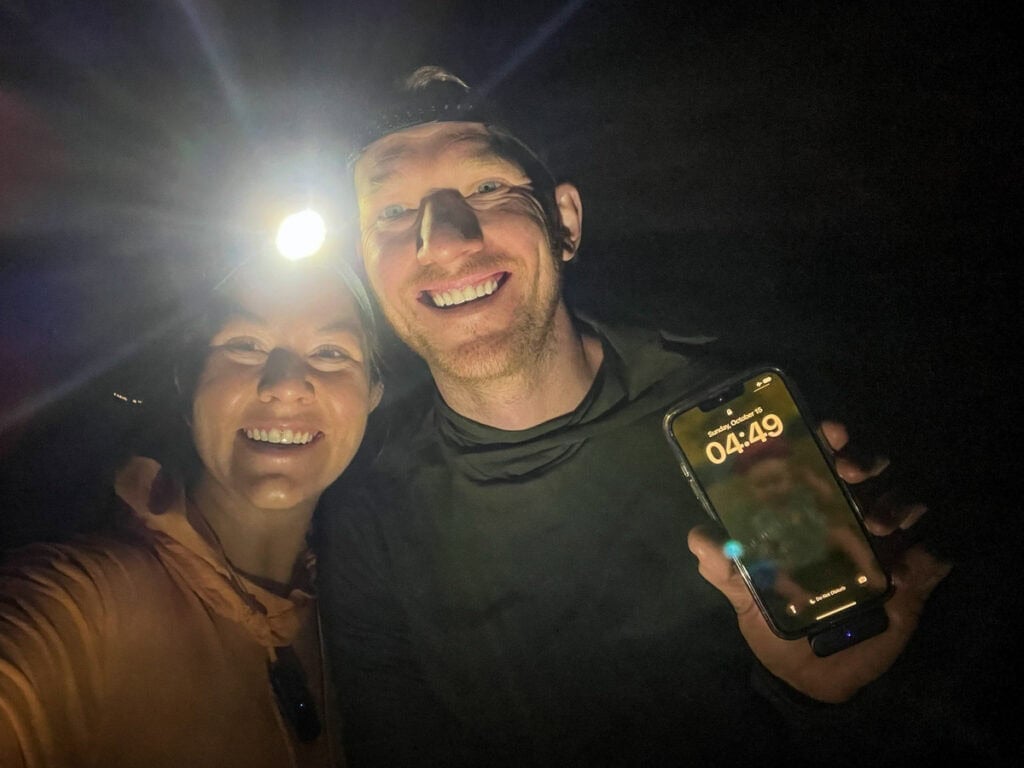
- We personally woke up at 3:30 a.m. so we could break down our camp, eat breakfast (do something quick but filling, like oatmeal), and fill up our waters.
- We left the water fill at 5 a.m. to begin the hike out.
- We hiked for just over an hour in the dark before the sun started to rise, so be sure to have your headlamp!
Mid-morning: Finish the hike!
- Yay, you did it!
- We personally got to the trailhead at 9:20 a.m., and since we got such an early start, we only had about 10-15 minutes of hiking in the direct sun.
- Use the bathroom at the trailhead, then return to your car and chug some water. You’ll be thankful you left some water and snacks in your car!
- Now it’s time to start driving to wherever it is you are headed. Hopefully you had an incredible time on this backpacking trip!
Havasupai itinerary FAQs
Still have questions about how to plan your time at Havasupai? We’ve got answers…
Can I stay longer and 3 nights?
No. Permits are strictly sold for 4 days/3 nights. There can’t be any additional days added.
Can I go for fewer than 3 nights?
Technically, sure. Nobody is going to stop you from hiking out early.
However, we’d highly recommend planning to stay the full 3 nights, 4 days.
There is a lot of hiking involved getting there and back, so you’ll want some time to relax. There are also some incredible extra trails (our favorite was hiking to Beaver Falls), that you can add to fill up your days if you’d like.
Plus, the first and last day will require an early wake up, so you’ll likely want the entire 4 days. You definitely won’t get bored!
What’s the best way to see all 5 waterfalls?
Because of how spread out the waterfalls are, we think it’s important to split them up and not plan to visit all of them on the same day.
We’d recommend planning to visit Mooney and Beaver Falls together on the same day, and Navajo and Fifty Foot Falls together on a different day.
Havasu Falls is right in the middle, so you can visit it on either day. That said, visiting Mooney and Beaver Falls is a longer, more involved hike, so we’d recommend planning to spend most of your time at Havasu Falls on the day you visit Navajo and Fifty Foot Falls.
Our Havasupai waterfalls guide goes over each of the 5 main falls in detail, including how to get there, what to expect, the best ones for swimming, and our personal favorite.
More bucket list hikes around the world
If you’re a hiking enthusiast like us, here are some more trails around the world to add to your bucket list!
And the good news is we’ve got guides to all of them!
- Kalalau Trail (Hawaii)
- Kumano Kodo (Japan)
- The Enchantments (Washington State)
- Inca Trail (Peru)
- Everest Base Camp (Nepal)
- Tongariro Crossing (New Zealand)
- Fimmvörðuháls Trail (Iceland)
- Path of the Gods (Italy)
- Old Man of Storr (Scotland)
- Ijen Crater (Java, Indonesia)
- Mount Storm King (Olympic National Park)
- South Sister (Oregon)
- Broken Top (Oregon)
- Sierra Norte (Oaxaca, Mexico)
- Cracker Lake (Glacier National Park)
- Mohare Danda (Nepal)
- Volcan Acatenango (Guatemala)
Plan the perfect Havasupai backpacking trip
Now that you know exactly what to expect on the hike to Havasu Falls, here are some other Havasupai articles to check out. We’ve got tons of guides filled with essential information and secret tips that’ll ensure you have the adventure of a lifetime!
- How to Get a Havasu Falls Permit
- Best time of year to visit Havasu Falls
- What to pack for Havasupai
- Havasu Falls Camping Guide
- Havasupai Waterfalls
- Havasupai Confluence Hike: Is it worth it? + Essential Tips
- Everything you need to know before you hike Havasupai
Don’t miss your chance to grab our Havasupai Packing List!

This FREE PDF download includes everything you’re going to want to pack for your Havasu Falls hike, including what NOT to bring, plus tons of insider tips!
Sign up for our ultimate Havasupai packing list now and get a copy sent straight to your inbox.
Save this article on Pinterest for later!


We want to hear from you!
Are you planning a trip to hike to Havasupai? Do you have more questions about doing the Havasu Fall hike? Comment below and we’ll do our best to get back to you!

Katie Diederichs is the lead writer and co-founder of Two Wandering Soles, where she creates in-depth travel guides, itineraries, and tips designed to help readers plan better trips with confidence. With a background in journalism, photography, and design, she combines thorough research with firsthand experience to deliver clear, practical, and visually driven travel content. As the primary trip planner, Katie turns complex logistics into easy-to-follow advice travelers can actually use.
we will be there in late November. I feel like most of what I read talks about the summer or spring. Do you have any tips focused on fall or November late?