
Plan the Japan trip of a lifetime through Kyoto, Hakone (Mount Fuji), Osaka, and of course, Tokyo. This is exactly how we spent one week in Japan on our first visit. You’ll get a taste of the country’s culture, food, cities and landscapes, and you’ll leave craving more!
I still remember the feeling of stepping off the plane in Japan for the first time. The organized chaos of the airport, the vending machines selling hot coffee in tiny cans, the perfectly manicured everything.
We hadn’t even left baggage claim and we were already buzzing with anticipation.
One week in Japan is not a lot of time. I’ll be the first to admit that. This country is so layered, so endlessly fascinating, that you could spend months wandering its big cities and small villages and still feel like you’d only scratched the surface. (Trust us—we’ve done it since!)
But one week is what we had, and we made it count.
This is the exact itinerary we followed on our first trip, hitting Kyoto, Hakone (Mount Fuji), Tokyo, and Osaka, with one very memorable detour to see snow monkeys in Nagano.
It’s packed, it’s a little whirlwind, and it will leave you already plotting your return before you’ve even boarded the flight home. (We started planning trip #2 somewhere over the Pacific.)
Plus, with 2 return visits under our belts, we’ve been able to return to all these places and really dig in. We’ve honed this itinerary along the way to make sure it’s exactly what we would plan if we were doing our first trip over again.
So without further ado…
Japan 1 Week Itinerary overview
Use these jumps to navigate to a specific day, or keep scrolling to read the full itinerary.
- Day 1: Arrive in Japan & make your way to Kyoto
- Day 2: Highlights of Kyoto
- Day 3: Explore more of Kyoto
- Day 4: Travel to Hakone
- Day 5: Morning in Hakone, Tokyo at night
- Day 6: Jigokudani Yaen-koen Snow Monkey Park, Nagano
- Day 7: Highlights of Tokyo
- Day 8: Meiji Shrine and fly home (via Osaka or Tokyo)
Good to know: This itinerary packs a lot in and can feel a bit rushed. We think this would be ideally spread across 8-10 days. But if you’re like us, and want to see as much as possible in a short time, this itinerary will do the trick!
Other contents:
- Have more or less time?
- Done-for-you Japan itinerary
- What to pack for Japan
- More Japan travel resources
Psst! One week is a great start — but if you want to really dive in, our 2-Week Classic Japan Itinerary takes this route further, with Hiroshima, Miyajima Island, and deeper dives into every city. See the daily breakdown →
There are a couple important things to take care of before you arrive…
How to stay connected in Japan

We made the mistake of not sorting out our WiFi situation ahead of time — don’t be like us! You do not want to be stuck in the technology capital of the world without internet access.
A Pocket WiFi device lets you bring a hotspot wherever you go for directions, train schedules, restaurant searches and more. You can connect up to 10 devices, which makes it a better option than a SIM card in our opinion. Check out some prices here.
→Psst! Figure out which method is best for you with our detailed guide to staying connected in Japan.
Do you need a JR Pass for this itinerary?
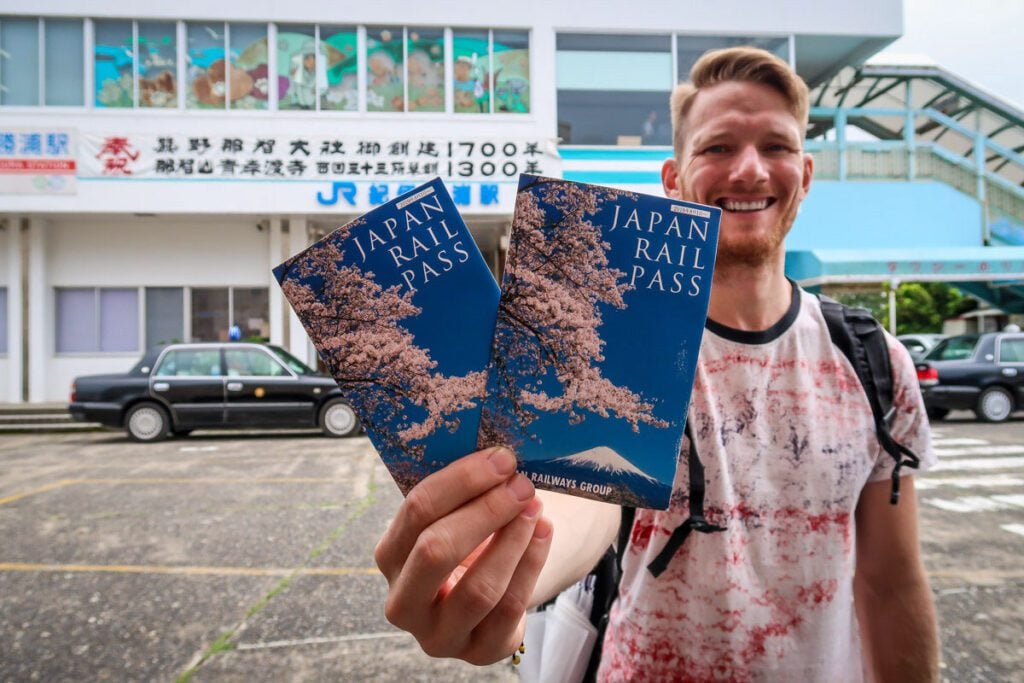
The short answer: it depends on your flights — and the math might surprise you.
The Japan Rail Pass currently costs 50,000 yen for 7 days and covers nearly every train leg in this itinerary — the Haruka Airport Express, the Shinkansen (bullet trains) between cities, the Hokuriku line to Nagano, and even the local JR train to Fushimi Inari.
On paper, it sounds like a no-brainer. But we did the math, and here’s what we found:
The pass only pays off if you fly in and out of Osaka Kansai Airport — in which case your individual ticket total comes to around 54,320 yen, saving you about 4,300 yen (~$29 USD) with the pass.
For every other flight combination, individual tickets are actually cheaper.
That said, there’s a real case to be made for convenience. With the JR Pass, you never have to queue at a ticket machine, calculate fares, or worry about buying the wrong ticket. You just tap and go. For first-time visitors to Japan who are already navigating a lot of new logistics, that peace of mind has genuine value.
Our take:
- If you’re flying in and out of Osaka: get the pass — it pays for itself and then some.
- If you’re flying into or out of Tokyo: decide whether or not the additional ~$50 USD cost is worth the added convenience.
Now are your ready to dive into the itinerary!?…
Day 1: Arrive in Japan & make your way to Kyoto
Welcome to Japan! Your adventure is about to begin…
Before we get to the fun stuff — aka things to do and what to eat! — let’s talk logistics.
It’s likely that some of the cheapest flights to Japan you’ll find are to Osaka, and this is where we begin our itinerary. (If you fly into Narita International Airport in Tokyo, simply adjust your days to suit your travel plans.)
- The best part of flying into Osaka Kansai Airport: It’s cheap.
- Worst part: It’s on an island, so it takes about 30-45 minutes by train to Osaka city center.
Plan to stay in Osaka at the beginning or end of your trip, as your time allows. We have things to do in Osaka detailed on the last day of your trip to Japan, however you can explore this exciting city as soon as you arrive and alter your dates accordingly.
Have a bit more time in Osaka? Why not do a day trip from Osaka to Hiroshima to check out the highlights? As a bonus, it’s even covered in your J-Rail Pass!
If, like us, you choose to save Osaka for the end of your Japan trip, plan to take an express train to Kyoto as soon as you land.
We spent our first night in Kyoto adjusting to jet lag and wandering around the neighborhoods. If you’re hungry, pop into a ramen shop and fill your grumbling belly with noodles that are infinitely better than the dried packet kind.
→ Psst! These expert jet lag tips will help you adjust to your new time zone faster!
Where to stay in Kyoto
The Southern Higashiyama area is a good area to base yourself in during your time in Kyoto. We stayed at Santiago Guesthouse (a great option for budget-conscious travelers!) and really enjoyed the location and clean rooms. Plus, you can’t beat the price.
- Budget-friendly/social atmosphere: Piece Hostel Kyoto: Awesome location, modern common areas, privates and dorms available, rooftop garden. Great place to meet other travelers.
- Couples stay/mid-range budget: Sotetsu Fresa Inn Kyoto-Hachijoguchi: Incredible location steps away from the Kyoto Rail Station. Each room has a plasma TV and free WiFi. Perfect spot to base from if you are exploring the city with your hunny.
- Luxury hotel: Hotel Granvia Kyoto: This 5-star hotel has everything, from an indoor swimming pool to a restaurant and bar to a spa. You can’t beat this location. Perfect for the business traveler or a splurging couple.
Note: If you’re following this itinerary exactly, you’ll need to book 3 nights in Kyoto.
Day 2: Highlights of Kyoto

Kyoto has enough history that you could spend a month here and still not see everything — and honestly, we were tempted to try.
Insider tip: Get an all-day bus card for 1,100 yen at your hotel (or directly on the bus). It’s the easiest and cheapest way to get around the city.
We started by heading west to the Arashiyama area to explore the old town, and of course, we walked through the Arashiyama bamboo grove — an absolute must while in Kyoto.
If you have time, try to catch a glimpse of the monkeys at Kameyama-koen Park like we did. Afterwards, we grabbed lunch at one of the many noodle shops lining the street.
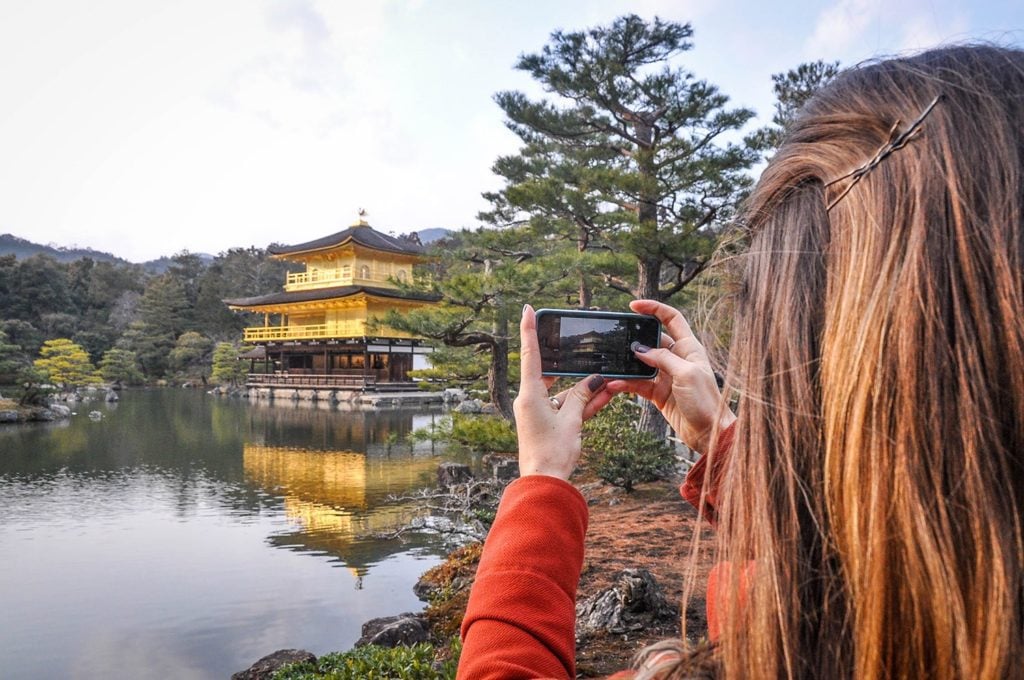
In the late afternoon, we hopped on the bus north to Kinkaku-ji, the famous Golden Temple, timing our arrival for sunset. It’s always busy, but honestly, the crowds fade into the background once you see it glowing over the water. We soaked it in and then headed back into town for dinner.
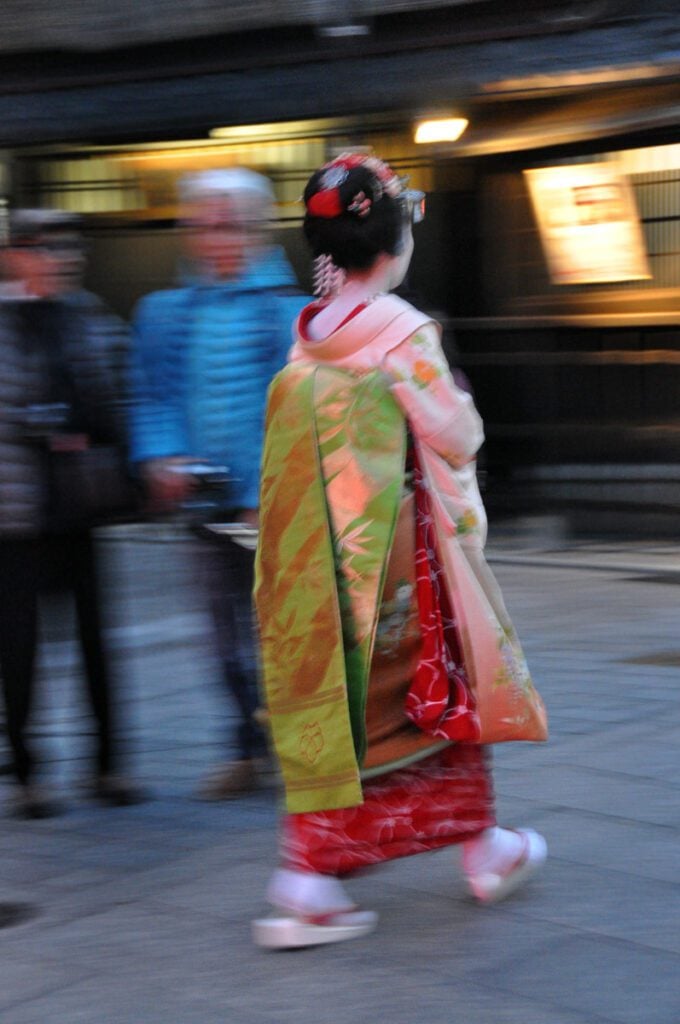
After dinner, we wandered Pontocho Alley in search of geishas. Keep your eyes peeled — they move fast, darting between restaurants and disappearing before you can blink.
Day 3: Explore more of Kyoto
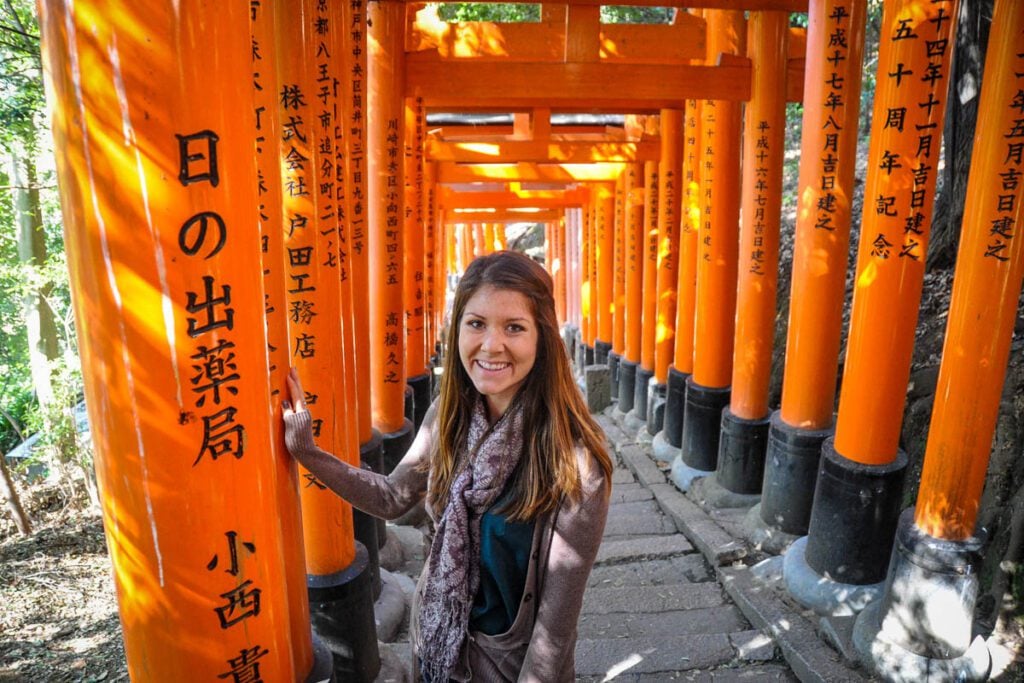
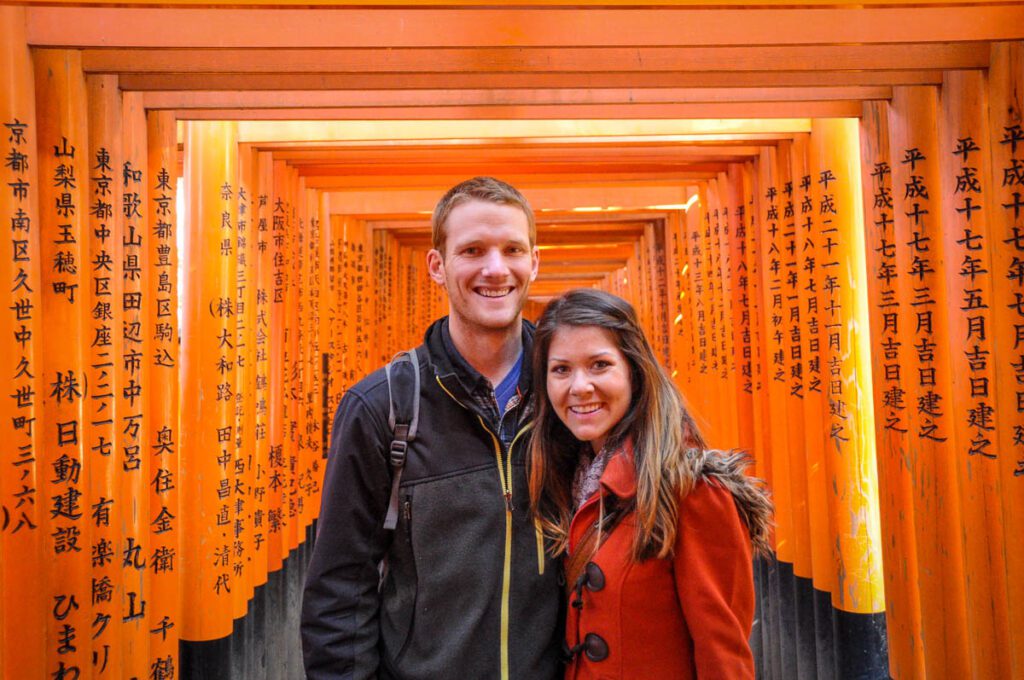
On our second morning in Kyoto, we woke up early and headed south to the Fushimi Inari Shrine, famous for its iconic orange gates.
To get there, we took the JR Nara Line to JR Inari Station (free with your Japan Rail pass!). Once you leave the station, the entrance to the shrine is right there.
This place gets incredibly packed, so the earlier you go, the better. We got a little lost taking pictures (no complaints there!). If you want to escape the crowds, head up the hill a little ways where you can get a shot without other tourists in the frame.
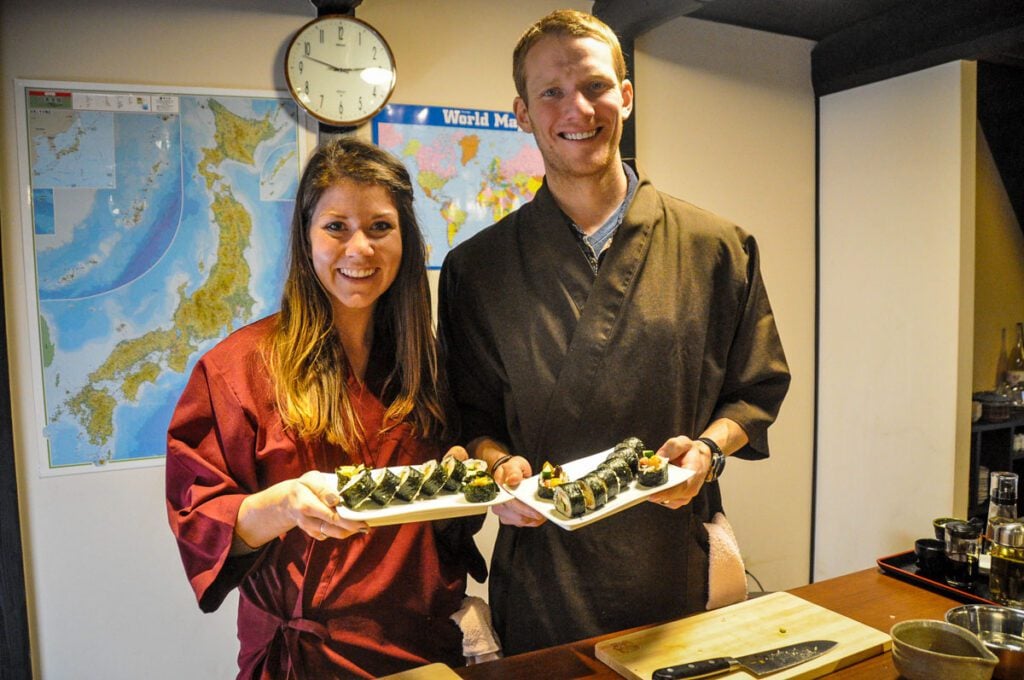
For the afternoon, we took a cooking class at Cooking Sun School. There are several class options, but we’d recommend the sushi making class — it was so much fun and we actually learned something!
We then made our way back into the city to explore Nishiki Market. Try the octopus balls — trust us on this one!
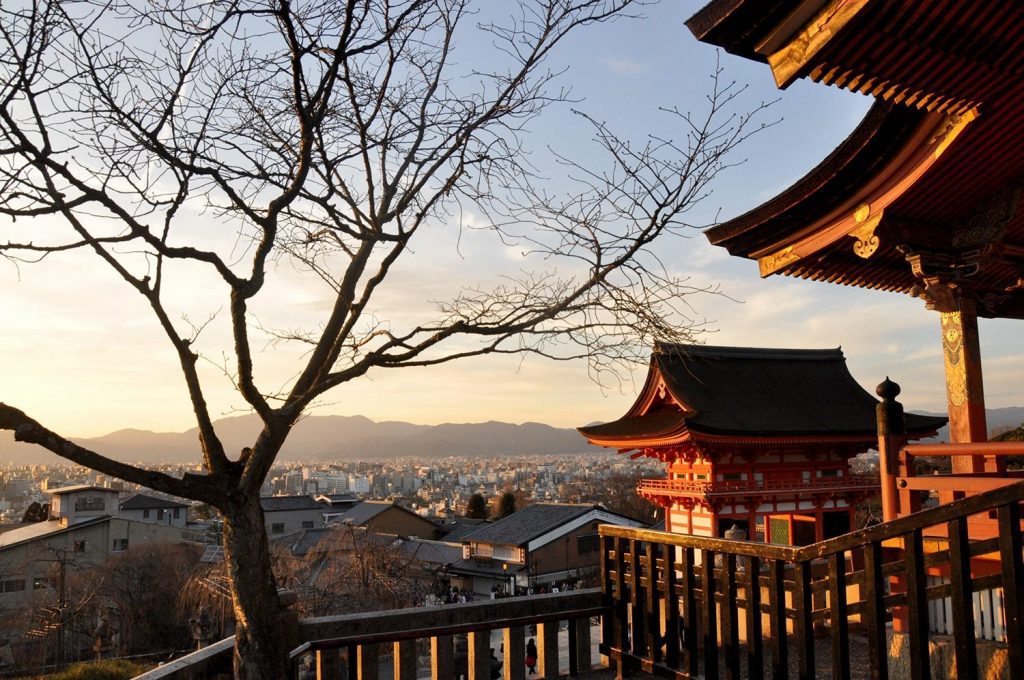
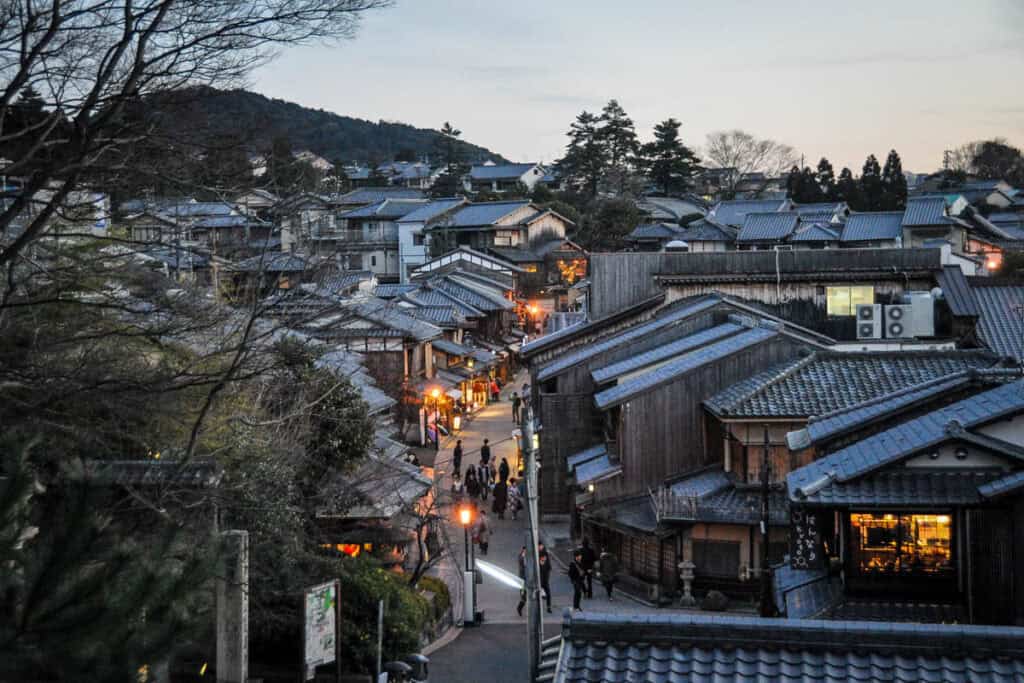
At sunset, we took the short hike up to Kiyomizu-dera Temple for a gorgeous view over the city.
As the sun dipped down, we wandered through the preserved streets of Ninen-zaka and Sannen-zaka, which felt like stepping back in time. It was one of our favorite moments of the whole trip!

Psst! Our 2-Week Classic Japan Itinerary expands on every stop here — more days in each city, restaurant recs, hotel picks, and the insider tips that only come from actually traveling in Japan multiple times. See the full itinerary →
Day 4: Travel to Hakone
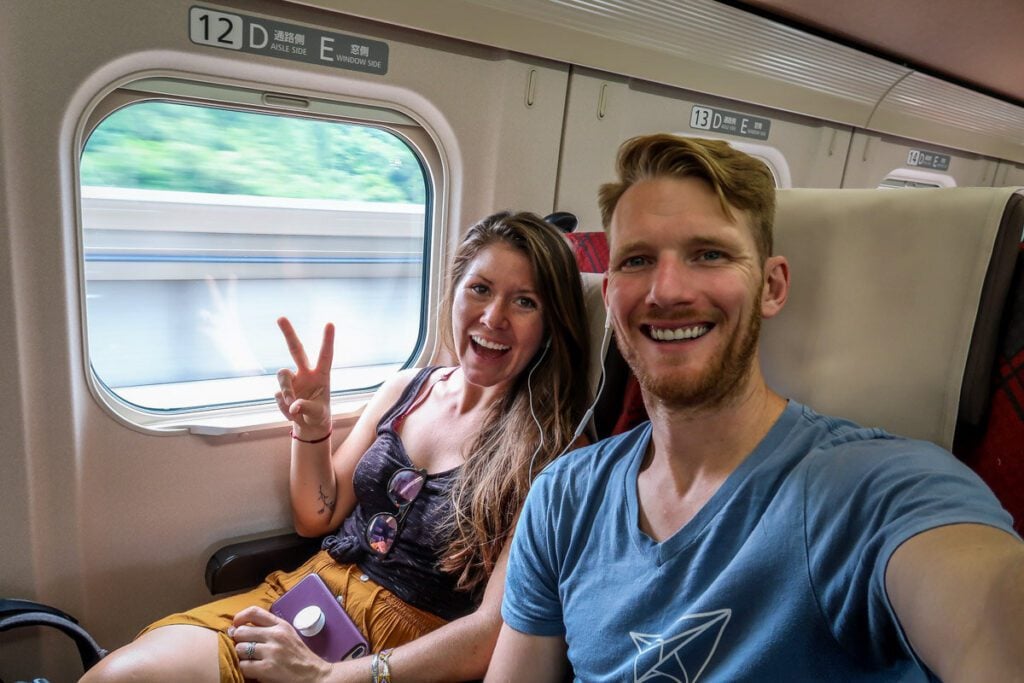
Using our JR Pass, we traveled via Shinkansen (bullet train) to Odawara and put our Hakone Free Passes to use.
Note on the Hakone Free Pass: The name is a bit deceiving as it’s actually about $45 USD for a 2-day or 3-day pass. Single-day passes are no longer an option, so if you needed an excuse to extend your trip to Hakone, you’ve found it! Grab your Hakone Free Pass here→
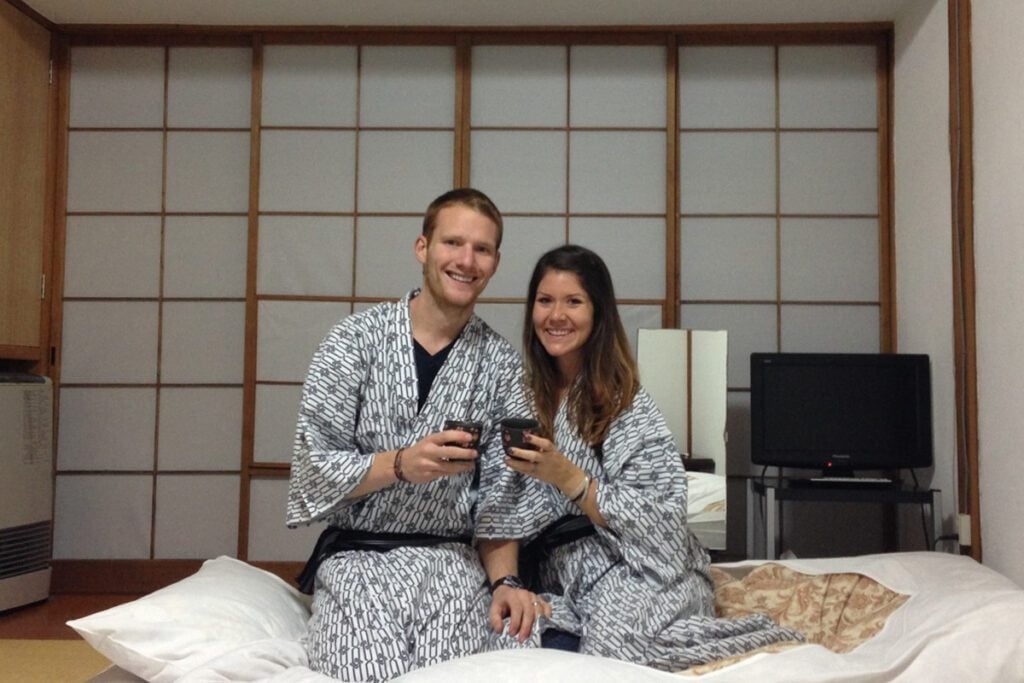
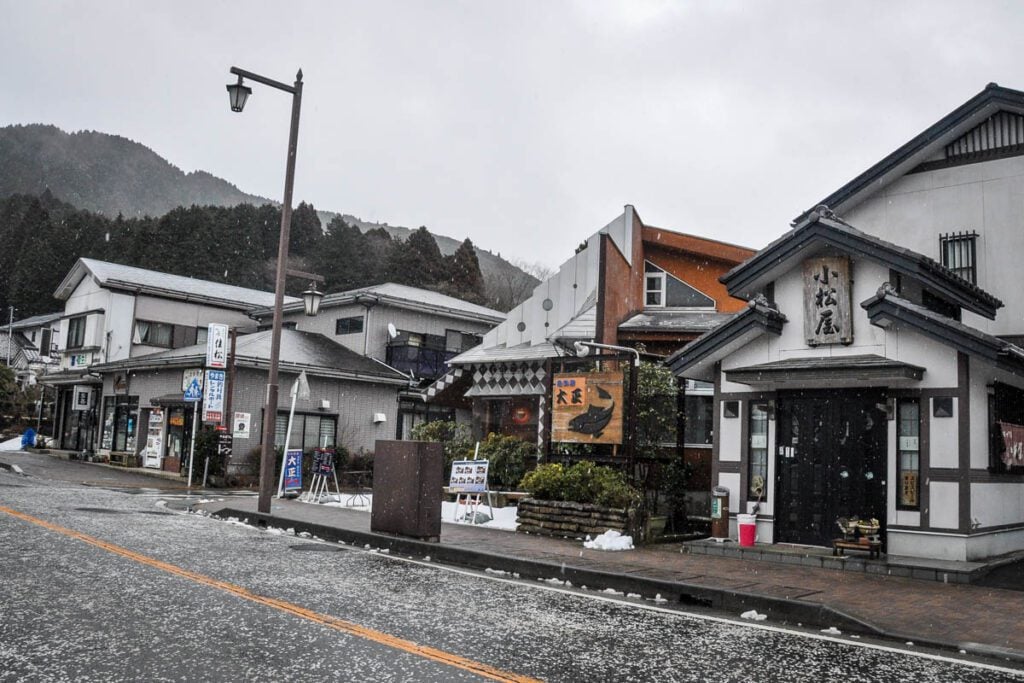
From the station, we took the bus (included in our passes) into the Hakone region and stayed in a ryokan-style guesthouse — one of the most uniquely Japanese experiences of the whole trip.
We stayed at Fuji-Hakone Guest House, which was one of the most affordable options in the area and did not disappoint.
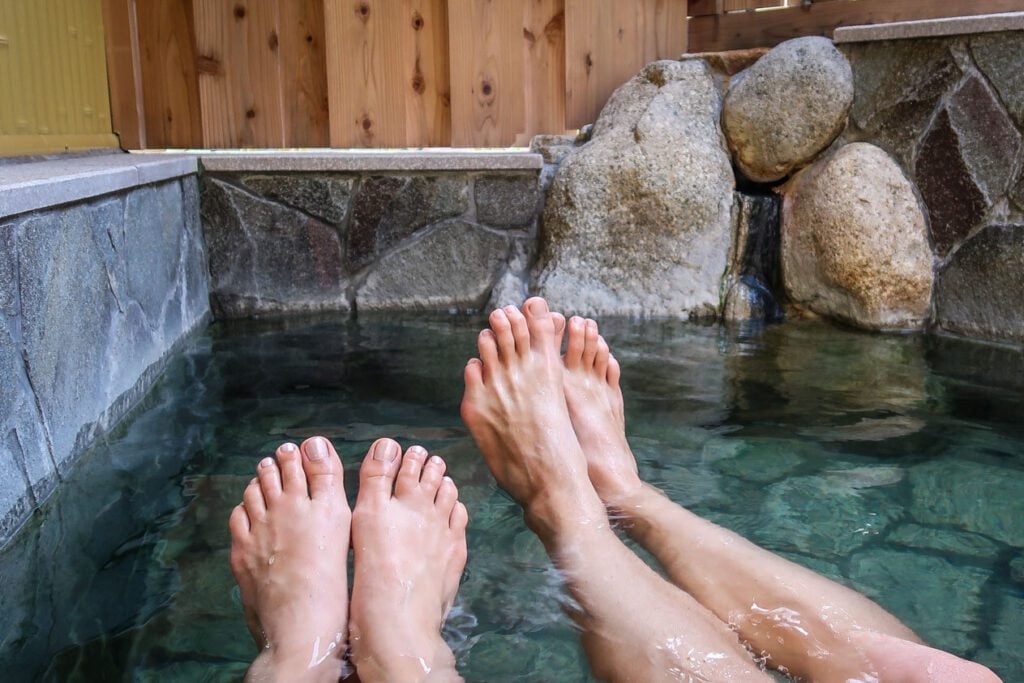
If you’re feeling adventurous and want a real cultural experience, visit an onsen — a Japanese-style bathhouse. Just keep in mind, bathing suits are not allowed!
The town of Hakone is known for its onsens, so you’ll have plenty to choose from. We’d recommend trying one that’s outdoors — if you’re lucky, you’ll get a glimpse of Mount Fuji in the distance. Many guesthouses in the area also have private onsens you can reserve, which is a lovely option for couples.
Psst! Before you start shedding your clothes, be sure to read up on proper onsen etiquette to avoid making any embarrassing mistakes.
We took a steamy dip in the private onsen at Fuji-Hakone Guest House and relaxed with wine as snowflakes fell all around us. Pretty magical.
In the afternoon, we used our Hakone Free Pass to hop on a bus to the cable car for a glimpse of Mt. Fuji (hopefully you’ll have better luck with the weather than we did!).
Itinerary note: We’ve since returned to Hakone and actually got to see the mountain in all her glory! You can see photos from our experience and read all about using the Hakone Free Pass to get around in our Hakone Day Trip article.
At the top of the cable car, don’t forget to try the black eggs. Legend has it that eating one adds 7 years to your life. We weren’t about to pass that up!
We headed back for dinner at a local restaurant and closed out the night with another soak in the onsen.
Where to stay in Hakone
- Budget-friendly/social atmosphere: K’s House Hakone – Onsen Hostel: A little ways out of Hakone town, but close to public transport so no worries. On-site onsen and nice social areas with free WiFi.
- Couples stay/mid-range budget: Fuji-Hakone Guest House: Lovely staff, Japanese style ryokan rooms, close to everything in town, and an on-site private onsen you can reserve with your sweetie.
- Luxury hotel: Hakone Kowakien TEN-YU: Peace and harmony. Traditional and Japanese style rooms available with some having an open-air bath on the balcony overlooking the mountains. Spa and onsen on-site. Pure luxury.
If you are following this itinerary exactly, you’ll just need to book one night in Hakone. If you have more time and want to stay longer, we have lots of ideas for fun things to do in Hakone.
Day 5: Morning in Hakone, Tokyo at night
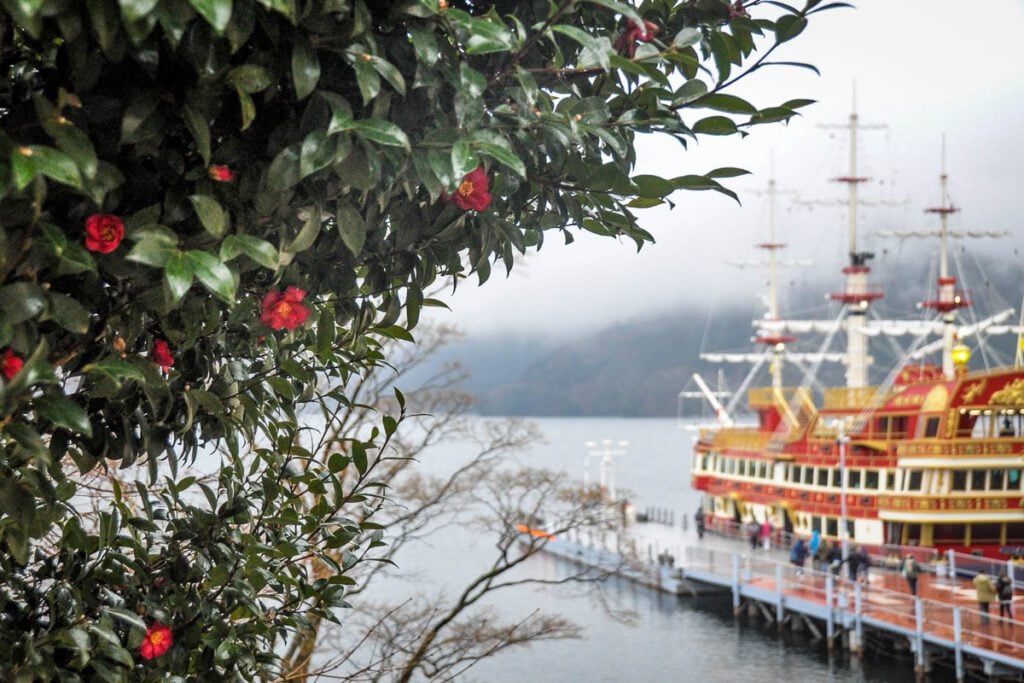
We started the morning at Togendai for another look at Mt. Fuji from Lake Ashi. The boat ride is admittedly a little cheesy, but we had fun with it — and it’s included in the Hakone Free Pass, so why not! It’s a fun way to take in the landscape.
We got off at the first stop, Hakone-machi Port, and walked northeast toward Moto-hakone Port, keeping to the hillside to walk through the stunning Cedar Tree Forest. Such a peaceful way to wrap up our time in Hakone.
From Moto-hakone Port, we traveled back to Odawara and then on to Tokyo via JR Rail that afternoon.
Once we arrived in Tokyo, we took the subway to our hotel and crashed for the night.
Where to stay in Tokyo
We’d recommend staying in the Shinjuku or Shibuya area, but if you want more info and specific hotel recommendations and a neighborhood breakdown of the city, we have a whole guide to where to stay in Tokyo.
If you want quick recommendations, here are our top picks:
- Budget: Book Tea Bed (Shibuya): Affordable capsule hotel in a prime location that has both women-only and mixed floors, as well as an onsite cafe.
- Mid-range/couples: Yksi Sauna & Stay (Shinjuku): Despite the name, this hotel doesn’t have a sauna. But it does have great reviews and offers private rooms at a reasonable price.
- Luxury: Trunk (Hotel) Yoyogi Park (Shibuya): This hotel receives rave reviews for its location and amenities, including an outdoor pool, a hot tub, and bikes available for guests to use for free.
Note: If you are following this itinerary exactly, you’ll need to book 3 nights in Tokyo.
Day 6: Jigokudani Yaen-koen Snow Monkey Park, Nagano
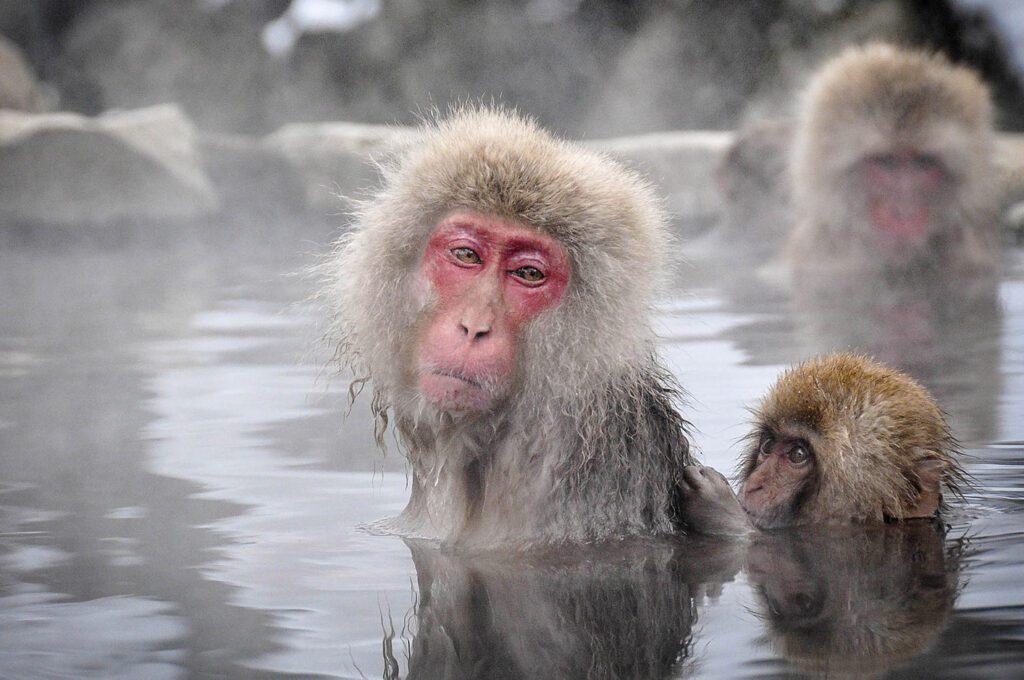
Using our JR Passes, we traveled to Nagano from Tokyo in the morning. From Nagano station, we walked to the local station, Nagano Dentetsu, and took the Yudanaka line to Yudanaka station.
From there, we hopped on a bus to the entrance of Jigokudani Monkey Park.
Itinerary note: Since we first went in 2015, they’ve added a shuttle system that makes getting to the monkey park a lot easier! From Nagano Station you can take the Nagaden Snow Monkey Express Bus directly to the park entrance and skip the need to navigate the local buses (unless you prefer them and want to save money).
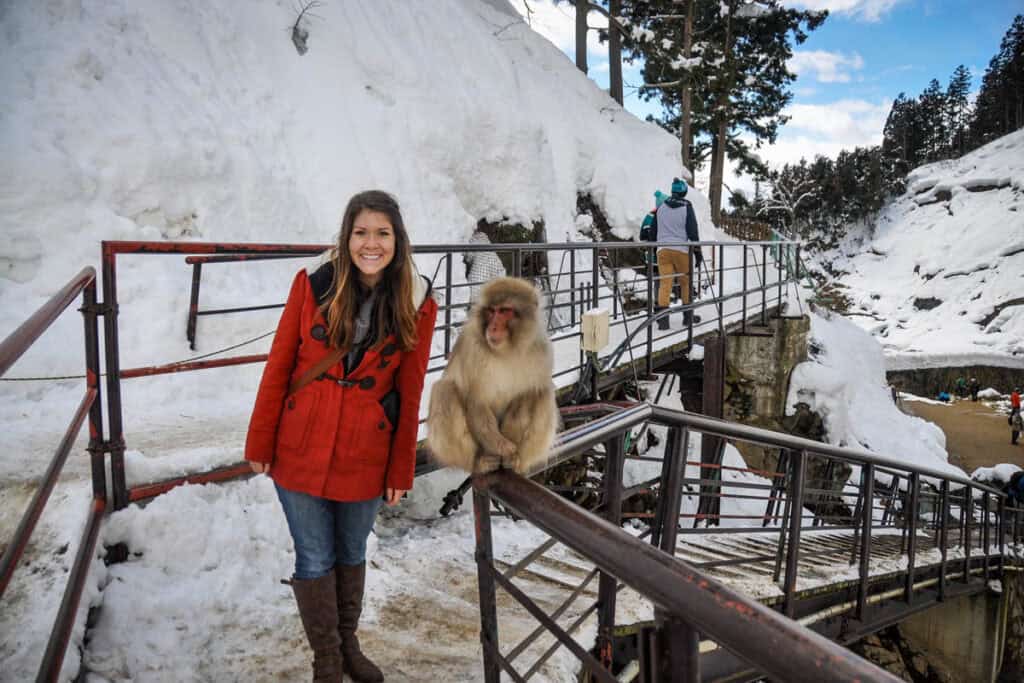
The walk into the park took us about 30 minutes — though honestly it was longer, because we couldn’t stop taking pictures of this fairytale forest.
We spent the whole morning just monkeying around, and it ended up being one of our favorite things to do in Japan. Genuinely one of those experiences we still talk about.
→Psst! Don’t miss our complete guide to visiting Jigokudani Monkey Park. It’s packed with important info and insider tips for the best experience!
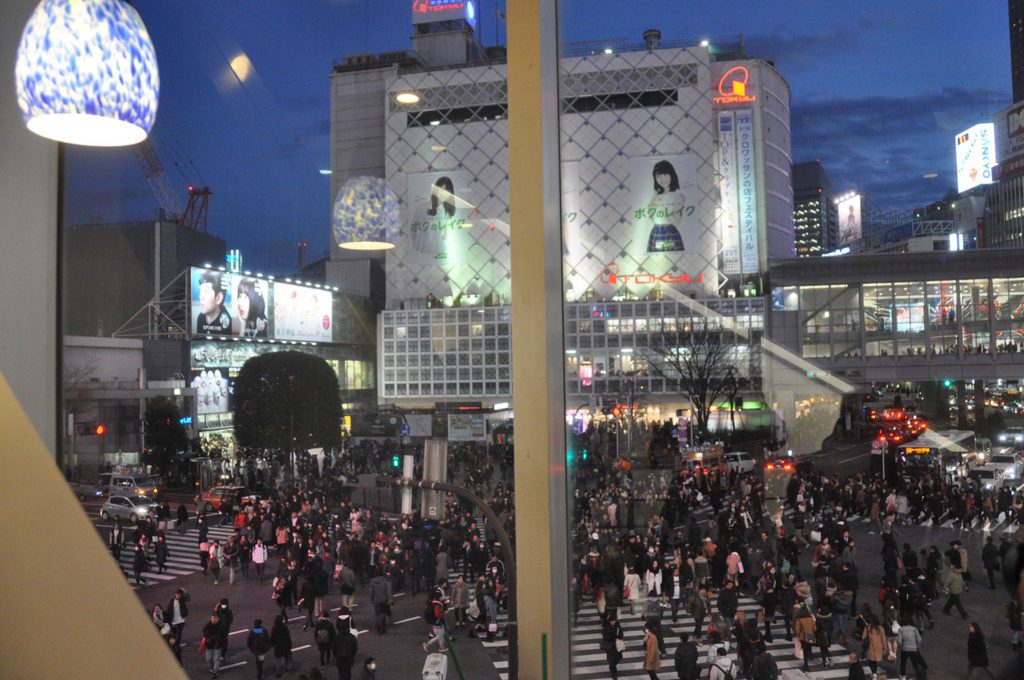
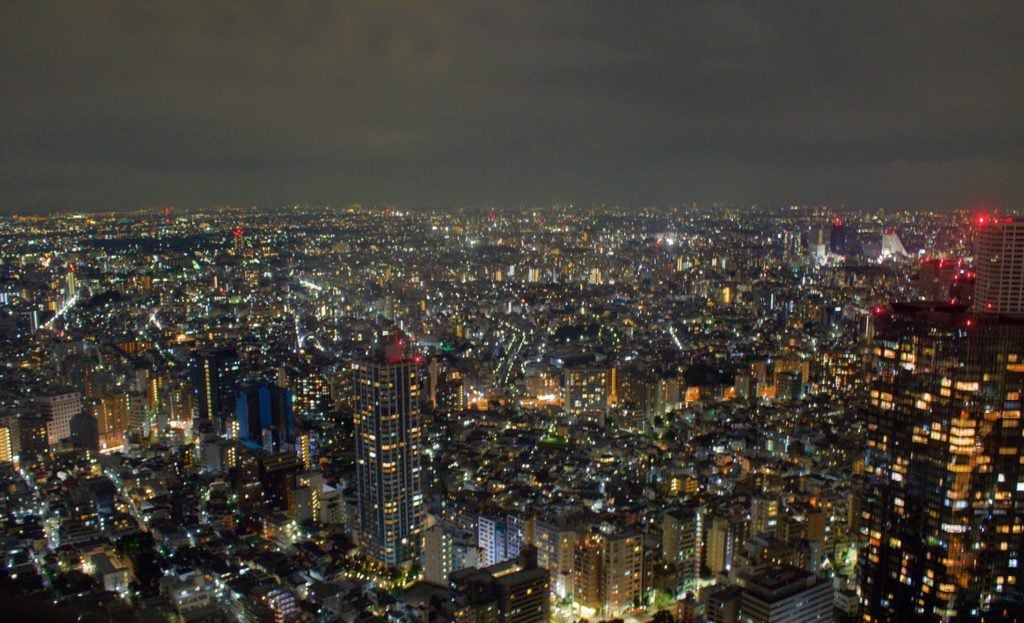
We headed back to Tokyo in the afternoon and made our way to the famous Shibuya Scramble — the busiest intersection in the world. We climbed up to the Starbucks across from the train station to watch the organized chaos from above. Worth every minute.
Itinerary note: Another thing that’s changed since we visited Tokyo the first time is the opening of the Shibuya Sky. Located on the 47th floor of the Shibuya Scramble Square Tower, the Shibuya Sky Observatory offers visitors sweeping panoramic views of Tokyo. We checked it out on our most recent trip to Tokyo and think it’s a must-do if your budget allows! (Must purchase tickets in advance!)
Before turning in, check out our list of the coolest things to do in Tokyo at night so you can make the most of your evening!
Day 7: Highlights of Tokyo
We spent the day traveling via metro and hitting some of the major spots in the city. Check out our huge list of things to do in Tokyo to help you plan your time in this overwhelming, yet completely addictive, city!
Insider tip: The easiest and cheapest way to get around Tokyo is to grab a 1-Day Pass. If you’re following our itinerary exactly, grab the Toei Line All Day Pass. (Otherwise you can use the Tokyo Metro 1-Day Pass, but you’ll have different stations). Read up on how to get around Tokyo before you arrive.
In the morning, we headed to Tokyo Tower, just off the subway stop at Akabanebashi Station on the Toei Oedo Line.
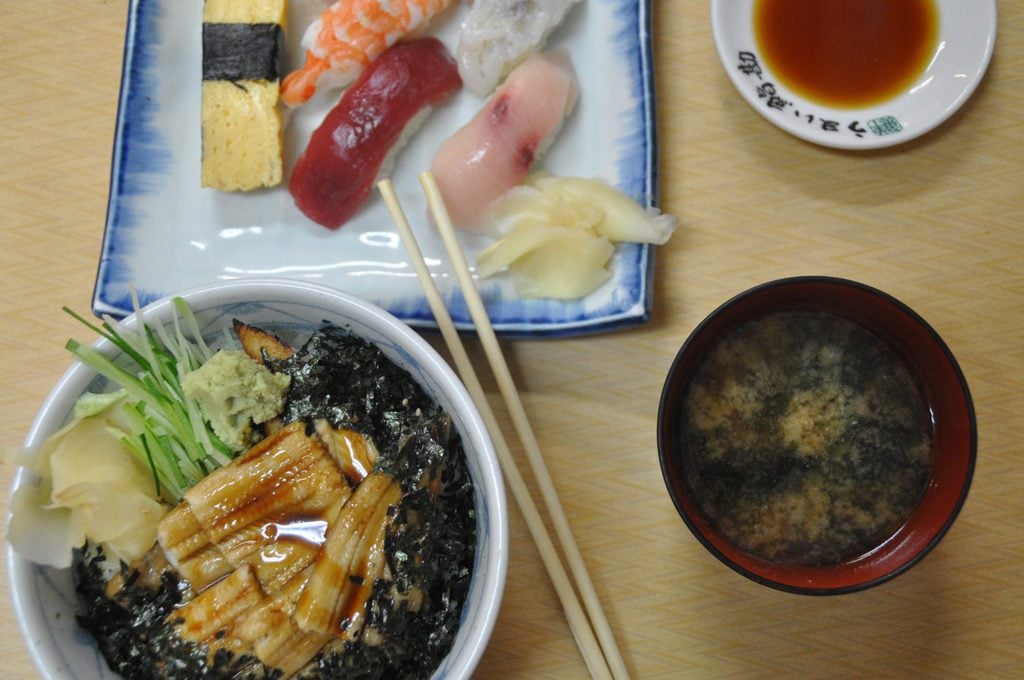
After soaking in the views, we made our way to the Tsukiji Fish Market for a sushi lunch (Toei Oedo Line, Tsukijishijo Station). Get there early — most of the restaurants close before noon. We had some of the best and freshest sushi of our lives here. I still dream about it.
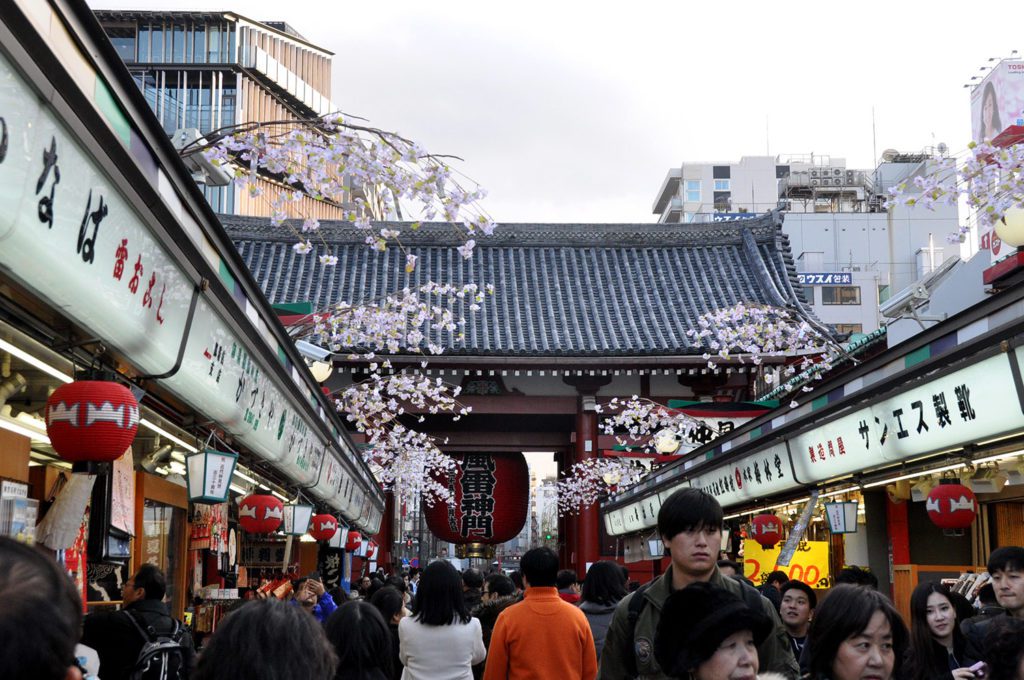
After lunch, we headed to Sensoji Temple to take in the massive red paper lantern at the Thunder Gate. It’s one of those sights that somehow exceeds expectations even when you’ve seen a thousand photos of it.

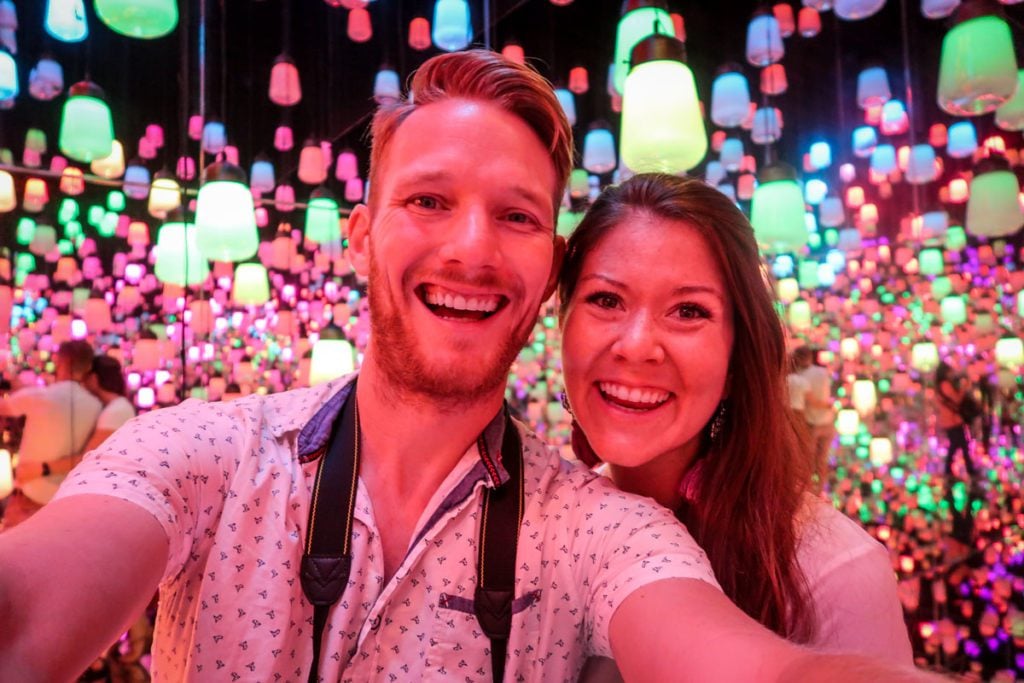
Later in the afternoon, we lost ourselves at teamLAB Borderless — an immersive art experience that is truly unlike anything else. If you only pick one “splurge” activity in Tokyo, make it this one.
- Location: Mori Building, Azabudai Hills Garden Plaza
- Hours: Monday – Friday, 9 am to 5 pm; Saturday – Sunday and holidays, 10 am to 7 pm
- Borderless is CLOSED on the 1st and 3rd Tuesdays of the month. (You will see that you cannot purchase tickets for these dates.)
- Entrance fee: ¥3,800 (~$26 USD) for adults
Psst! One of our biggest pieces of advice is to purchase your tickets ahead of time (otherwise you’ll have to wait in line and they may be sold out at the door).
Day 8: Meiji Shrine and fly home (via Osaka or Tokyo)
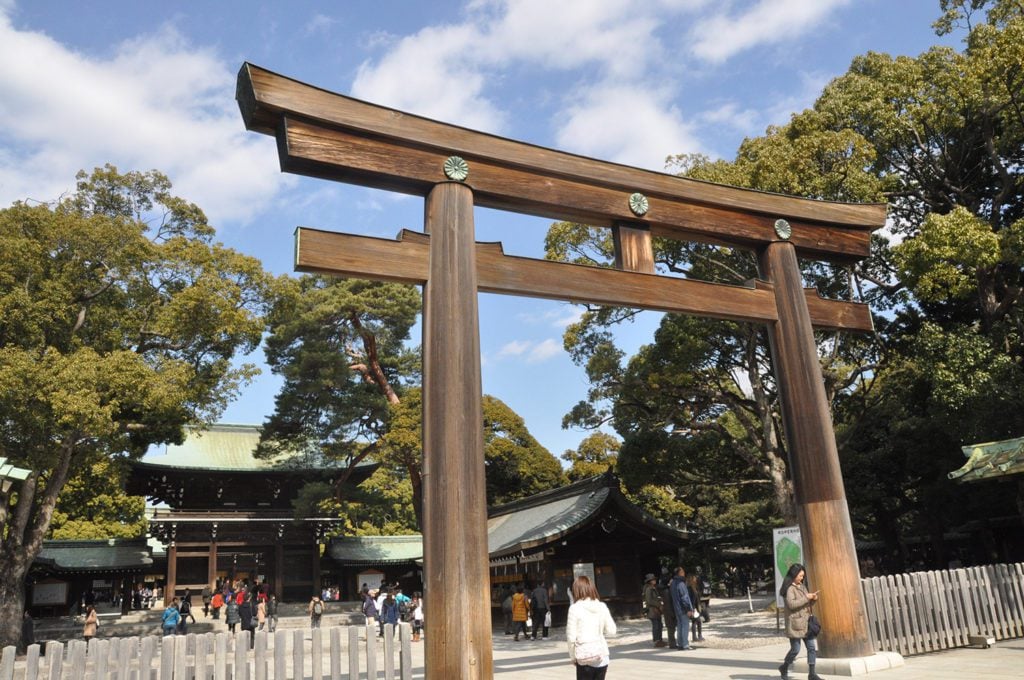
Before making our way out of Tokyo, we paid a visit to Meiji Shrine. Although it’s just a few stops outside of the bustling center, you feel like you’ve ventured out of the city and into nature entirely.
We breathed in the fresh air and wandered the wide paths lined by towering trees on the way through the woodsy temple grounds. If it happens to be a weekend, you’ll likely catch a traditional wedding ceremony — we did, and it was a beautiful, unexpected bonus.
From there, we headed to the airport and flew out of Tokyo, though you can also hop on the JR Shinkansen back to Osaka to catch your flight home.
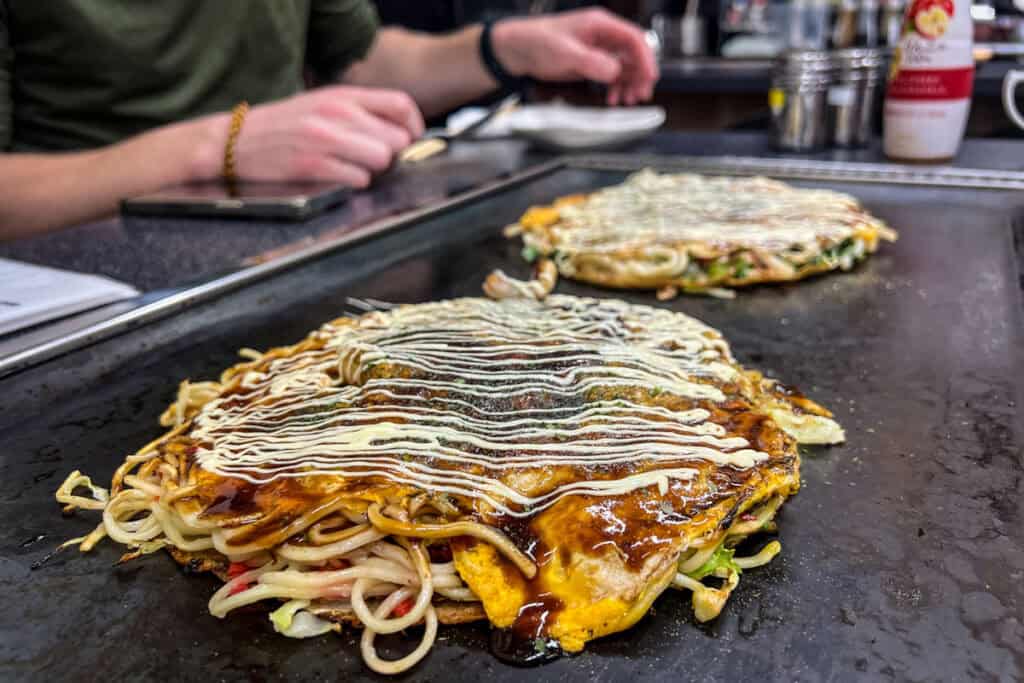
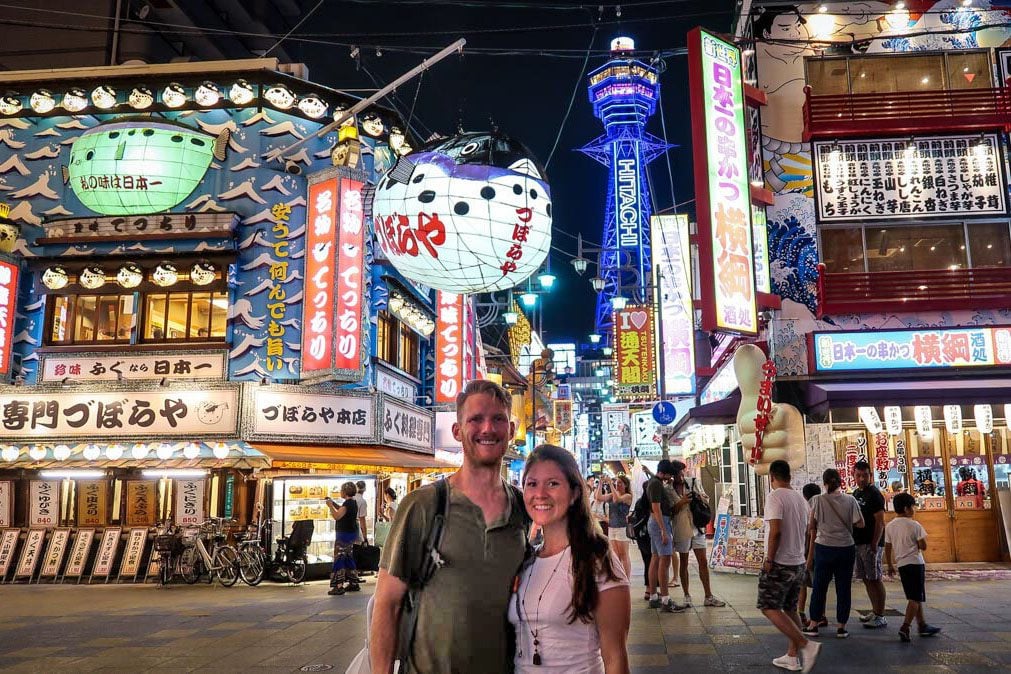
If time allows before your flight, we’d highly recommend wandering the Dōtonbori area in Osaka and trying Okonomiyaki — Japanese pizza, basically, and absolutely delicious. This neighborhood is a total foodie haven, so come hungry!
Psst! We have an entire article filled with our favorite things to do in Osaka if you can spare an extra day or 2 (highly recommended!). We didn’t make it there on our first trip to Japan, but we did take the time to explore the city on our return trip and we were pleasantly surprised by how much we enjoyed it!
If you’re spending the night, be sure to check out this guide on where to stay in Osaka.
Have more than one-week? Our 2-Week Classic Japan Itinerary takes it further: 14 fully-planned days with Hiroshima, Miyajima Island, and deeper dives into every stop. Plus restaurant recs, hotel picks, and all the insider tips we couldn’t fit in a blog post. See what’s inside the 2-Week Classic Itinerary →
Have more or less time? What to add or cut from this Japan itinerary
Traveling for less than one week in Japan?
If you have less than one week, we’d recommend choosing to visit either Kyoto and Osaka, OR Tokyo and Hakone. There is simply not enough time to see them all without feeling too rushed.
Traveling for more than one week in Japan?
There is so much to see and do in Japan. If we had to choose one city to spend more time in, it would be Kyoto. Take another few days there and possibly try out an onsen.
If you still have extra days, you could slow down your travels even more, plan some day trips from Tokyo, or head to another region altogether. Renting a car is a great way to get off the beaten track. And driving in Japan is easier than you probably think!
We have more ideas to help you plan your time in our guide to how many days to spend in Japan.
Want the perfect itinerary planned for you?
If you don’t have a ton of time to spend planning your Japan itinerary (or you just don’t find travel planning fun), we’ve got something you might be interested in…
We’ve already put in more than enough for you and us combined. Trust us.
And we’re happy to share everything we learned — from digging through reviews, Youtube and all sorts of Internet rabbit holes, as well as actually traveling in Japan on 3 separate trips.
We’ve put together the perfect Japan itinerary for your first visit. This itinerary includes day-by-day instructions, photos and tips that will make your first time a dream trip to Japan!
Highlights of our 2-week classic Japan itinerary:
- Sample the freshest sushi on earth at Tokyo’s world-famous fish market
- Experience izakaya culture in hidden alleyways
- Observe sumo wrestlers at their morning practice
- Soak in a beautiful open-air onsen
- See Mount Fuji in all her glory
- Experience a traditional tea ceremony
- Walk through the magical orange gates of Fushimi Inari
- Enjoy Japanese foods you’ve never heard of on an exciting food tour
- Meet the friendly, bowing deer of Nara
- Learn how to make Japanese ramen from scratch
- & so, SO much more!
We’ve spent hours of research putting this all together, just for you!
In full transparency, this is a paid itinerary since it has taken an incredible amount of time for us to create.
However, we keep all of our paid itineraries affordable – just $27 for an entire 2-week itinerary. We think this is an incredible value considering almost all your planning will be done for you!
What to pack for traveling to Japan
We know it can be overwhelming packing for a trip to a new destination. That’s why we spent hours creating these super helpful guides full of packing hacks and tips for traveling in Japan that you won’t find anywhere else:
- Our Japan packing guide lists all the essentials (many of which you might not think about), as well as what you should NOT pack for a trip to Japan.
- This article on what to wear in Japan will help you create a perfect capsule wardrobe for every season and let you in on some cultural taboos so you can be sure to dress appropriately.
- With this FREE Japan packing list PDF download, we’ll send checklists straight to your inbox for everything from clothing and toiletries (for both women and men!) to what shoes to pack and extra stuff you may want to have on-hand just in case. Click the image below to get your free copy!

Plan your trip to Japan
After 3 trips (and counting!), we’ve fallen head over heels for Japan—and we’ve created TONS of resources to help you plan your dream trip. Start with our Ultimate Japan Travel Guide and be sure to check out these helpful articles:
- First time? Our Japan Trip Planner walks you through everything you need to know.
- Use our Japan Rail Pass guide to determine if getting a train pass is optimal for your trip.
- Here’s our curated list of the best things to do in Japan—from iconic sights to once-in-a-lifetime experiences.
- Not sure where to go? Our Japan itinerary ideas will help you map it all out.
- Foodies, rejoice! This guide to what to eat in Japan will have you drooling before you land.
- This guide to what to wear in Japan (and what not to wear) will help you blend in.
- Use our ultimate Japan Packing List to make sure you don’t forget anything.
- Before you go, brush up on these essential Japan travel tips (including major do’s and don’ts!).
- Avoid awkward moments by brushing up on Japanese etiquette.
Still have questions? Drop us a comment—we LOVE helping travelers plan unforgettable trips to Japan!
Don’t miss your chance to grab our Japan packing list!
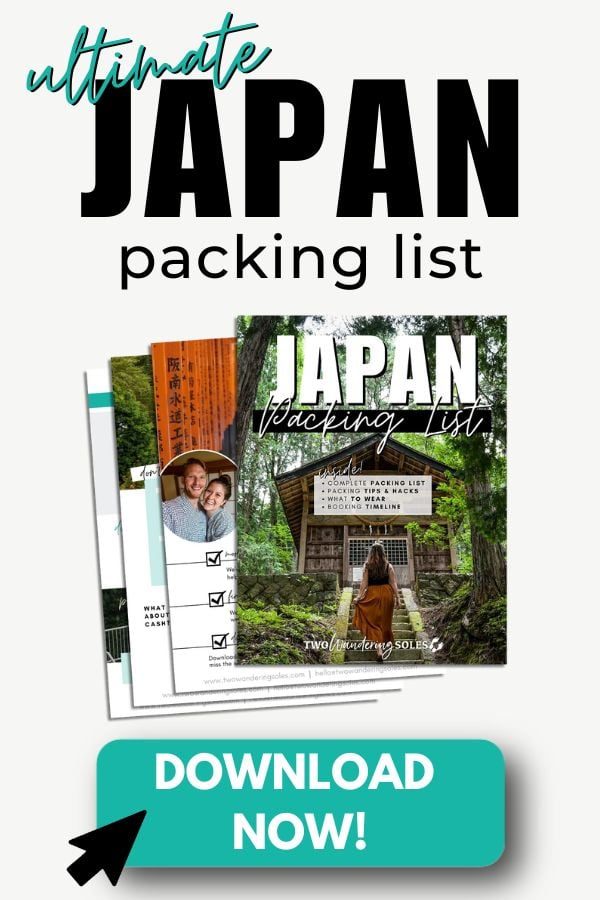
This FREE PDF download includes everything you’re going to want to pack for your Japan trip, including what NOT to bring, plus tons of insider tips!
Just enter your email and we’ll immediately send you access instructions!
Save this article to Pinterest for later!


We want to hear from you!
Are you ready to book your flights yet!? What’s the most exciting part of this one week in Japan itinerary for you? Leave us a question or a comment below and we’ll do our best to get back to you!

Katie Diederichs is the lead writer and co-founder of Two Wandering Soles, where she creates in-depth travel guides, itineraries, and tips designed to help readers plan better trips with confidence. With a background in journalism, photography, and design, she combines thorough research with firsthand experience to deliver clear, practical, and visually driven travel content. As the primary trip planner, Katie turns complex logistics into easy-to-follow advice travelers can actually use.
Hi, wondering if you would recommend staying at Yamanouchi and trying the onsens during a visit to the snow monkeys or would those 2 days be better of staying in another location with ryokan with onsens and just visiting the snow monkeys on a day trip? just not sure how much there is to see and places to eat/drink around Yamanouchi. thank you.
great content, I enjoyed reading it very much, I look forward to more of your articles
Great blog! I am planning to travel solo to Japan. kindly share your thoughts on solo traveling through Japan and the experience of doing a homestay with a Japanese family