
If you’re trying to choose a toilet for your campervan build and are curious about the Nature’s Head Composting Toilet, this is the place to be. We’ll share our (honest!) opinion, divulge insider tips, and explain if this campervan composting toilet is worth the hype or not…
We’ve built three (very different!) campervans, yet there’s one question that never seems to change.
The long pause. The neck craned to look inside the van and scope it out…
“So, ummm, where do you go to the bathroom in your campervan?”
We’ve been asked this query so many times – by strangers and good friends alike – that now we can usually feel it coming.
Our answer in our first very low-budget build was, “Well, wherever we can find one!”
And then would come the bulging eyes and slew of questions about where we find toilets. Answer: Gas stations, rest stops, coffee shops, public parks, the woods*… shall I continue?!
*If you’re gonna do your business in the wild, all the power to you. Just be sure you’re digging a hole to bury #2 and you properly dispose of TP in the trash.
While our lack of a bathroom never bothered us too much in our first campervan, I do remember some early mornings where we had to frantically search for a loo.
But we’ve come a long way since then and now we’re truly fancy, folks.
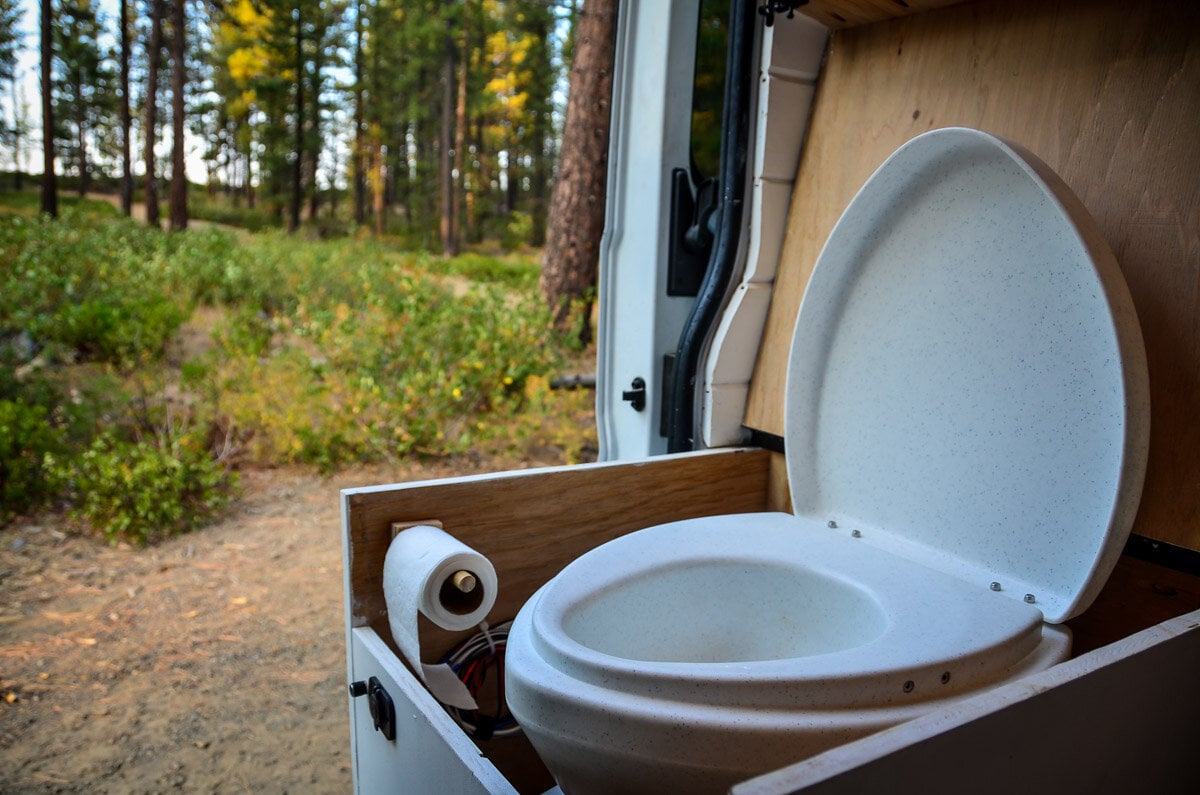
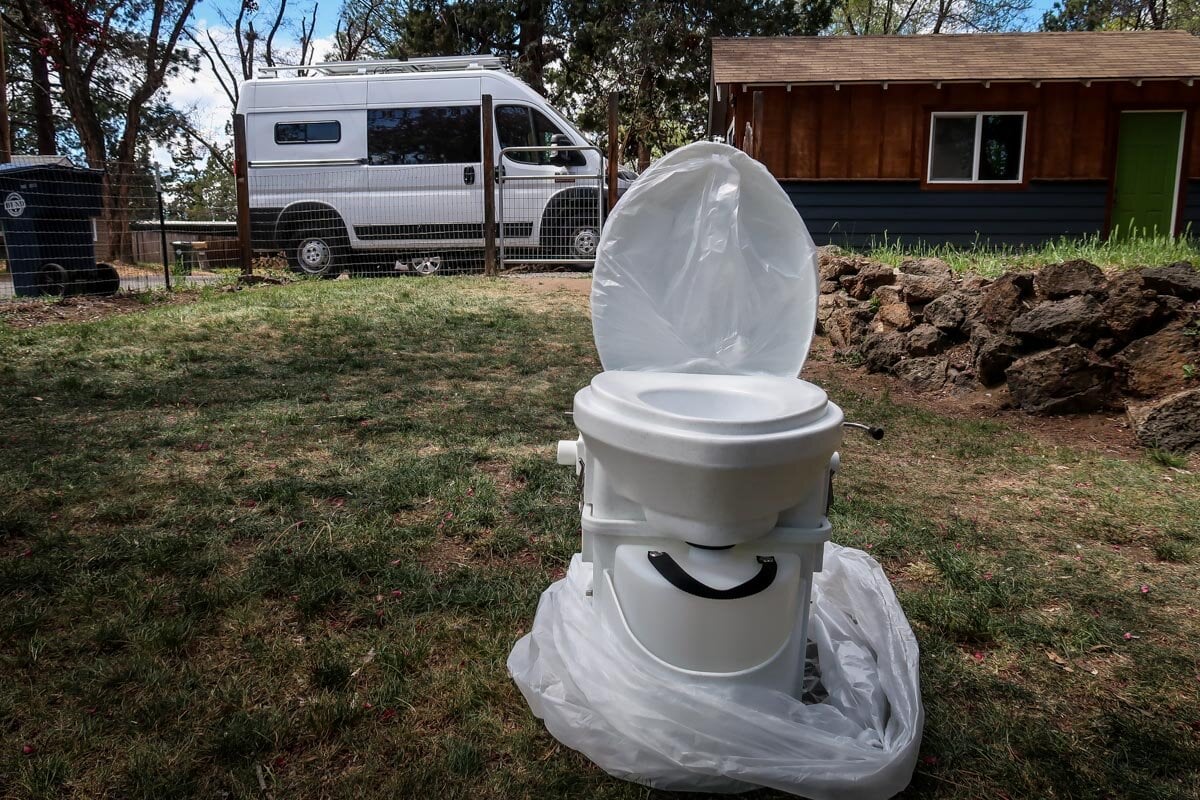
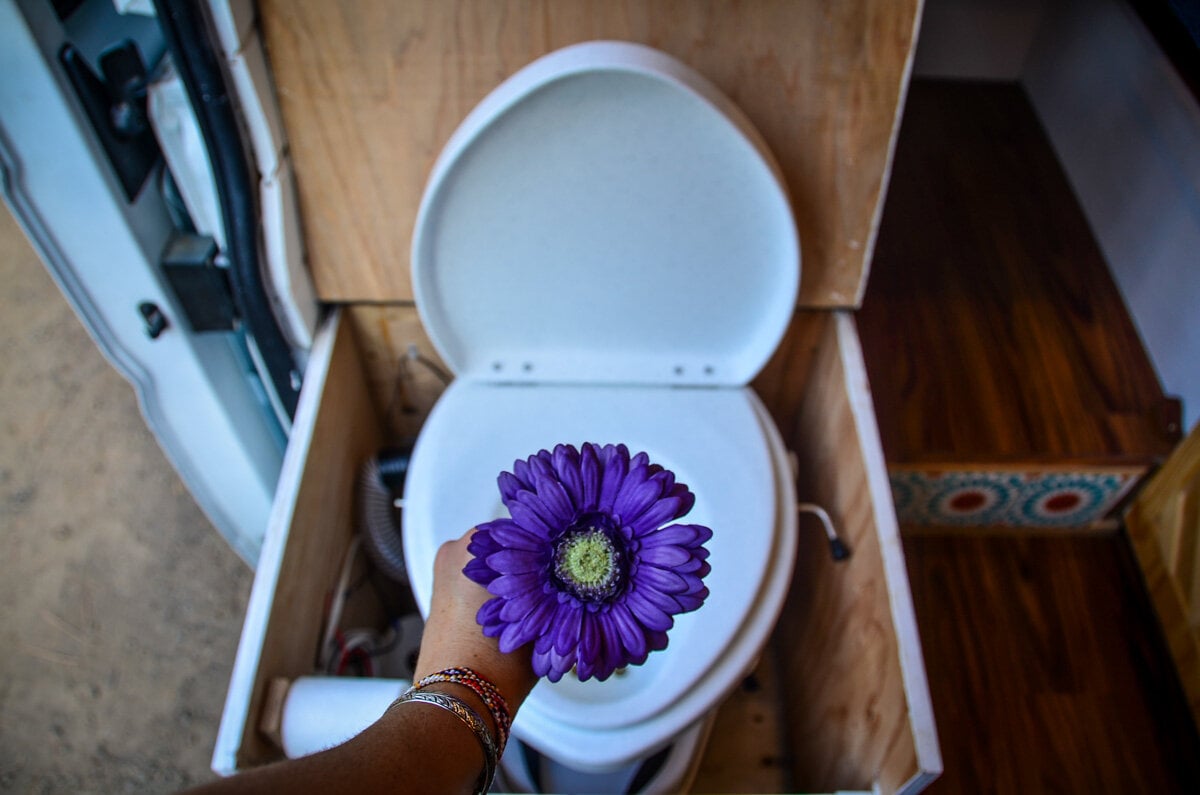
We’ve got a top-of-the-line Nature’s Head composting toilet, and I’ve gotta say, I really, really love it.
Gone are the days of jumping out of bed, putting on shoes, grabbing a headlamp, and running to the nearest toilet for a midnight leak. Gone are the early mornings where we’d drive around frantically searching for a coffee shop that was open.
Thank-freaking-goodness.
Nature’s Head Review Article Contents
Click the links below to jump to that section:
- Why did we choose a Nature’s Head toilet?
- How does a Nature’s Head composting toilet work?
- How much does a Nature’s Head composting toilet cost?
- Nature’s Head dimensions
- How to clean your Nature’s Head toilet
- How to empty a Nature’s Head toilet
- Nature’s Head FAQs
- How to Install a Nature’s Head toilet in your campervan build
→ Psst! Save yourself hours of research and headaches and jump straight down to our DIY campervan conversion guide!
Why did we choose a Nature’s Head?
In our previous campervan build, we had no toilet, and while we made due for 3 months, we knew we wanted a toilet in our next build. So why did we choose Nature’s Head specifically?
While there are a ton of different options when it comes to choosing a campervan toilet, we didn’t like the idea of having a bucket in our van with “stuff” sloshing around and using chemicals in our small living space.
We felt like the Nature’s Head would feel the most similar to an actual toilet, would require the least amount of maintenance, and would be one that we would actually be comfortable going in.
The other options seemed like good ways to go in an emergency, but I couldn’t picture myself wanting to use it all the time.
Do we recommend a Nature’s Head composting toilet?
If you came to this article just to see if we’d recommend a Nature’s Head or not, I’ll give you the answer you’re looking for right away: YES.
If you have the budget for it, we would highly recommend a Nature’s Head. Without a doubt.
So if you just needed our seal of approval then might as well take the next step to buying one for yourself:
But there’s a lot more information we want to share, so be sure to stick around.
In this article we’re going to walk you through all the features of a Nature’s Head composting toilet, answer some of the most frequently asked questions (like does it smell?!), talk about cleaning the loo, and share some tips for installing one in your campervan.
So let’s begin, shall we?!
Just a quick warning: We’re not shy and there may be a little TMI in this article. I mean, we’re talking about toilets, after all. You have been warned…
How does a Nature’s Head composting toilet work?
Nature’s Head is a composting toilet that’s perfect for campervans, RVs or tiny houses.
In short, the toilet looks very similar to a normal flush toilet that you’d find in a house. But one main difference is that it separates liquids from solids (more on how that works later!).
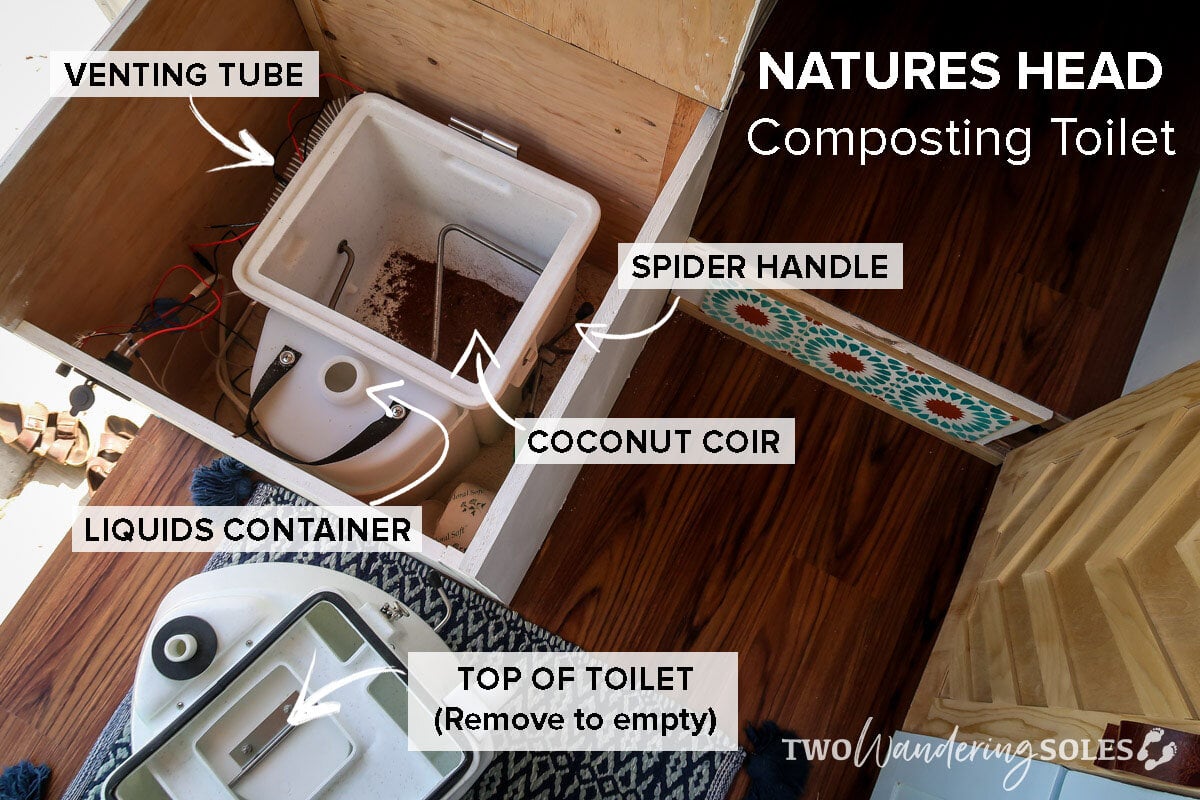
Solids: The solids container gets partially filled with a composting material such as sphagnum peat moss or coconut coir. When you need to go #2, you will pull a lever which opens a hole to the solids compartment where your business will go.
After using the solid compartment, pull back the lever to shut the hole, then you will turn the handle, which mixes everything together, and encourages composting. All the solid matter will eventually turn into “humanure”.
Liquids: The liquids container is much more straight-forward. Your pee is directed into two holes at the front of the toilet bowl where it will drain into a 2.2-gallon container. This container will need be emptied as it starts to get full.
Composting material: Sphagnum peat moss vs. coconut coir
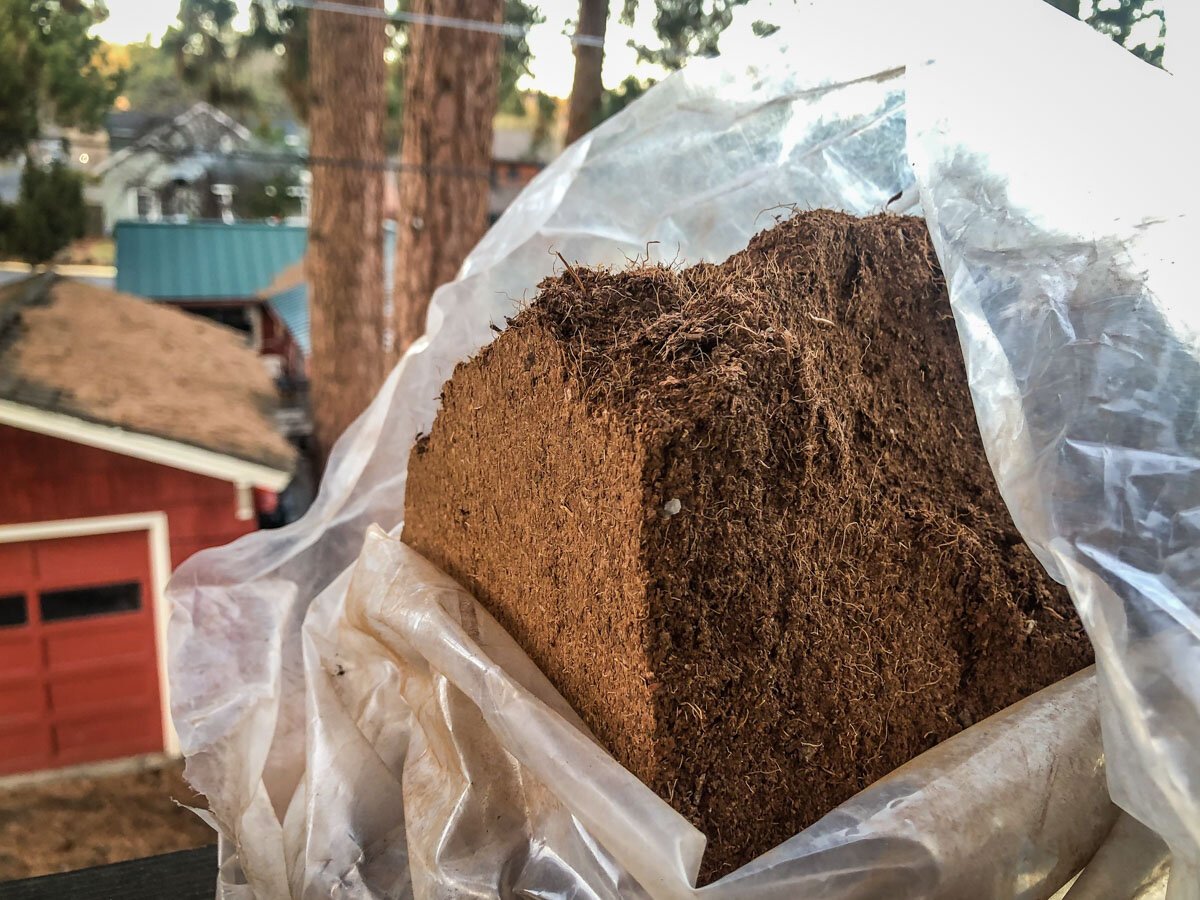
This is our brick of coconut coir. We’ve had this for several months and still have quite a bit left! (It expands quite a bit, so one brick goes a long way!)
These are the two most popular composting materials to use with your Nature’s Head. So what’s the difference, and which is better?
They’re both good choices and do essentially the same job (aka soaking up moistures and promoting the decomposition process), however there are a few differences:
- Sphagnum Peat Moss: Dead material that is harvested from centuries-old bogs. This means it is not a very sustainable material since it takes hundreds of years to form.
- Warning: DO NOT buy the kind with fertilizer (like MiracleGro) unless you want to grow a disgusting little garden inside your toilet!
- Coconut Coir: Made from the fibers of coconut shells, this is a more renewable material than peat moss and does the same job.
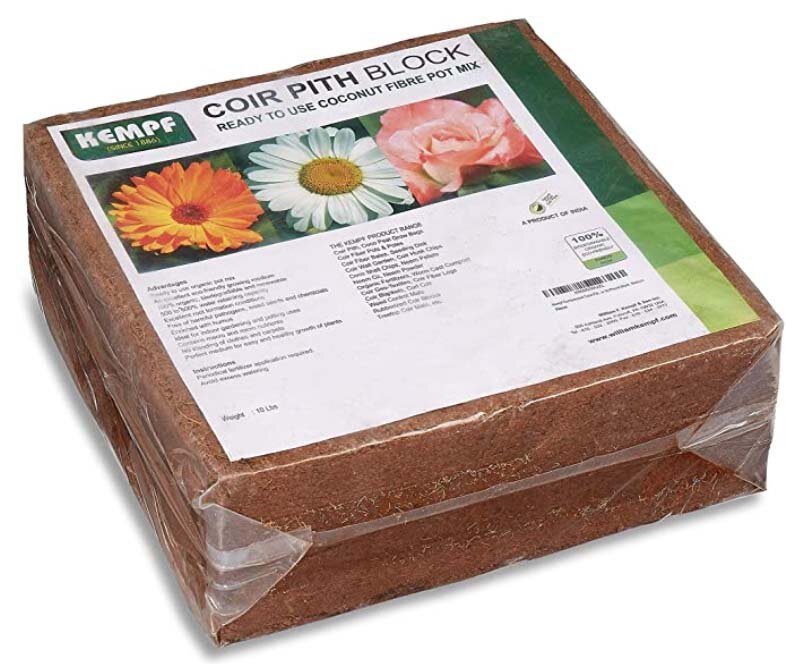
Another benefit of coconut coir is you can purchase it in a compressed brick form which will last a long time and takes up less space than the same amount of peat moss. (This is what we chose to go with, and we’ve been very happy. It has lasted us several months and we’ve still got a lot left!)
How to add composting material to your Nature’s Head
Our experience has been with a compressed brick of coconut coir, but most of the steps will be similar if you use peat moss. You’ll want to have about 2 gallons of pre-moistened composting medium in the solids container to start.
- From the brick of Kempf coconut coir (above), separate about 3-4 large handfuls of compressed material into a large bucket. Use a metal spoon or butter knife to separate the material from the brick.
- The entire brick of coconut coir will make about 17 gallons of loose material, so a little will go a long way.
- In the bucket, add about 2-3 cups of water to the coconut coir to help it break down. Use your hands or a clean towel to mix up the coconut coir until all the clumps are gone and the material is moist. Do not over water the mixture. It should be damp, not wet.
- Add pre-dampened material to the solids container and it should fill up to the level of the agitator bar when horizontal. Do not overfill pas the agitator bar.
Where can you buy composting material? You can buy both coconut coir and peat moss from local gardening or home improvement stores, or you can purchase them on Amazon.
How much does a Nature’s Head composting toilet cost?
As we’ve already mentioned, it ain’t cheap.
The cost of the Nature’s Head composting toilet is: $960
That includes the toilet itself as well as most of the components you’ll need to install it (like tubing, a micro fan, and a handle). You’ll also receive a small spray bottle for cleaning.
Additional costs
We want you to be prepared — down to the penny — of how much a Nature’s Head costs, so we’re sharing some additional expenses we had for the installation.
- Plywood for the box = $37.38
- Part of a Continuous Hinge for wooden lid = $10.78
- Screen Repair Patch (used to keep bugs from flying up the vent) = $6.98
- L-Brackets/Corner Brace 20-pack (for securing to the floor) = $9.69
- Coconut Coir Brick = $23.44
- Small bolt for securing lid when open = $6.25
Total Additional Costs = $94.52 (many of these items can be used in other van projects or will last for multiple uses like the coconut coir)
Is it worth the price?
The answer to this question is obviously a subjective one, but in our opinion, it is well worth the price to have a toilet in our van that functions well, requires little maintenance, and doesn’t smell.
It allows us the freedom to camp anywhere we want and not have to worry about finding a place to do our business. I never thought I would spend nearly $1,000 on a toilet, but I’ve gotta say, I think it was a worthwhile investment.
First, be sure you know exactly what your total budget is (we have a handy guide to help you figure out a van build budget), and determine from there if it makes sense to spend this kind of money on a toilet.
If you do have room in your budget, we think you’ll be happy with this purchase. We certainly are.
Still unsure? We compared all different types of campervan toilets and have shared the pros and cons of each. Hopefully that will help you decide if the Nature’s Head is for you or if there’s a different toilet that would meet your needs.
Nature’s Head composting toilet dimensions
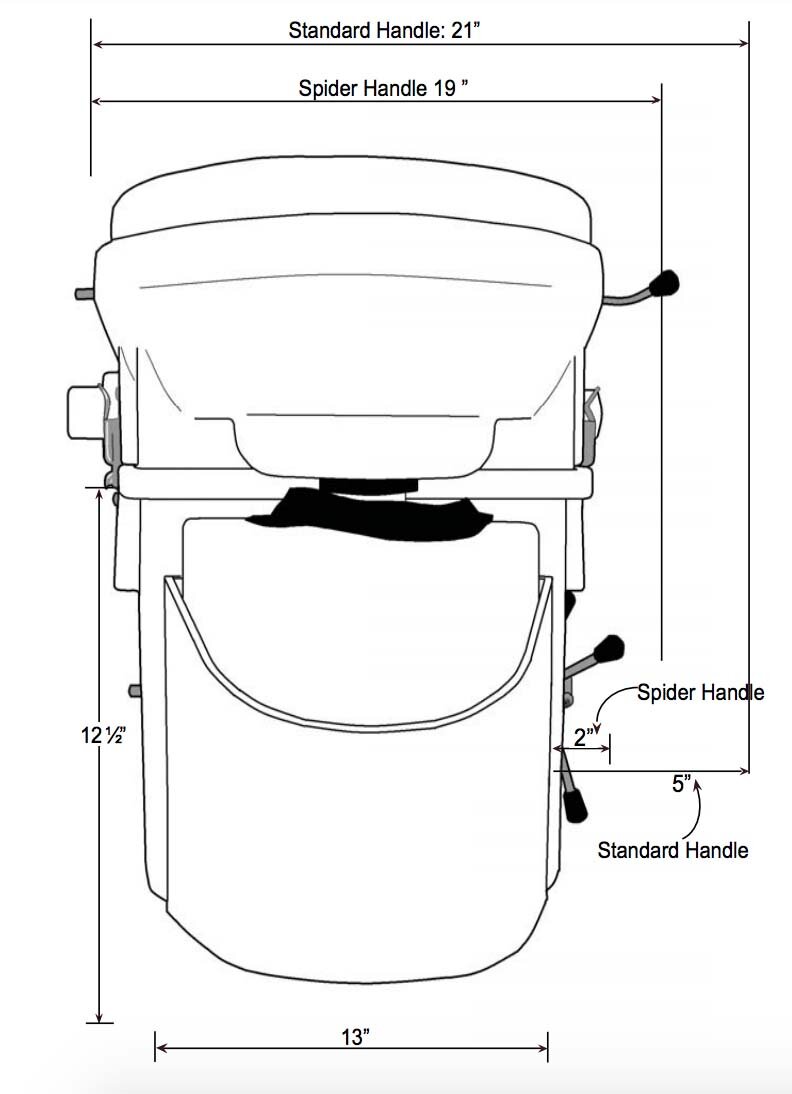
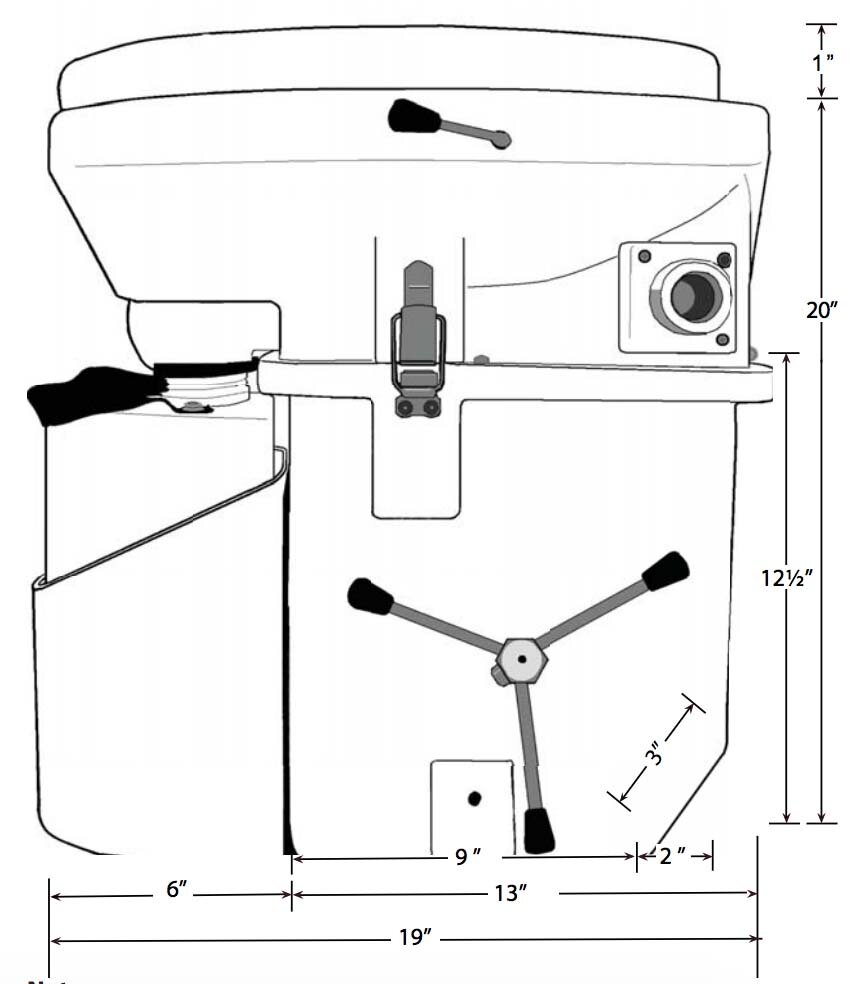
Above are the sketches from the installation guide. Here are the dimensions of the Nature’s Head composting toilet:
- Height: 21 inches
- Length (front to back): 19 inches
- Width (with standard handle): 21 inches
- Width (with spider handle): 19 inches
The dimensions can be up to 4% off due to the plastic molding process. If you are building a box or a drawer for the toilet in your campervan, you do have to account for the space needed to open the lid, remove the seat unit, remove the liquids container, and adequate space for the venting hose and spider handle.
Nature’s Head recommends at least 1.5 inches clearance in the back of the toilet to allow for the seat unit to tilt back and remove the liquids container. They also recommend at least 2 inches to the left (when facing the toilet) to allow the seat unit to slide off the hinge in the back.
Spider handle vs. standard handle
There are two options for handles when ordering a Nature’s Head:
- Standard Handle: Offers better grip and is good for larger spaces
- Spider Handle: More compact, making it perfect for small spaces
As you can imagine, the spider handle will be a good choice for most van builds. If you have the luxury of extra space and have a separate toilet room, you could get by with a standard handle, but if you’re building a box or drawer, you’ll definitely want to order a spider handle. (They are the same price, by the way.)
In case you want to get nerdy about the numbers, the spider handle will save you 2” on the right side (when facing the head), which can be a big deal when space is at a premium.

How to clean your Nature’s Head toilet
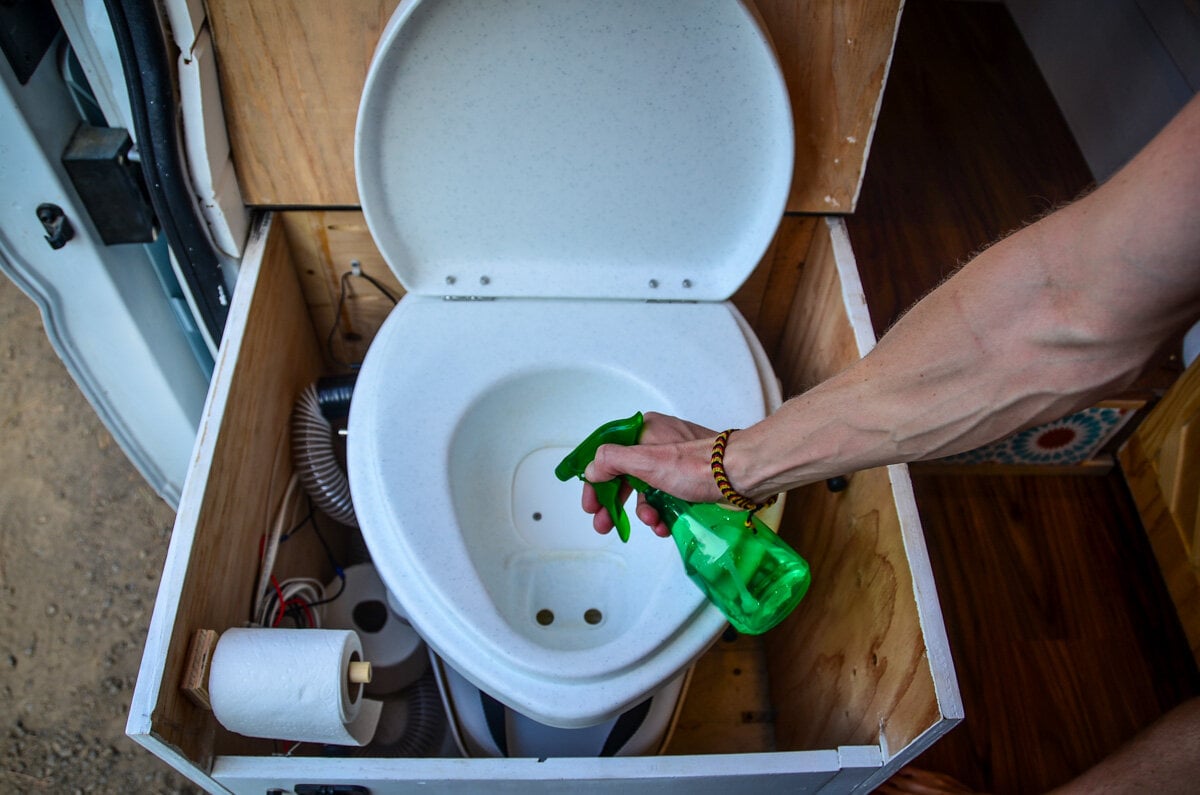
Every Nature’s Head toilet comes with a small green plastic spray bottle. According to the user manual, this is to be filled with a mixture of half water and half white vinegar.
After each use, spray the toilet with this mixture (be sure the solids “door” is closed!).
Insider Tip: We love all-natural cleaners, so we use a very similar mix for cleaning most things, though we find that vinegar can smell a little, well, vinegar-y… so we typically add a couple drops of essential oils (lemongrass or geranium are some of our faves!) to make it smell a little nicer. Another trick is to infuse your vinegar with orange peels before adding it to the spray bottle.
How to empty a Nature’s Head toilet
Not gonna lie: Emptying the toilet isn’t my favorite part of #vanlife. But you kind of get used to it and it’s not horrible.
And compared with all the different campervan toilet options, the Nature’s Head doesn’t have to be emptied nearly as frequently as most. (Especially the solids compartment.)
Emptying the liquids container
- Unlatch the seat unit of the toilet and tilt it back.
- Screw on the cap to the liquids container (don’t want that splashing up)
- Pull the handle of the liquid container and remove it from the toilet.
- Set the seat unit back down
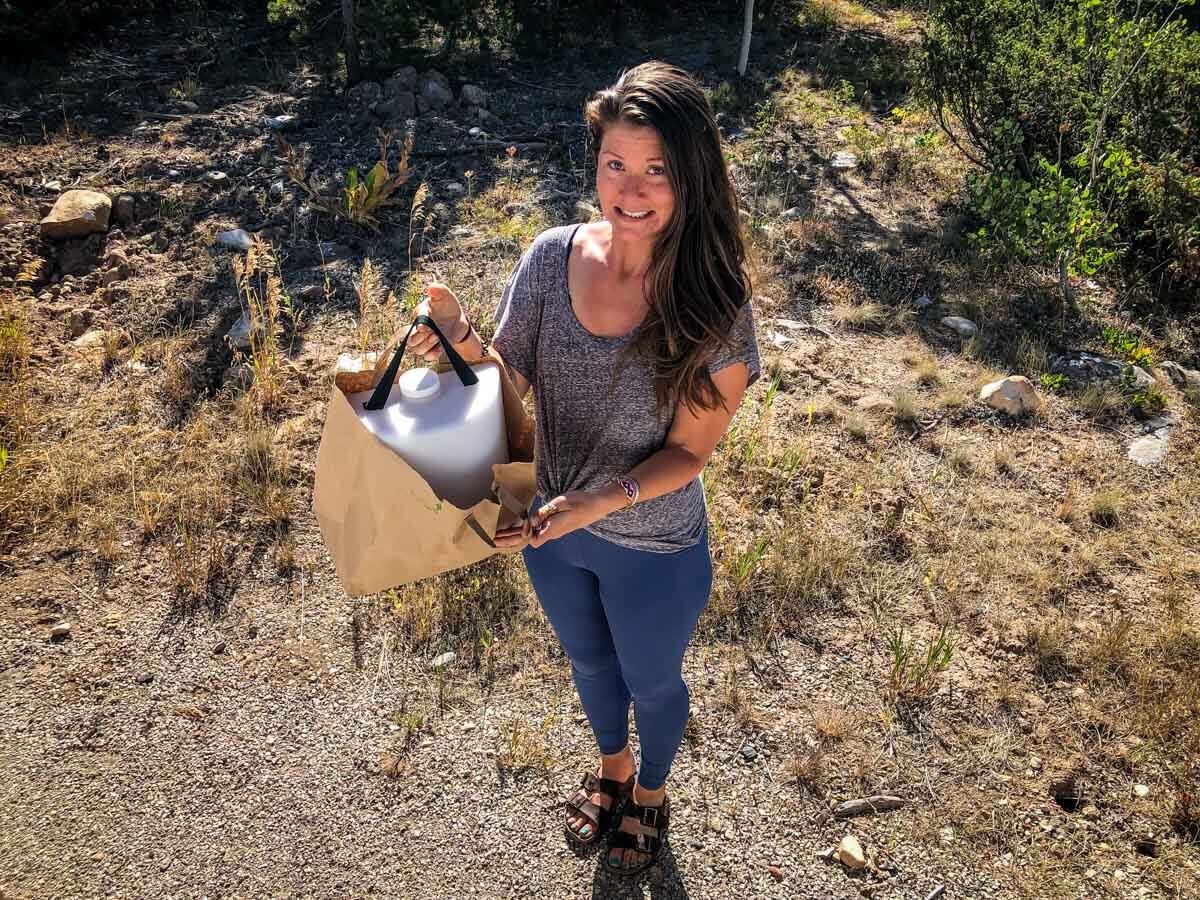
- We like to place the container in a brown grocery bag, so it’s not completely obvious we are carrying 2.2 gallons of urine
- Empty liquids slowly into a toilet, urinal, or pit toilet. Gravity will naturally flush most of it down, but be sure to flush the toilet when you are done.
- Spray vinegar/water/essential oil mixture inside the container to help with odors.
- Tilt back seat unit, resituated container, unscrew container cap, lower the seat unit and re-latch.
Emptying the solids container
- Unlatch the seat unit, slide off, and remove.
- You may need to detach the hose vent and the power depending on your set up.
- Unscrew the knobs from the mounting brackets at the base of the unit.
- Cap and remove the liquids container.
- Place a 13-gallon kitchen garbage bag (we prefer a compostable one) over the rectangular top of the solids container. It will be tight but ensure the bag is fully covering the rim.
- Invert the base unit slowly and allow the contents to fall into the bag. If you wish you can clean any remaining contents with gloves and towel, however, this is not necessary because the residual material will aid in composting in the future.
- Do not put chemical cleaners in the container because you will remove all the good bacteria that will aid in composting.
- If you plan on cleaning for storage, clean the container thoroughly with a vinegar mixture cleaning spray.
- After emptying, add coconut coir or sphagnum moss and reassemble.
How often do you need to empty the toilet?
The answer depends on how many people are using the toilet and how frequently. It also differs between the liquids and solids container…
Liquids: According to the user manual, two people should expect to empty it every 3-4 days. We personally find it’s usually closer to the third day (we drink a lot of water!).
If we’re in the van all day (not using any public restrooms) or if we have a few beers or coffees (which make us pee more!), it may even fill more quickly than 3 days.
Also, it’s worth noting that you shouldn’t leave urine sitting in the container for longer than necessary. So if you go on a weekend getaway in your campervan, don’t just let the liquids sit there for another couple weeks.
Solids are a bit different…
Solids: According to Nature’s Head, the solids compartment can hold between 60-80 uses. This means if there are two people using it once a day, it should be emptied about every 4-5 weeks. If you’re not using it daily, you can go longer before emptying it.
The solids essentially turn into dirt, so unlike the liquids, it’s not as important to empty right away.
Where can you empty the toilet?
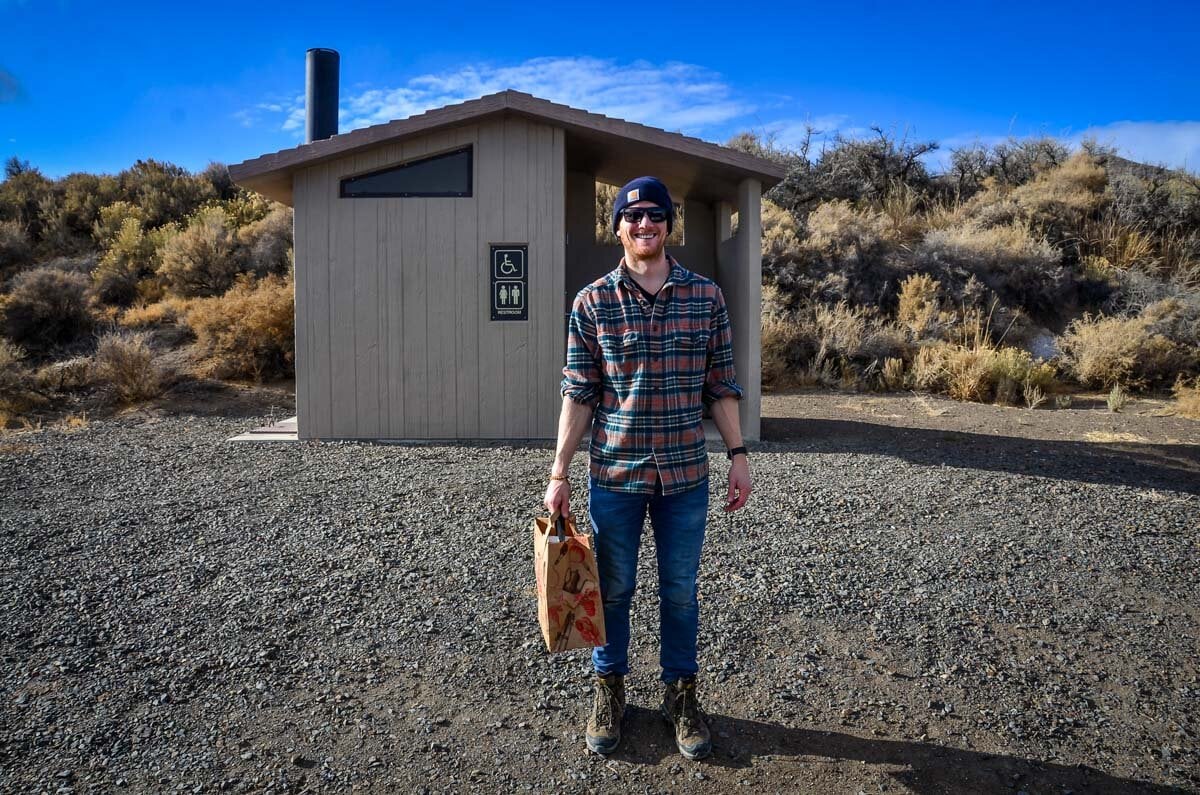
Liquids: The liquids container is easy. You can empty it in any toilet (pit toilet or flush works just fine). I mean, I wouldn’t walk into a crowded trendy coffee shop to do this job, but a rest stop or trailhead toilet work just fine.
Be sure to screw the cap on the bottle before you take it out so there isn’t any sloshing.
Insider Tip: We’d recommend keeping a paper grocery bag near your toilet so you can “disguise” the container as you carry it (see the picture above!).
It’s not very pleasant carrying a clear bucket full o’ piss into a public bathroom. Even if people know what you’re doing, you probably don’t want them seeing it. If you do this, just be sure you carry it by the cloth handle as well as the paper bag handles so the paper bag doesn’t rip.
Solids: It’s recommended to place the contents in a proper composting bin to allow it to fully compost. If enough time has passed for the contents to fully compost, you can place your bag in a typical dumpster.
If you have a home base, some people choose to add their “humanure” to their NON-EDIBLE gardens, such as a flower garden. This is perfectly safe to do.
However, if you live on the road or aren’t into gardening, then it might be a bit more difficult to dispose of the solid waste. Allow at least 6-8 hours of not using the toilet before you empty the contents into garbage bag and be sure to use gloves.
Nature’s Head FAQs
First of all, there are no dumb questions. We had all of the questions when we were first researching the toilet, so I feel you. We hope to answer all your weird poo and pee questions without embarrassing you (too much!).
Does it smell?
Anytime we bring up the fact that we have a composting toilet, this is the response we get:
“A composting toilet, you say… doesn’t it smell?!”
Short Answer: Nope!
Medium Answer: The only smelly part is when you’re emptying the urine bucket.
Long Answer: The solids container essentially turns into dirt (hence it being a composting toilet). We’ve gotten our noses pretty close in the solids container and it really just smells like dirt. Yeah, seriously. I was surprised too.
Additionally, one of the components of Nature’s Head toilets is a small fan that directs air out of the van, so you won’t even get a whiff of the “earthy” smell unless you get close. If I’m being really honest, I think you get more smells with a normal flush toilet.
If the solids compartment starts to smell — it’ll be a stronger version of that earthy dirt smell — that means it has too much liquid. Simply add more of your composting material (peat moss or coconut coir) and turn the handle a few times.
Now as we mentioned, the liquids container does smell a bit. We’ve never noticed it smelling inside our van, but when we empty the container it’s not roses we smell… When you empty the liquids container, you’ll notice a strong urine smell since it isn’t diluted with water like it would be in a traditional flush toilet.
The thing is, you only smell it for the 10 seconds you’re emptying the container, so we’ve never found it to be too bad (especially since the alternative toilets have the same issue).
How does it separate liquids and solids?
I wondered the same thing before buying this toilet, so I’m right there with ya…
Essentially, there are two different holes where your, umm, business goes.
Liquids: There are two tiny holes near the front of the toilet, and the bowl is formed to drain any liquids in this direction. They lead to the urine container, which is essentially a jug with a cloth handle for your emptying pleasure.
Solids: There is a larger hole located in the center of the toilet bowl and there is a “trap door” of sorts. This door should remain closed at all times unless you need to go #2. There is a simple lever to lift the latch so your solids go into the correct compartment.
How do you… use the Nature’s Head composting toilet?
Well, pretty much just like a regular ol’ john. But there are some differences…
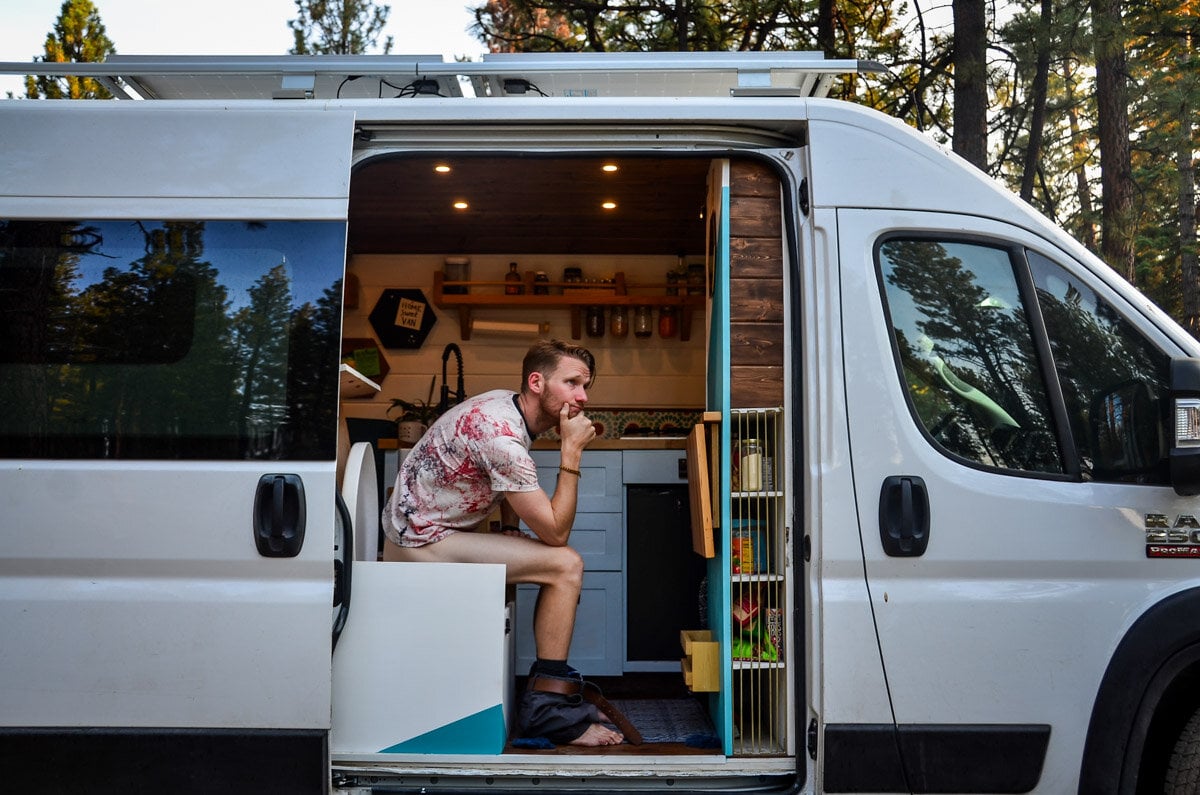
First of all, men should sit down whether they’re going number one or number two. Standing while peeing will result in… how shall I put this… splatter. Ben says it’s easy to get used to the whole sitting down while peeing thing.
Secondly, if you need to go number two, you will need to open the latch (as described in the question above). This will allow everything to go into the proper compartment. You will want to make sure you’re sitting in a way that the solids will go into the hole, if ya know what I mean.
Once you’re finished doing your business, close the door to the solids compartment if necessary, and turn the handle a few times to rotate the solids. Spray the toilet bowl with cleaner (more on that in a minute). Close the lid, and voila!
Where do you put the used toilet paper?
Inside the solids container, just like a normal toilet. The heavier the ply, the longer it’ll take to break down. For this reason, we prefer to keep a “lighter” toilet paper in our campervan so it breaks down more easily.
Good to know: Make sure that you’re putting the toilet paper all the way inside. We’ve had a small piece of TP get lodged in the liquids hole and we (by “we” I mean Ben) had to extract it with tweezers, which was no simple task.
What happens if it overflows?
The solids container won’t really overflow. If it does, you’re using it wrong. (aka it more or less stays around the same volume and you won’t have to worry about making it overflow.)
The liquids container, on the other hand, must be more closely monitored, for lack of better words.
So yes, it can overflow. (Ours has!) But there is a safeguard in place in the form of another little enclosure to catch the pee. All you need to do is soak up the excess with a paper towel, then use your spray bottle to clean it out. Good as new.
Now, if you totally just forget to check your liquids container, like, ever… and it overflows past the little “safety compartment”, well, then you’re gonna have to do a little more deep cleaning in your van. But I think the smell would signal you before you get to that point, so I wouldn’t worry too much.
In short: Just remember to check the level of the liquids container (it’s translucent, so you should be able to tell!) every couple of days and you should be fine.
What about… diarrhea or vomit?
Remember when I said there were no dumb questions? I told you we’d be going through everything… TMI and all.
Truthfully, we haven’t dealt a ton with either (yet), so we can’t speak from personal experience. But according to Nature’s Head, if you have diarrhea or vomit that is not prolonged, it shouldn’t be a problem.
However, if symptoms continue, you may need to add a bit of composting material (sphagnum peat moss or coconut coir) to help dry it out.
If your solids compartment begins to smell, you may need to empty it earlier than usual and start from scratch.
How do you handle your period with a Nature’s Head?
First off, if this subject makes you uneasy (I see you, fellas!), keep scrolling.
Buh bye.
I’m of the belief that periods are normal and should be discussed as such. I know when I was trying to research the whole composting toilet thing I was confused as hell because there was legitimately NO information online about periods + composting toilets.
So at any rate, I hope this information is helpful to someone.
The way you handle your period with a composting toilet is going to be somewhat similar to what you typically do with a flush toilet.
Do you use tampons and/or pads?
Use them as you normally would, but dispose of them in the trash instead of in the solids compartment.
Easy peasy.
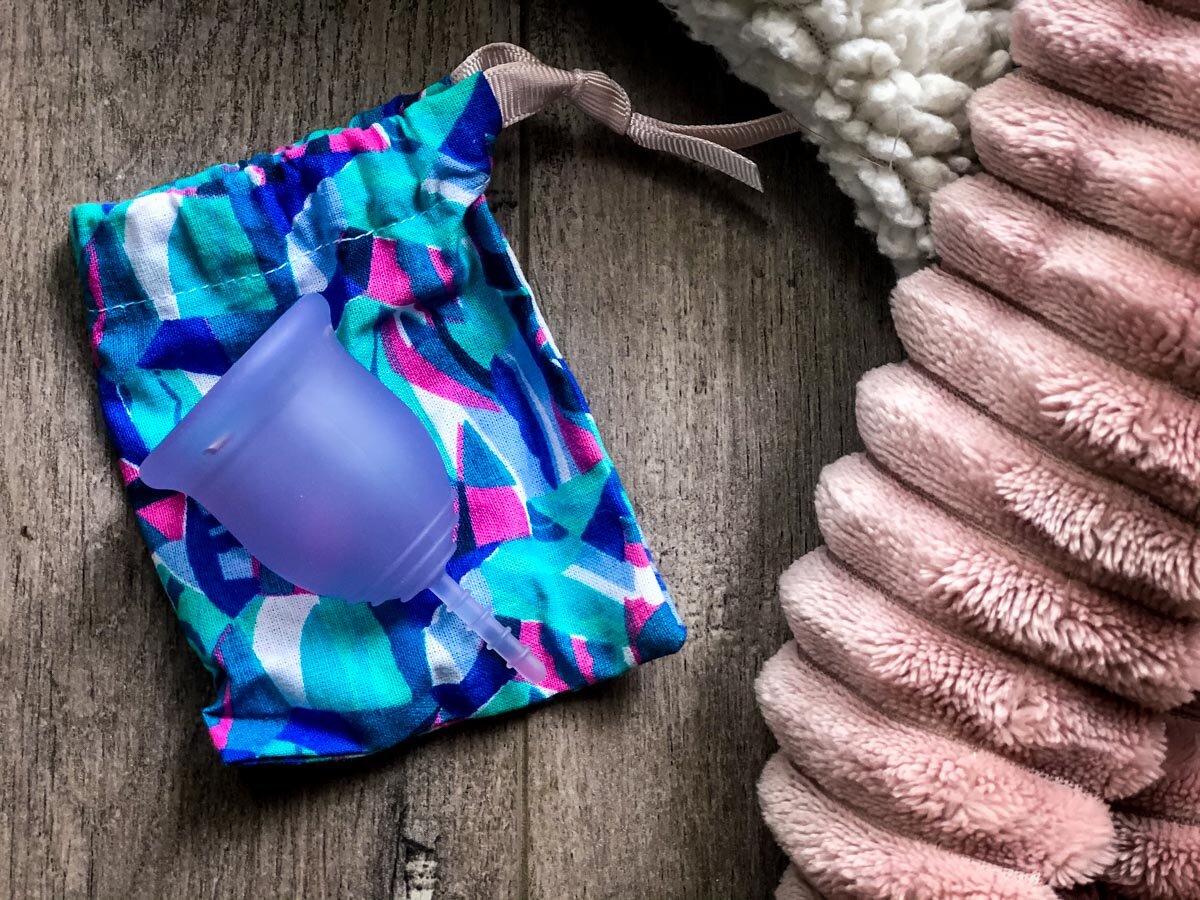
Do you use a menstrual cup?
I gotchu girl, this is what I use as well. (They’re waaaay better for the environment and one of my favorite eco-friendly products!)
I’m going to be honest, when I first started using the Nature’s Head I went out and bought tampons (my first box in more than 3 years!). I was nervous about learning to use a whole new toilet and I didn’t want my period to complicate things. Which I realized later, was nothing to be worried about.
If you continue to use your menstrual cup, you can either:
- a) Empty its contents into the liquids container. You can use a small amount of water to flush any blood left in the bowl into the container. Fair warning: You will be able to see the blood in the liquids container.
- b) Empty it into the solids container, but you should add more composting material (coconut coir, etc.) so that it can keep things dry and from smelling. This step is important, so if this is what you plan to do, keep some dry material on hand.
Are there other composting toilets on the market?
There are, however, not all of them are suitable for vanlife.
Air Head: Similar functions to the Nature’s Head, but a bit more pricey.
Separett: Waterless toilets that are popular in tiny homes. Made in Sweden.
Sun-Mar: Simple design, basically a Luggable Loo that tries to separate the liquids. The reviews are not really that great.
DIY: You could try to make your own composting toilet that separates liquids and solids, but it would be tricky to make an agitator with a vent fan.
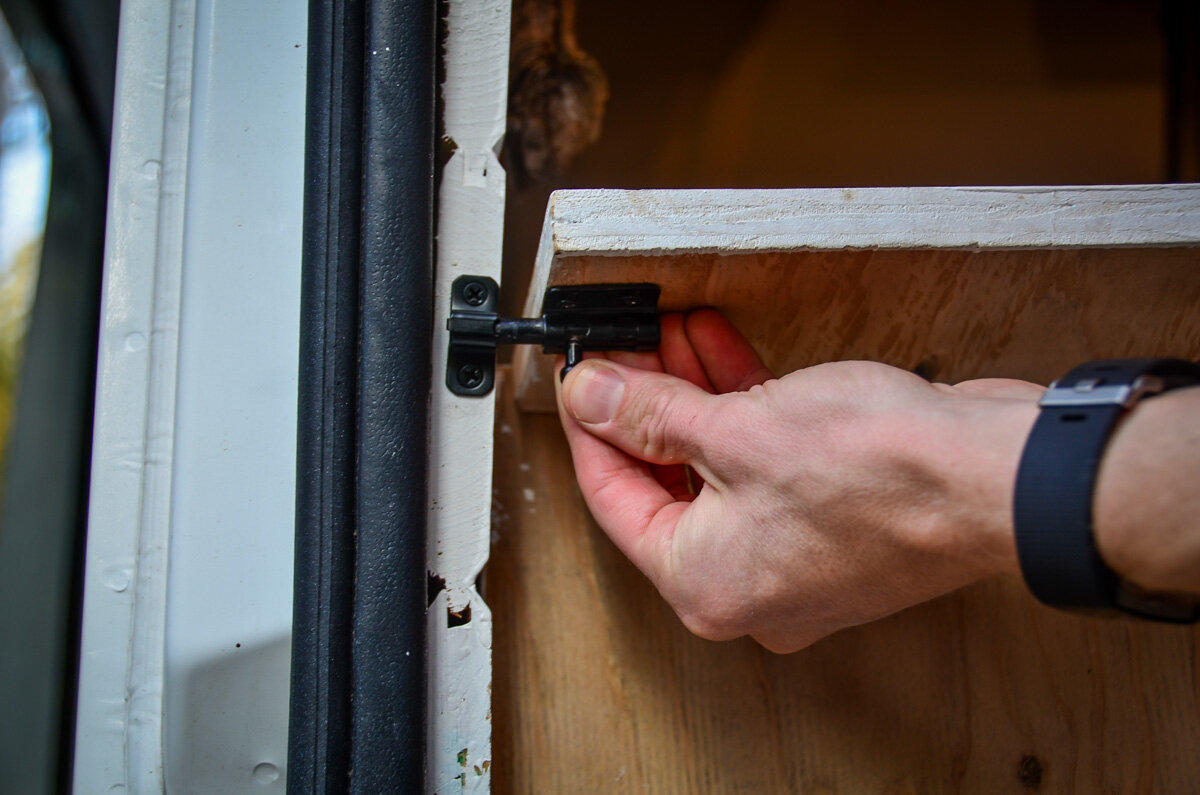
How to install a Nature’s Head toilet in your campervan build
Installing a Nature’s Head in your van build isn’t too terribly difficult, but it does take some time and a bit of patience. And yes, you will need to drill a hole through the floor of your van.
Here are the basic steps for installing your Nature’s Head:
- Build a box, place the toilet in the box and test the dimensions.
- Test that you can open the lid, easily turn the agitator handle, and open the seat unit to remove the liquids container.
- Secure down the box with corner brackets to your van floor.
- Mark the location of the base and where the toilet’s mounting brackets will be placed.
- Determine if you need to switch the fan and the vent for the solids compartment.
- Locate a safe place to drill the vent hole through the bottom of your van.
- Once the hole is drilled, spray with primer to prevent rust.
- Secure it with a layer of screen mesh (to prevent bugs), the vent cap, and screw the vent cap to the base of your van.
- Place a ring of silicone around the vent cap under your van and another ring inside the van where the vent hose comes up.
- Wire the power coming from a 12V fuse block.
- Place Nature’s Head in the box, screw down the mounting brackets, attached the power and vent. You are now go to go in your van!
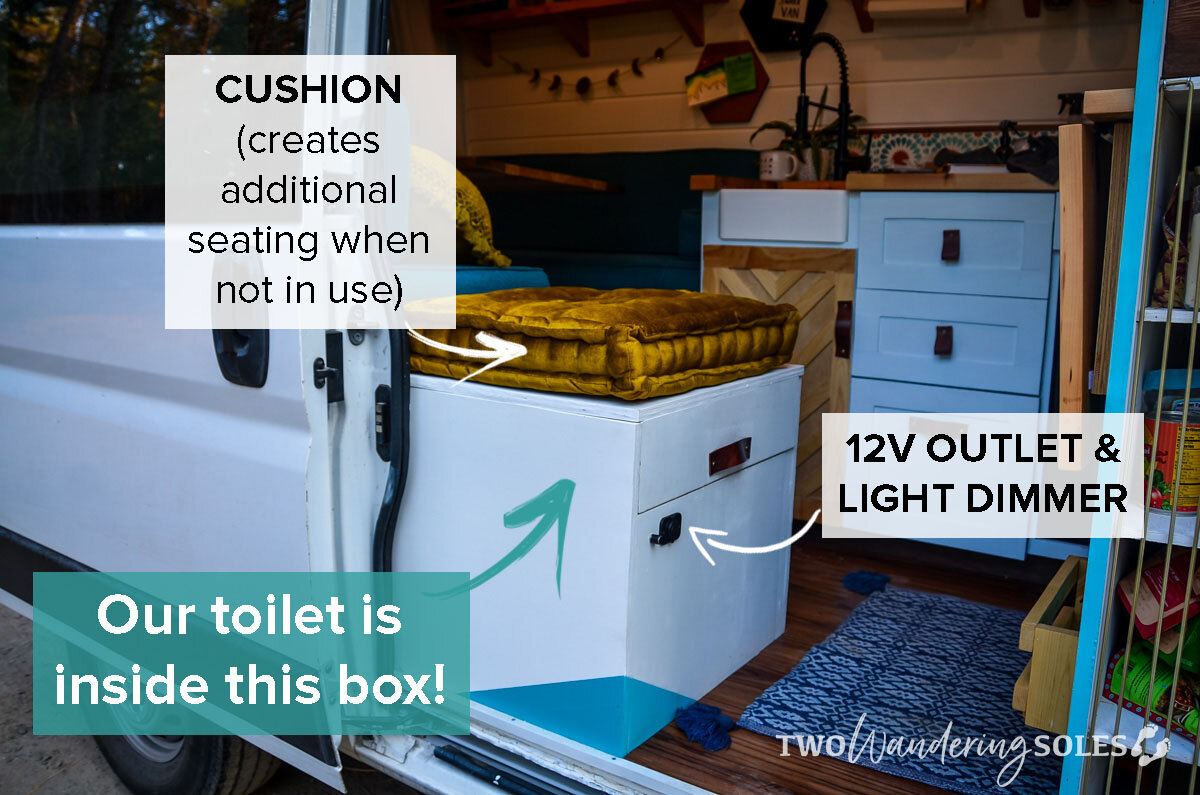
Tips for building a box for your Nature’s Head
- Make sure you have your dimensions correct before building your box. We we were off by just a fraction of an inch the first time and had to start over.
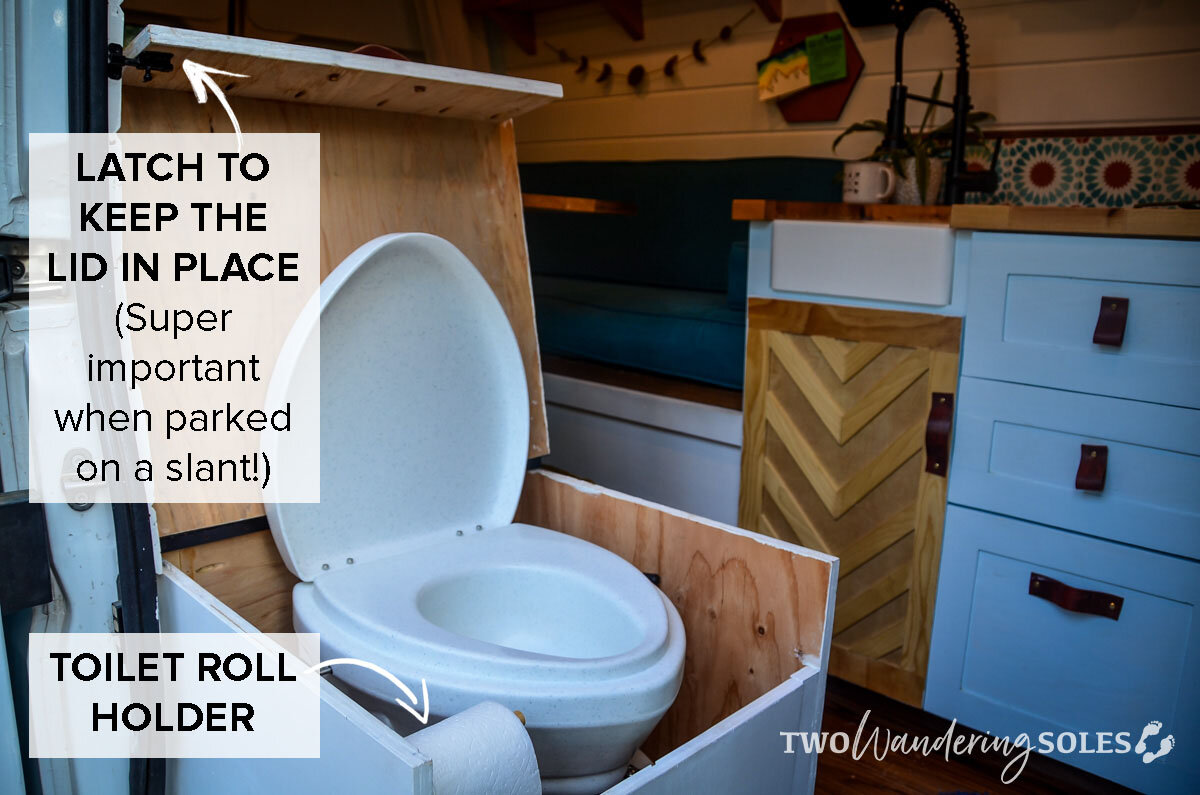
- It’s really easy to add a spot to hold your toilet paper. Just a simple dowel works well.
- Make sure you account for where your legs are going to go when seated. You simply can’t just build a box, the front side must be lower than the other sides.
- Add a latch to keep the lid up if you’re parked on a slope.
DIY campervan conversion guide
Simplify your van build & get on the road faster!
Want to save yourself the headaches and hours of research we went through and get straight to the building process?
We created Van Conversion Academy, a DIY campervan conversion guide, because it’s exactly what we wished we’d had when we were building our campervans.
Save yourself the time and money and get straight to the building process with step-by-step instructions, video tutorials, blueprints you can actually copy and tons of insider tips and recommended products to get you on the road faster!
Click below to learn more about Van Conversion Academy.

Are you thinking about living the campervan life?
We have TONS of resources on converting your own campervan and living the #vanlife. Check out our Ultimate Guide to Van Life for all the answers to your most burning questions, or read some of our favorite articles below.
- Best Campervan Toilets (for all budgets!)
- Campervan Wifi: How to Get Internet in an RV or Camper
- Campervan Gear Essentials: The Ultimate Packing List
- How Much Does a Campervan Cost? Budget to Luxury Van Builds
Interested in engaging with others about all things #vanlife? Join our Vanlife Facebook community!
Don’t forget to grab your FREE Vanlife Jumpstart Toolkit!

Save this article on Pinterest for later!
We want to hear from you!
Do you have more questions about Nature’s Head toilets? We promise we won’t give you crappy answers 😉 Comment below and we’ll do our best to answer!

Katie Diederichs is the lead writer and co-founder of Two Wandering Soles, where she creates in-depth travel guides, itineraries, and tips designed to help readers plan better trips with confidence. With a background in journalism, photography, and design, she combines thorough research with firsthand experience to deliver clear, practical, and visually driven travel content. As the primary trip planner, Katie turns complex logistics into easy-to-follow advice travelers can actually use.
Thanks for the great review and the first that has dealt with the monthlies! I found that the paper builds up quickly if we both add it, so I use a small bucket with a paper bag inside for wee paper and lightly marked poo paper. Easy to burn or dispose of with regular waste.
Thank you so much for your article! I just bought my first RV, which is a reno project, and while researching the toilet issue I came across your review. I ordered my toilet today and signed up for your newsletter. I also downloaded your packet. I am now a follower!
Fantastic review! Just ordered two for my new toy hauler 5th wheel (not a tiny house! 😉
Has anyone had experience with the Thinktank toilet? I like the idea that it ventilated with outside air, rather than heated air from my bathroom. Also can men really stand to pee? I don’t like sitting on the Nature’s Head to pee.
Hi, great info on Natures Head. How practical/easy would it be to unhook the vent and power supply and move the whole toilet each day in a shared shower space? Just wondered about weight and ware of vent/power parts if we did this. Thanks
It’s really easy to move it. You slip off the vent air hose, unplug the wire for the little vent, and remove the 2 thumps screws that hold the toilet to the floor. 1 minute tops. Lifting it is no big deal, it’s a little cumbersome but not that heavy.
I have been using the Nature’s Head full time for almost 4 years now and love it. I’m building a camper van at the moment and move it to the van whenever I’m using it.
A little note for the spray bottle you use to “flush” the bowl after peeing: I used to use the vinegar/water solution but got quickly annoyed with the vinegar smell. Now I’m using a water bottle with a squirt of liquid dish soap and a health dose of essential oil, eg. lemon or orange. Never had the pee bottle smell. Just empty it every 2 days max, it’s so easy.
Great article 🙂 How big was the box you built for the toilet.
What a thorough review! Thank you. There was no mention of needing to connect this to a power connection, but I see in the installation guide for the toilet, it mentioned 12 volts needs. Can you comment?
Hey! I noticed the spider handle was REALLY close to the side of the wooden box. Do you just squeeze your hand down there to turn it or does that side of the box fold down when you have to turn the handle? Thanks!
Hey Hannah, with the design of our box, there is plenty of room to reach down and spin the spider handle. The side of the box does not fold down. We designed this box so we would have maximum living space for standing, cooking, and lounging. Hope this helps!